I’m learning more and more about how to enjoy the fruits of the garden year round. For example, we have been eating home-canned green beans all winter and it has been lovely to have a go-to side that we know was grown in our garden. Not to mention the dilly beans, strawberry jam, pepper jelly and more! I’ve also shared a simple pressed flower DIY, you can read about it here. The garden produces so many gifts.
I decided to grow statice this year. I chose the Forever Happy variety and it did not disappoint. I grew statice because I have fond childhood memories of my mom buying a dried statice bouquet each year from the local farm. I still remember how the bouquets hung beautifully from the ceiling, and how much she enjoyed picking out just the perfect one.
When the statice plants started blooming, I harvested them as they were ready. Then I hung them upside down in a dark closet to dry. Great news, statice is very easy to dry and keeps its color nicely. (You’ll see I also dried some of my hydrangea blooms and celosia.)
I knew I had to make something with the statice for my mom, because she inspired me to grow it and she loves all things purple. A wreath seemed like the perfect craft.
This DIY wreath was pretty easy, except, I will note that dried statice is prickly. You could use another method to create a wreath before it dries, and depending on the look you are going for, that might be the way to go. But here’s what I did…
Supplies:
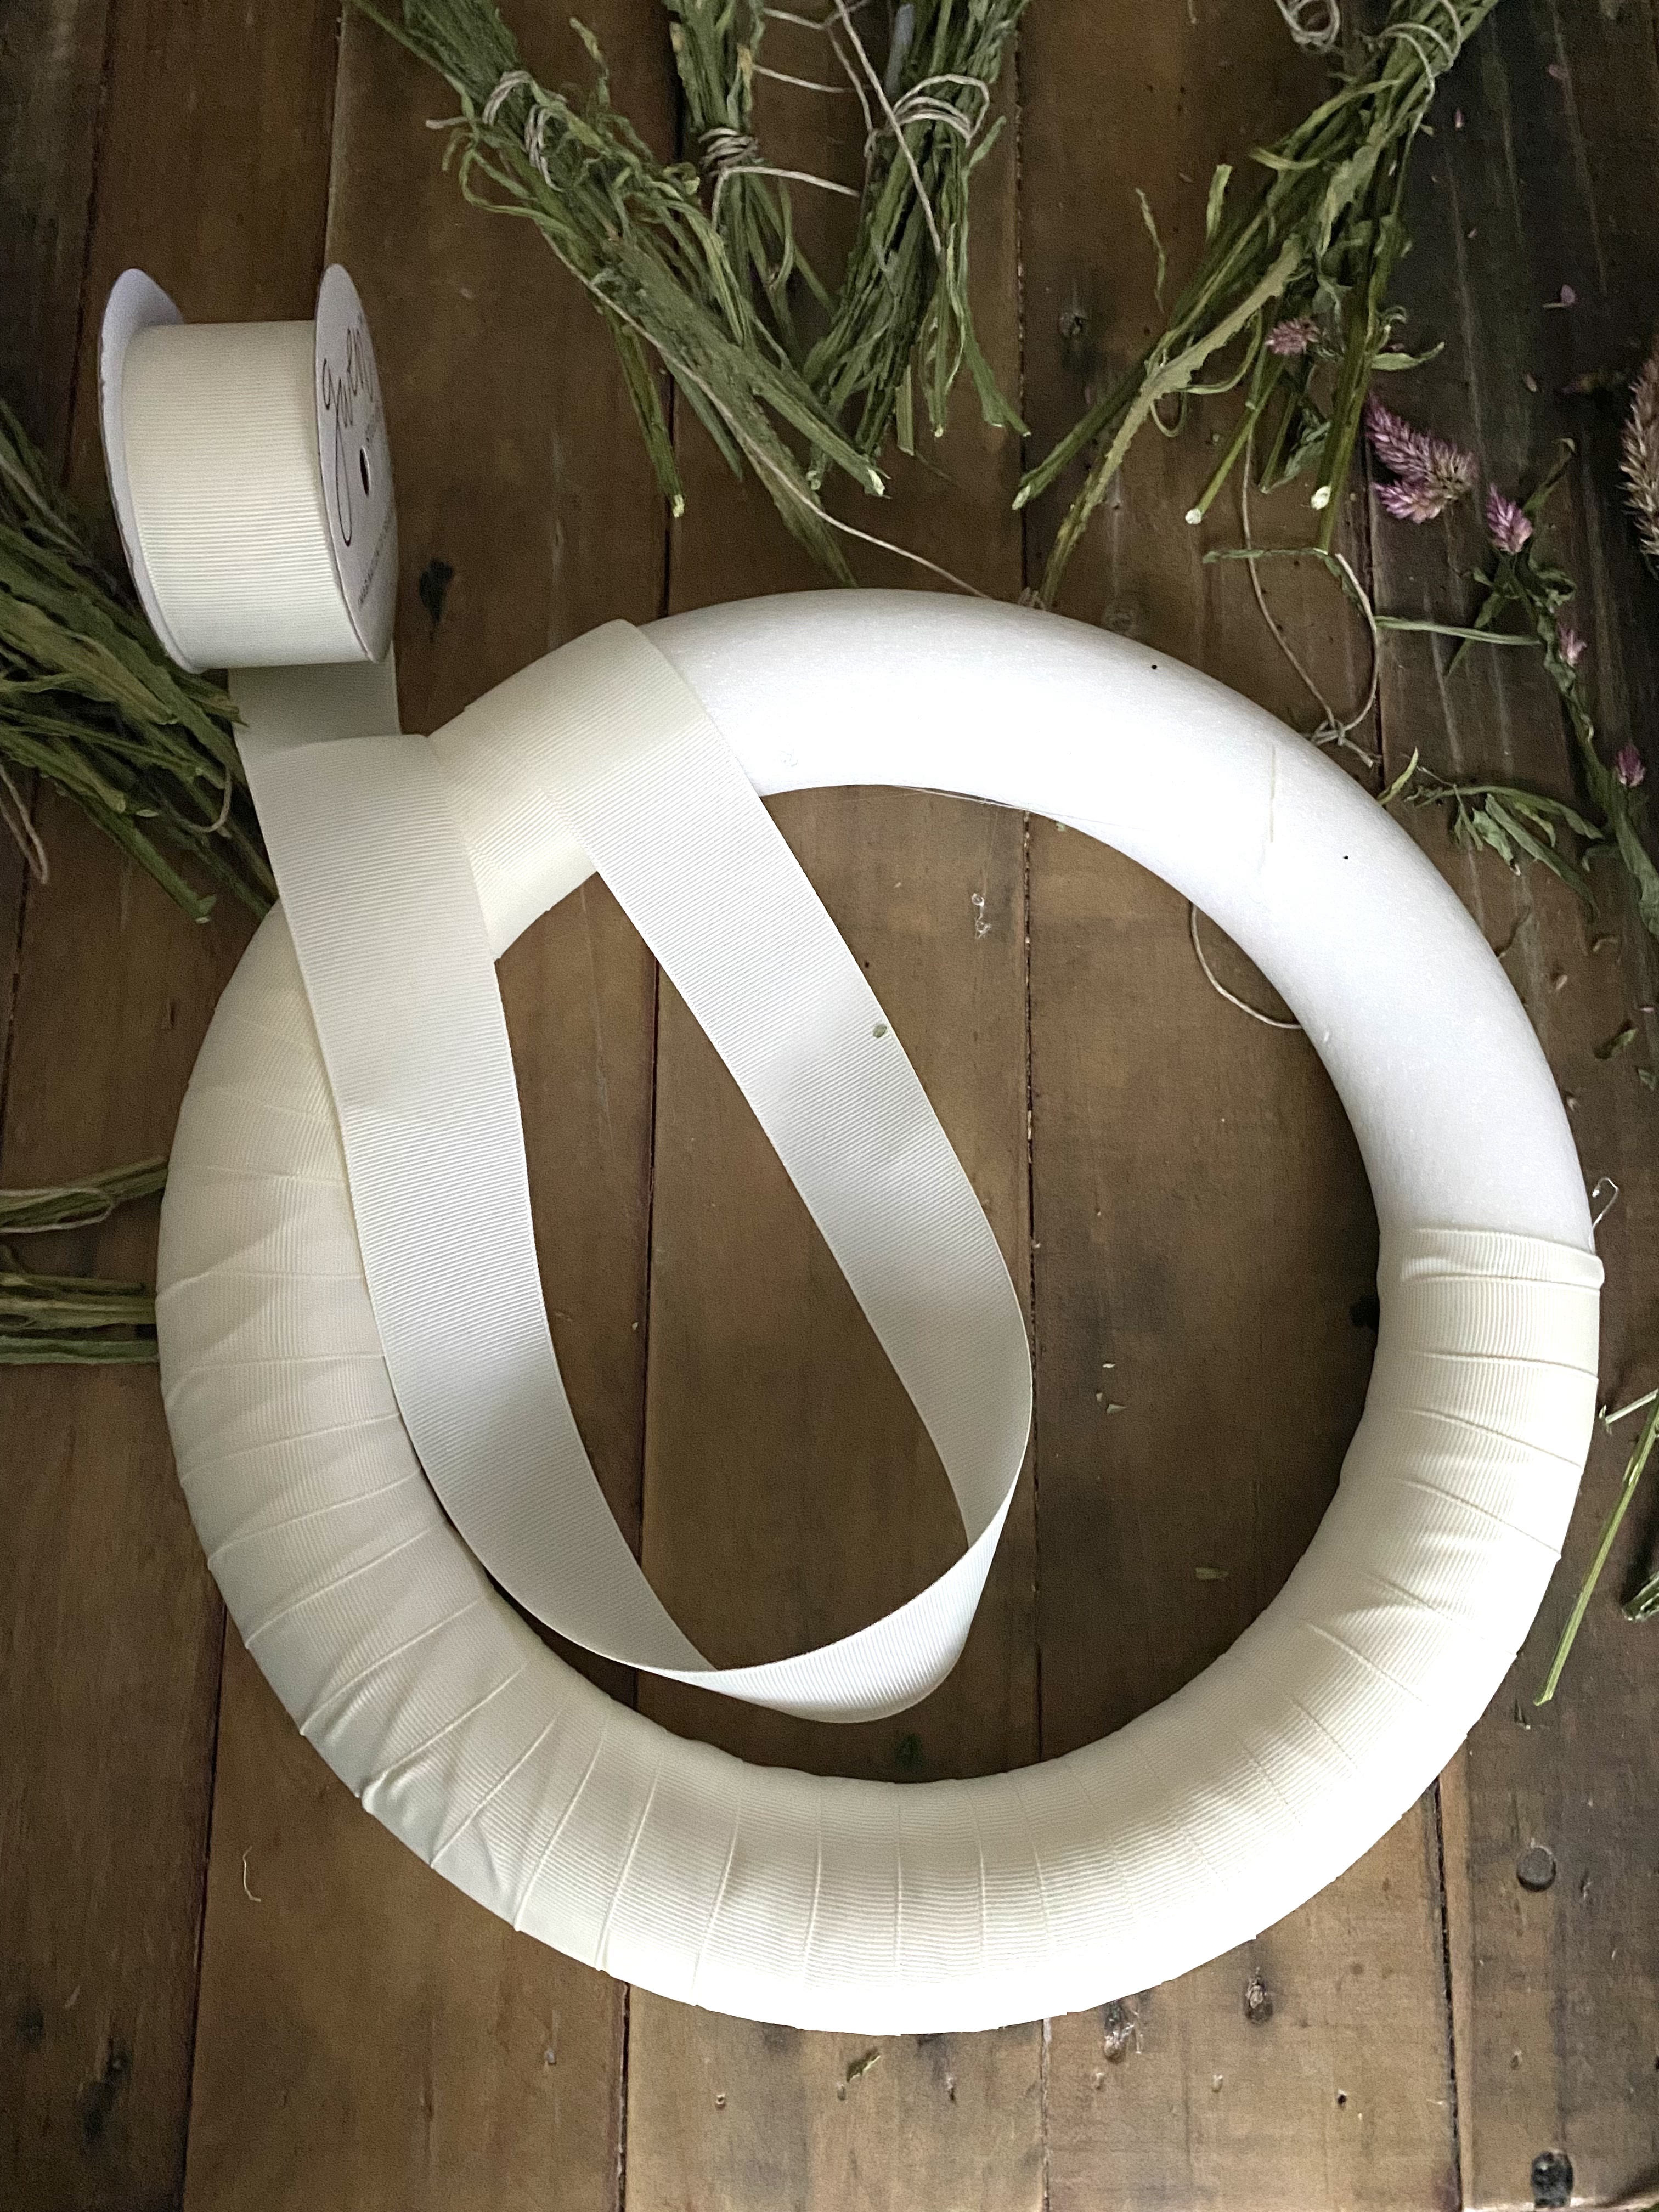
Wreath form – I used Styrofoam
Ribbon – for wrapping the form
More ribbon – for creating a hanger and bow, this could all be the same ribbon too
Hot glue – the most evil yet highly-practical invention
A bunch of dried flowers of your choice
Directions:
Line up all your dried flowers somewhere with pretty light and take no less than 50 photos to admire them. Sooo pretty!
2. Next, I wrapped the ribbon around the form to cover the Styrofoam. I added a dab of hot glue to the ribbon every few times around. Once it was covered, I also used ribbon to create the hanger.
3. Next, I painstakingly cut off stems and glued and glued and glued and glued and glued and glued and glued. Then I glued some more. Then more. Then I hung the wreath up, stared at it, and glued some more. I tried to use the beautiful variation in the colors of the flowers to the best advantage, spacing like colors around at first. It should feel intentionally random. You’ll note I also mixed in some white statice I got from a friend (thanks, Adrienne!).
4. When I was happy with the shape and distribution of the flowers, I tied a bow and hot glued it to the front of the wreath. It was pretty and feminine and just needed a bow. There you have it, a simple DIY to enjoy the garden all year round.
XO, h
P.S. I wouldn’t hang this on the front door or outside as the dried flowers are pretty fragile. But if you have a window or interior door that needs some cheer then this wreath is perfect!
Sometimes you just need a sweet project to break up all the major projects. Or maybe you just need something to do with all the dried flowers you pressed with your daughter, with zero plan but lots of possibilities.
Over the last two summers, Kyrie and I started picking and pressing some of the flowers we’ve been growing. She kept asking me, “Mom, what are we going to do with all of these?” I have grand illusions of about a million projects, including creating a gardening journal complete with pressed flowers inspired by @missmustardseed (but that’s for another day). Instead, we picked and pressed to our hearts’ content without a real goal. We used parchment paper tucked into stacks of the biggest, heaviest books we have. It only takes a couple of weeks, and they are dried and ready to use.
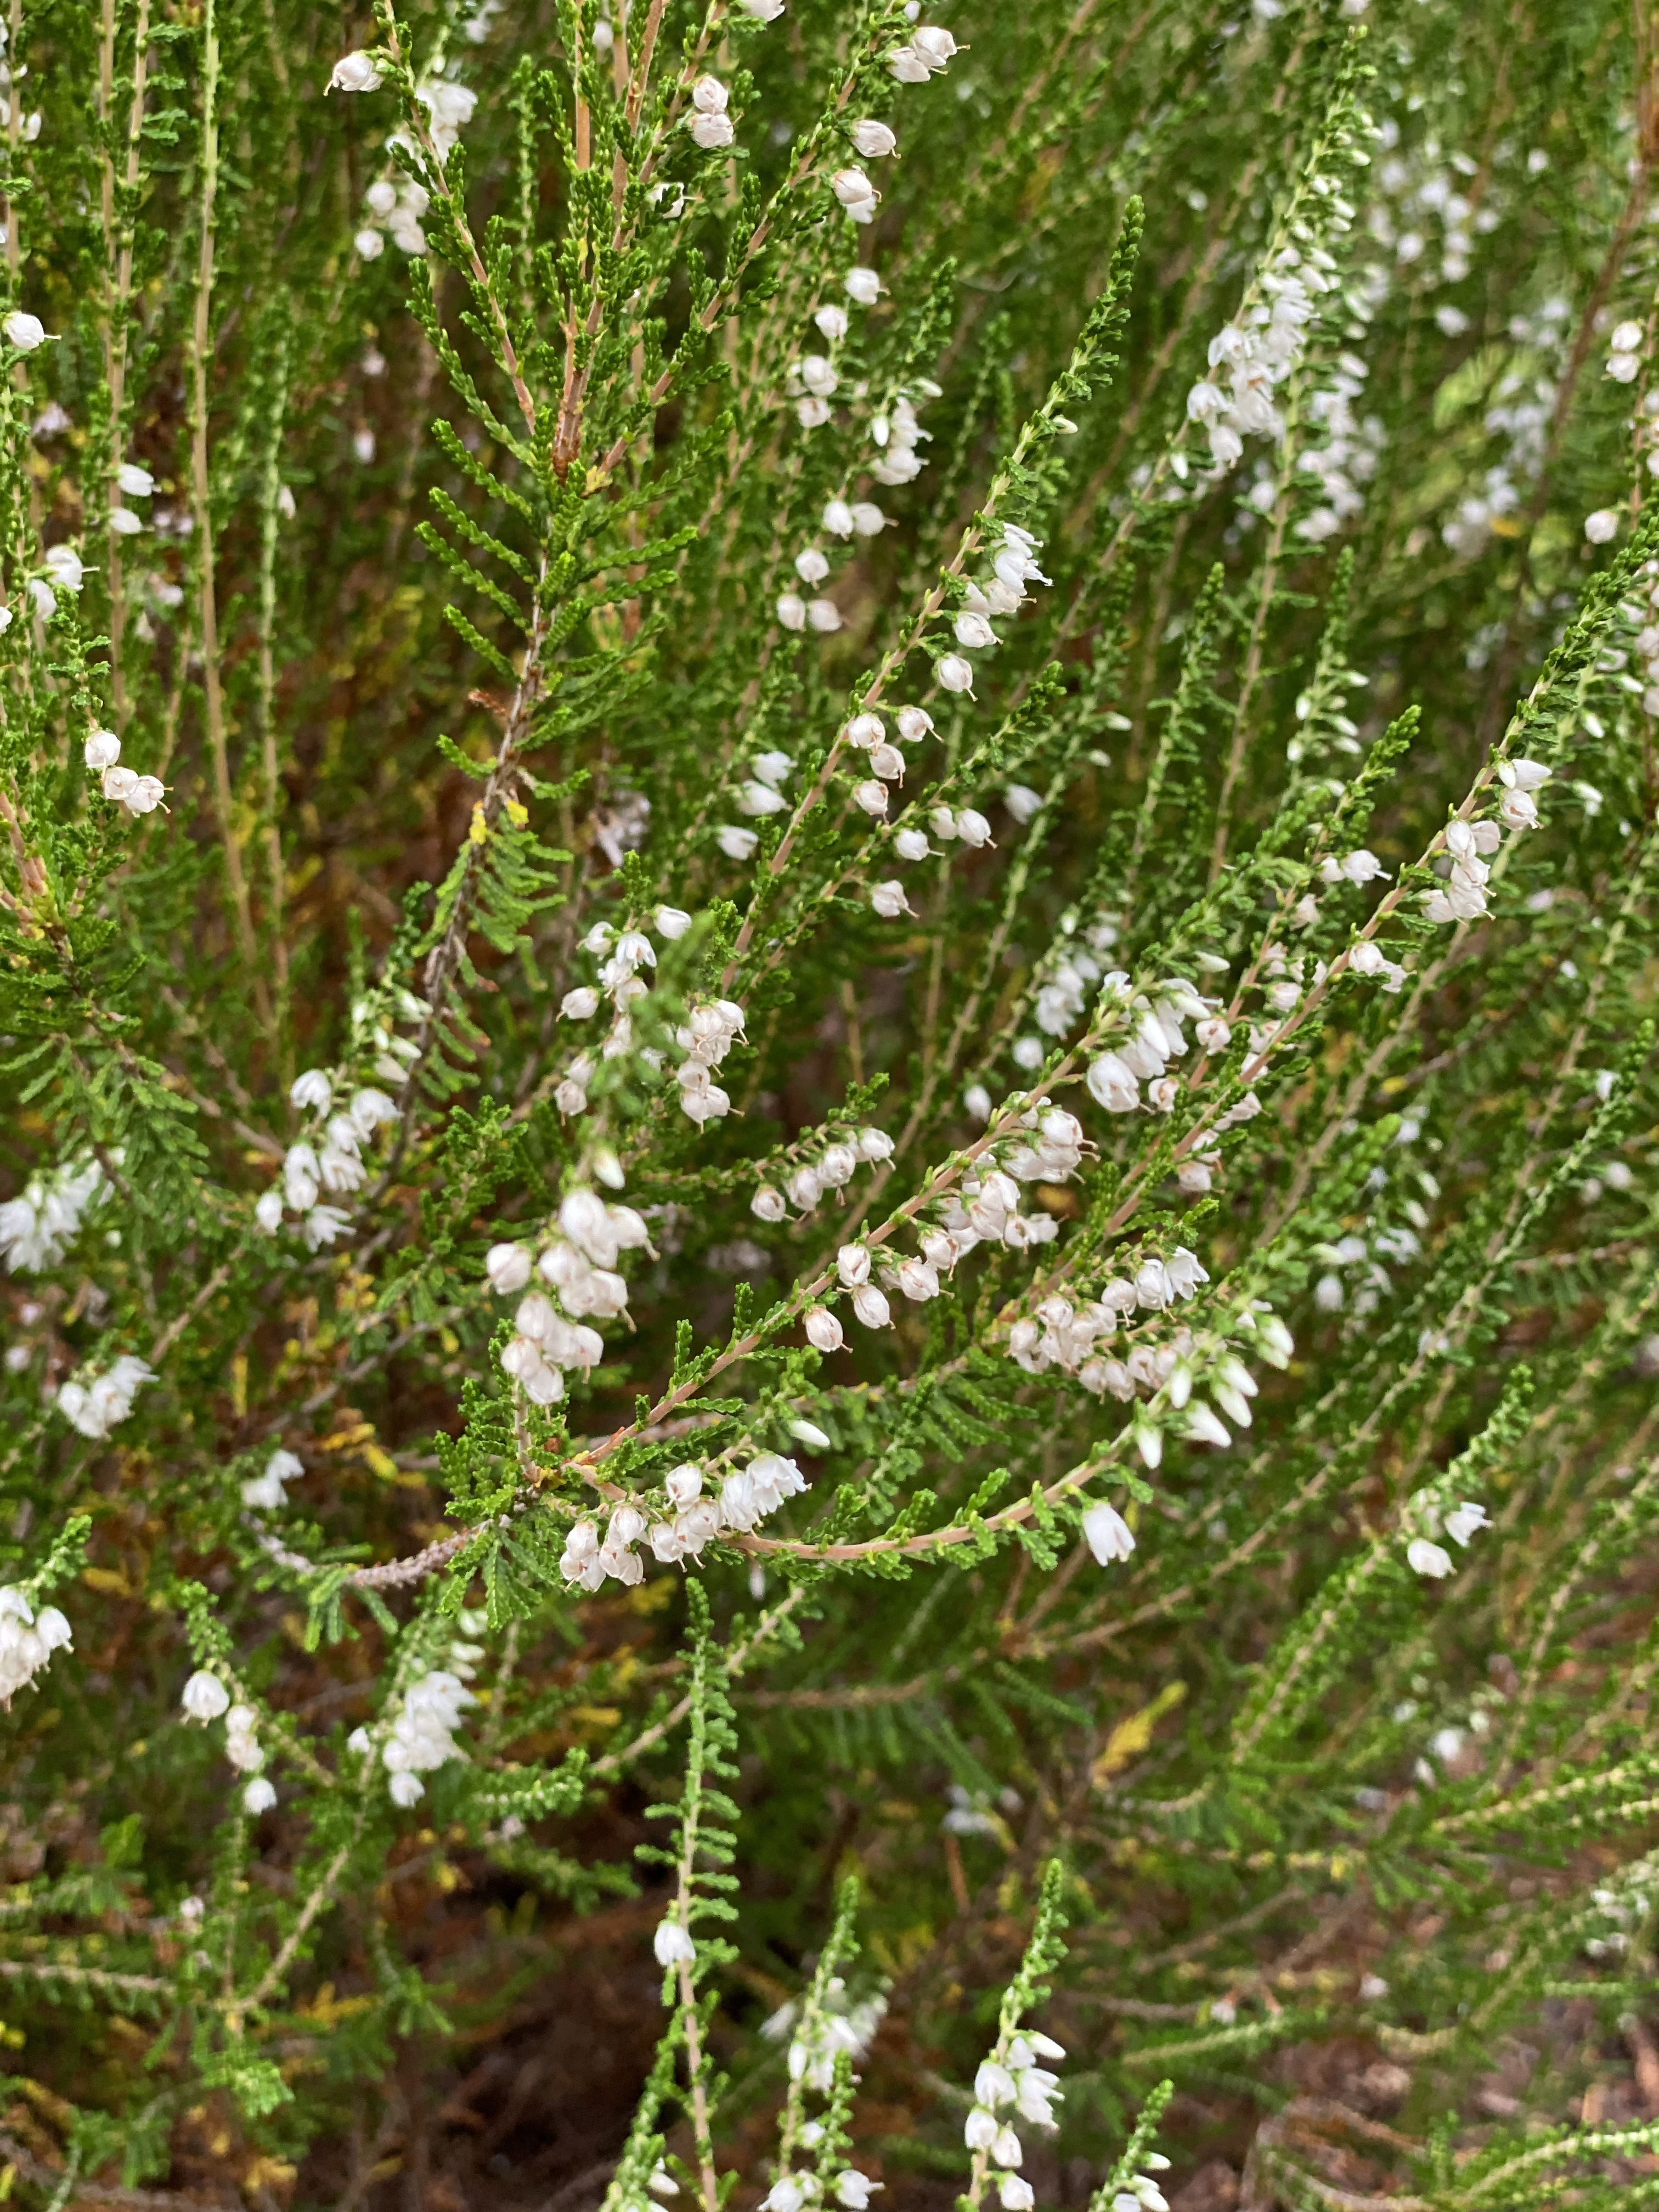
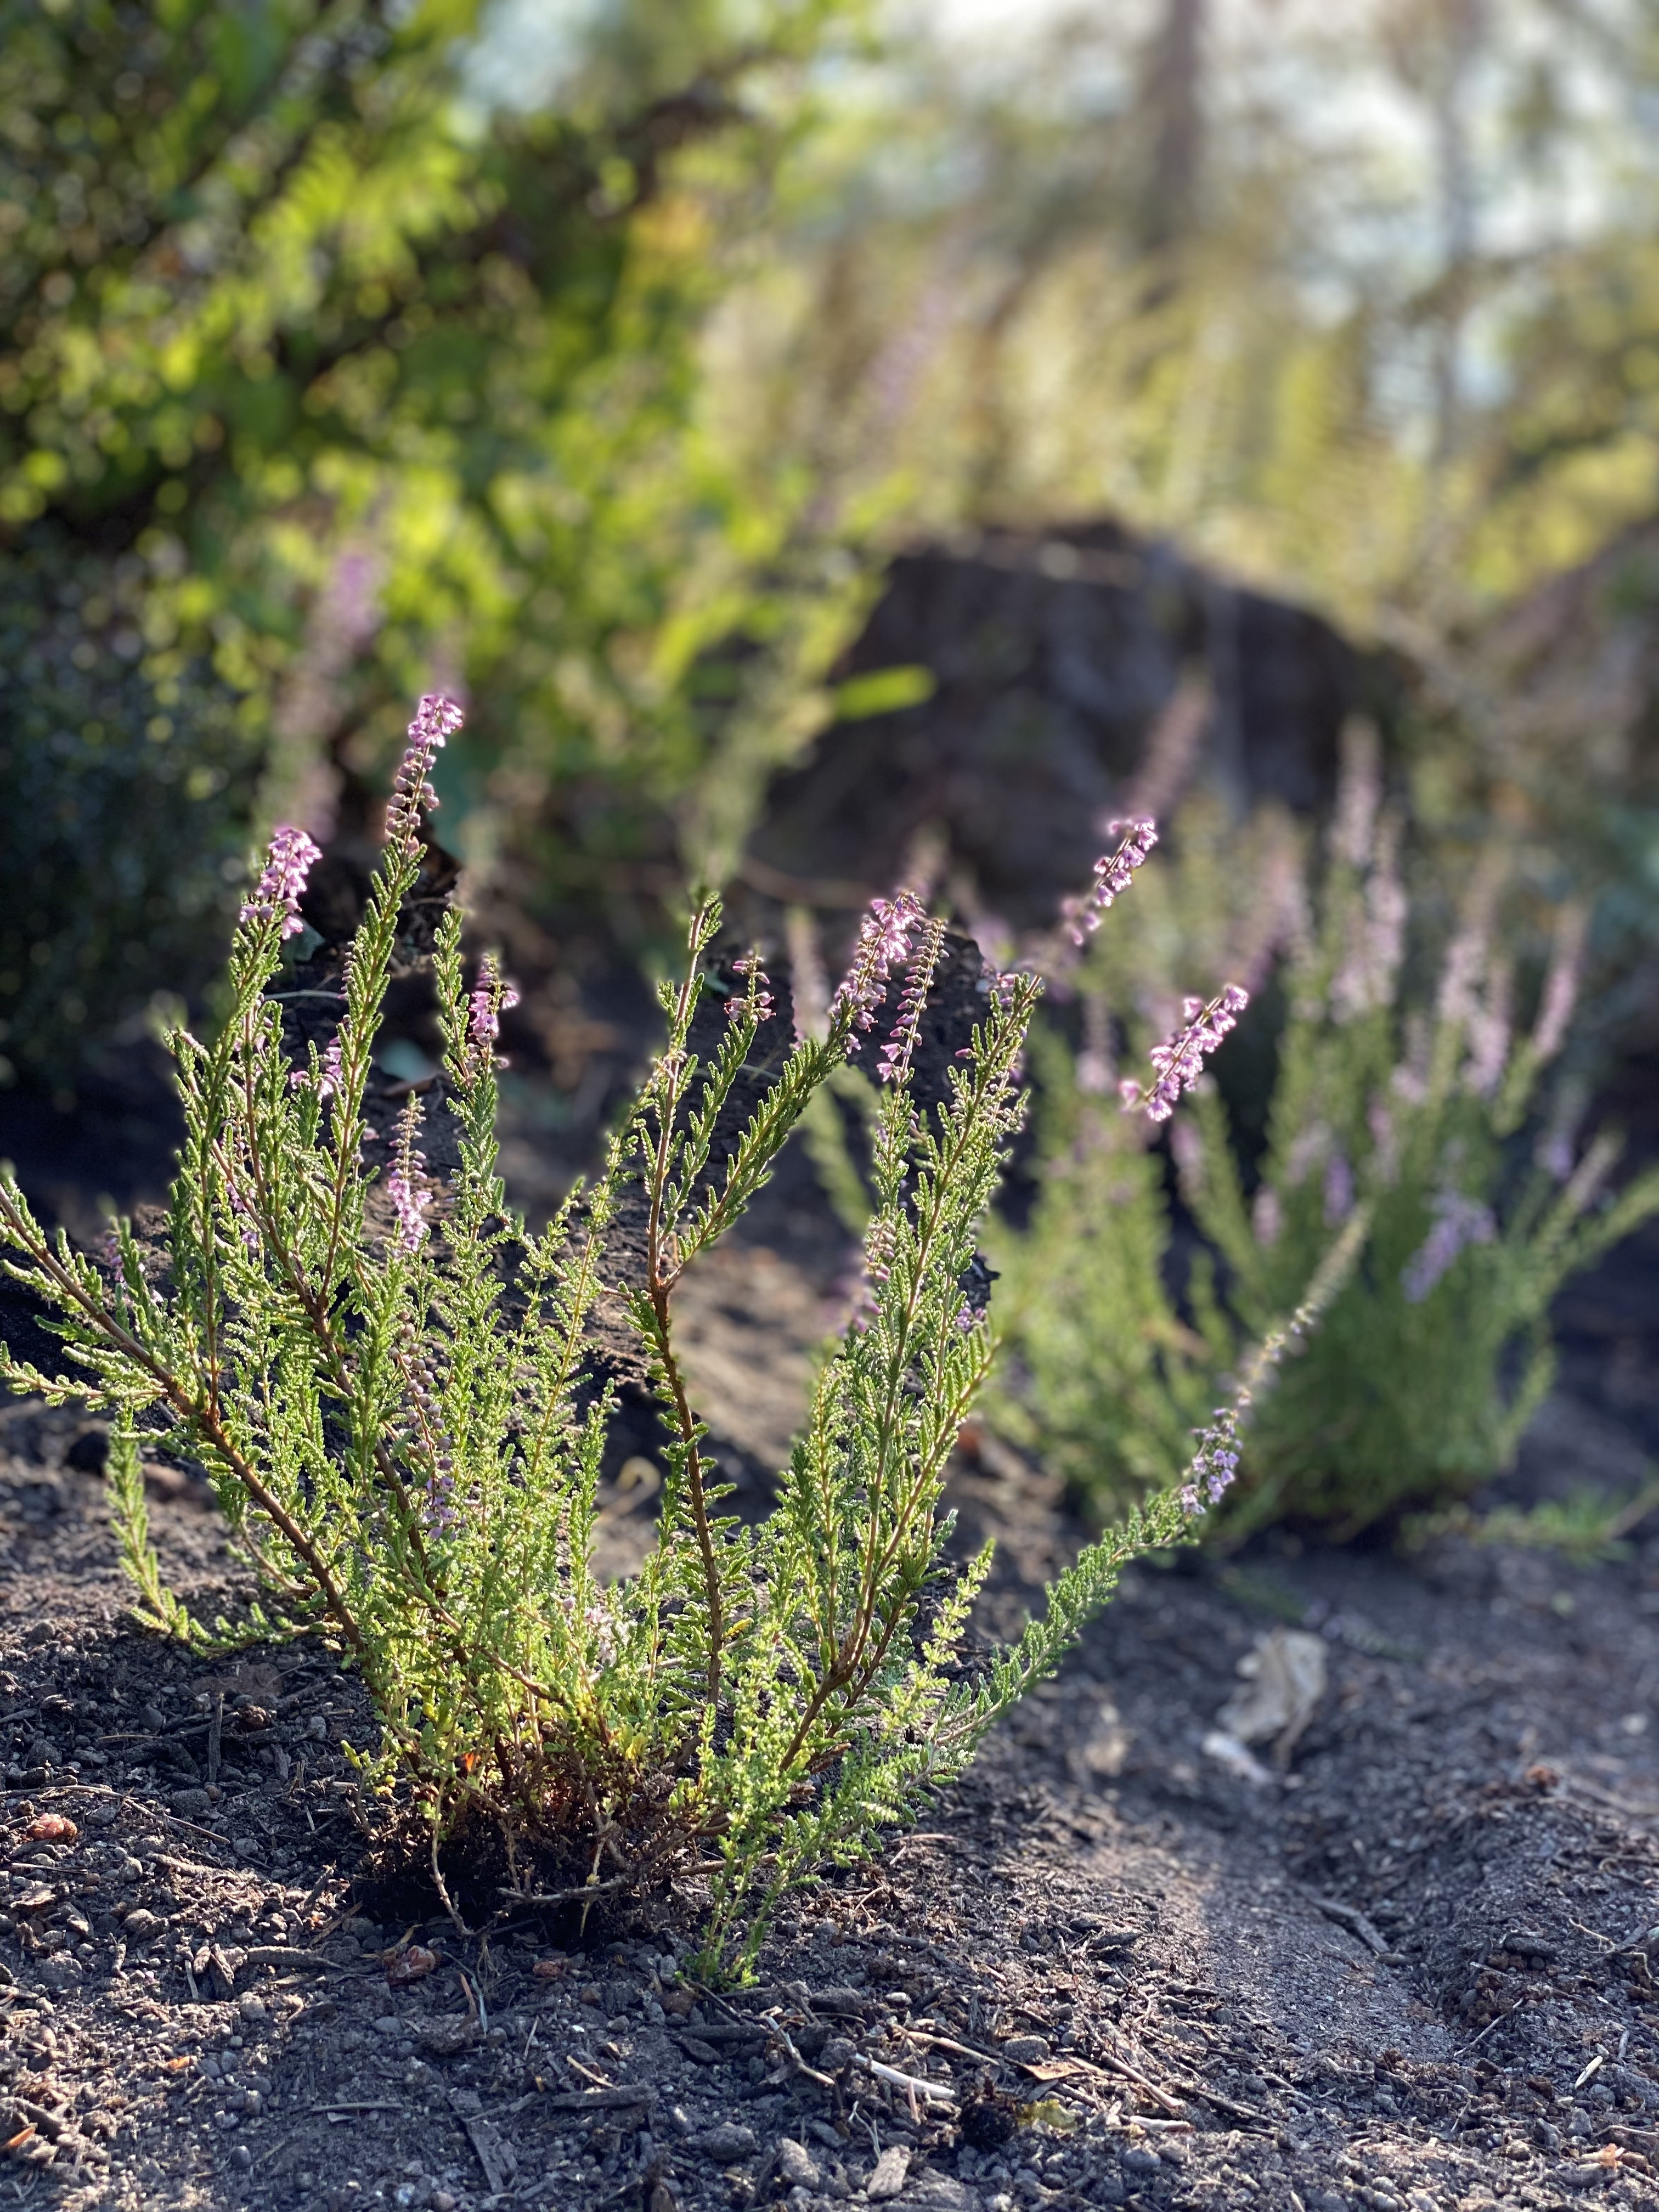
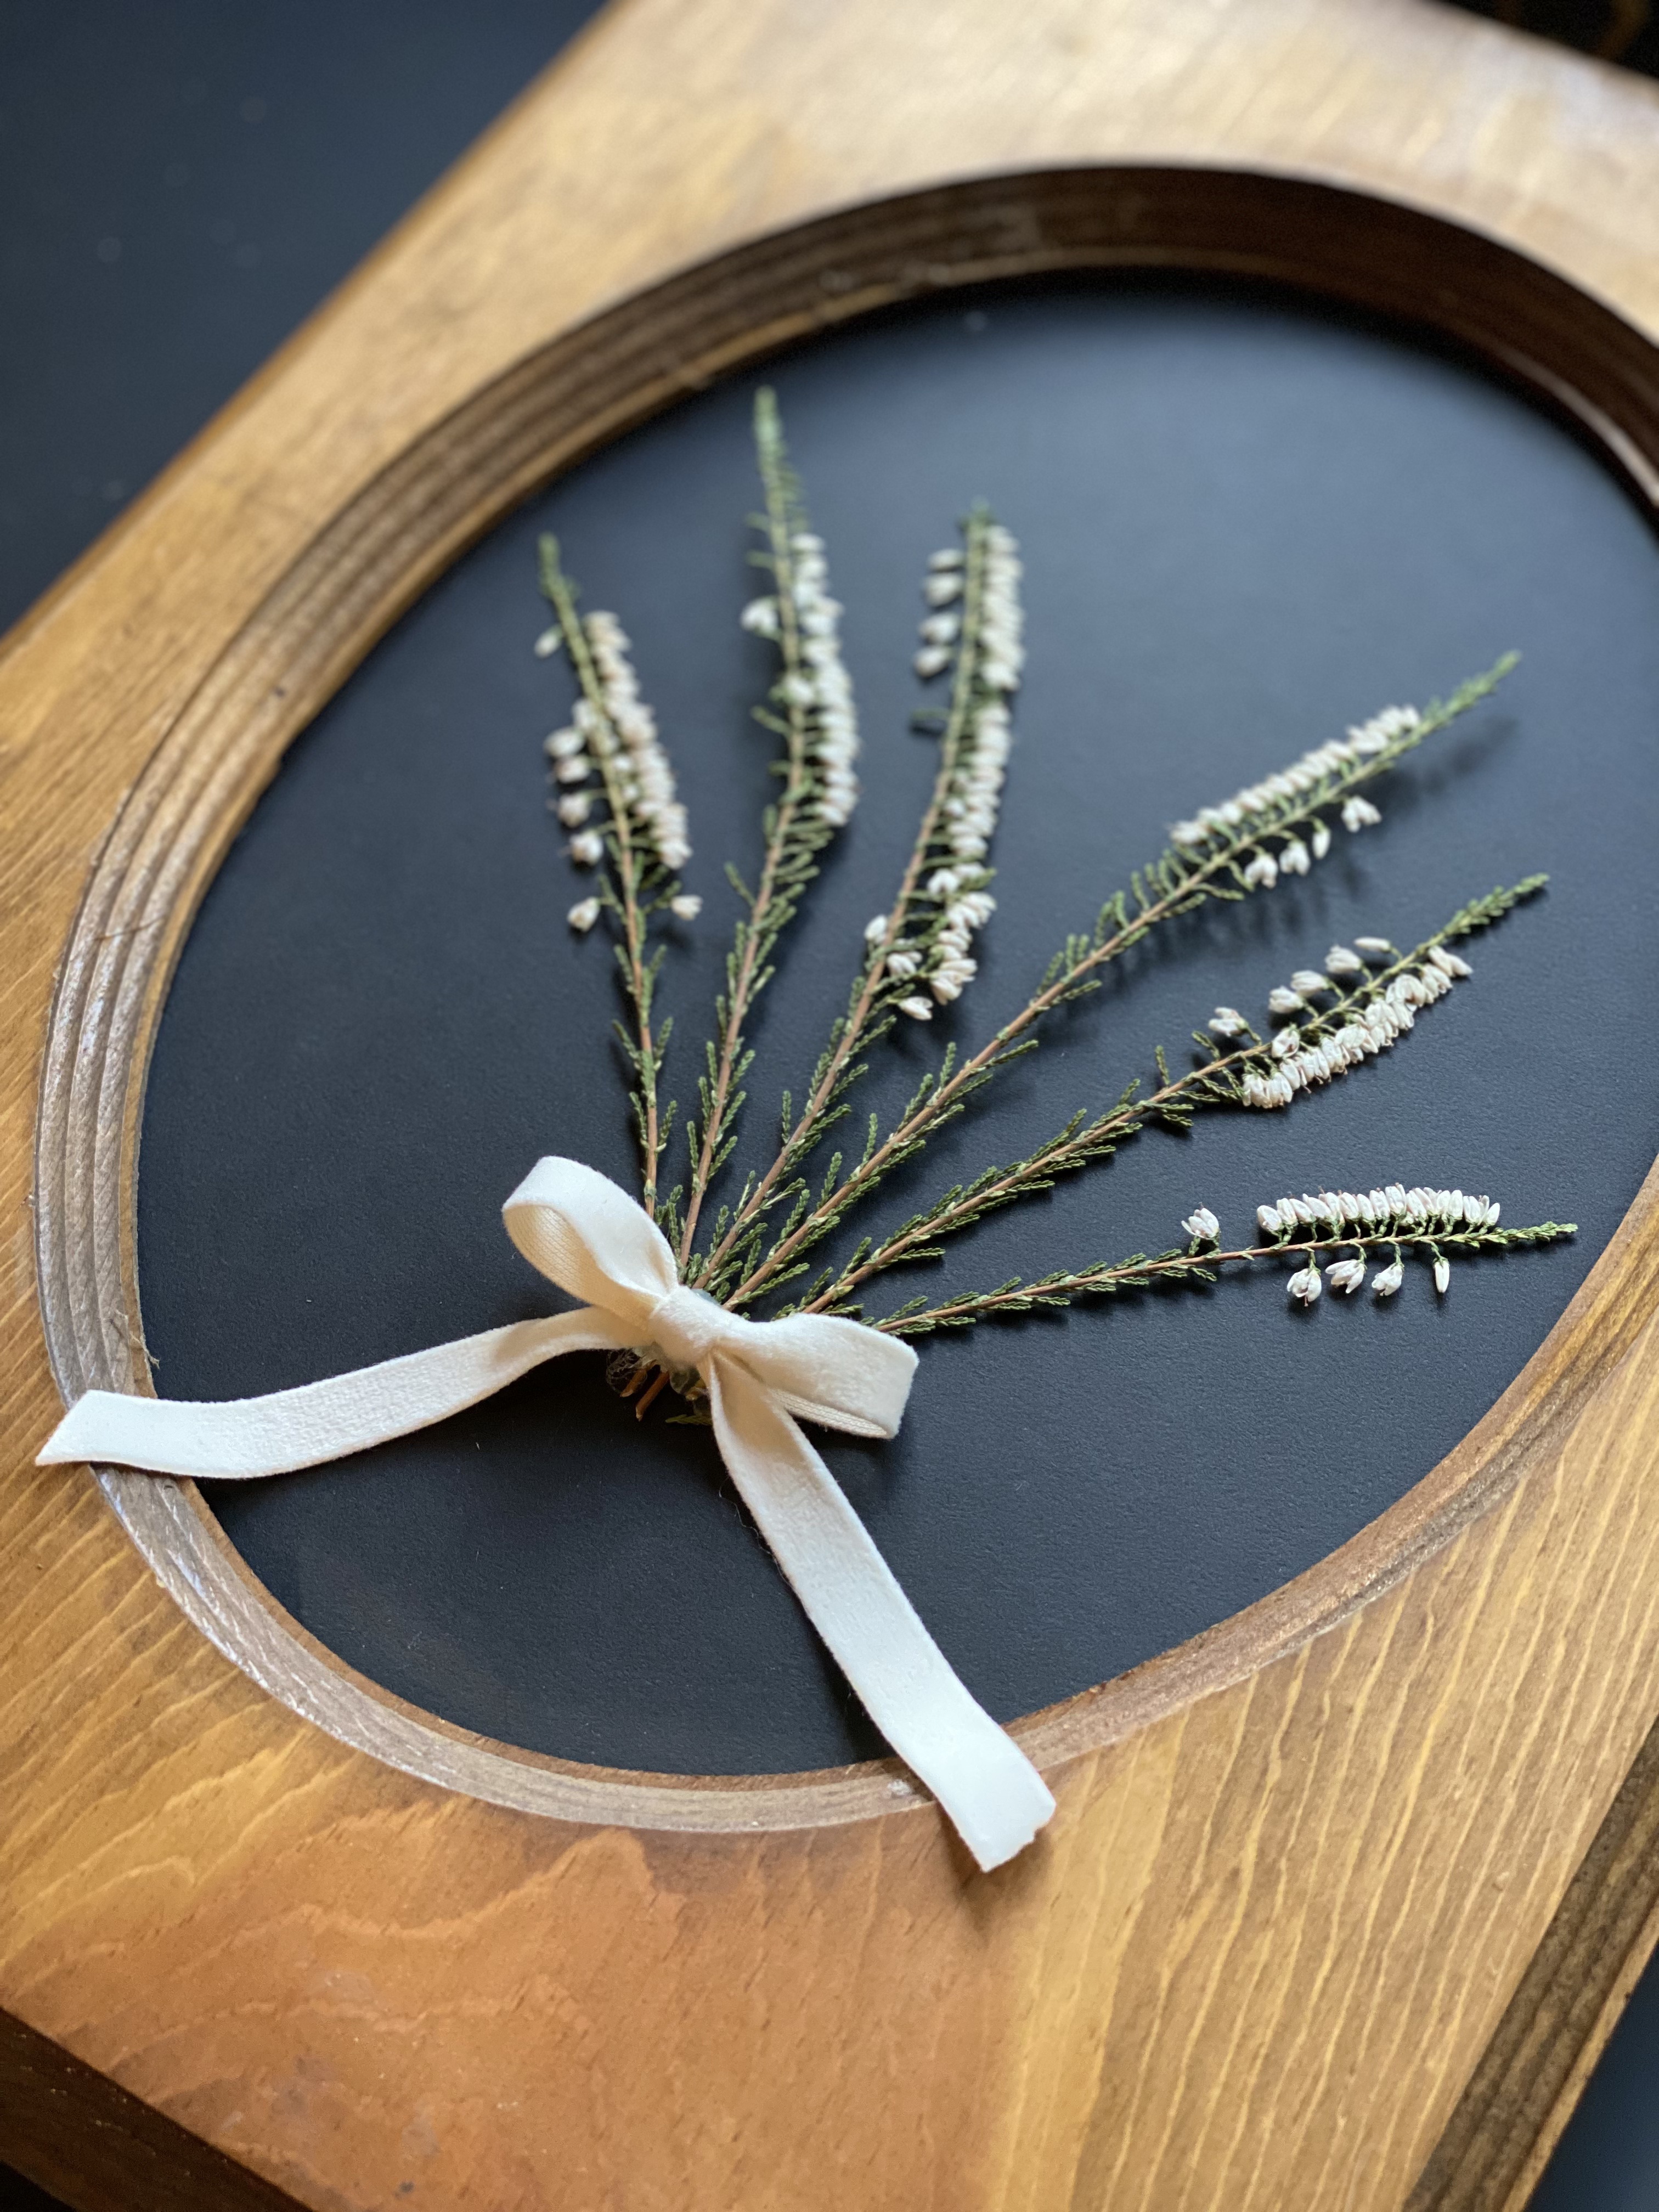
I find the best ideas come from happenstance. I was at an outdoor antique fair this fall and found a few vintage frames for about $4 – $5 apiece. Again, with no true plan, I bought them because they were cool and you never know when inspiration might hit. When I got the frames home, it hit me, we should frame some of the pressed flowers! And no ego involved, I promise, but I had to start with heather.
Supplies: -vintage frame -pressed, dried flowers (DIY or you can find some on Etsy) -scrapbook paper -hot glue -velvet ribbon (via Amazon)
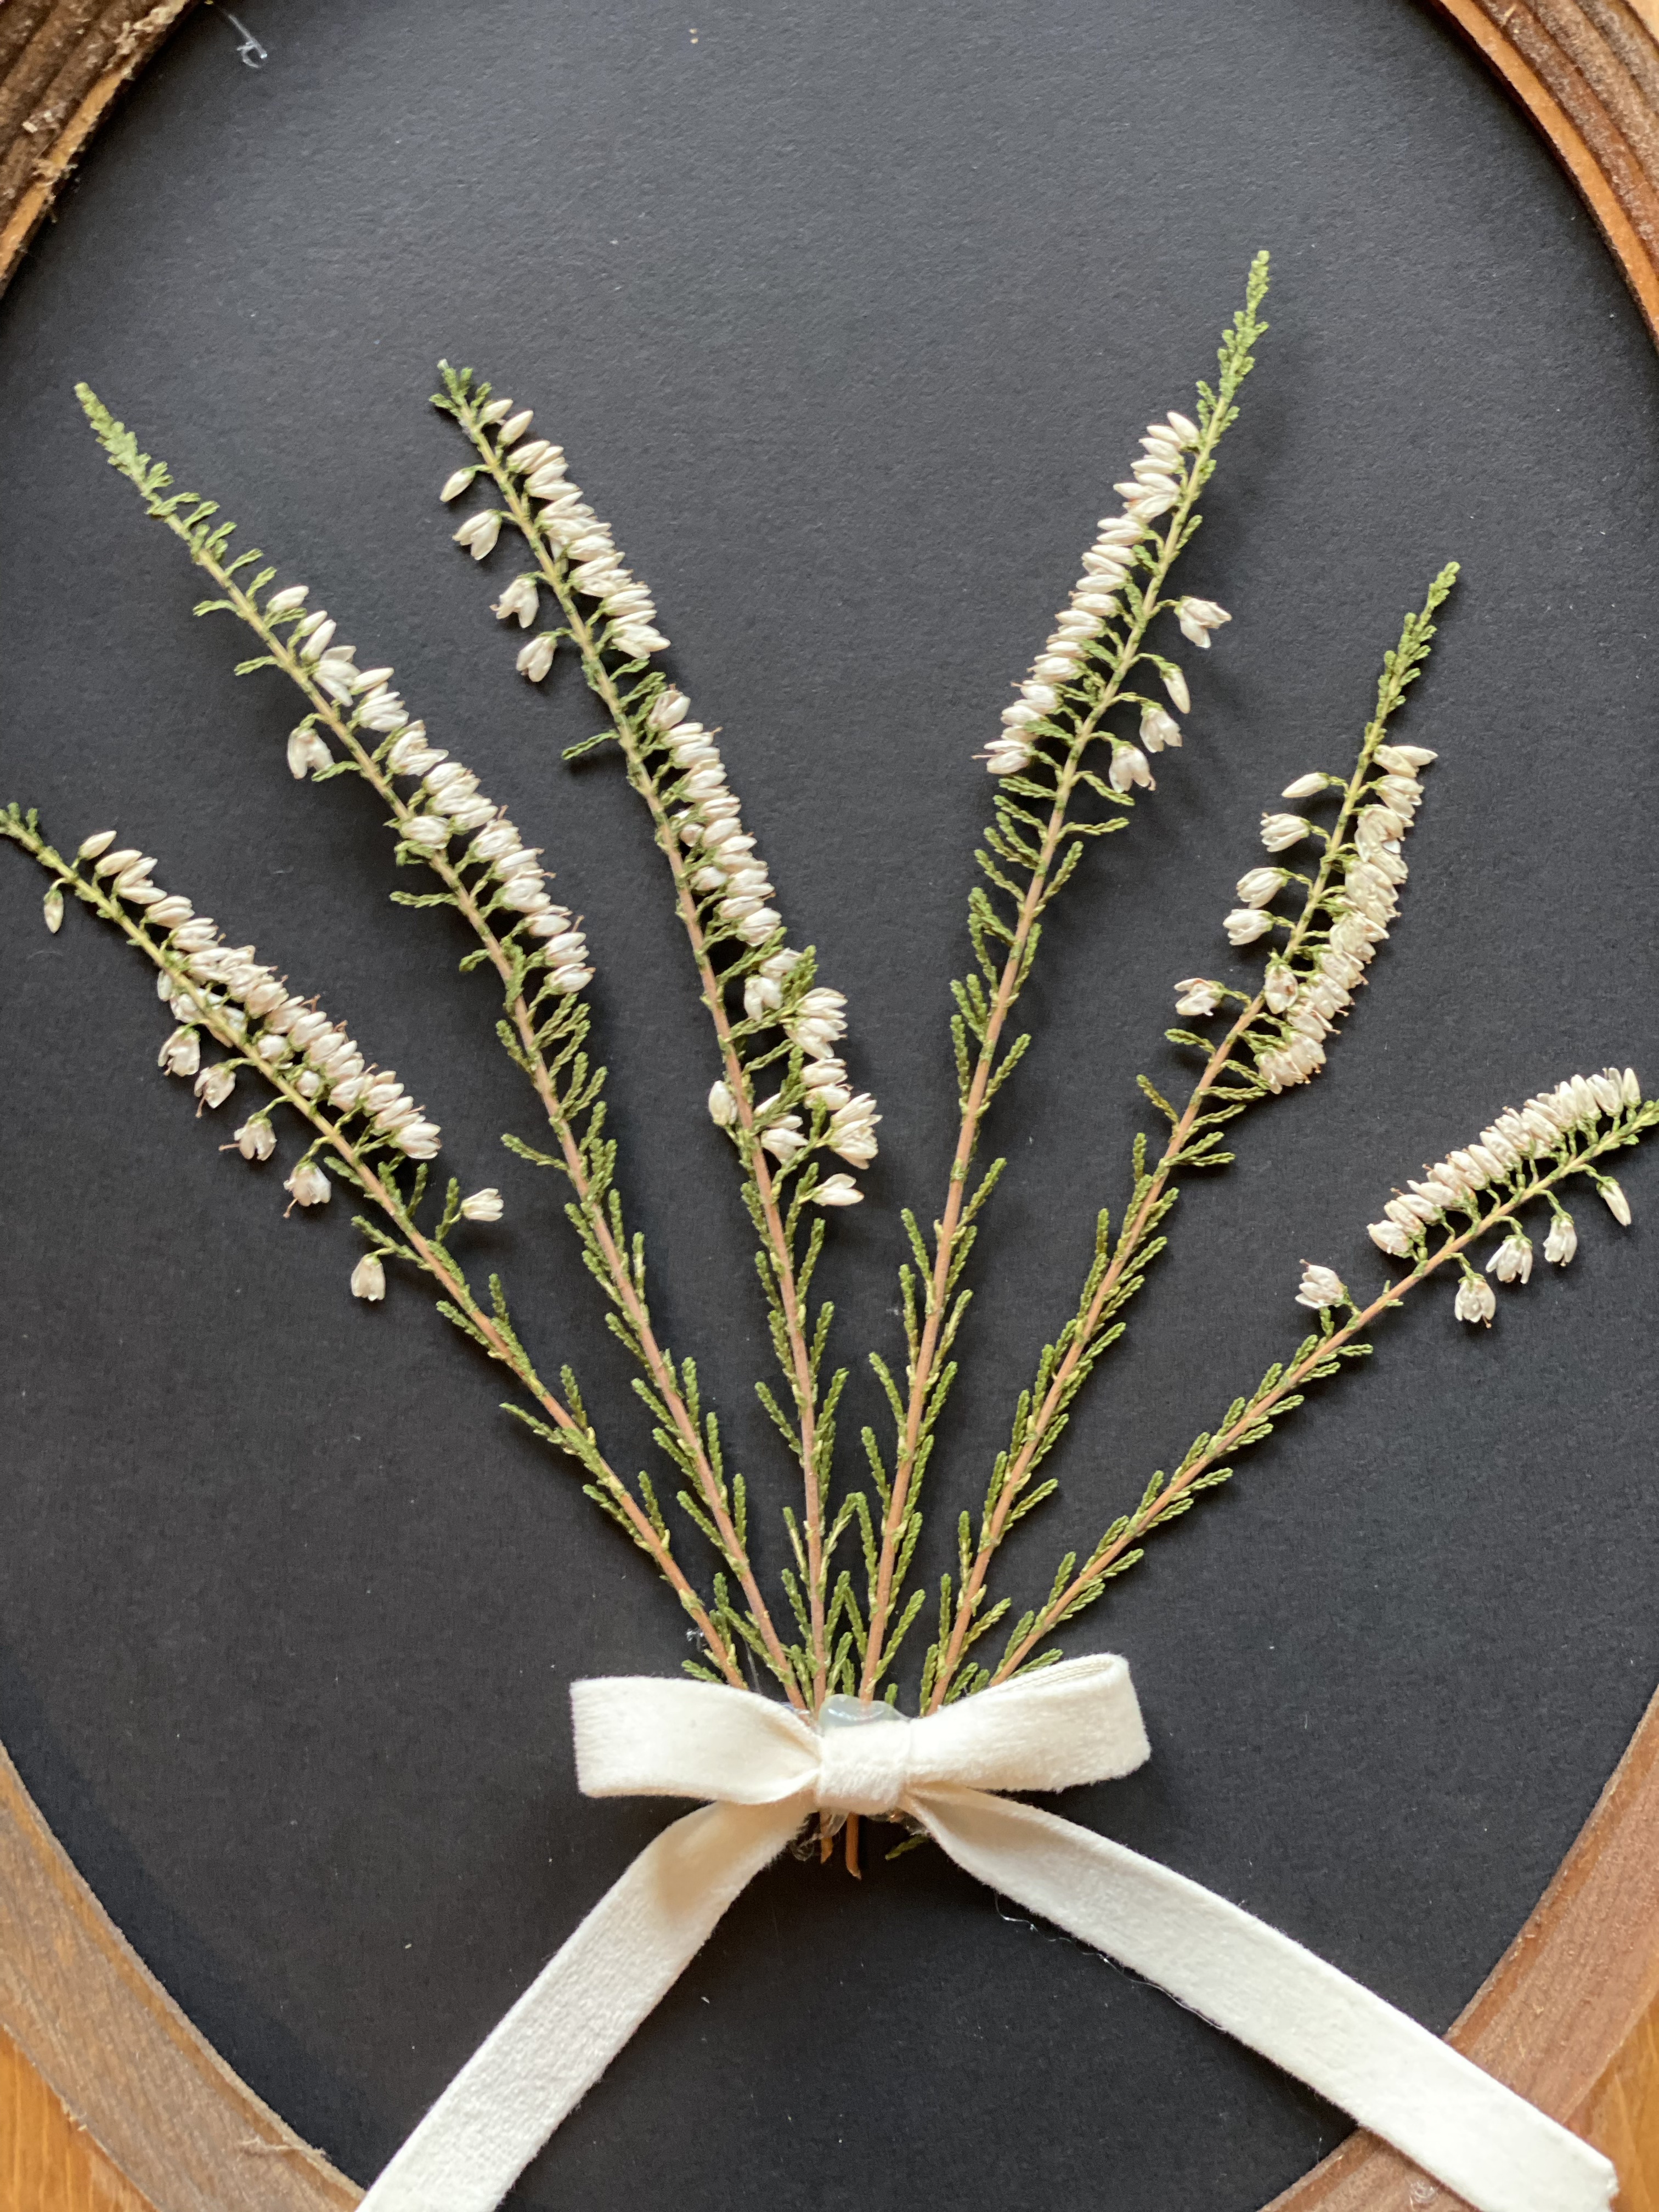
Directions: 1. I measured the scrapbook paper and cut it to match the size of the backing of the frame. I used black paper because I love the contrast.
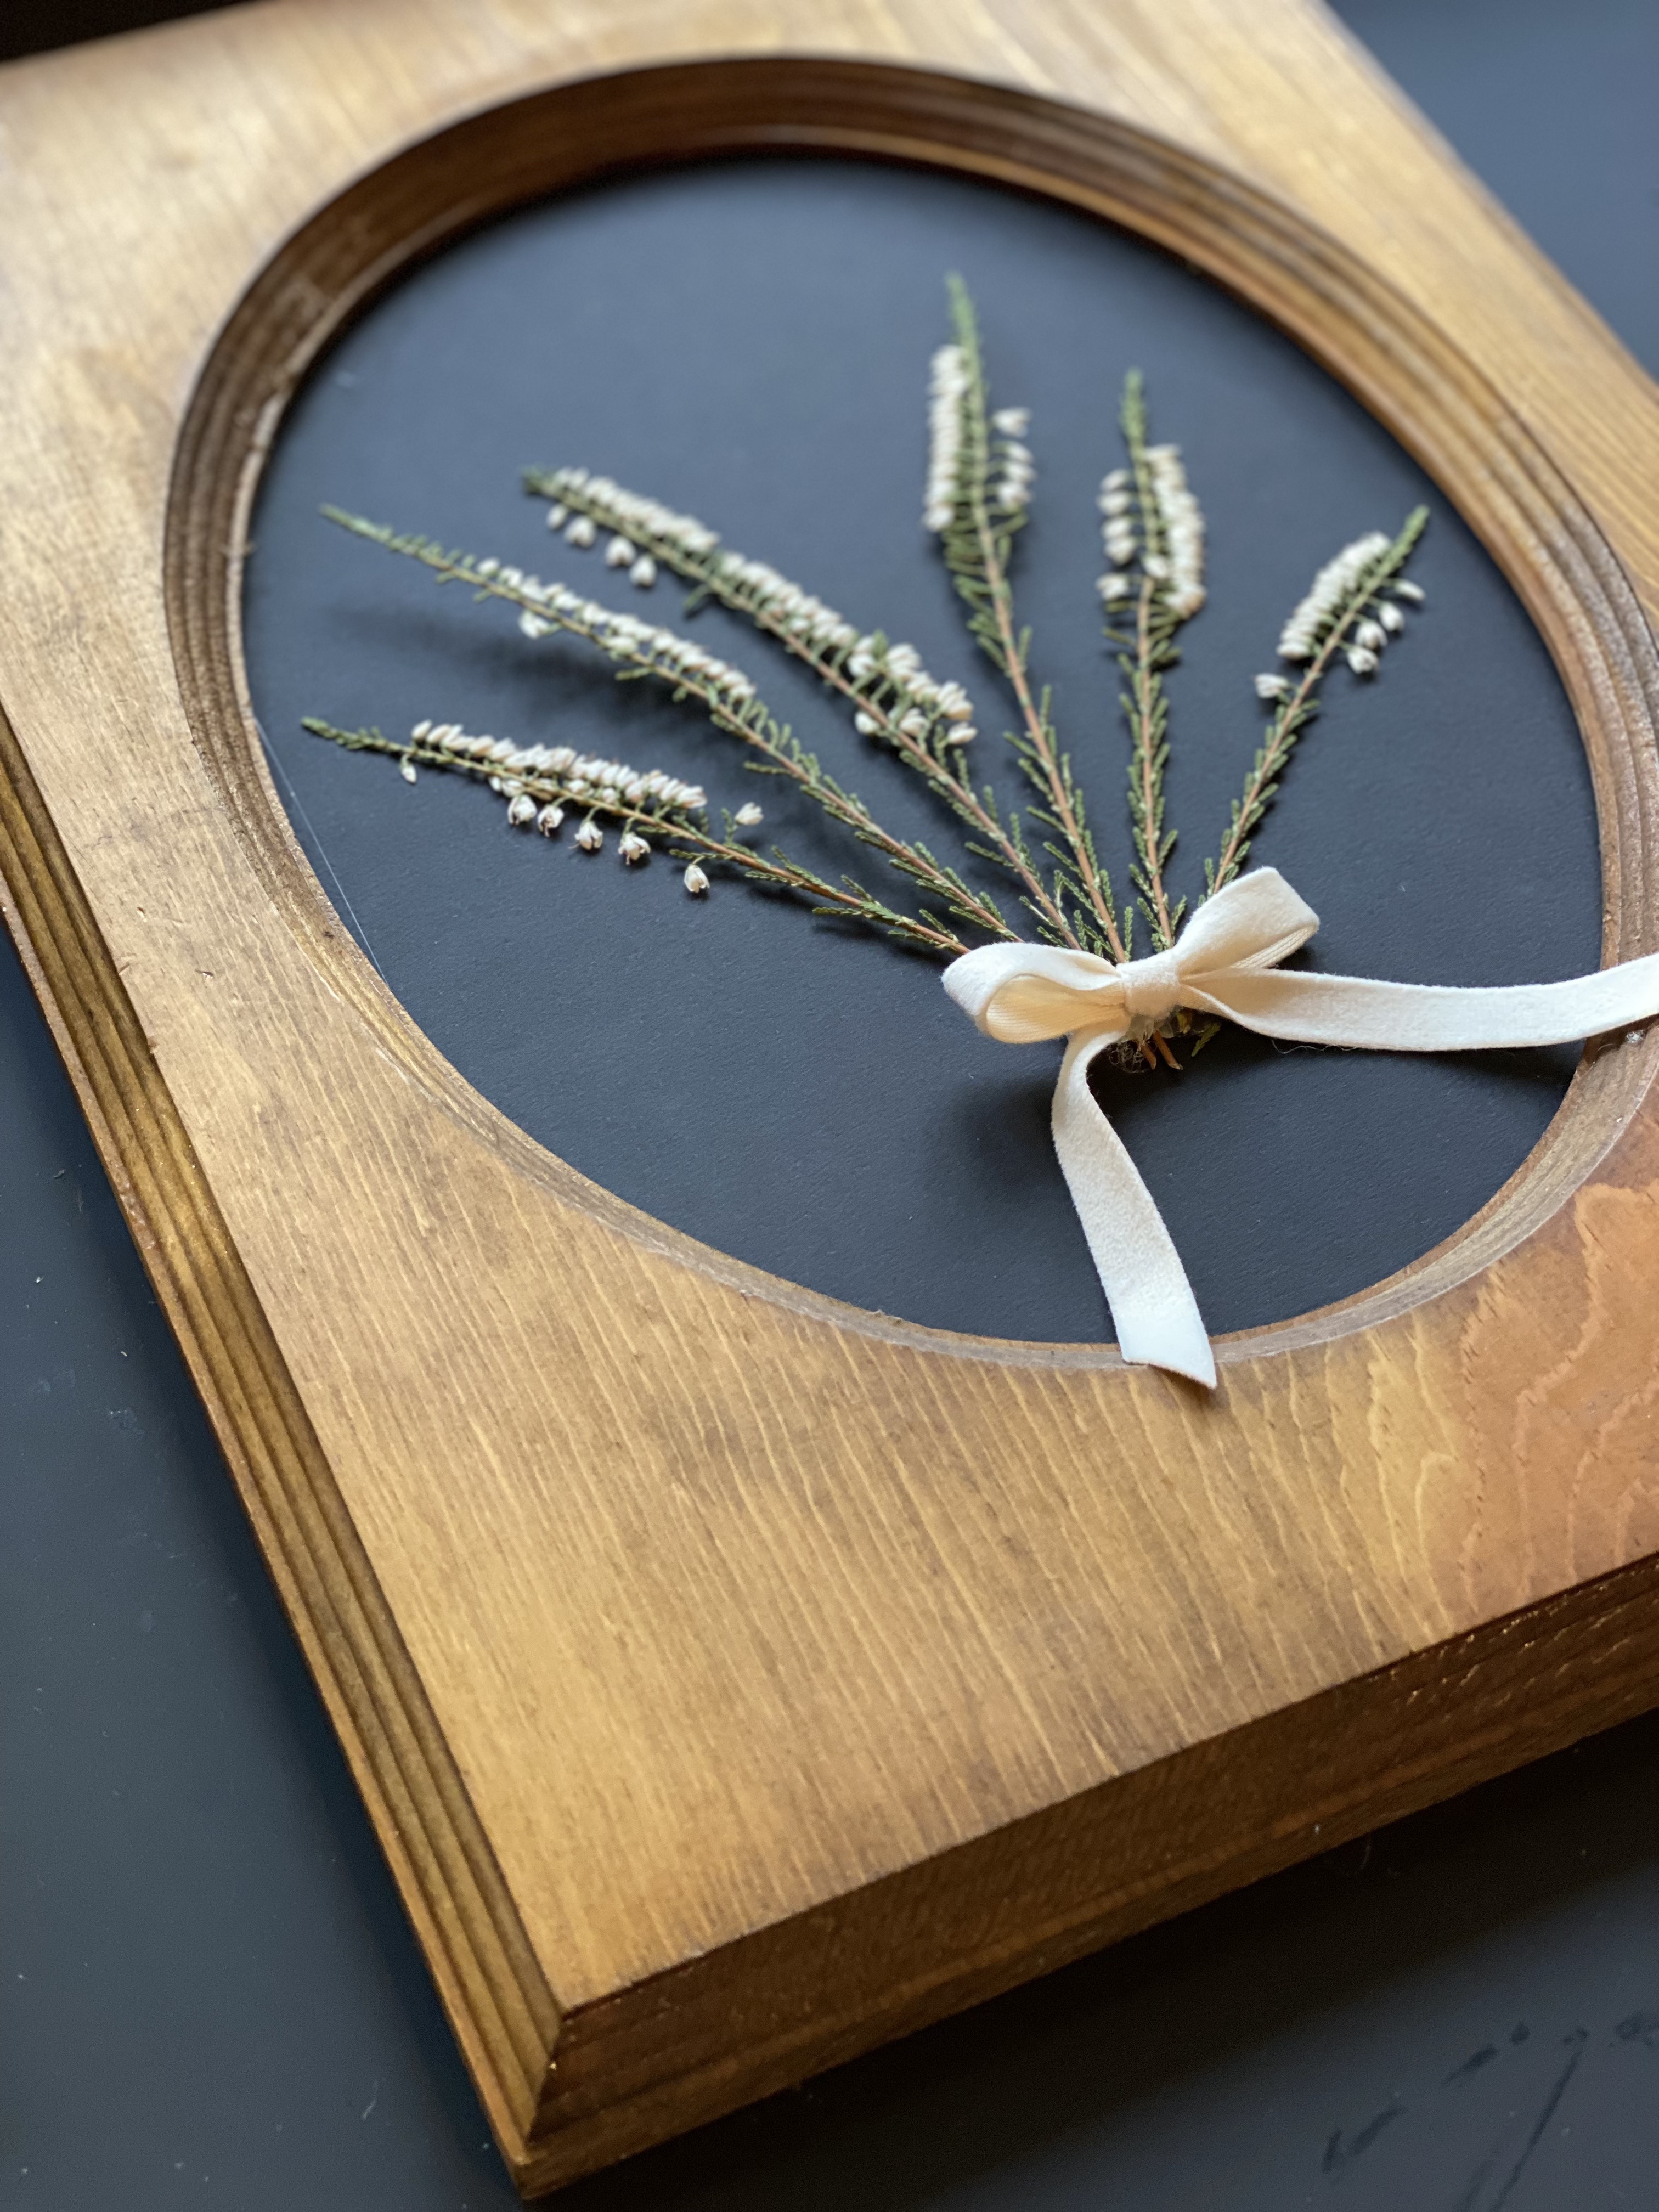
2. I then played around with arrangement of the flowers until I found a pleasing look. Typically, you would arrange in odds, but this art piece was just begging for one more stem.
3. Once I was happy with the arrangement, I used hot glue to secure the ends of the flowers. The frames I bought did not have glass, so I had to do something to secure them. Hot glue, while treacherous, does the job well.
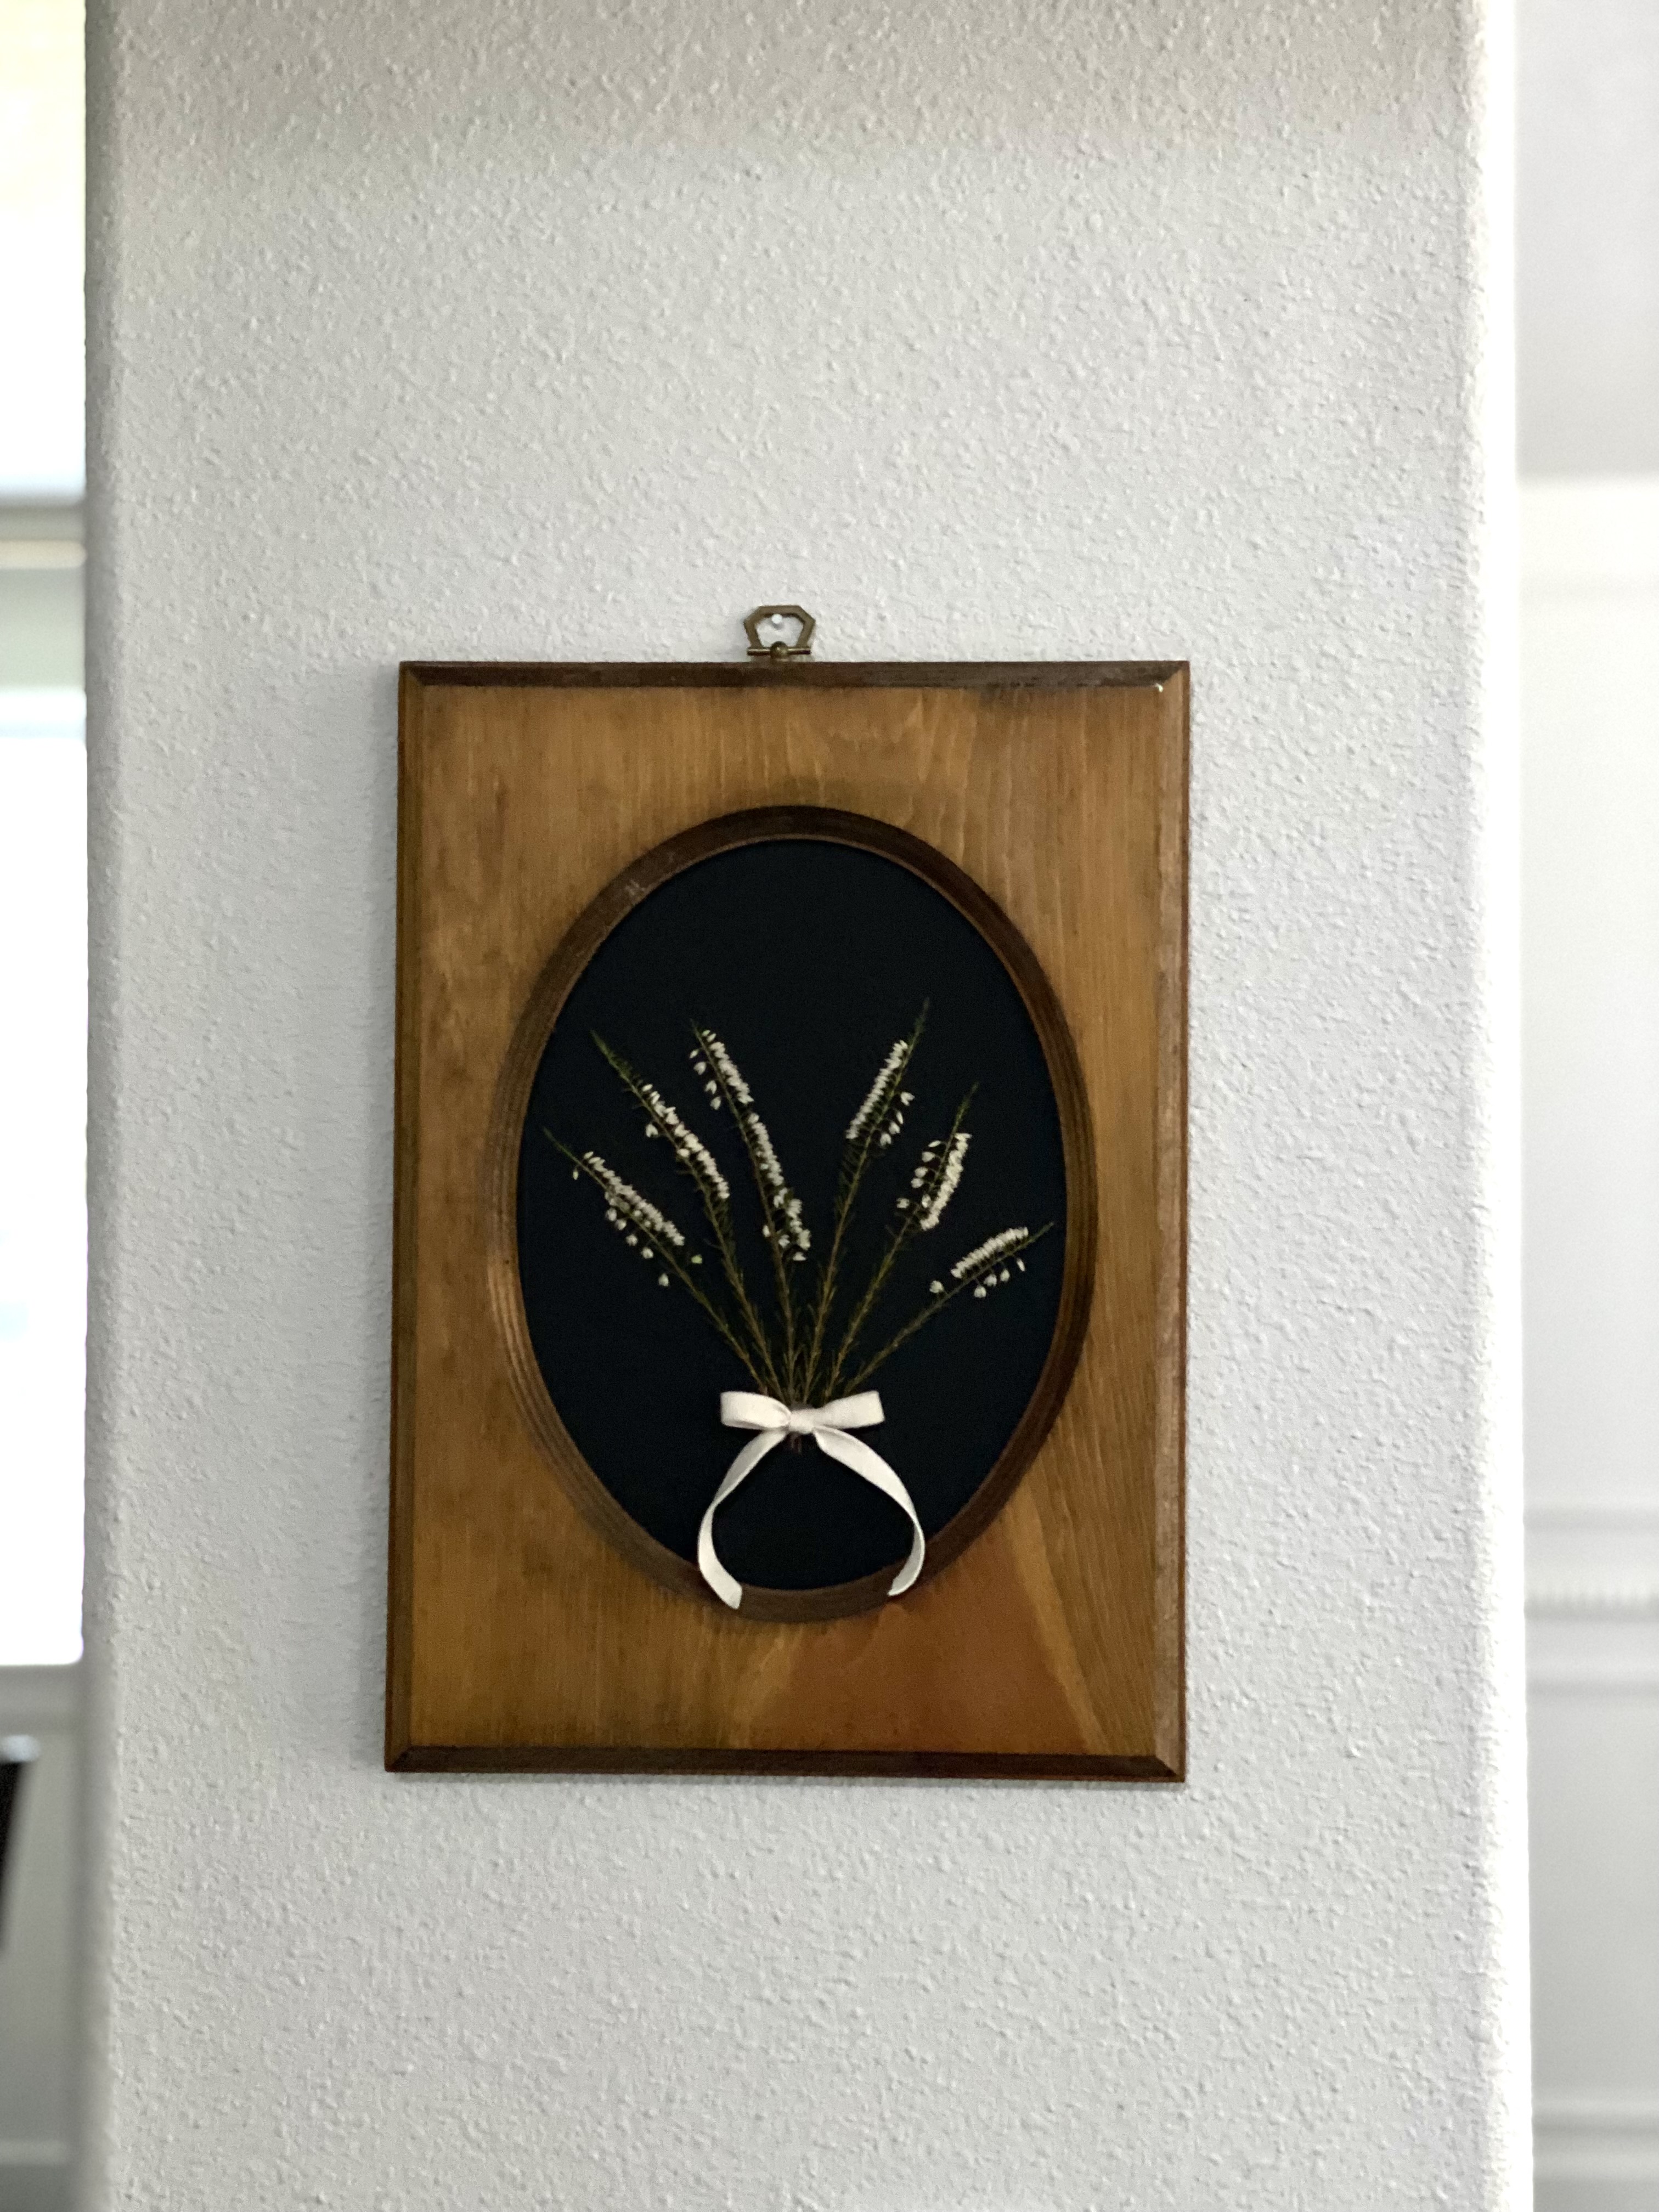
3. The ribbon comes next, and yes, it is 100% to hide the hot glue. Nothing but honesty on this blog. I also thought about creating a little tag or using some lace to hide the glue, but the velvet ribbon won this time!
4. I assembled the paper and frame, and voila, done! I even found a spot to hang it that already had a nail, win/win/win.
This project took all of 4 steps (5 if you add pressing the flowers), and maybe 15 minutes!
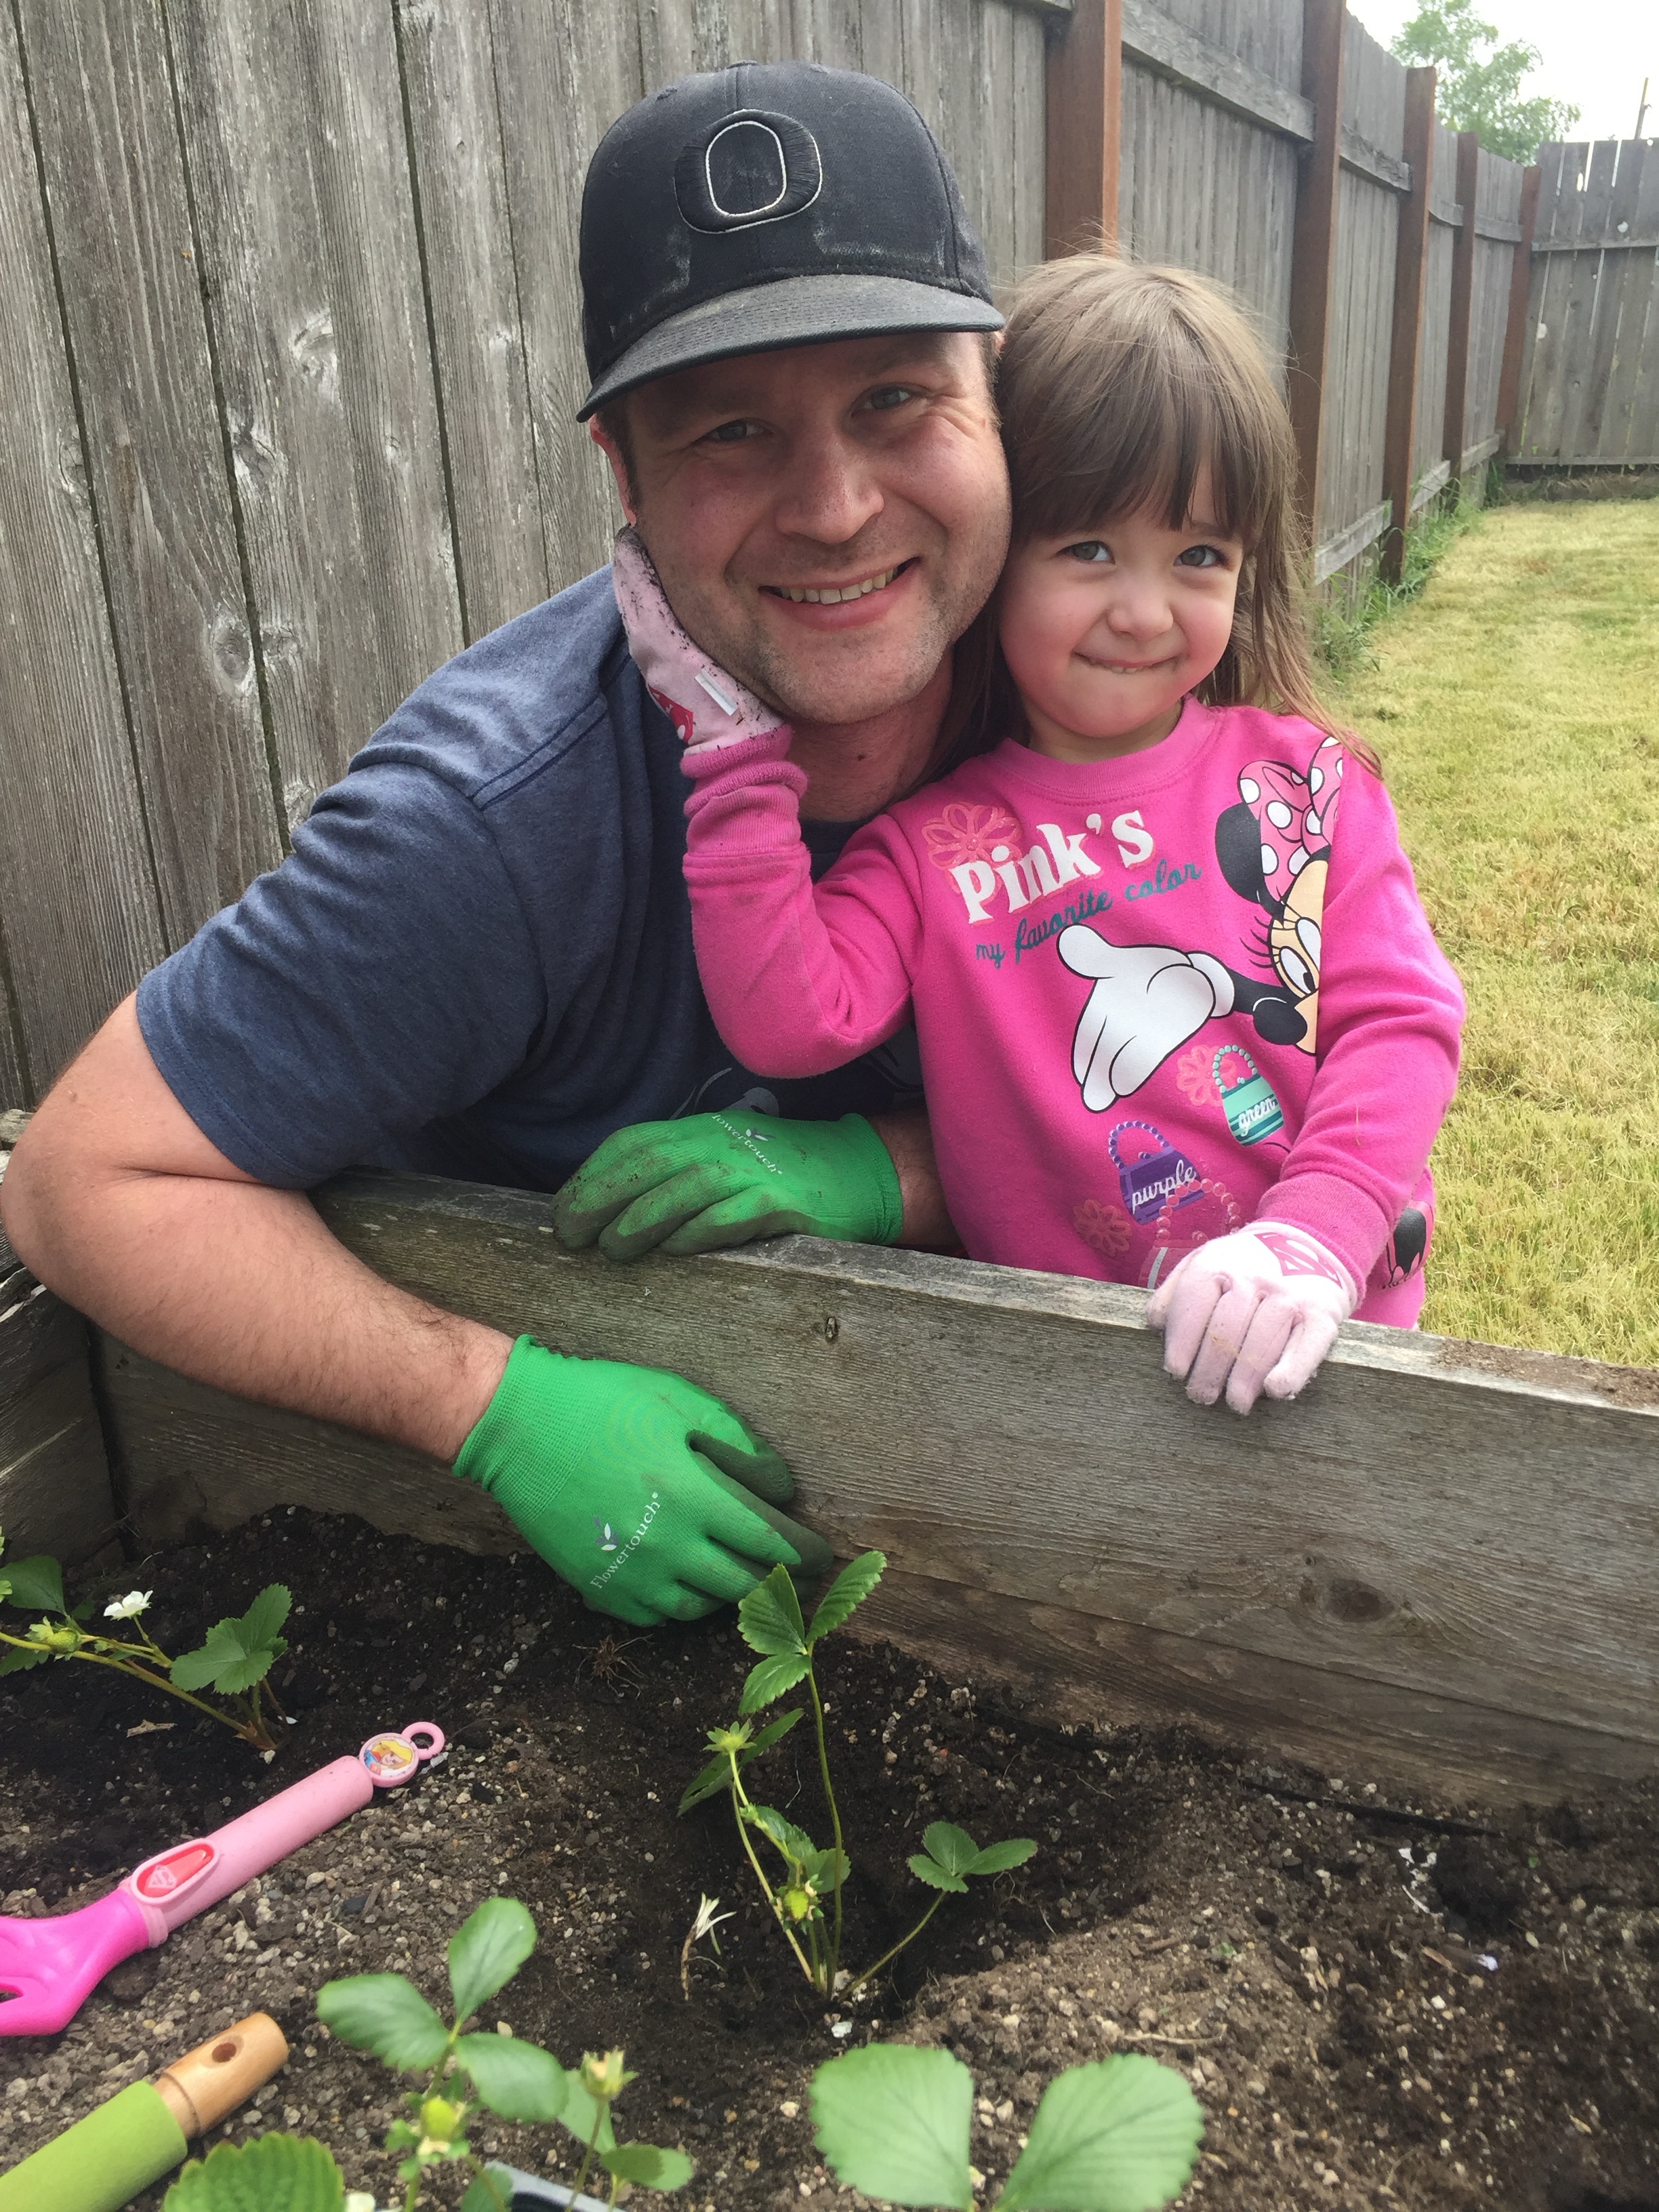
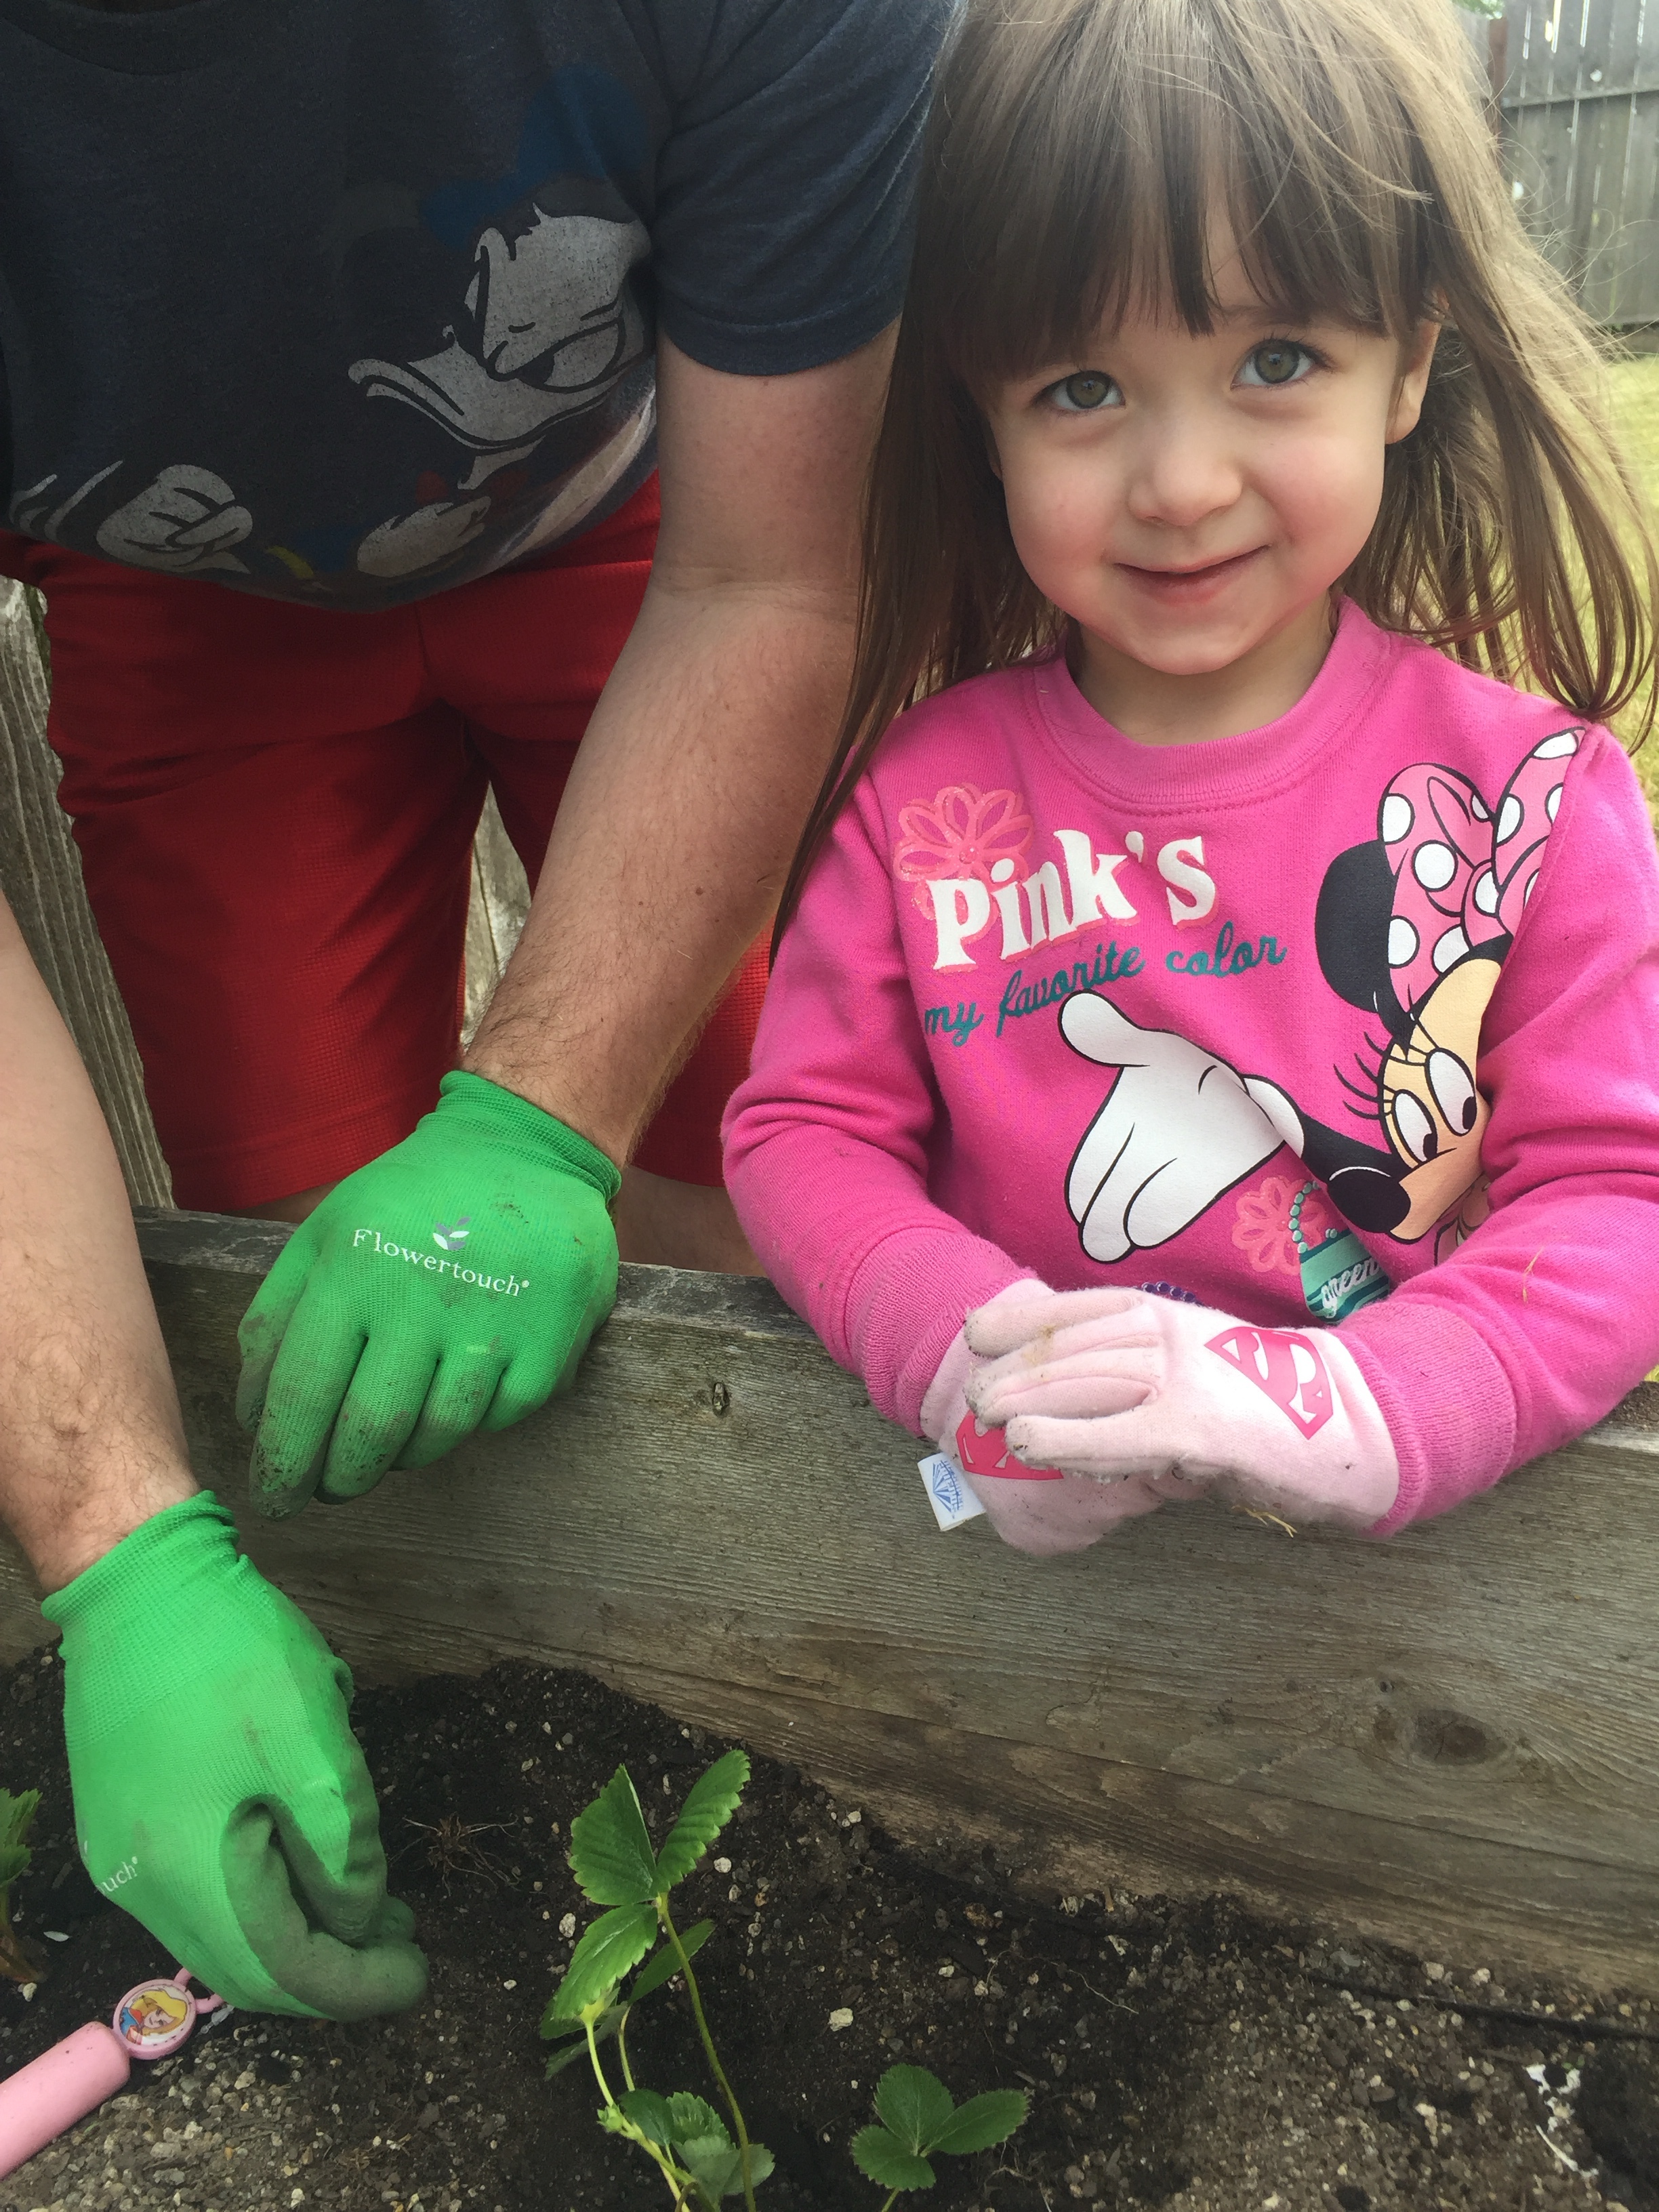
Did you know that there was a time when I had zero interest in gardening? Zero interest. When Kyrie was 3 or 4 years old Ryan decided to plant some strawberries in the backyard thinking it would be fun for the kids. I remember telling him I really didn’t want to start a garden. So he could do what he wanted but I had plenty on my plate and would not be contributing to the gardening thing. I was a bit grumpy about it if I’m being completely honest. Ryan will corroborate this story.
Then the strawberries started growing. And we got our very first one. It was completely delightful to see these beautiful sweet fruits growing. We were hooked, kids and parents alike. Yes, plural on parents. Uh-oh.
Then we added tomatoes.
Then raspberries.
Some cucumbers.
Then we moved to the Lost Wood.
Like so many other things, this is all entirely Ryan’s fault (in the best way), because now we had so much more space for a garden. So much more space! And suddenly, I am all in on gardening. All in!
We started by picking a location to put the garden, we needed some sort of flat-ish space (our lot is very sloped and full of trees), we needed to be able to fence it (the deer), and we needed optimal light (again, so many trees). After much consideration, we found a perfect spot basically in the front yard. Don’t worry, when you live in the country you can put your garden in the front yard and no one blinks. Promise. So much better than 5 abandoned vehicles.
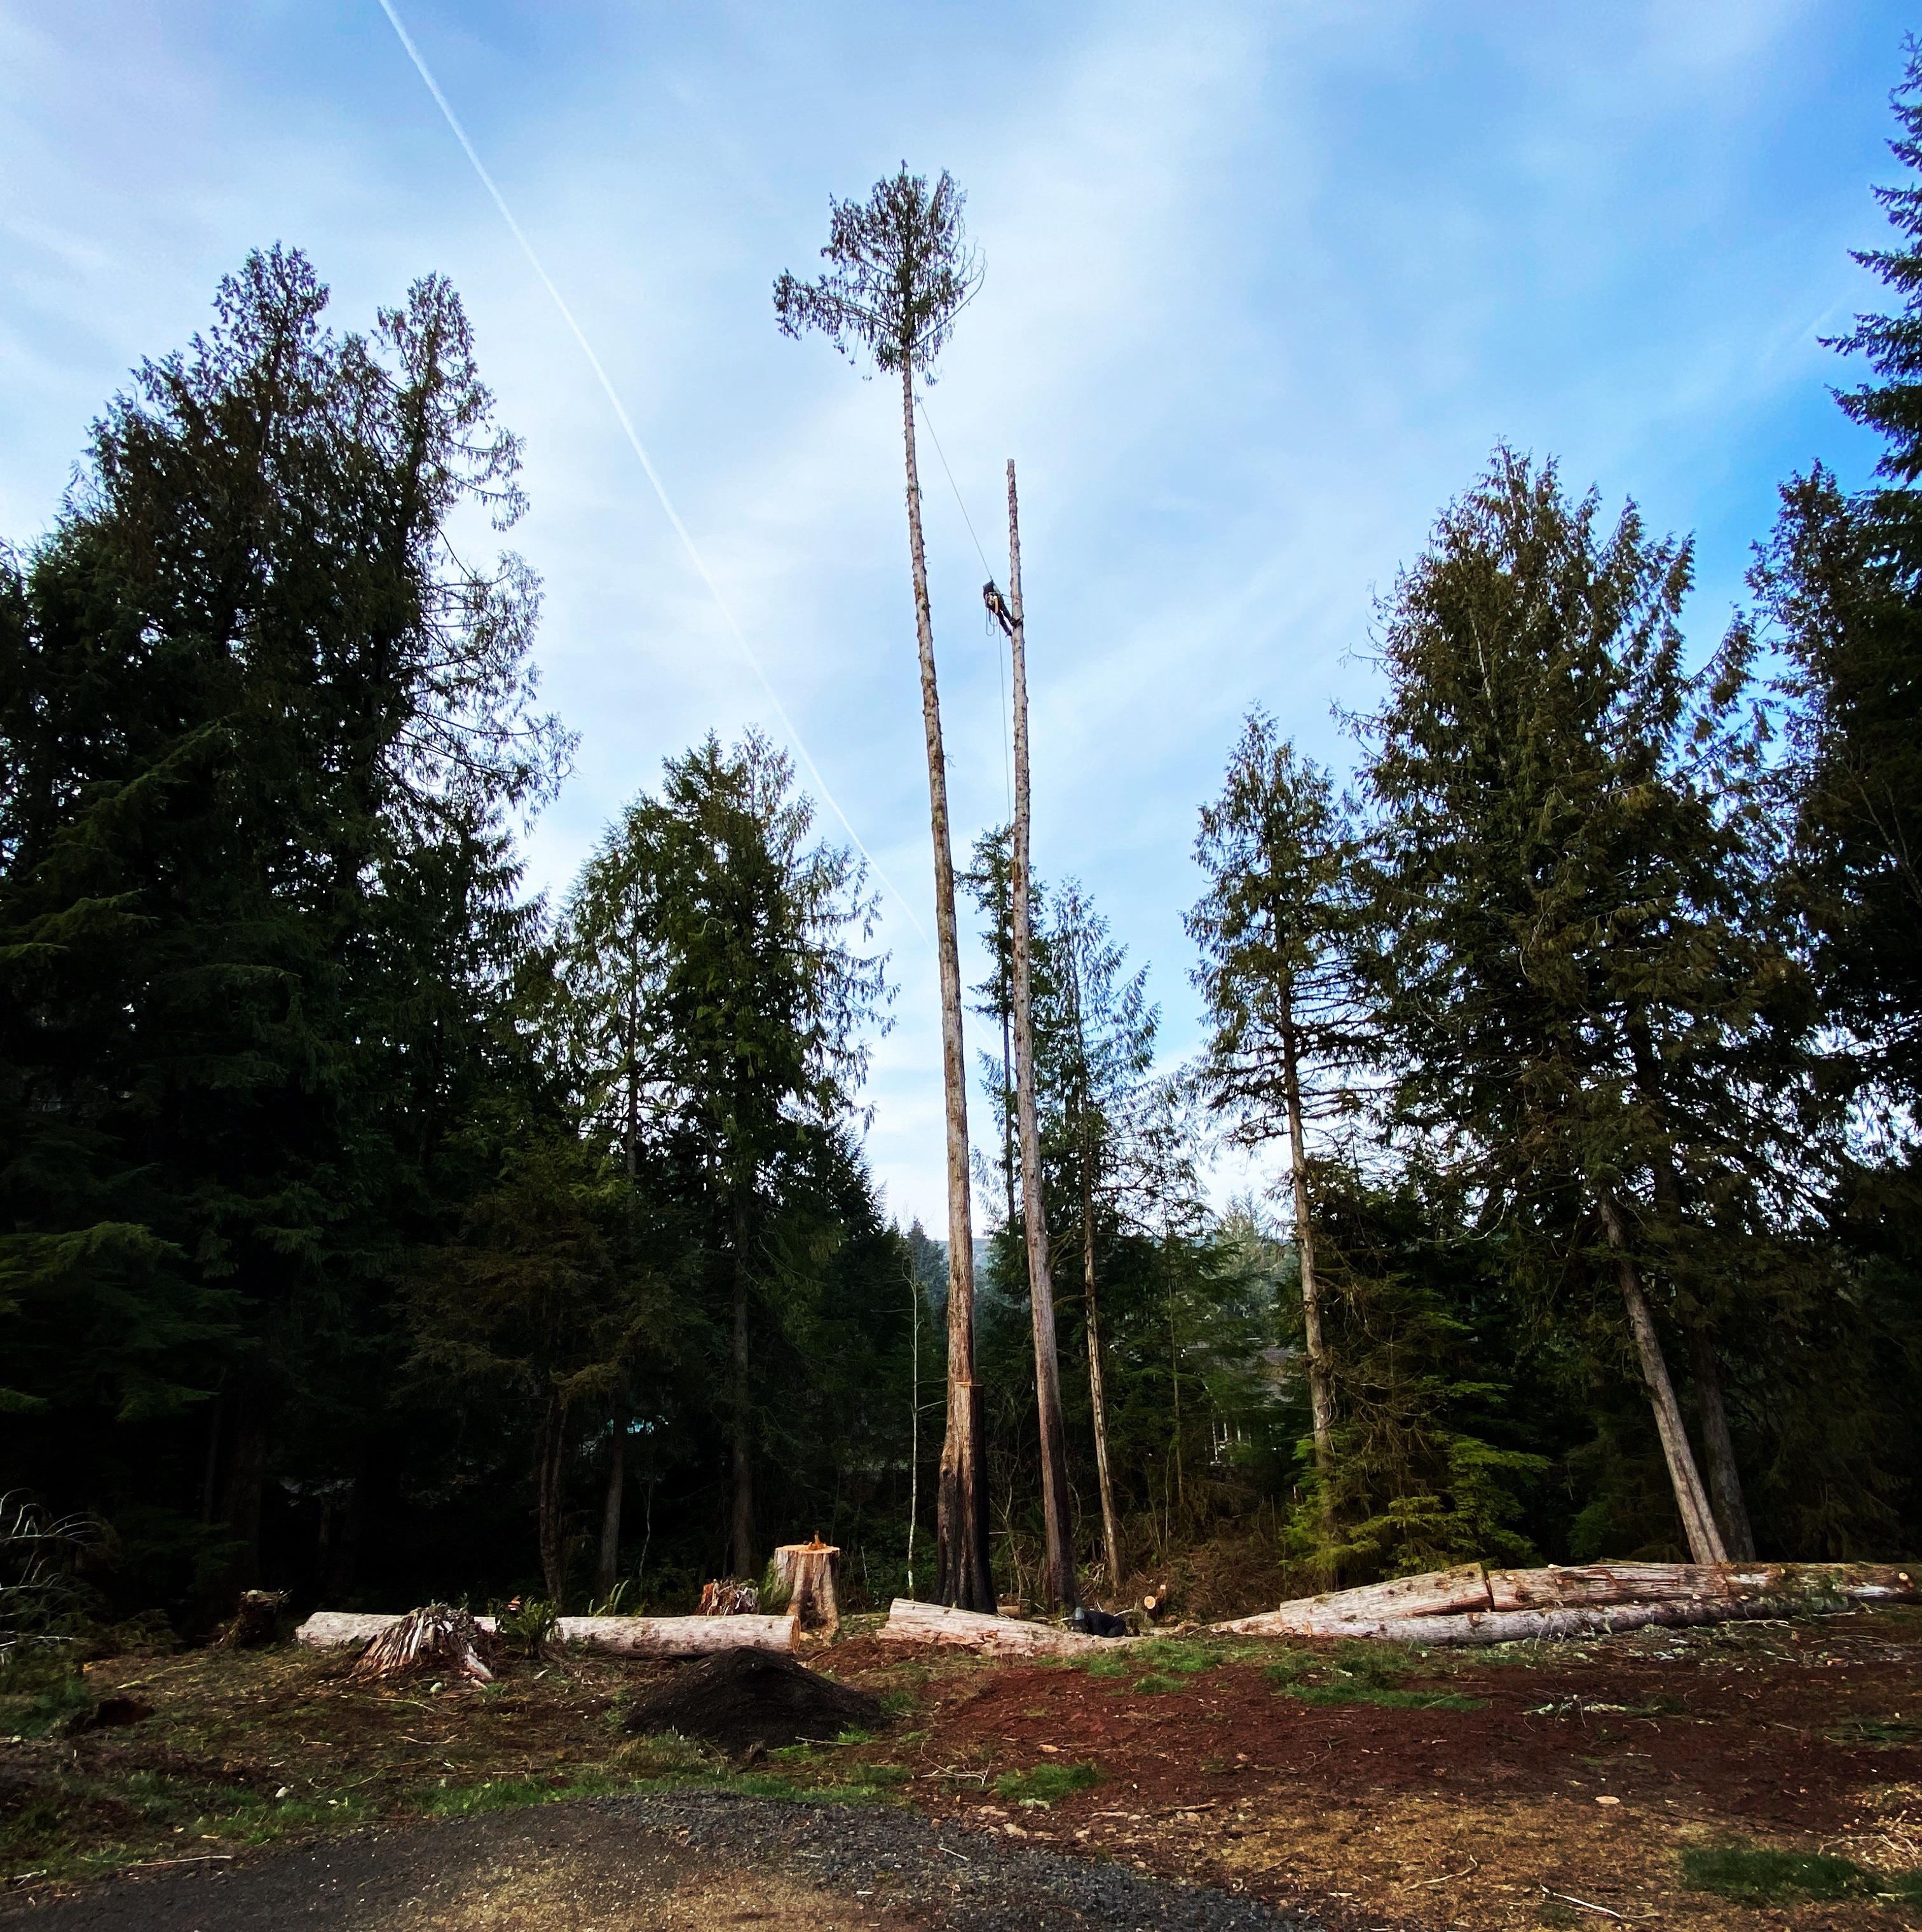
Thus begins the start of a project that I thought would be pretty simple, but as always, this is the start of a giant snowball of a project. We called Ryan’s dad, Greg, to give us some advice on how to best prep the area for the garden. We were thinking we’d flatten out an area a bit and build 5 or 6 simple Wilco raised bed kits. Ryan’s dad evaluated the area and quickly determined we needed to take out some old cedar trees that were dead and dying.
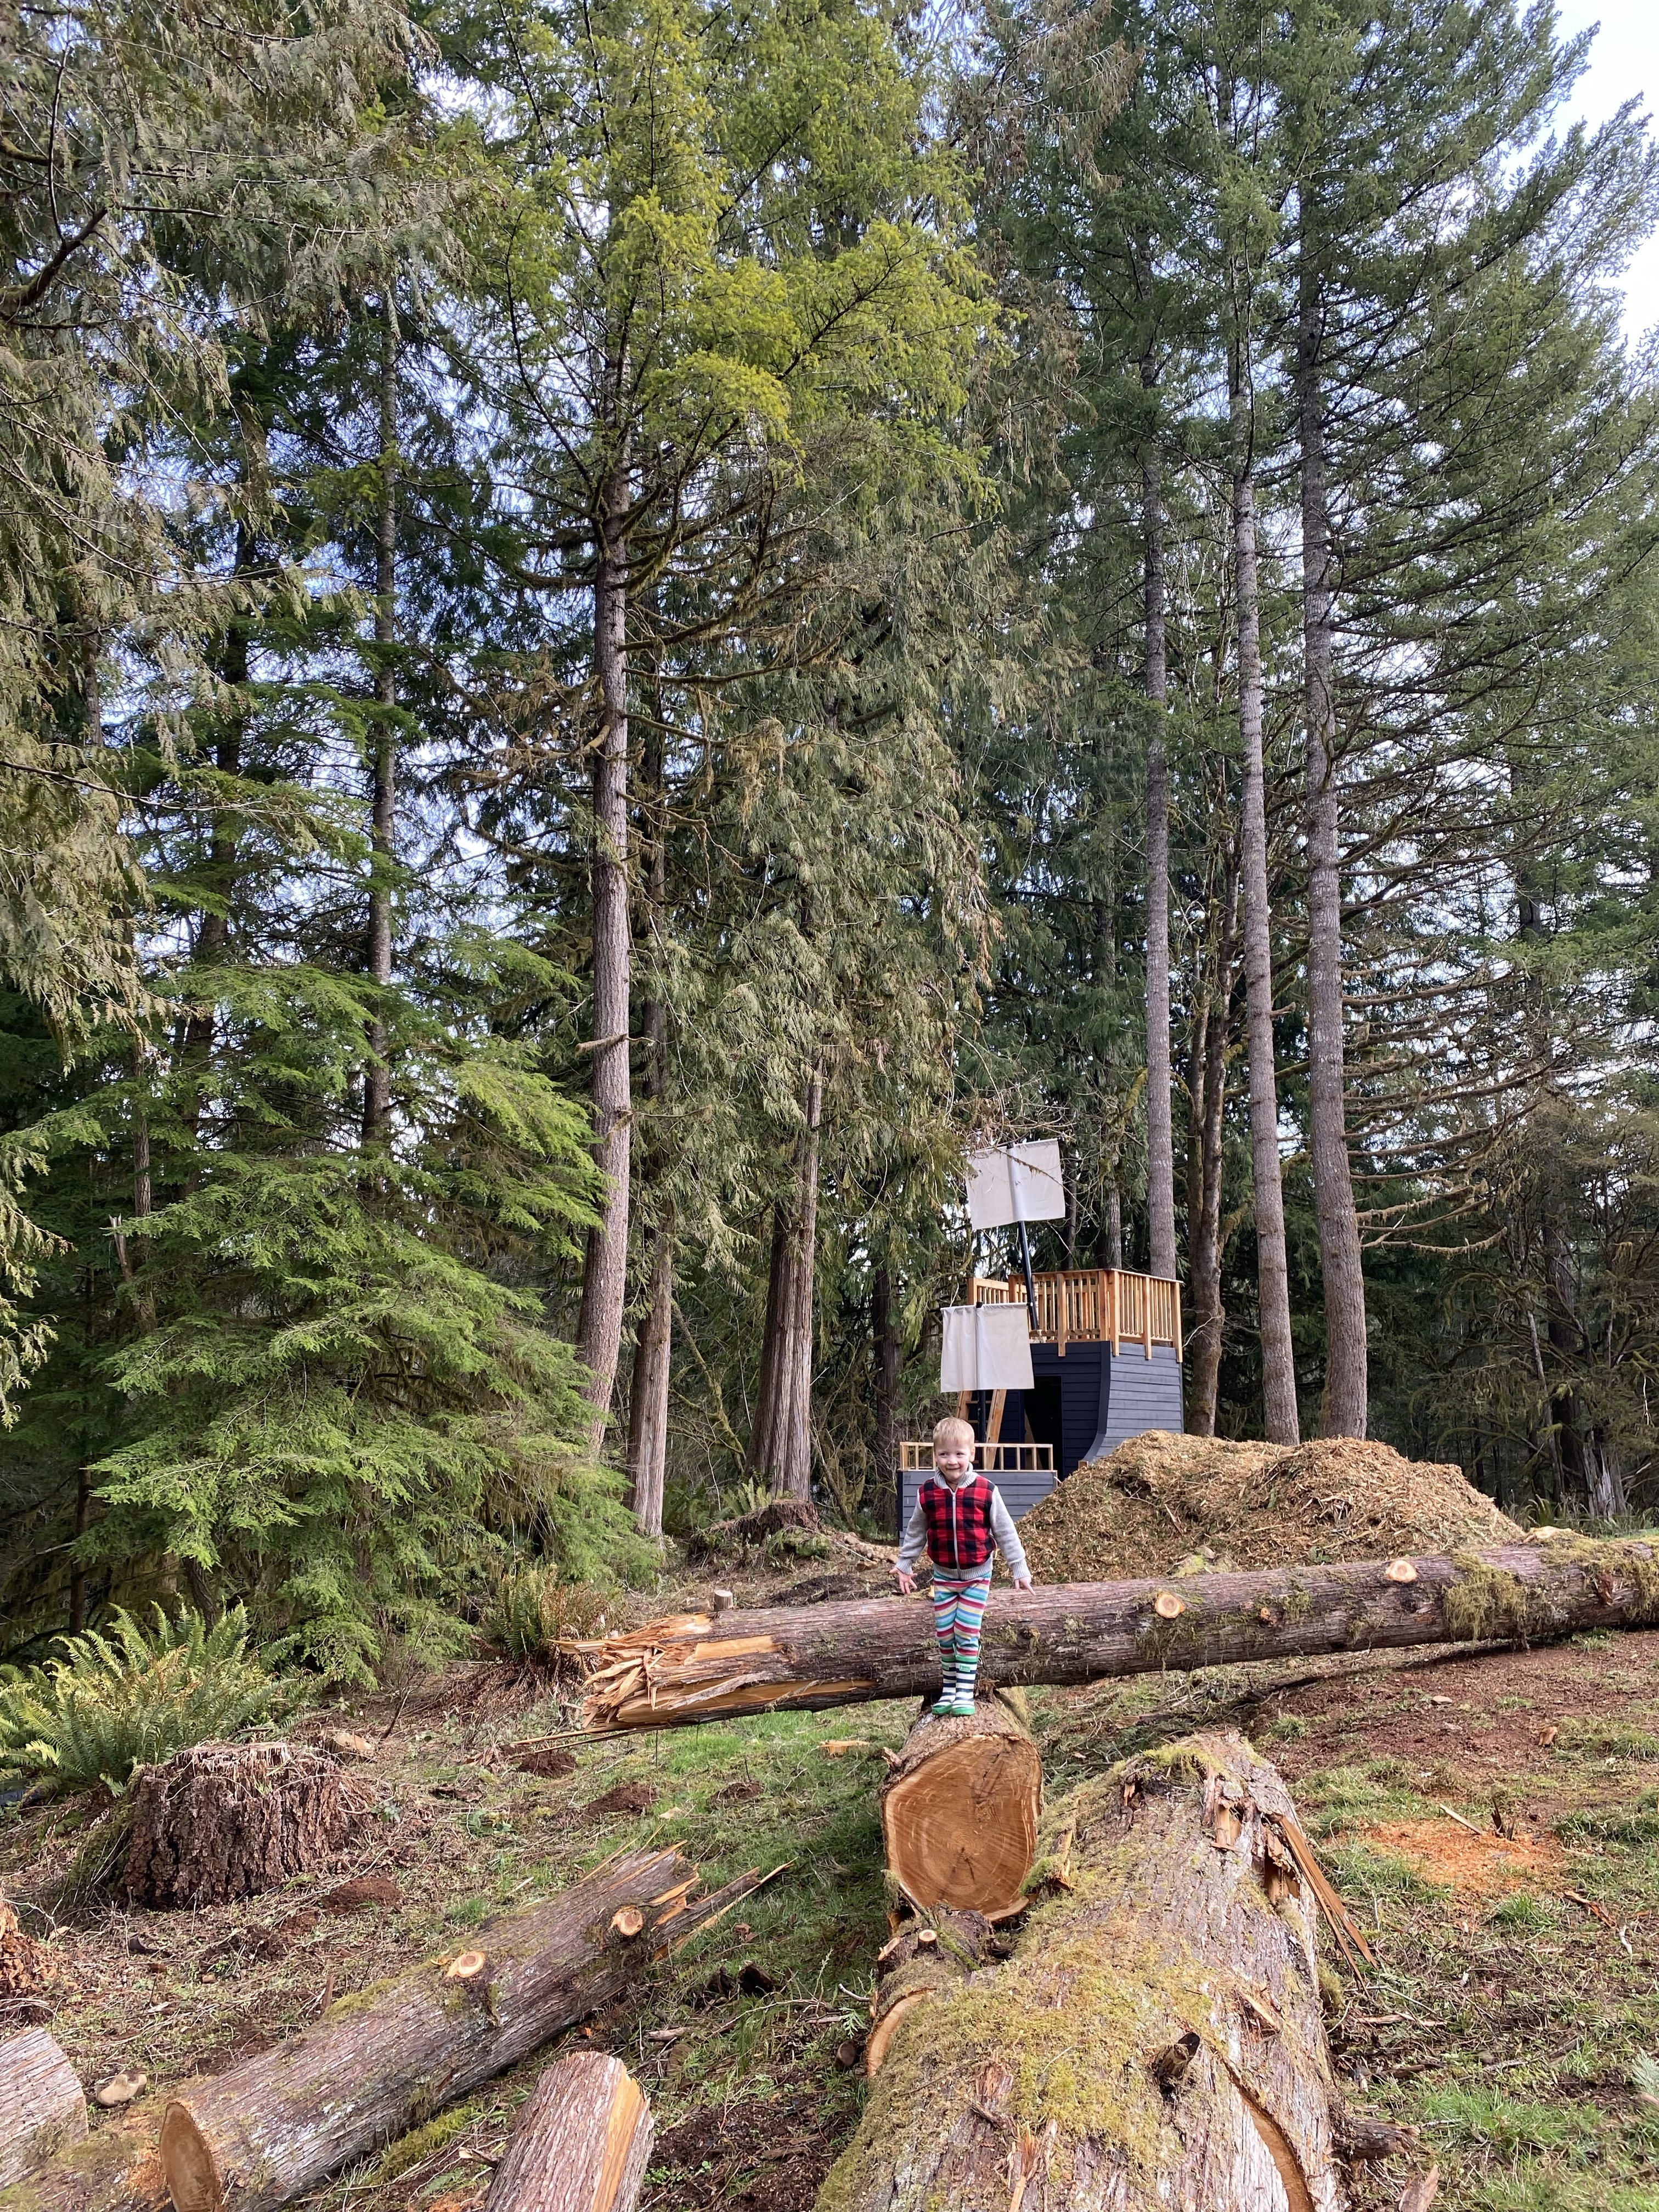
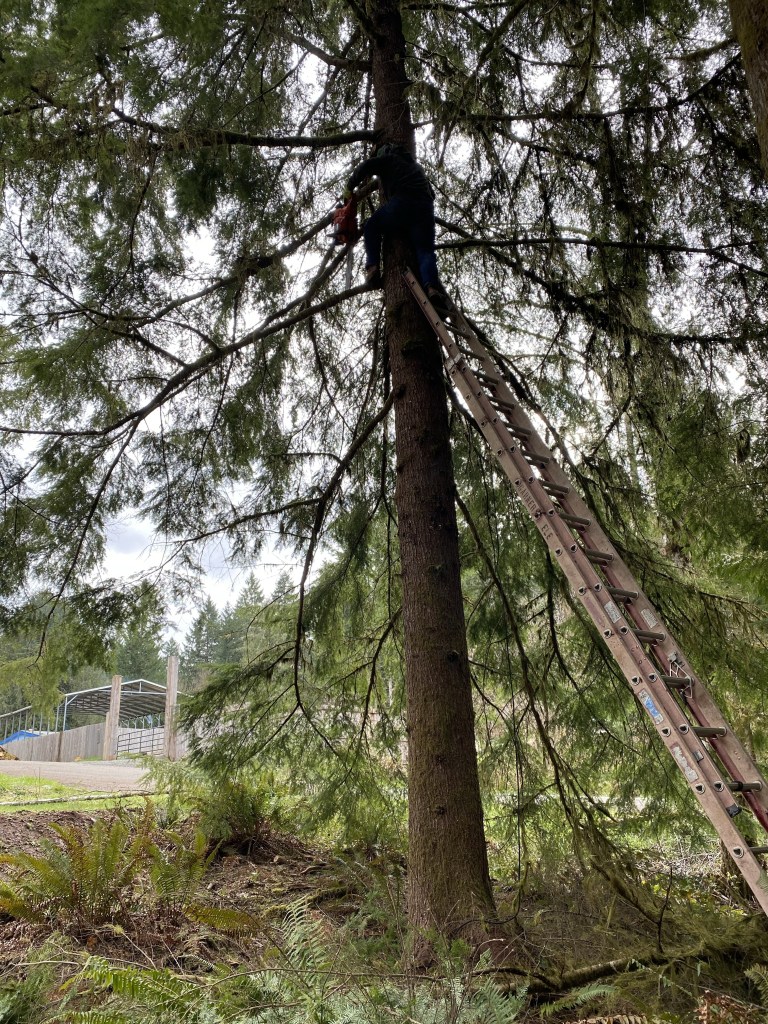
As much as we hated to admit it, the trees were looking rough (and they were partially burned, which is a whole different story). The last thing we wanted to do was build a whole garden and have a tree fall on it. So I called a couple of tree companies for quotes. The “simple” project just got a bigger price tag.
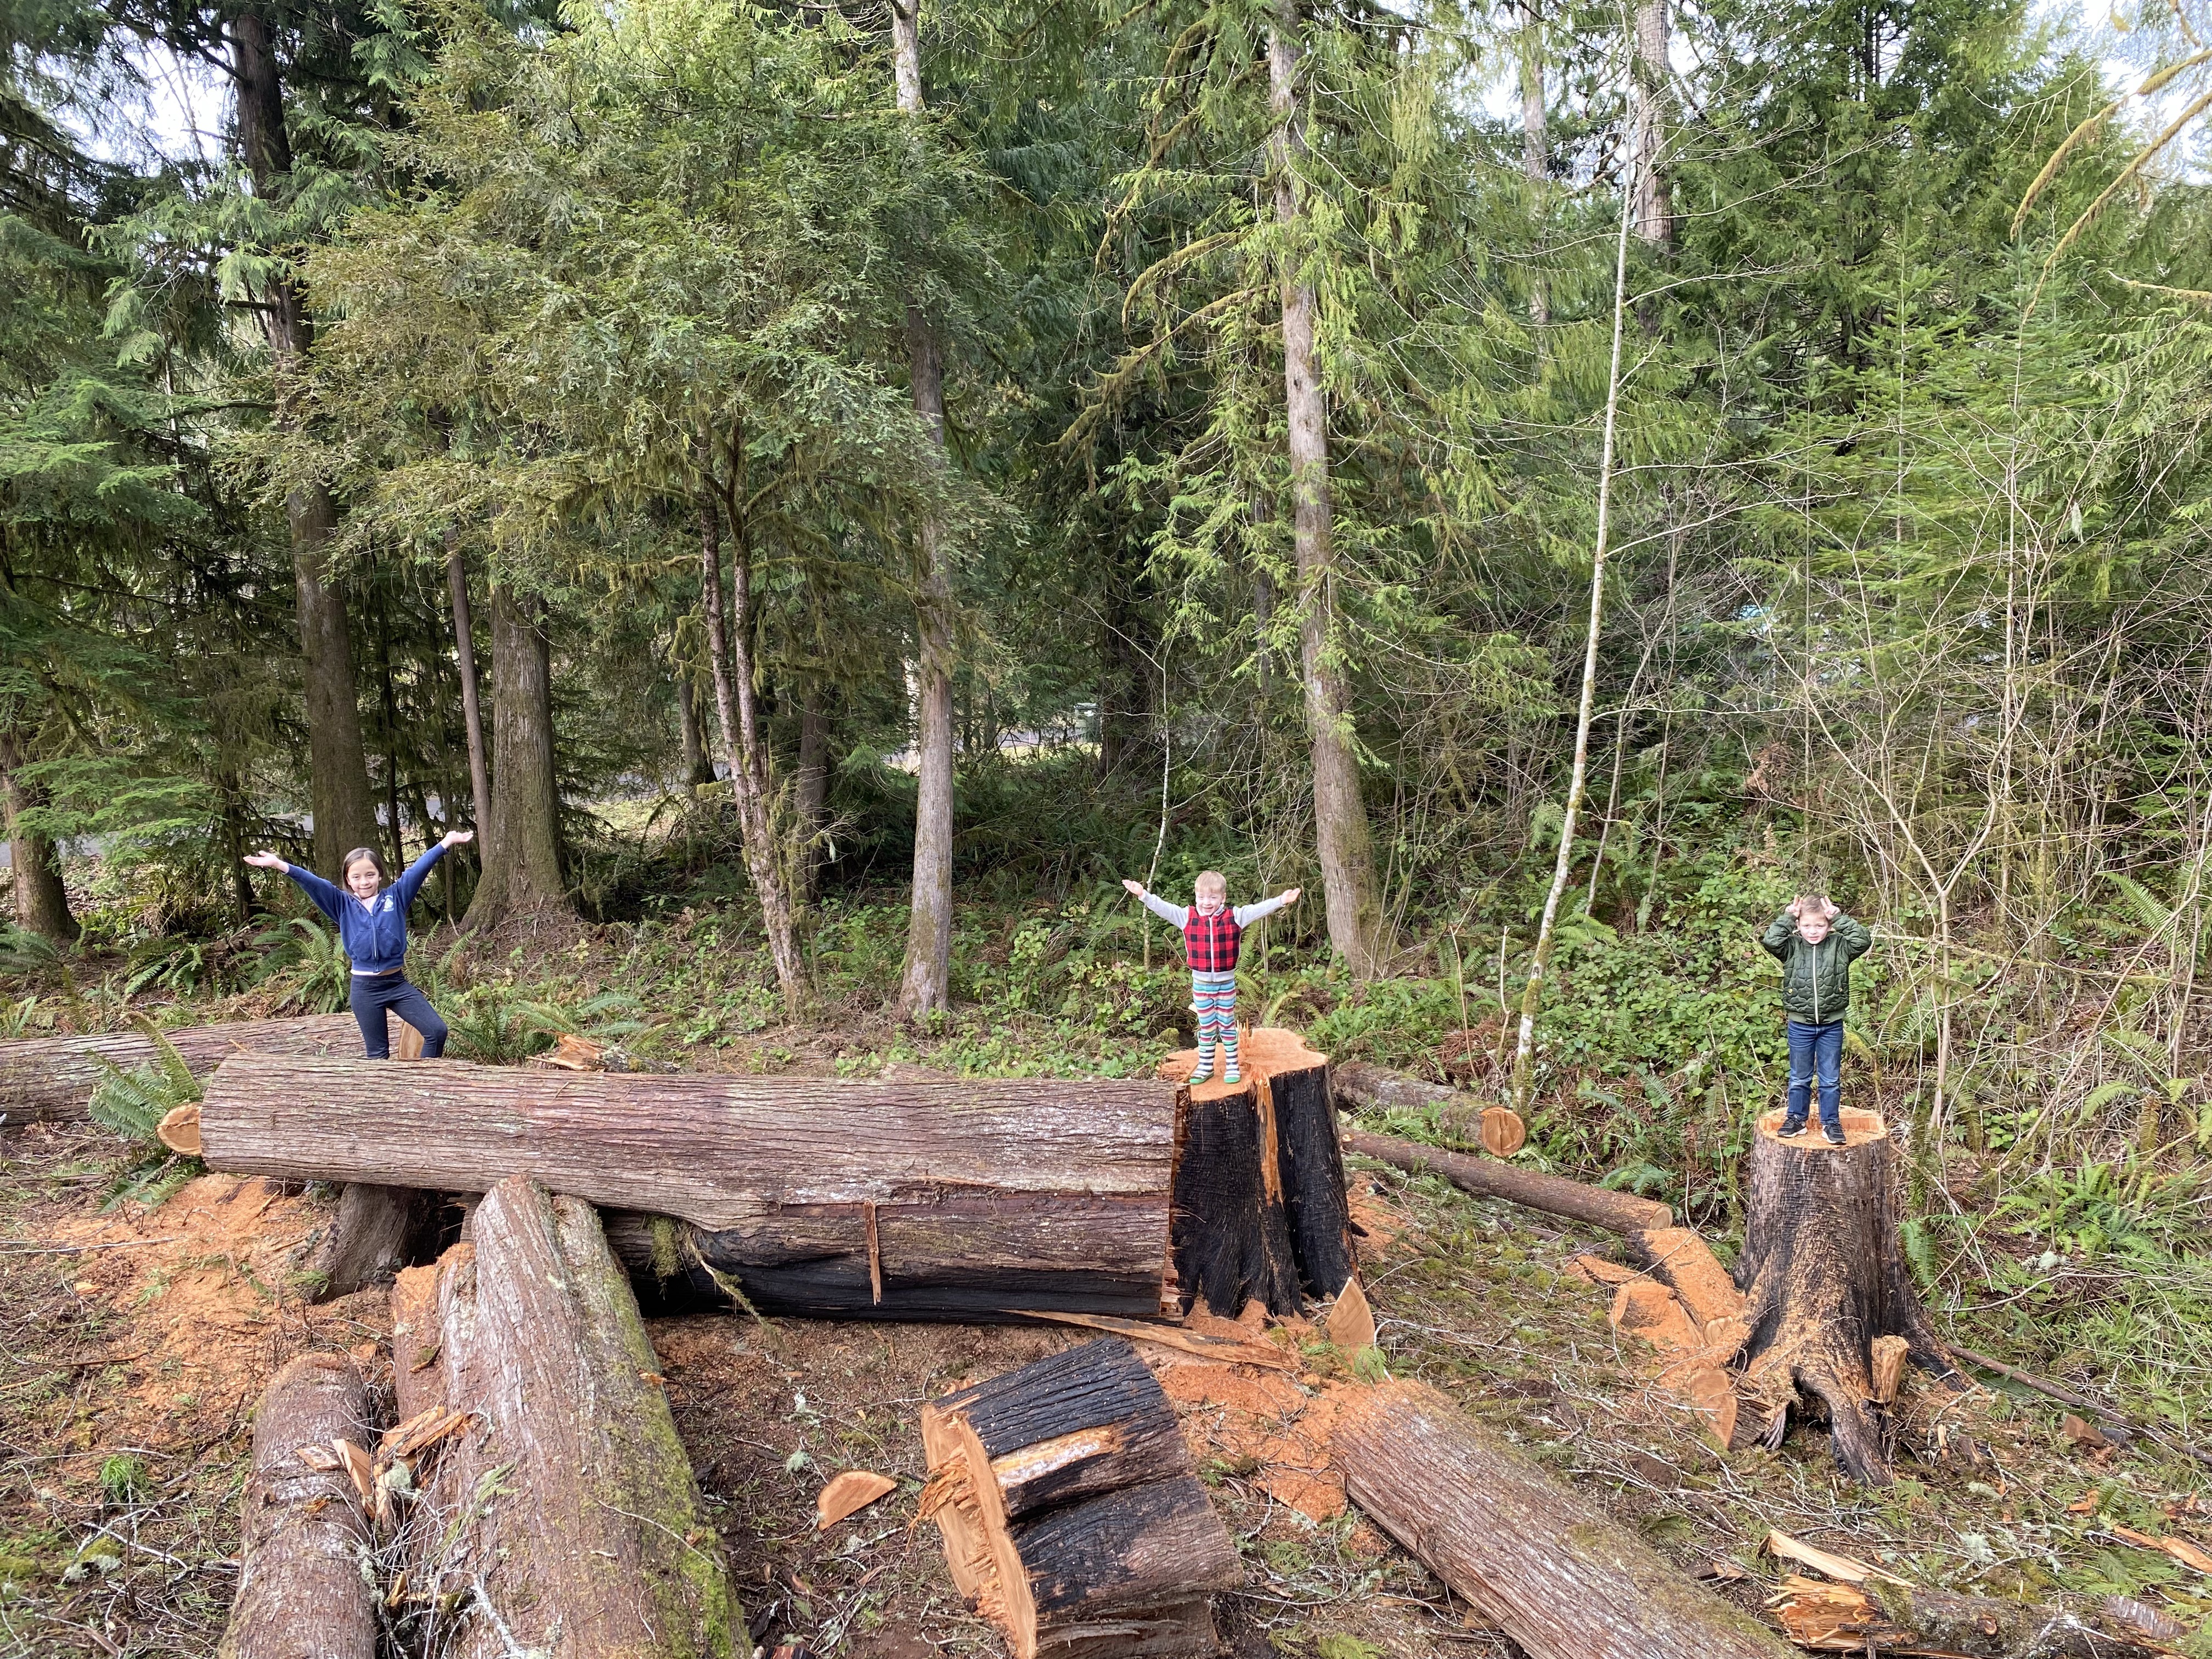
We had about three large cedars removed and a couple smaller ones. At this point, we had unwittingly made a mess of the front yard and as a bonus, a ninja obstacle course for the kids. In great news, our neighbor offered to pay us for the logs. We were excited, it would offset the cost of having the trees cut down and get them out of the yard.
And the snowball begins.
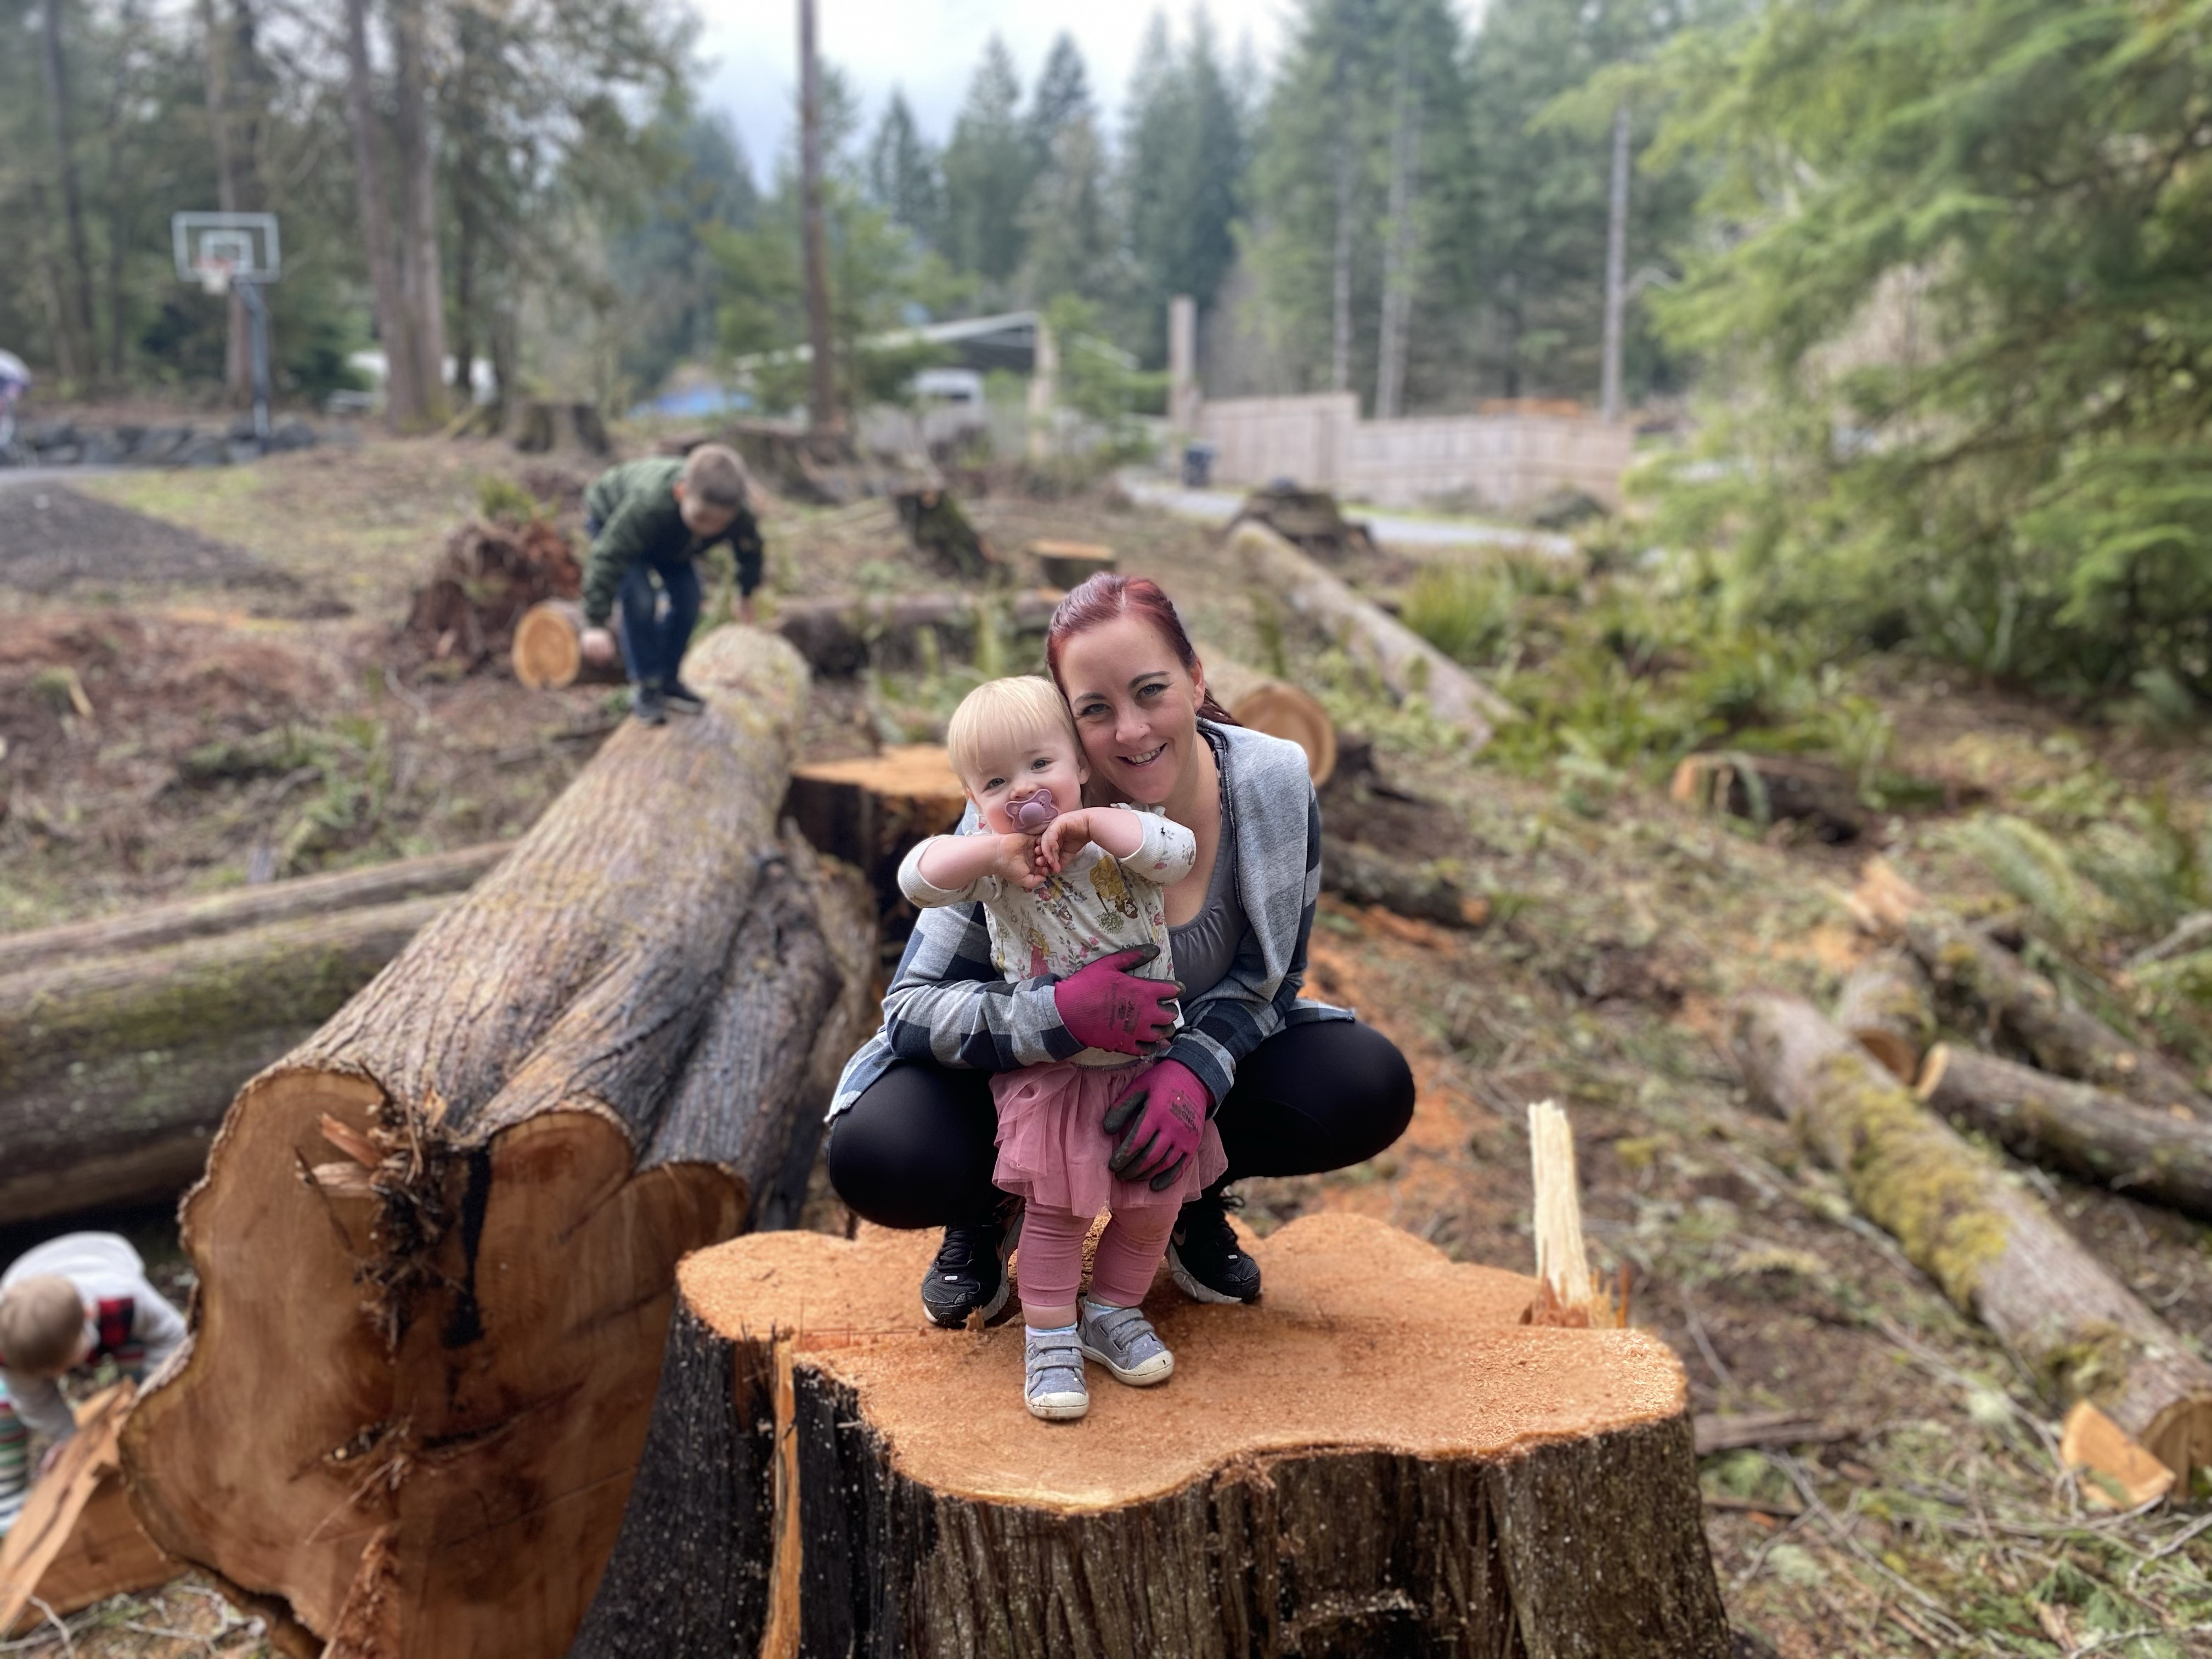
Enter Ryan’s dad (again). When he heard we were going to sell the logs, he insisted we talk to his friend who has a portable mill. At this point, I was a tad frustrated. I just wanted to ditch the logs and make my simple kit garden. Priorities people! The friend came to evaluate the logs and told us we had some tremendous value on our hands — the trees were Western Red Cedar which was (is?) in high demand in the lumber world. And oh, by the way, were we planning to build our raised beds?
Side note: My friend Adrienne has a gorgeous raised bed garden. One I could only ever dream of having. She incidentally has taught me most of what I know about gardening! The amazingness of her dream garden started to enter my mind at this point.
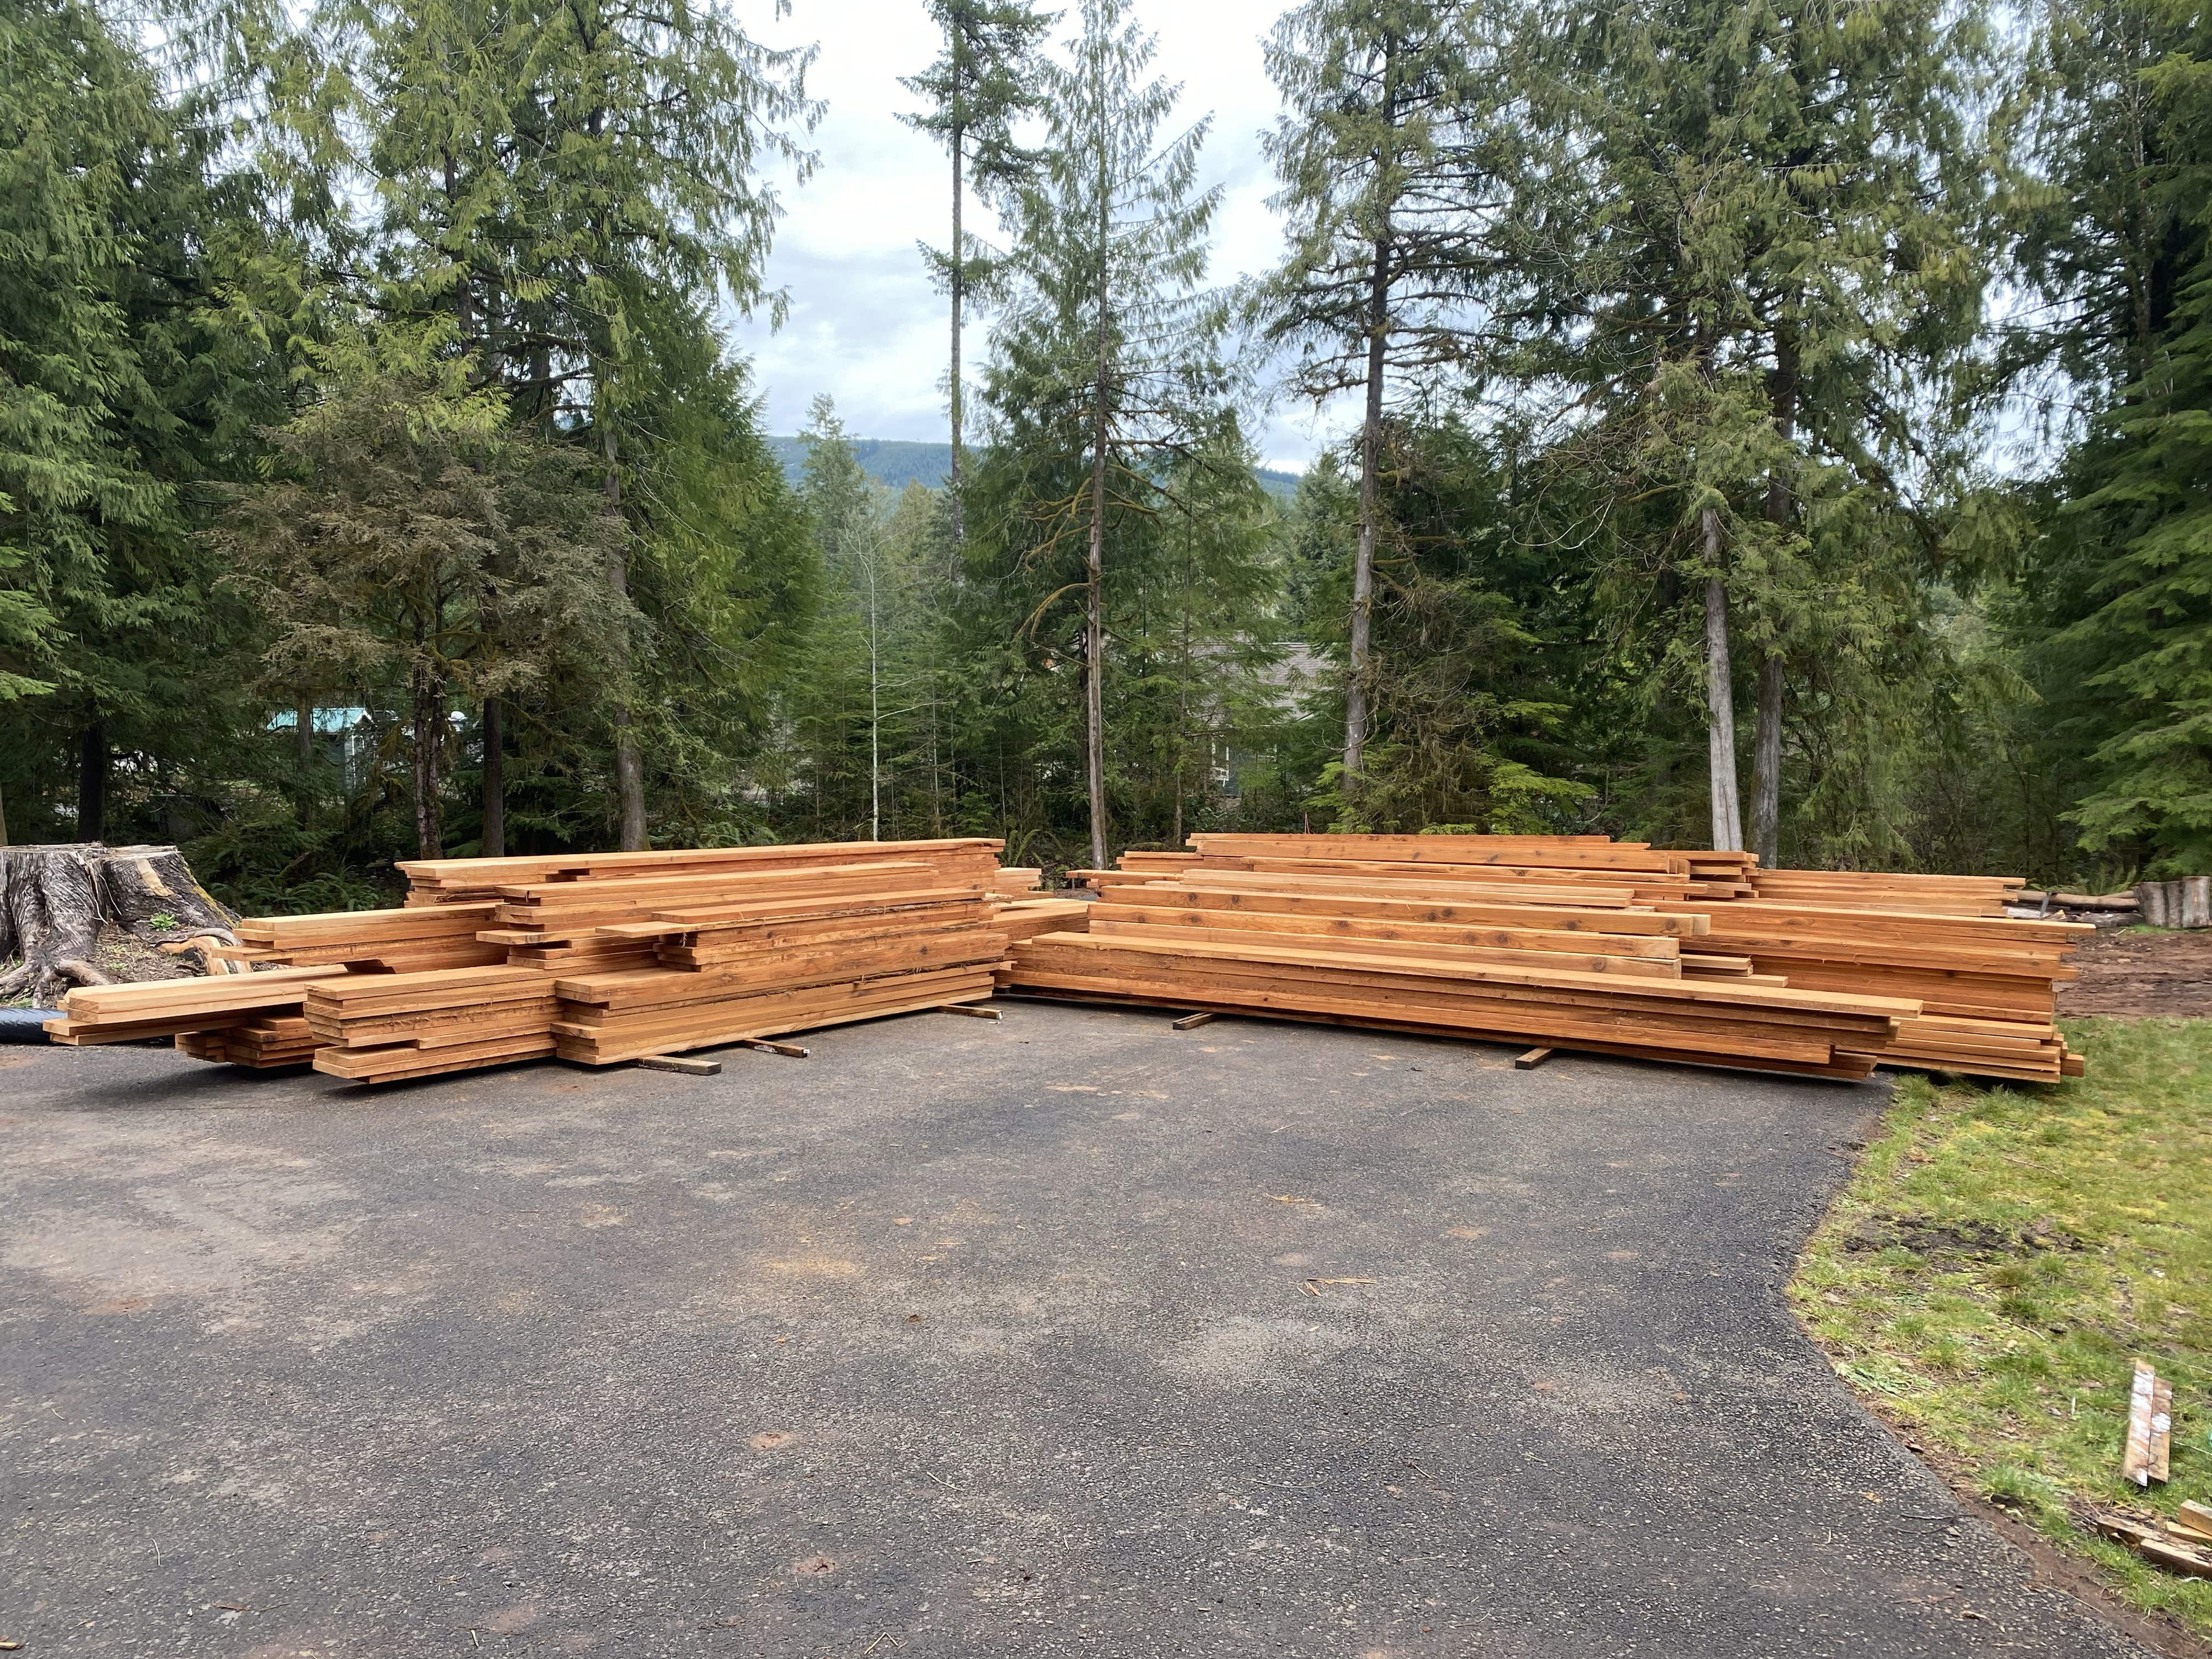
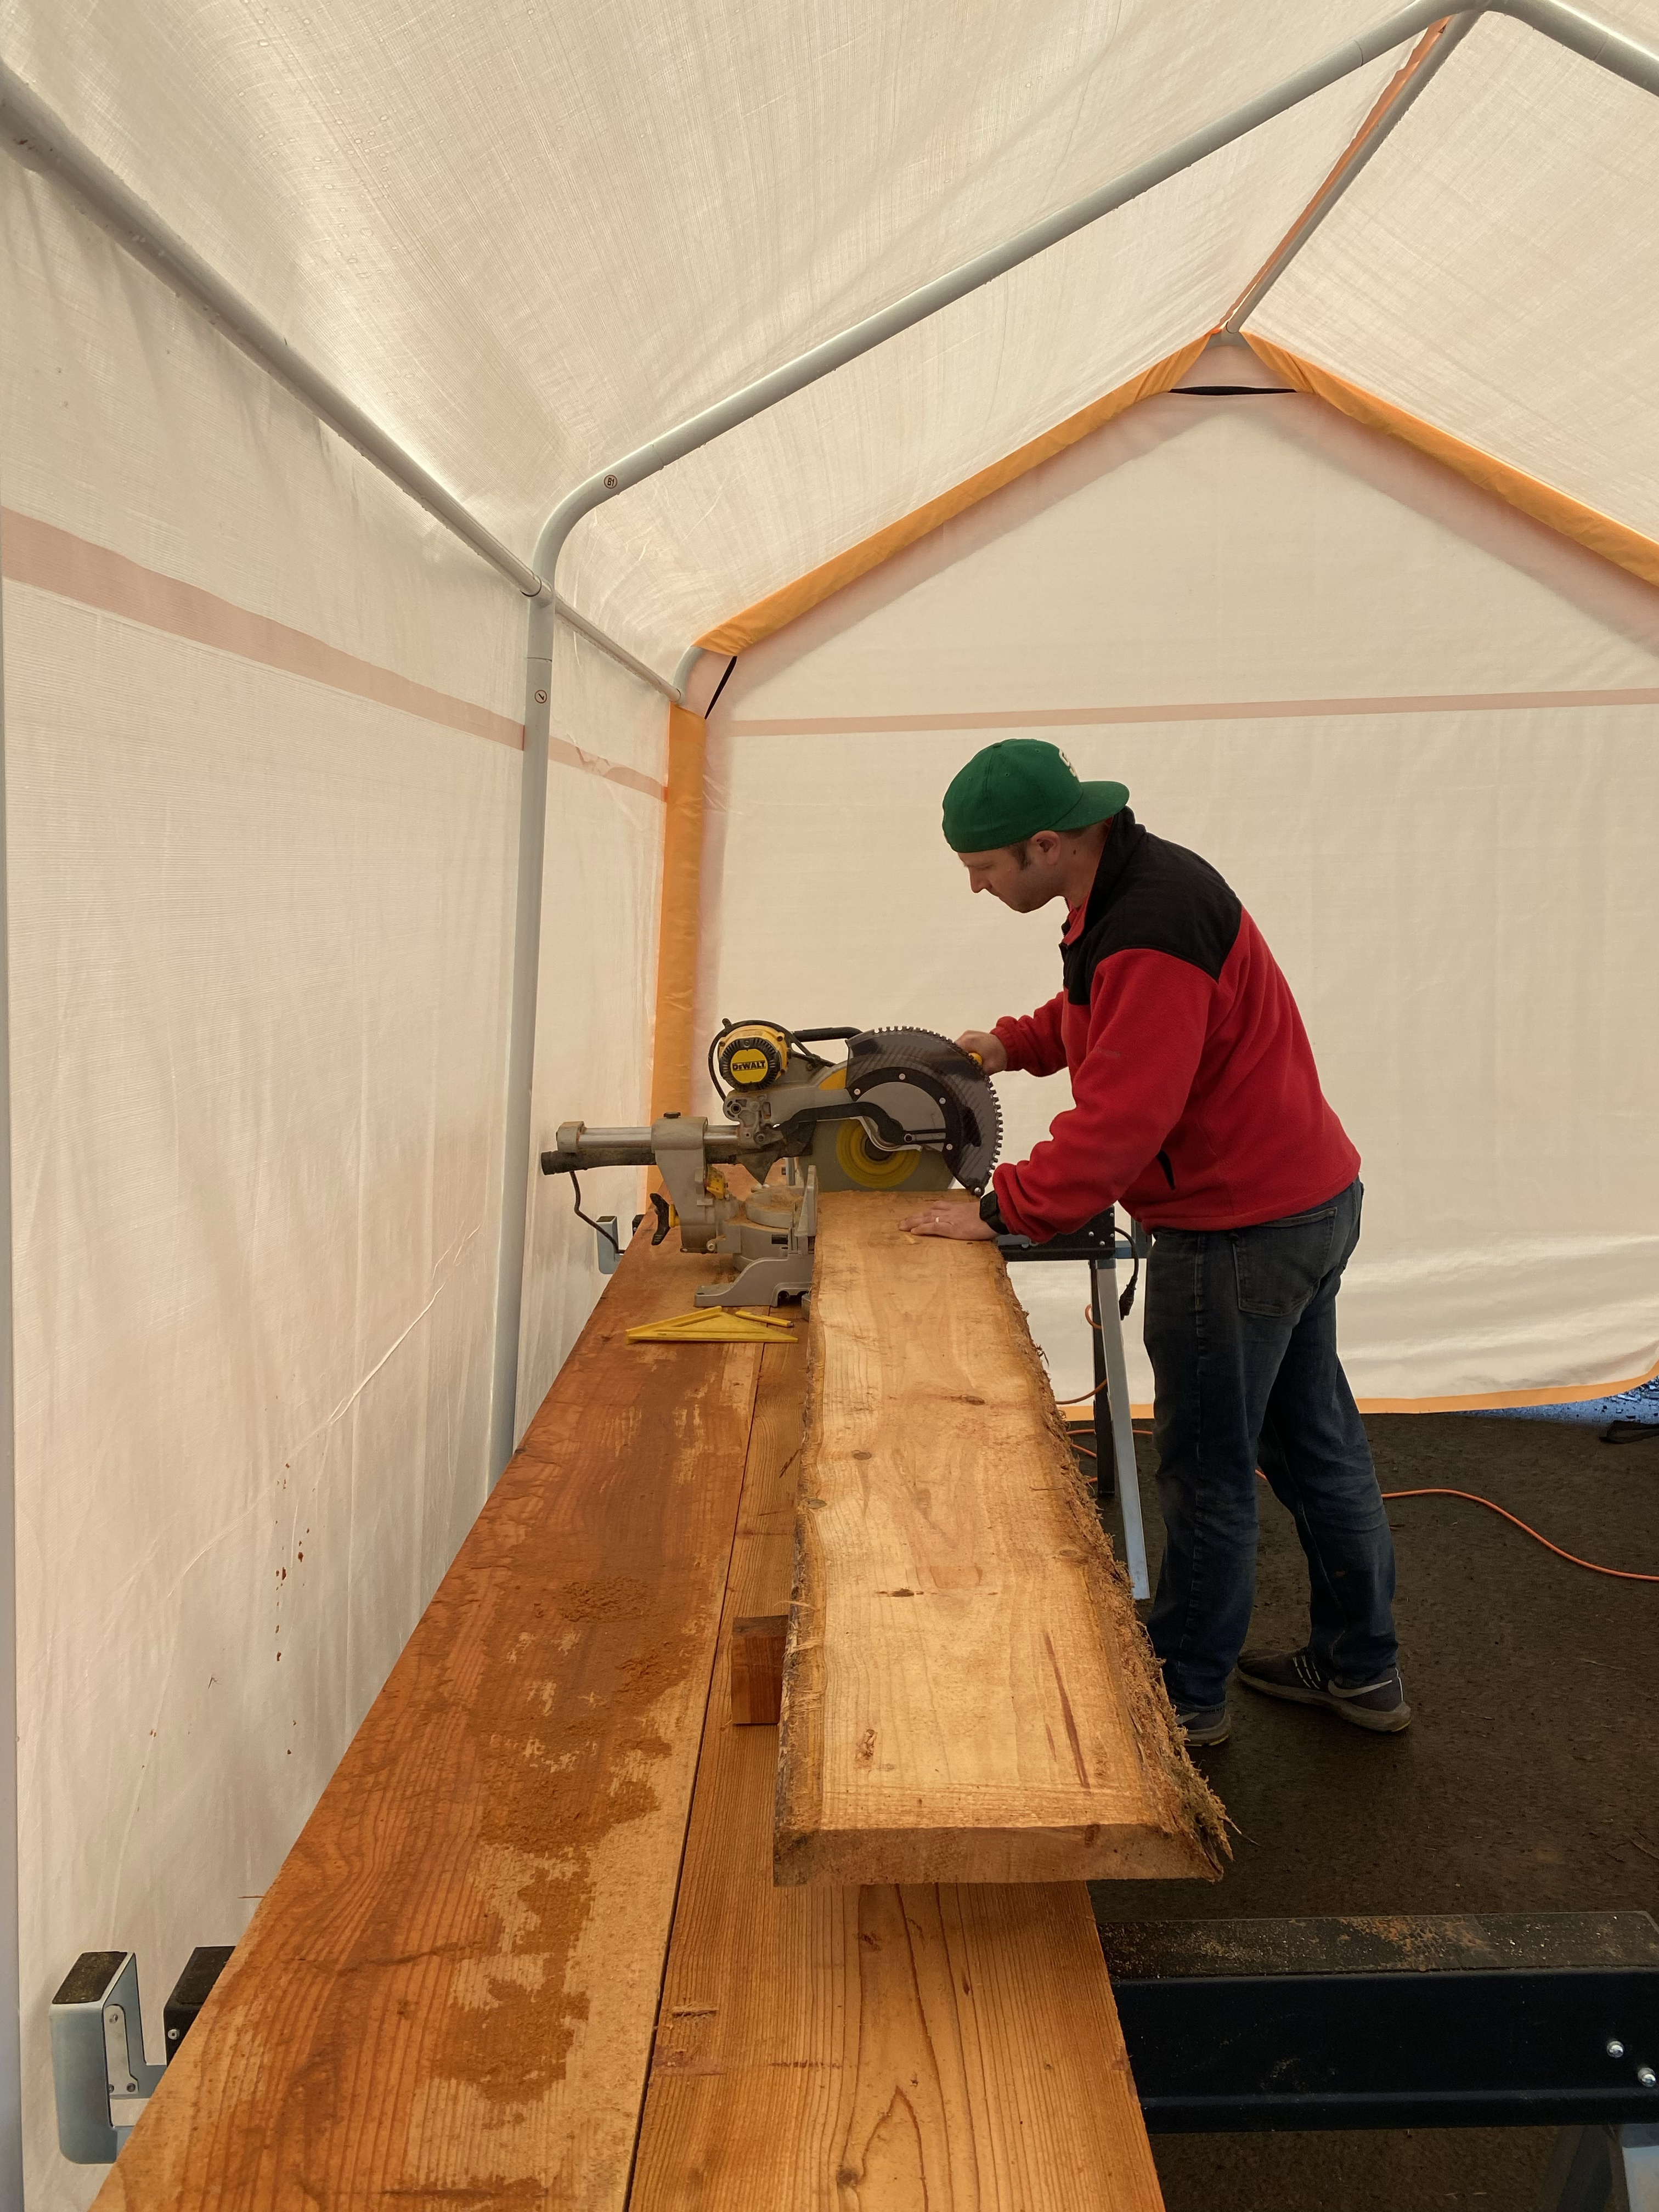
After countless discussions and pricing and thinking and contemplating, we decided instead of making money and having someone take the logs, we would pay to have the wood milled for our purposes. Oh, and by the way, there isn’t just enough wood for the raised bed garden and corresponding fencing, but we can also get enough wood custom-milled to build an arbor for the entrance to the garden and a pergola for our back patio and still have some to spare. Believe it or not, we ended up with over 4 times the the cost of the project in custom-milled wood. Also, super green and sustainable because our wood would stay on our property and be repurposed to grow things!
The snowball is very real, but we are also super thankful for Greg’s insight on this one. We just had to get the giant logs transported about 30 miles south to the mill (cheaper than actually transporting the mill to our property). See how the project gets infinitely more complicated? Ryan, Greg, and his brother spent a couple of weekends making that happen.
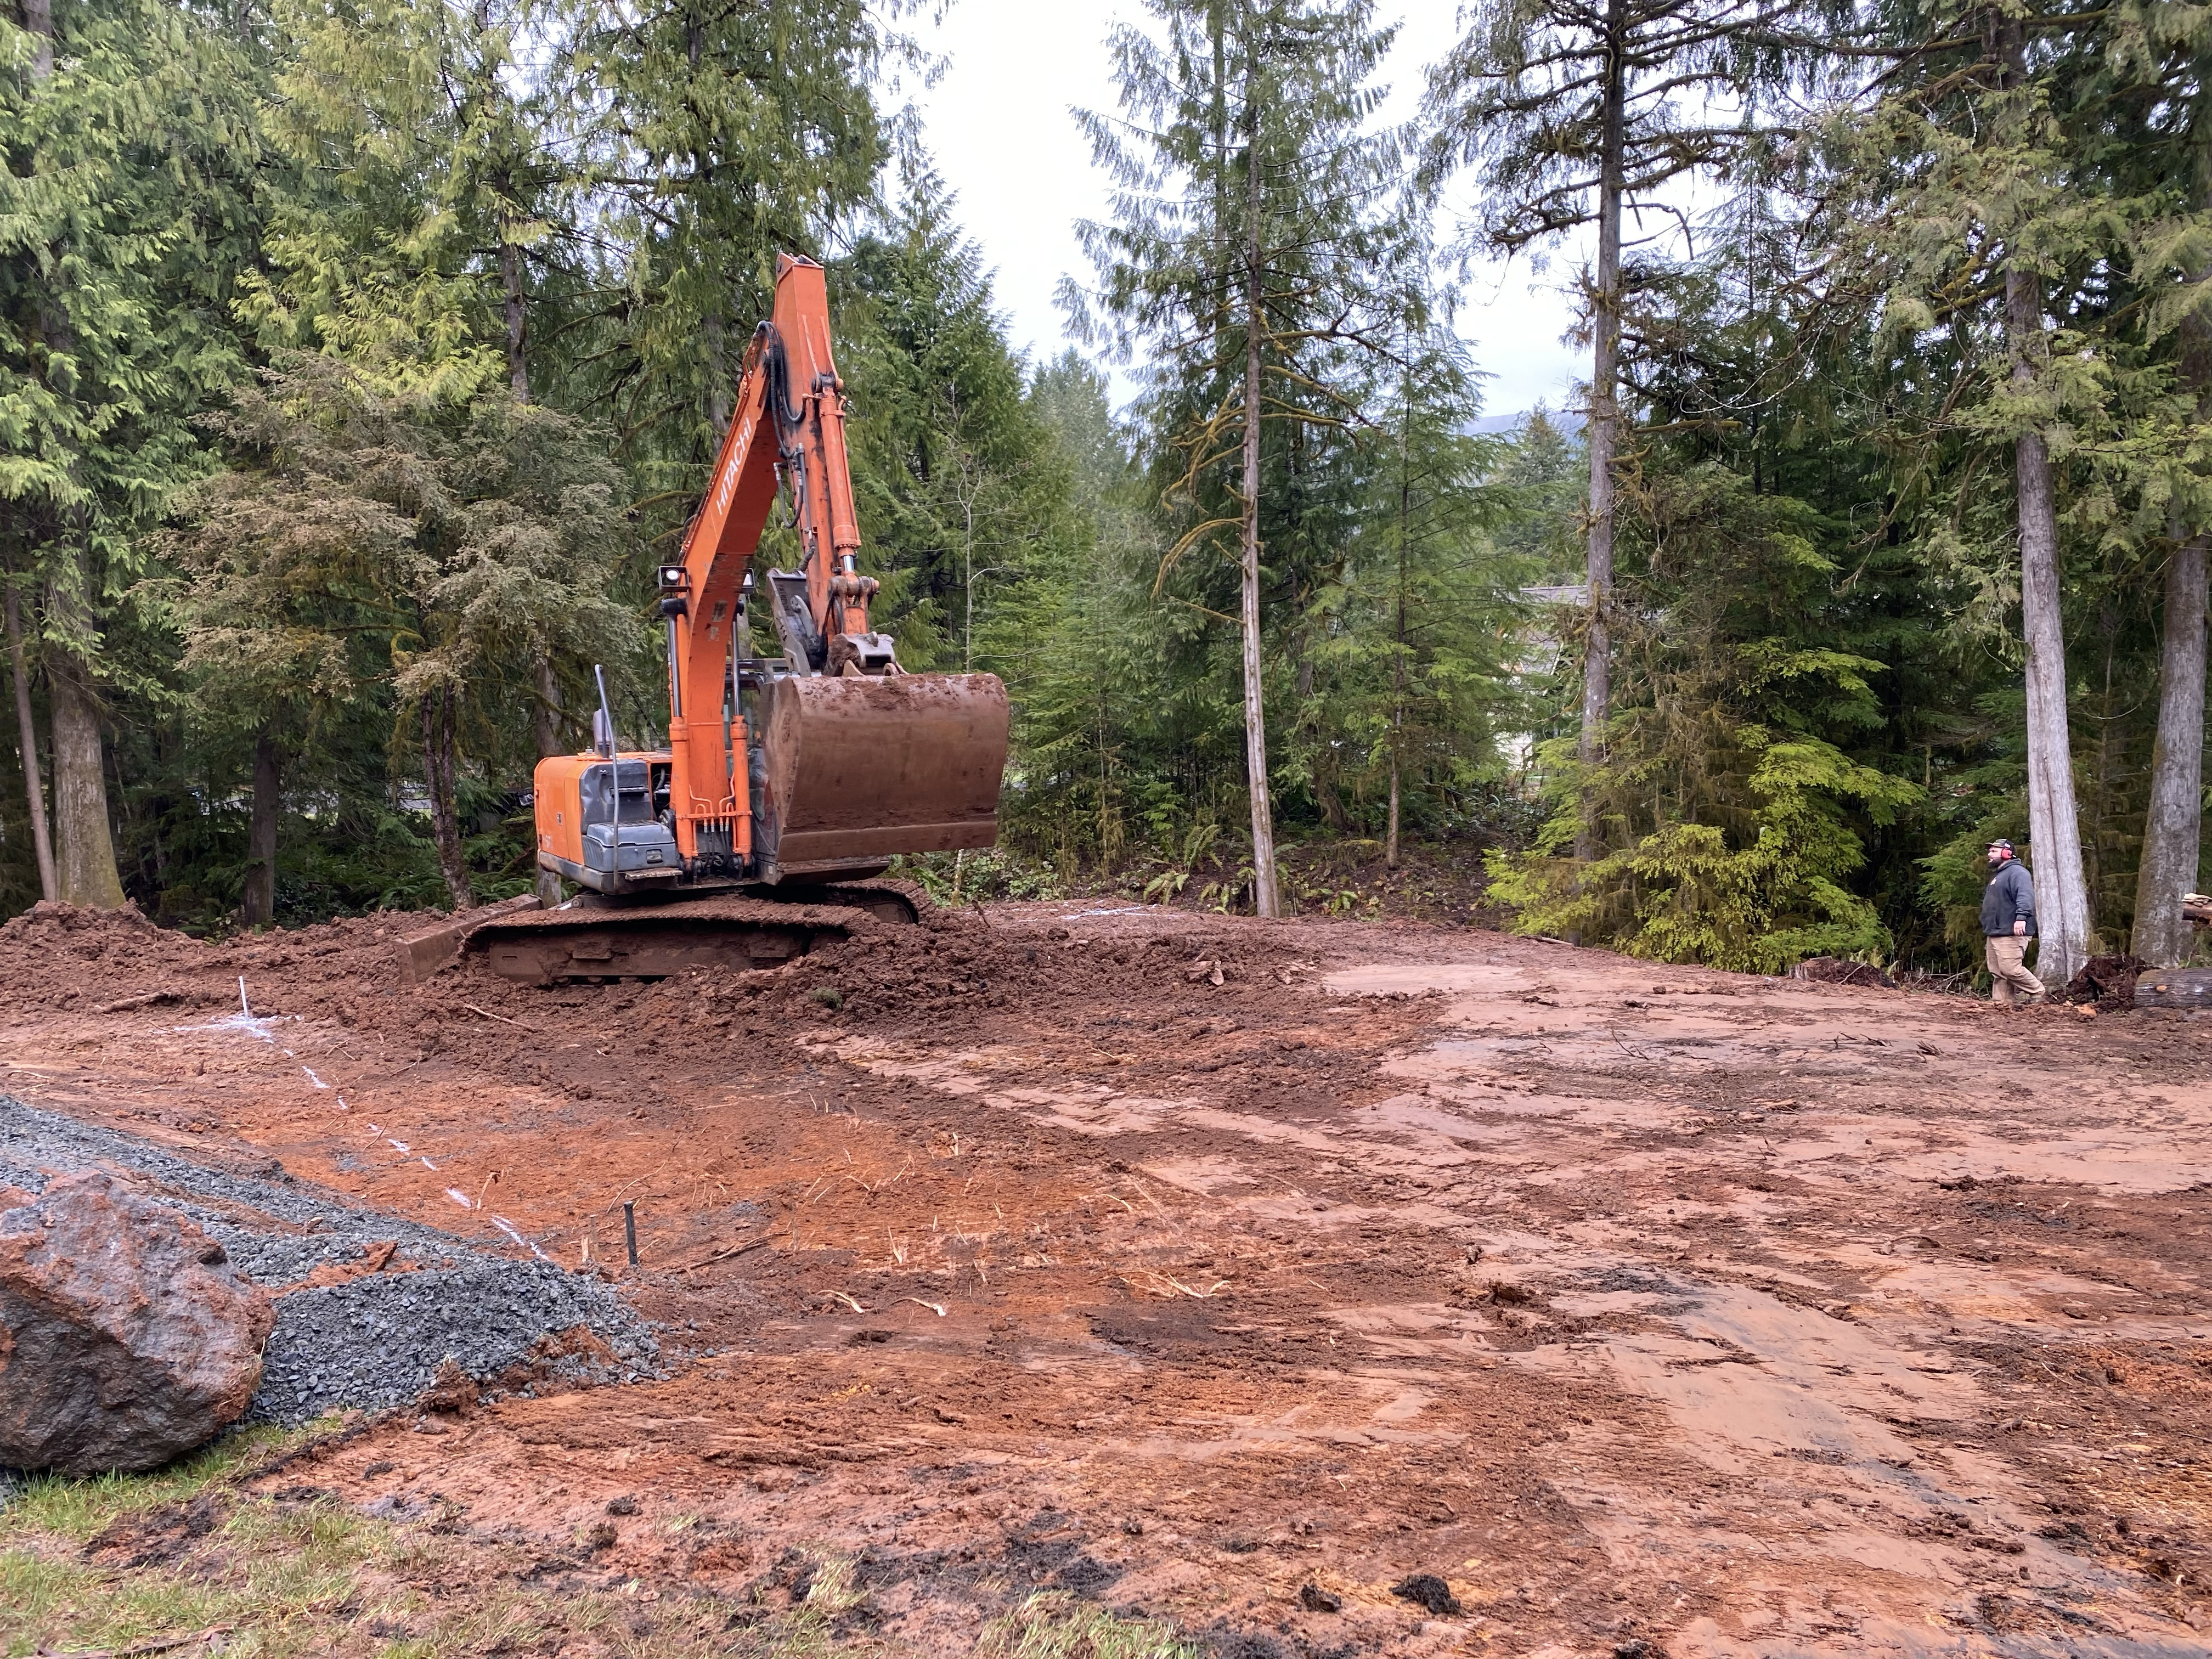
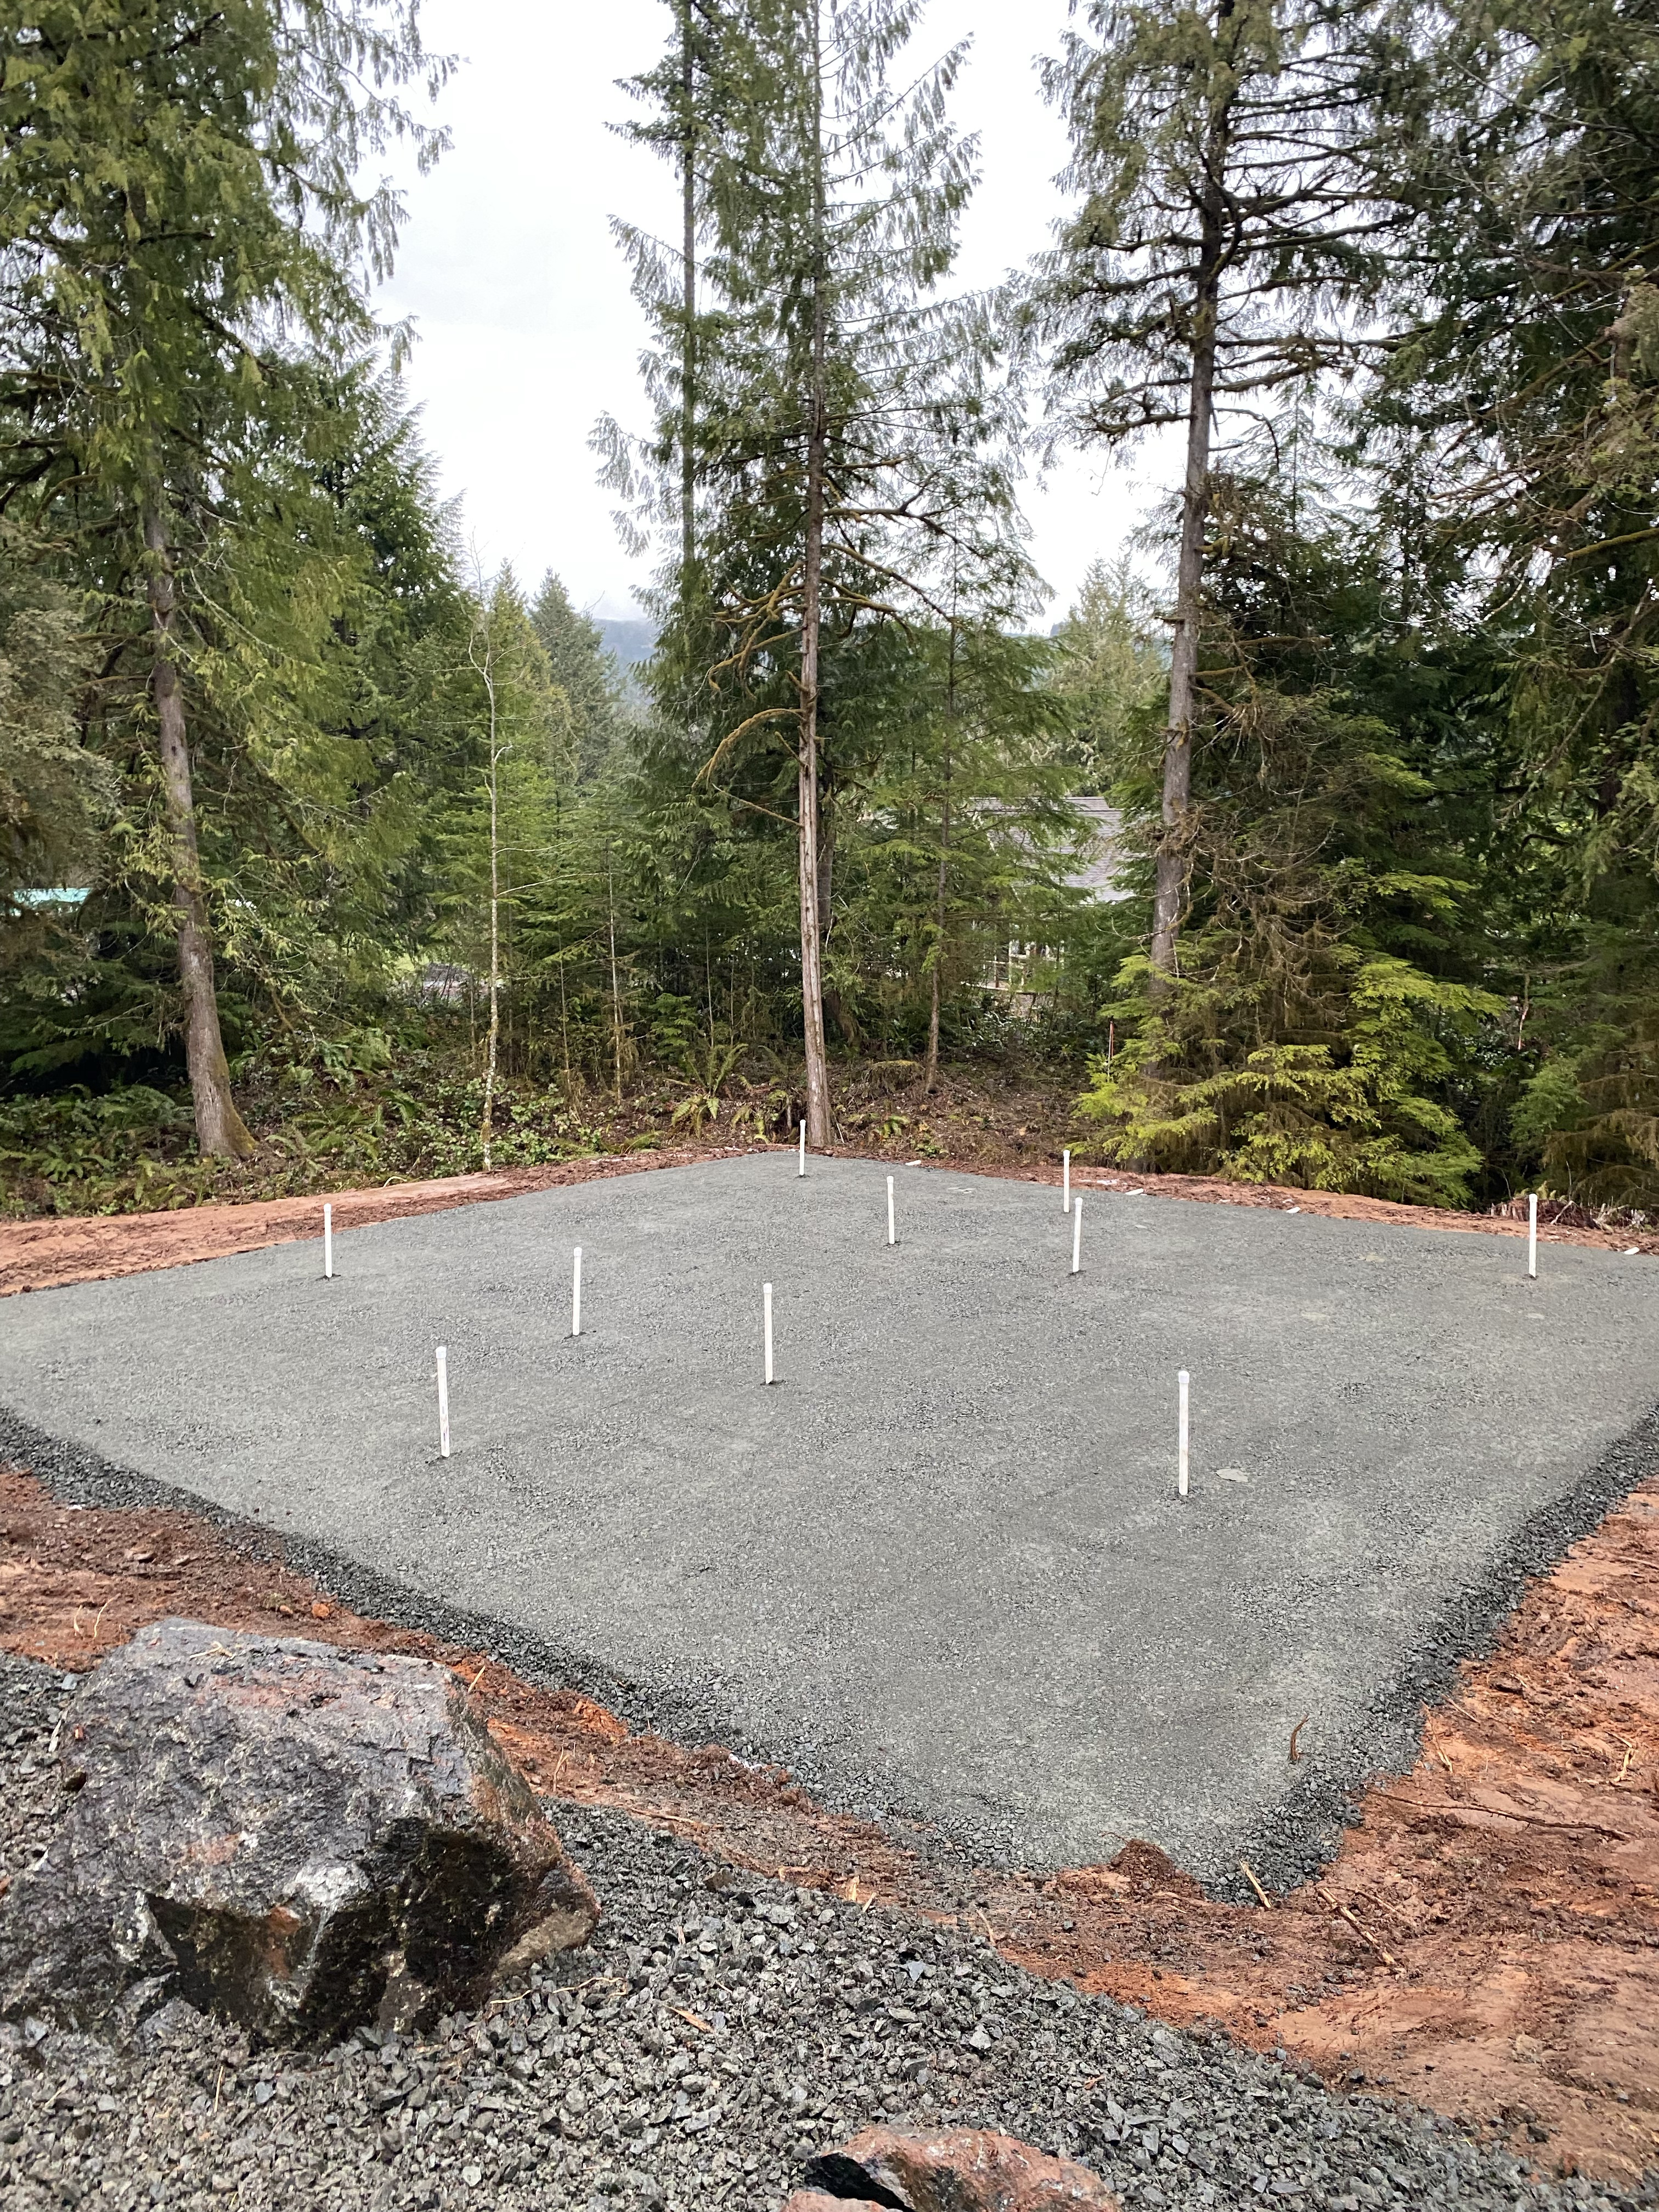
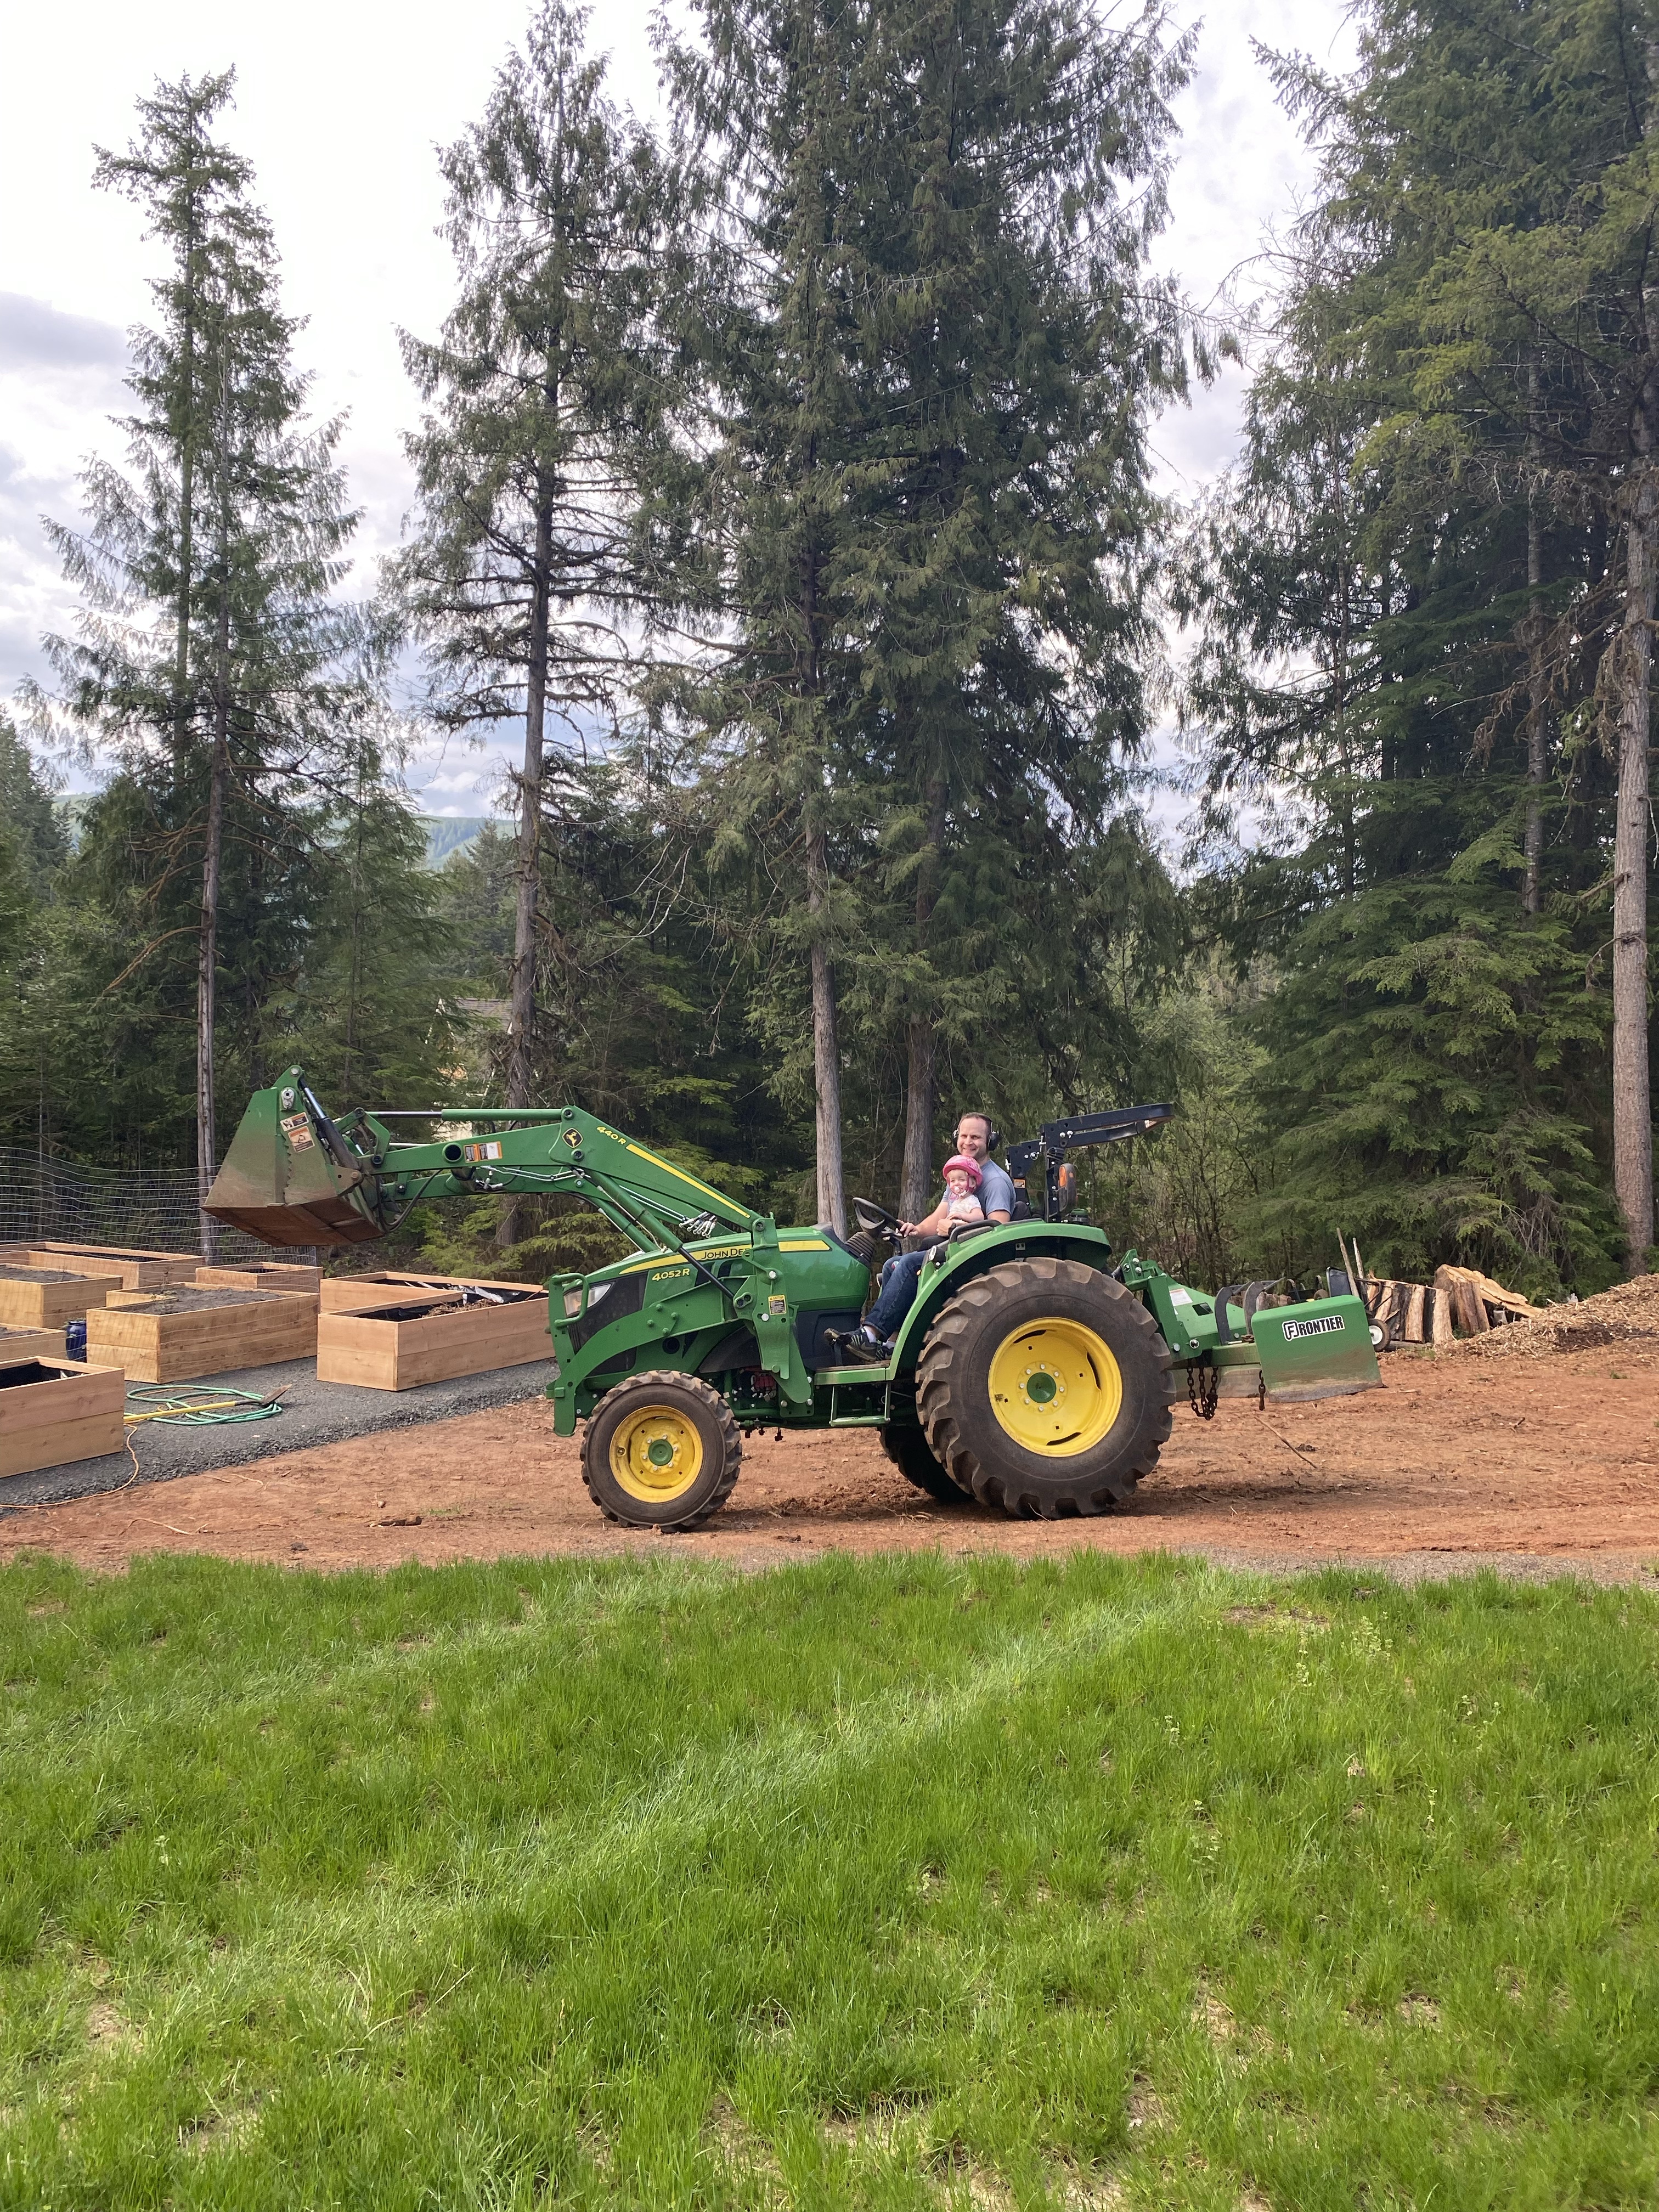
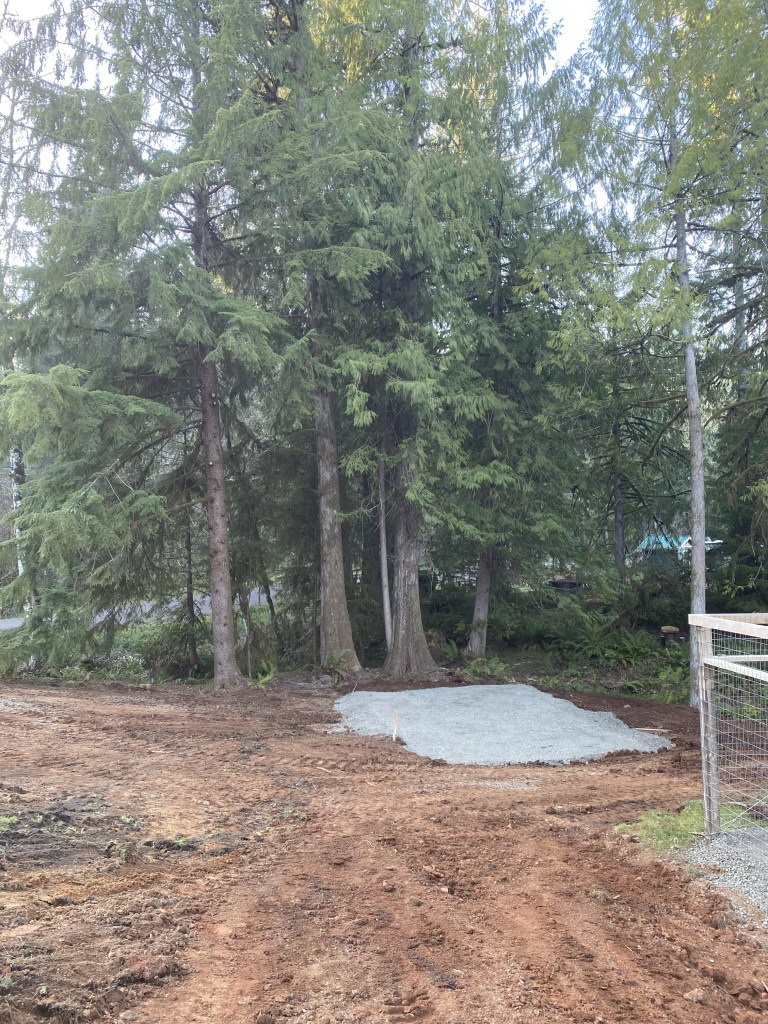
Meanwhilst, as the wood was being milled, we hired an excavator to remove the remaining giant stumps, and level and prep the garden area. This ended up having a hefty price tag as well. Anyone who tells you gardening saves money is not being truthful. Ever heard of the $300 tomato? Well, we were in way deeper than $300 per tomato. But we went ahead and had the excavator put in the gravel pad and run irrigation lines as well. They did a beautiful job!
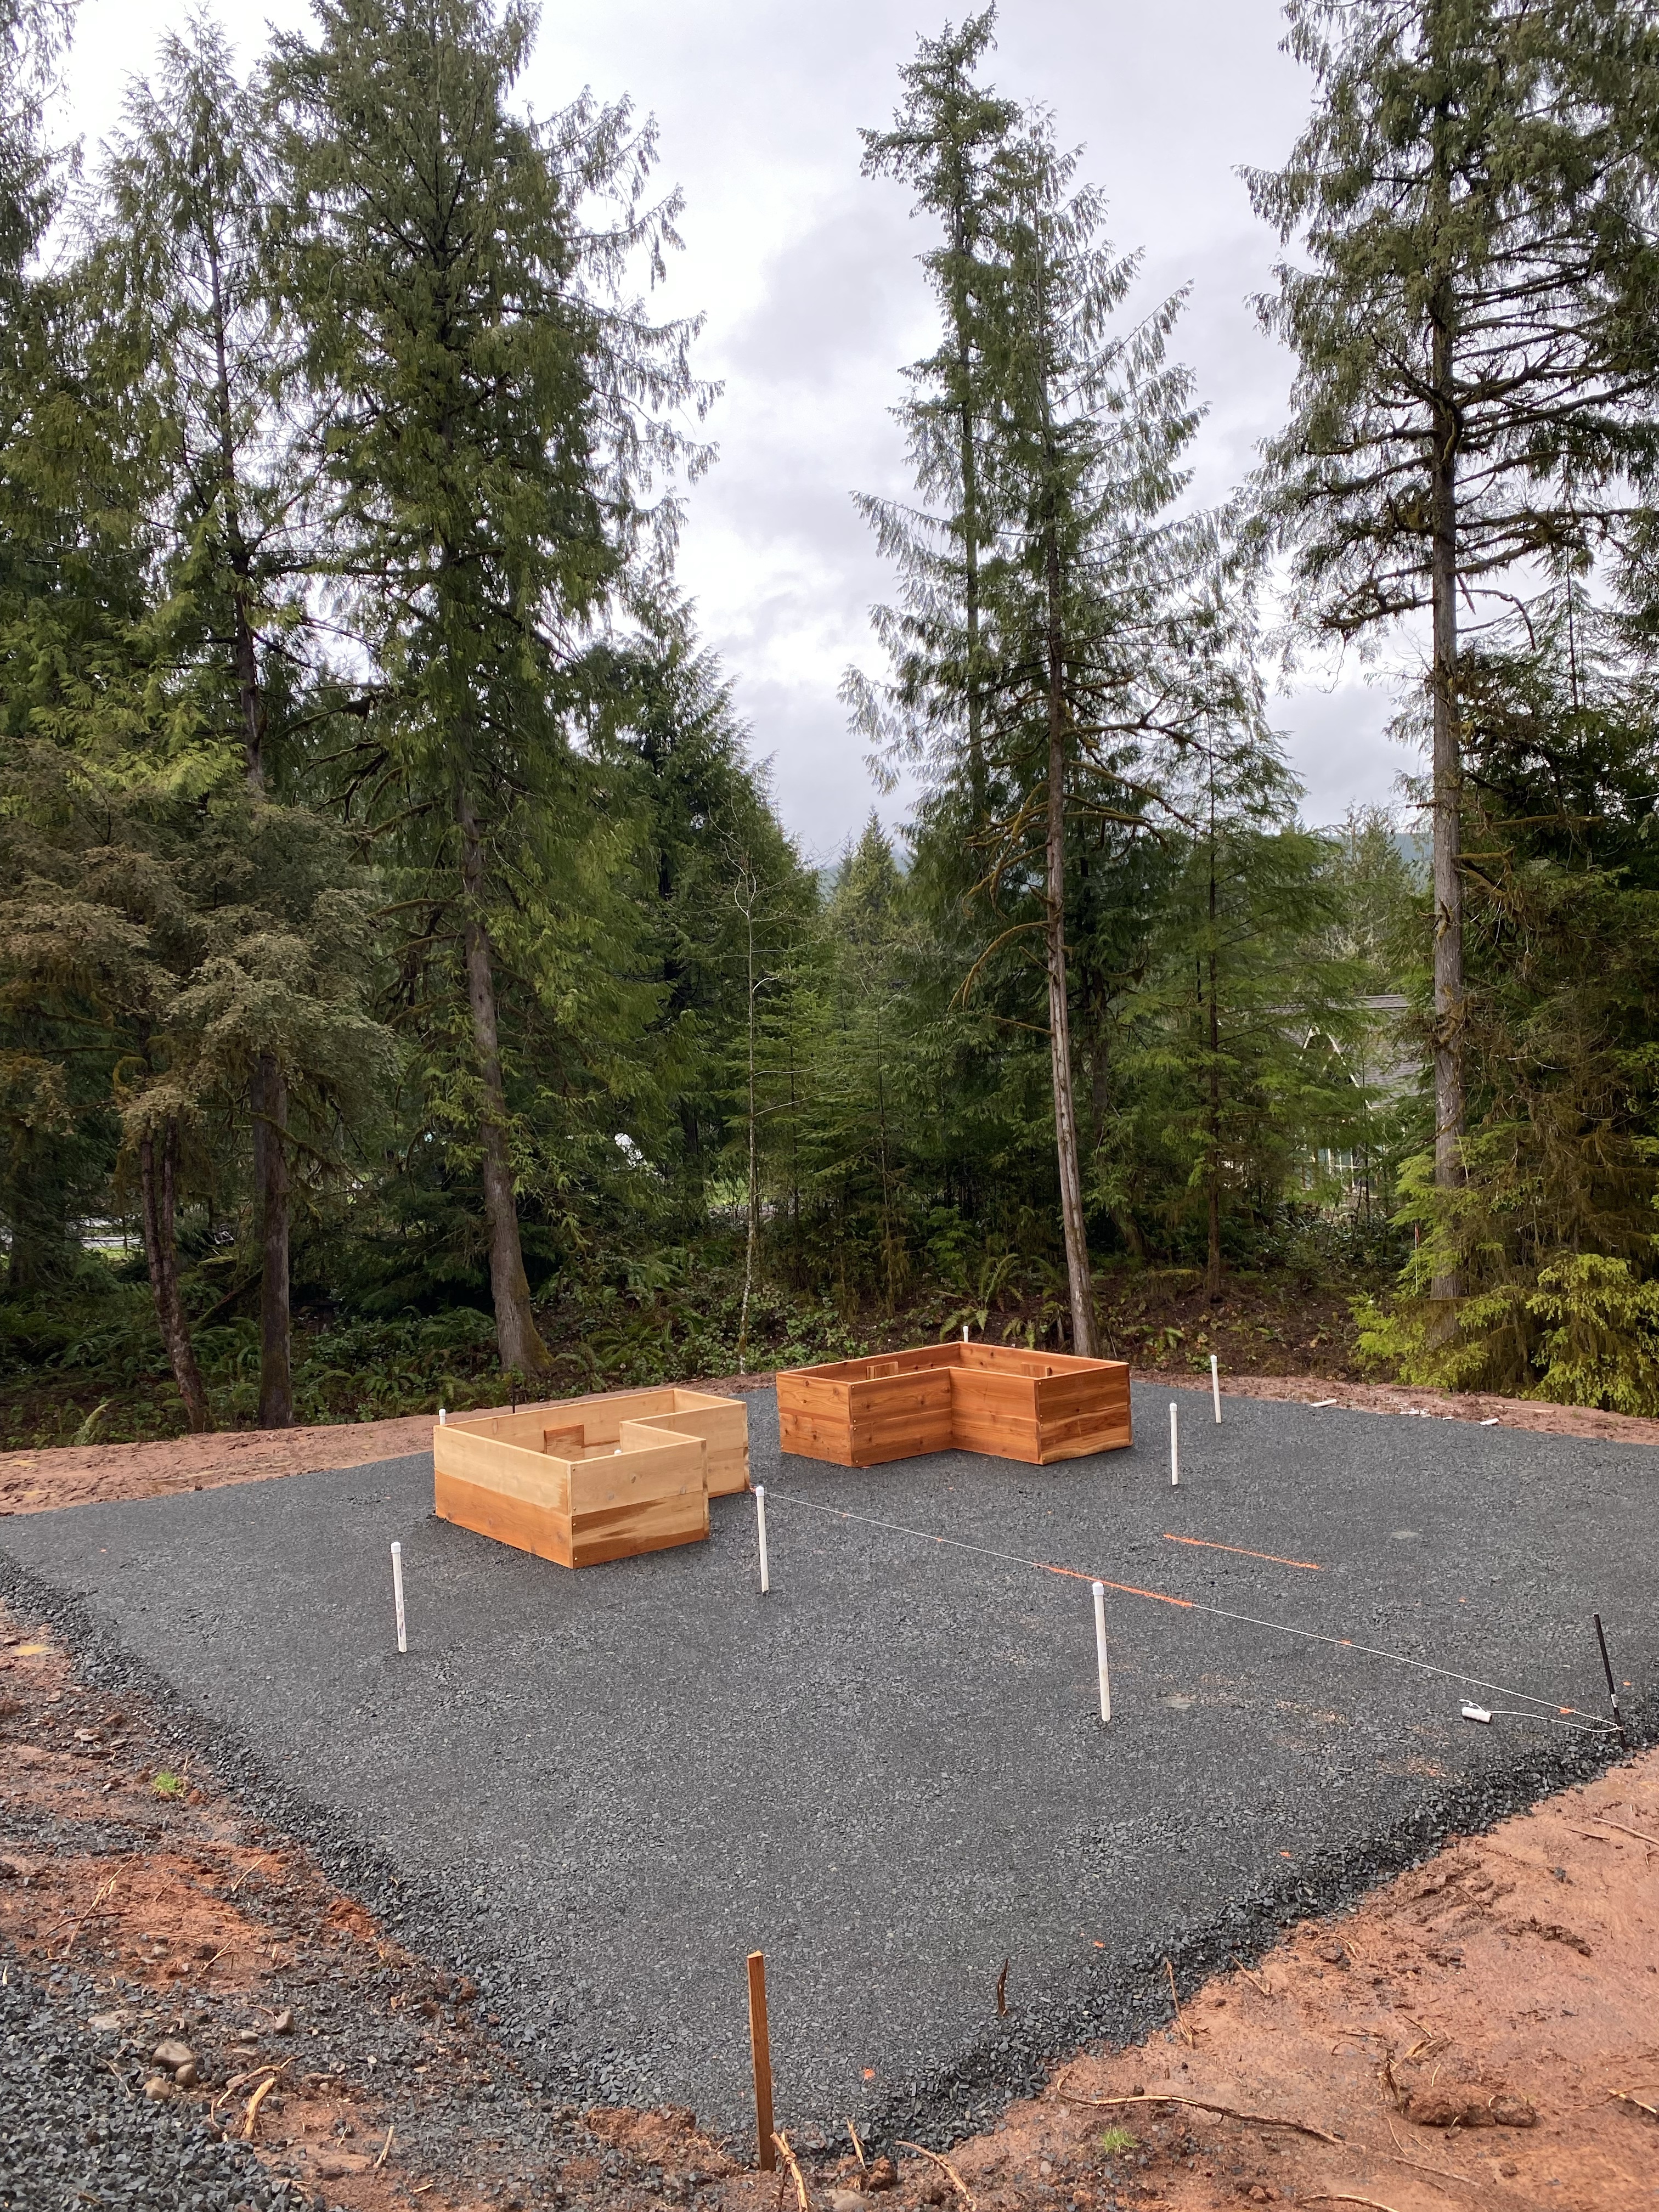
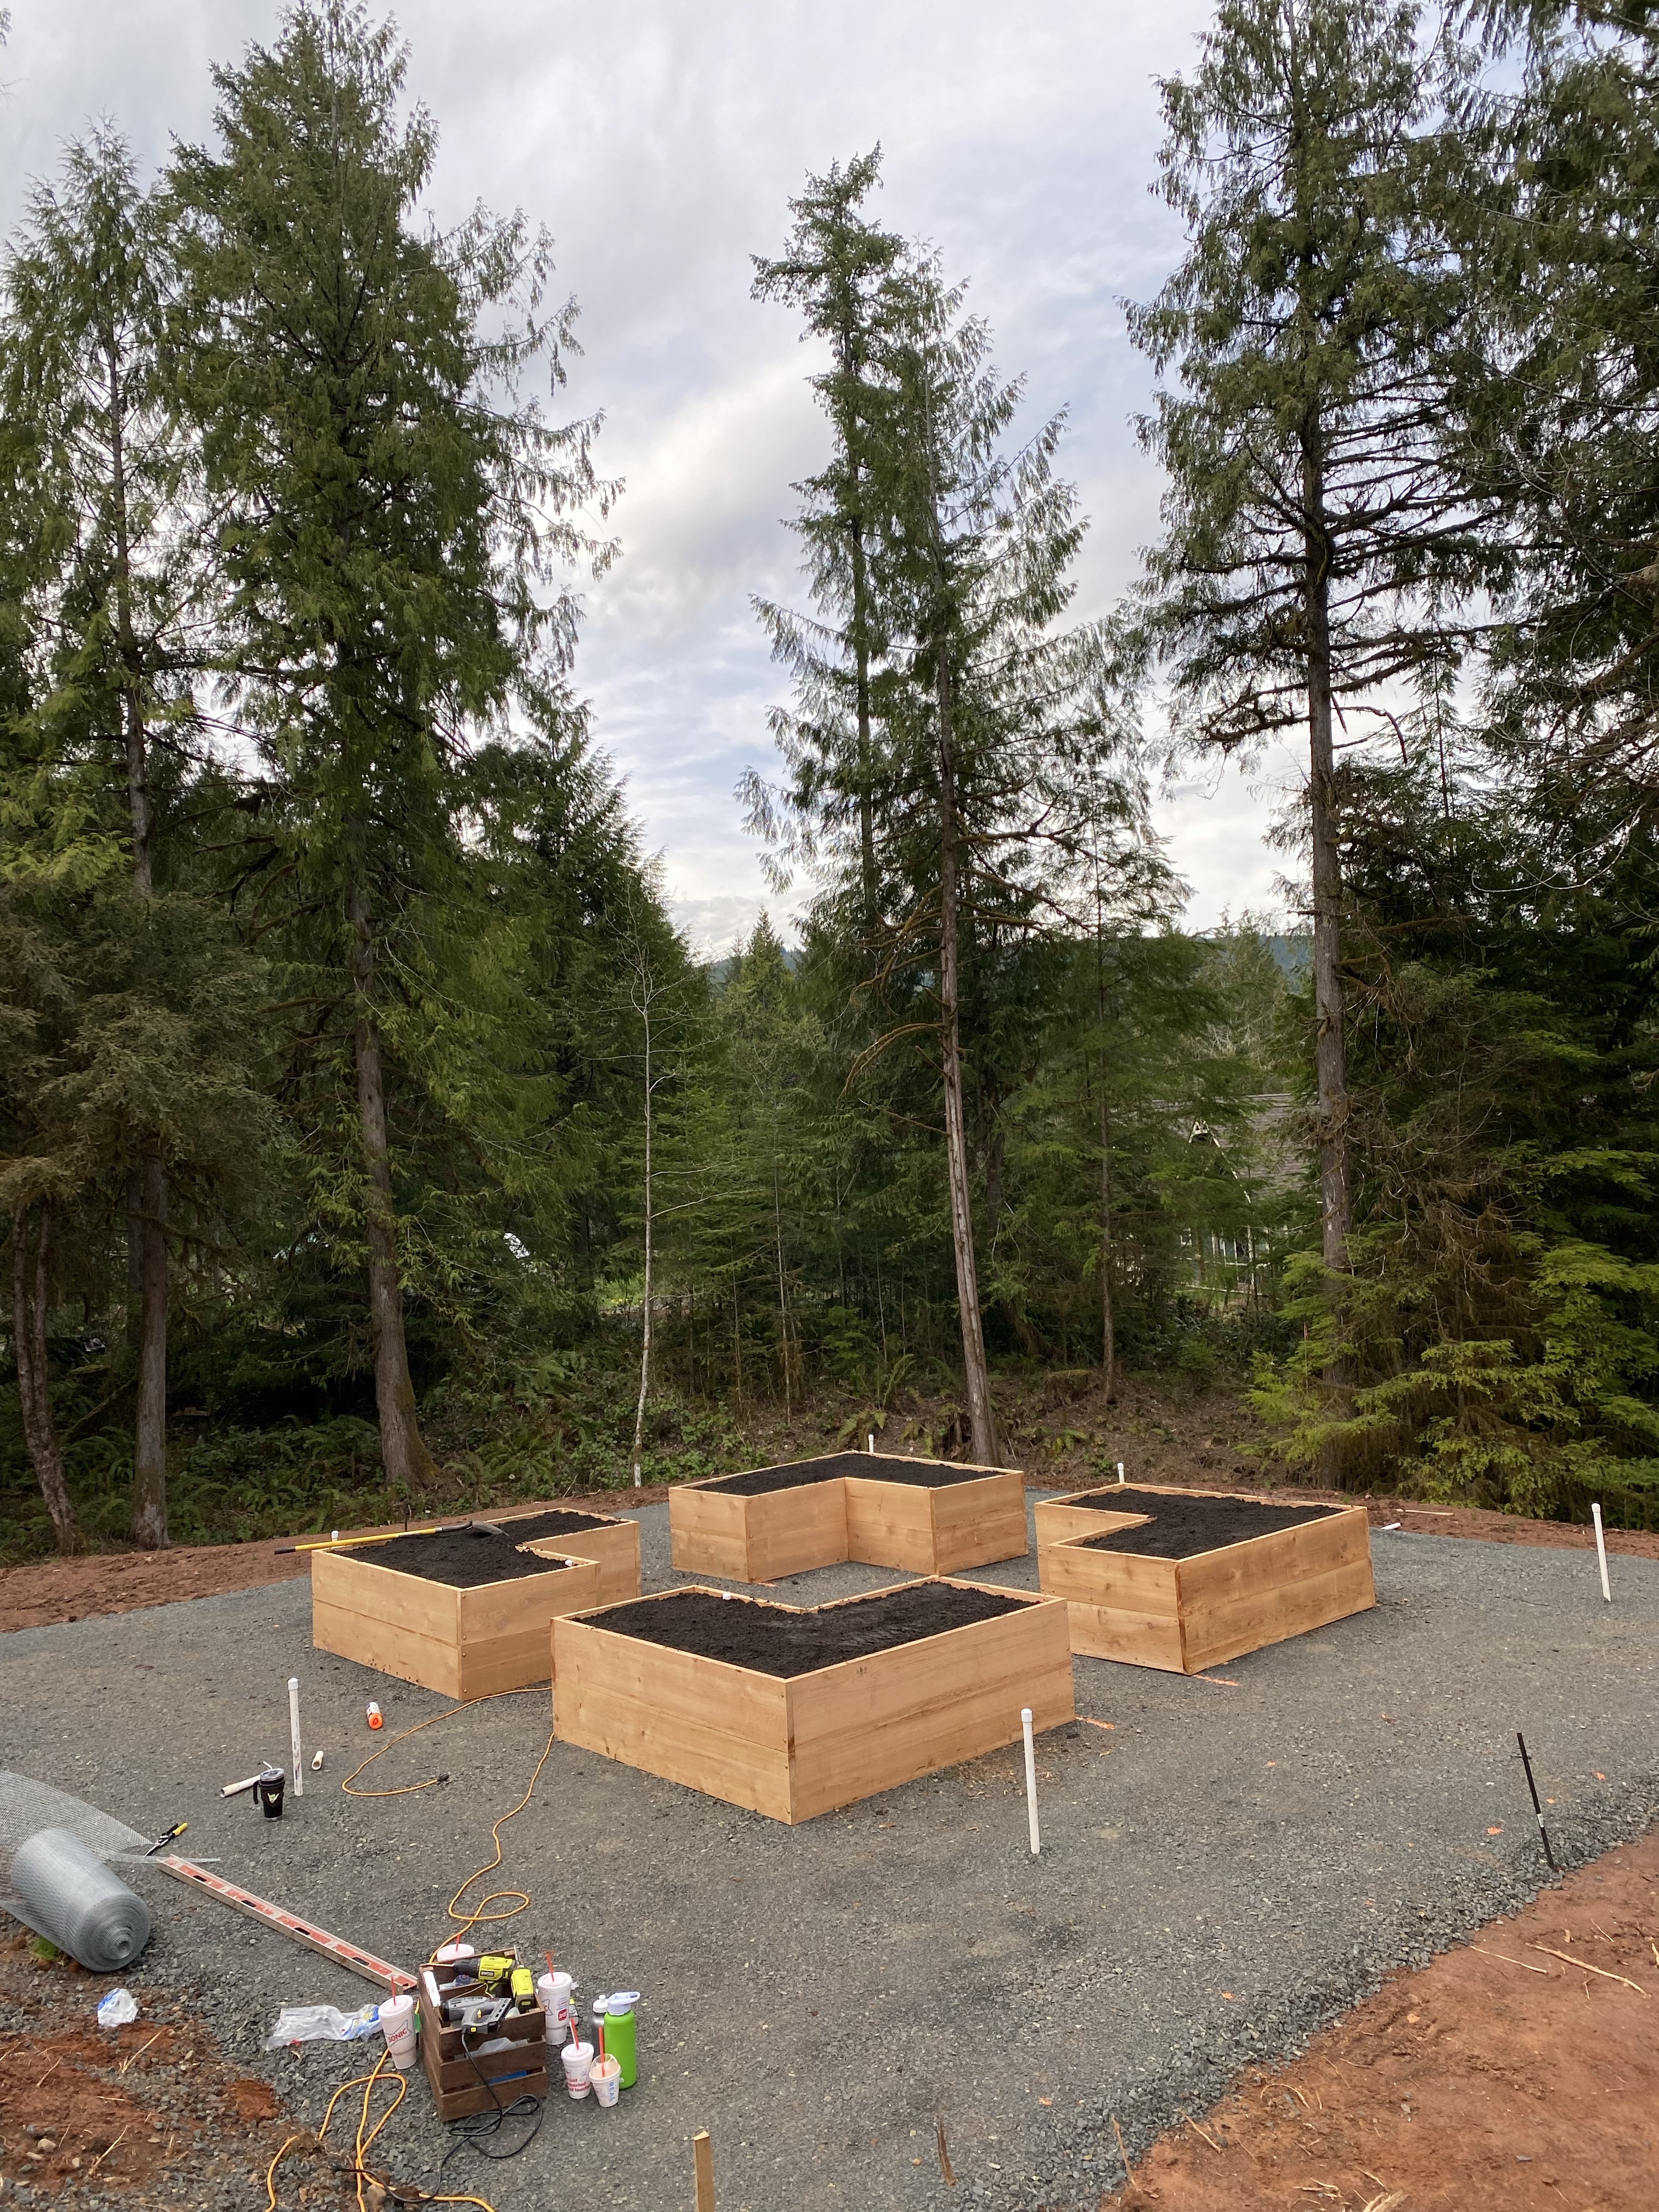
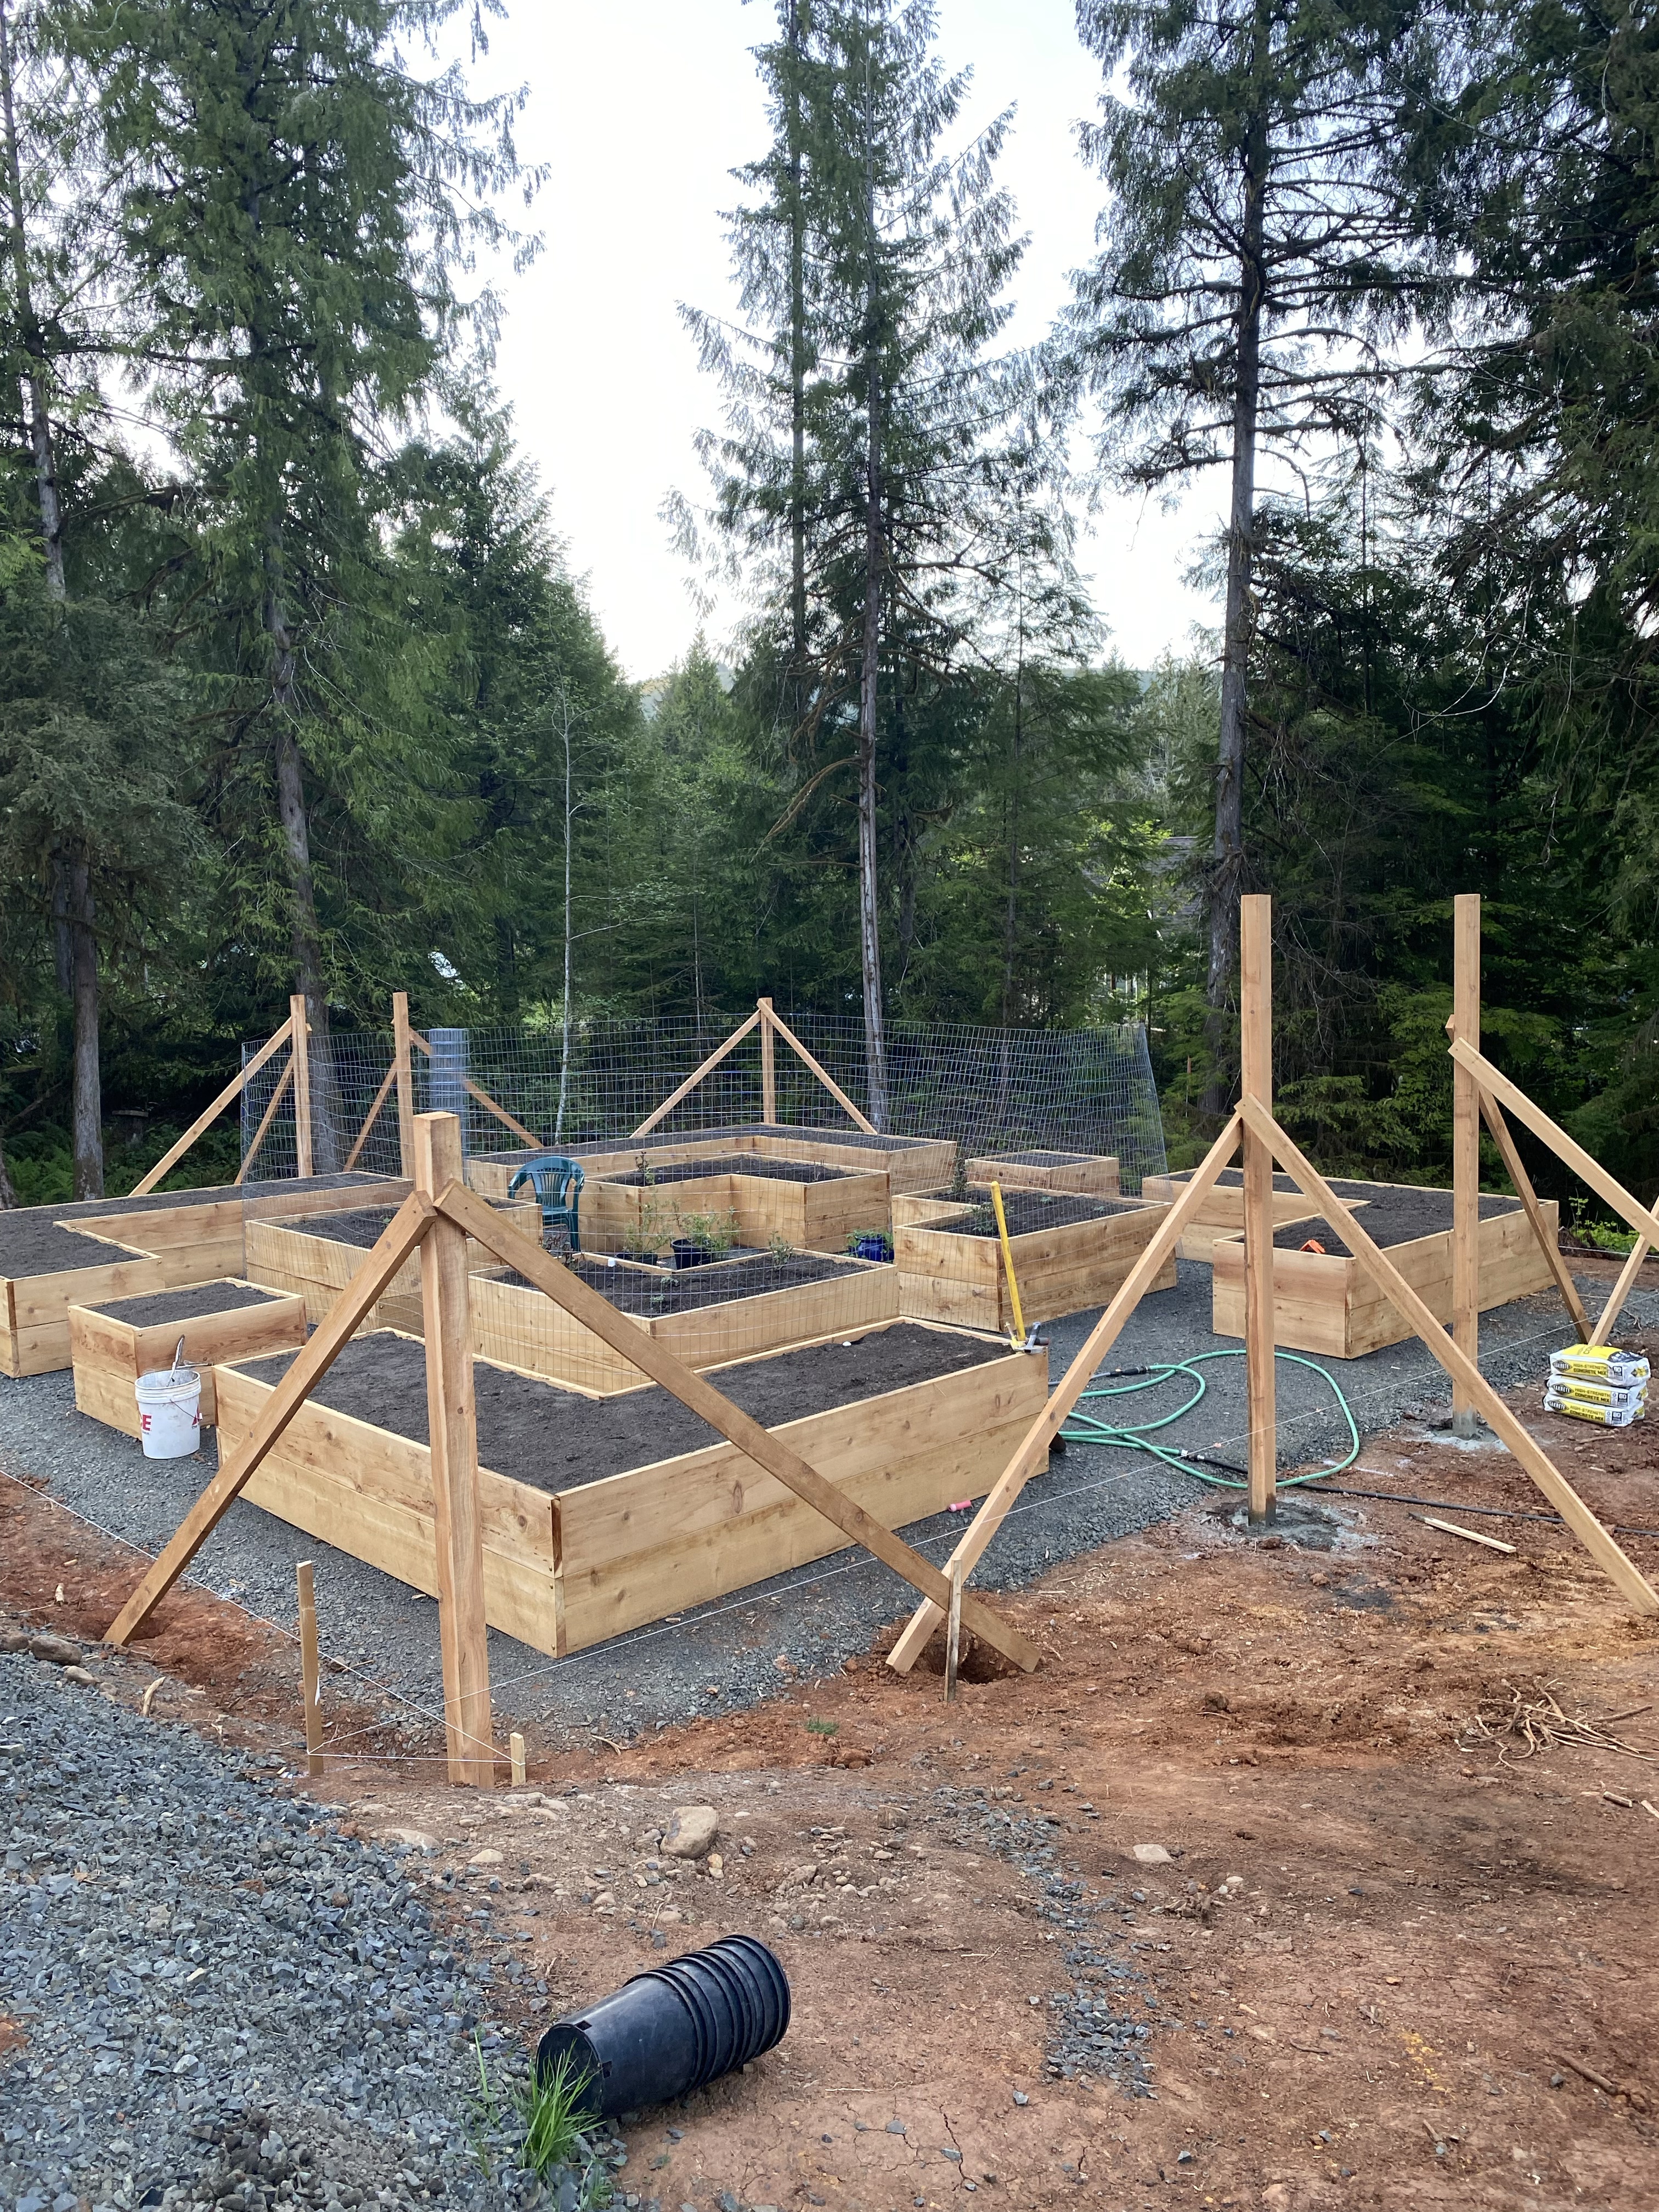
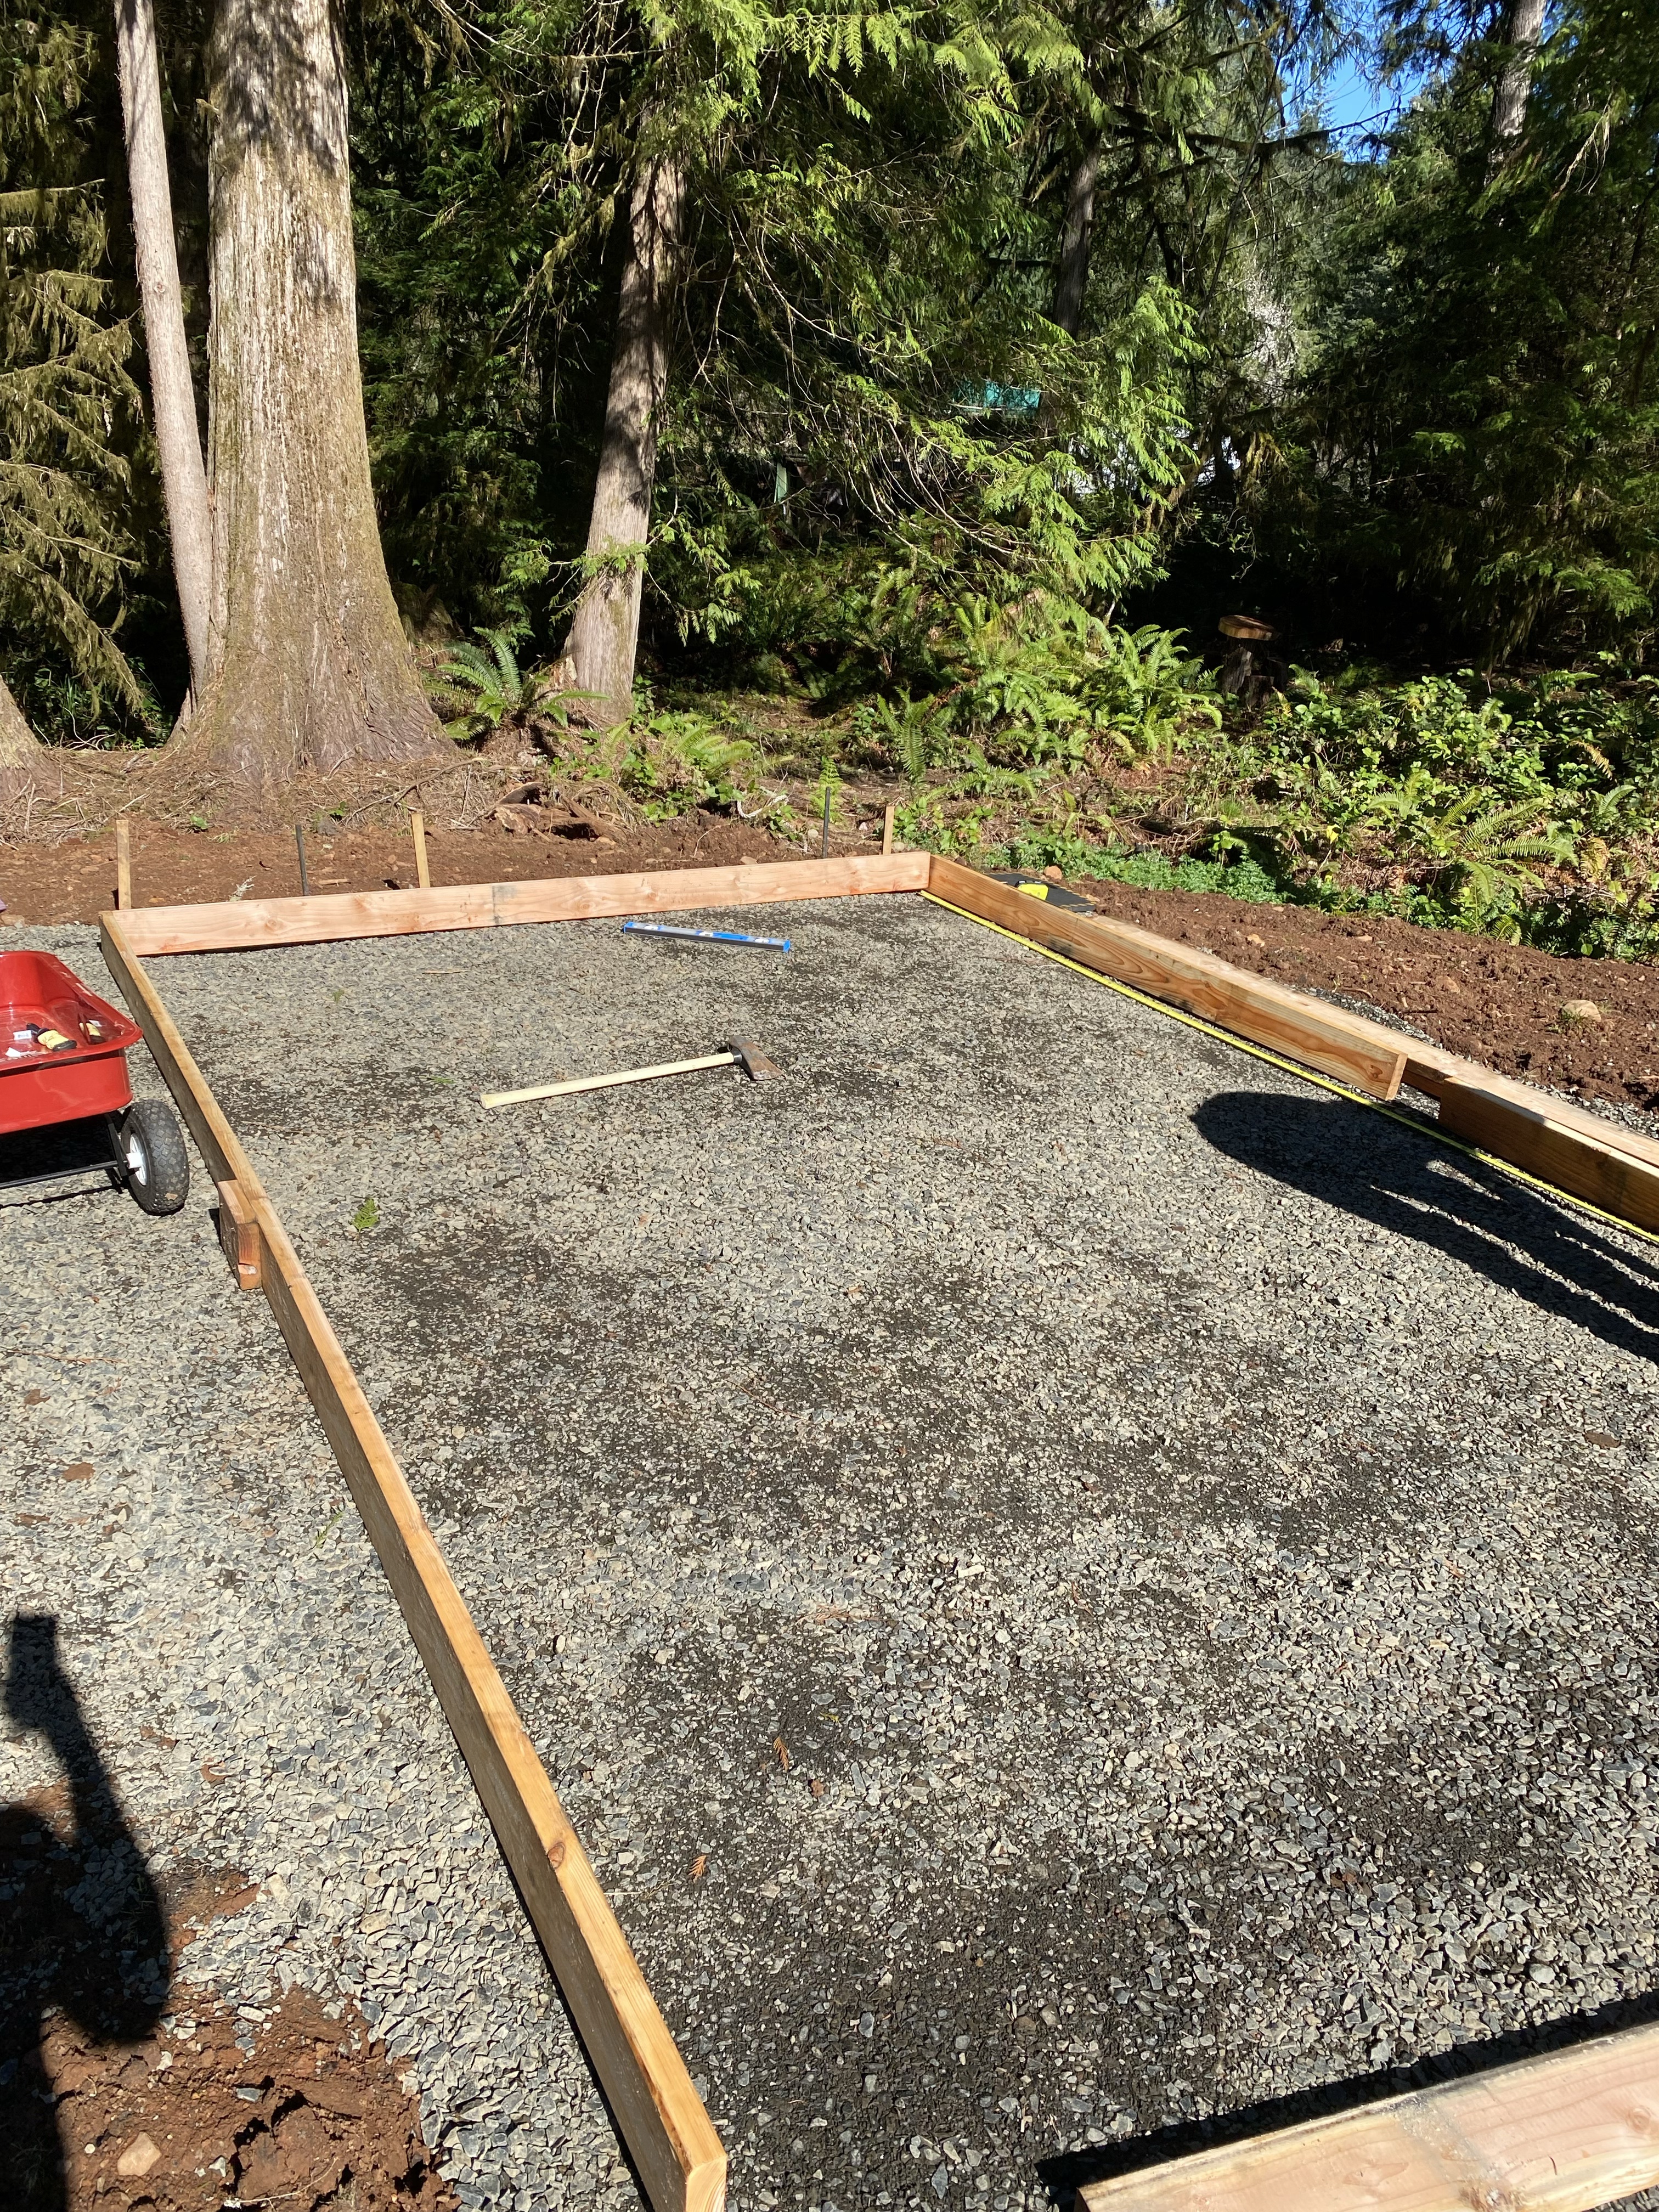
Because the area was so sloped and undulating to begin with (and covered in giant logs), we weren’t sure how much space we would end up with. But we ended up with a 33′ x 33′ area for the garden. And here’s a look at my plan (each square represents 3′ x 3′) and the gray areas represent the raised beds:
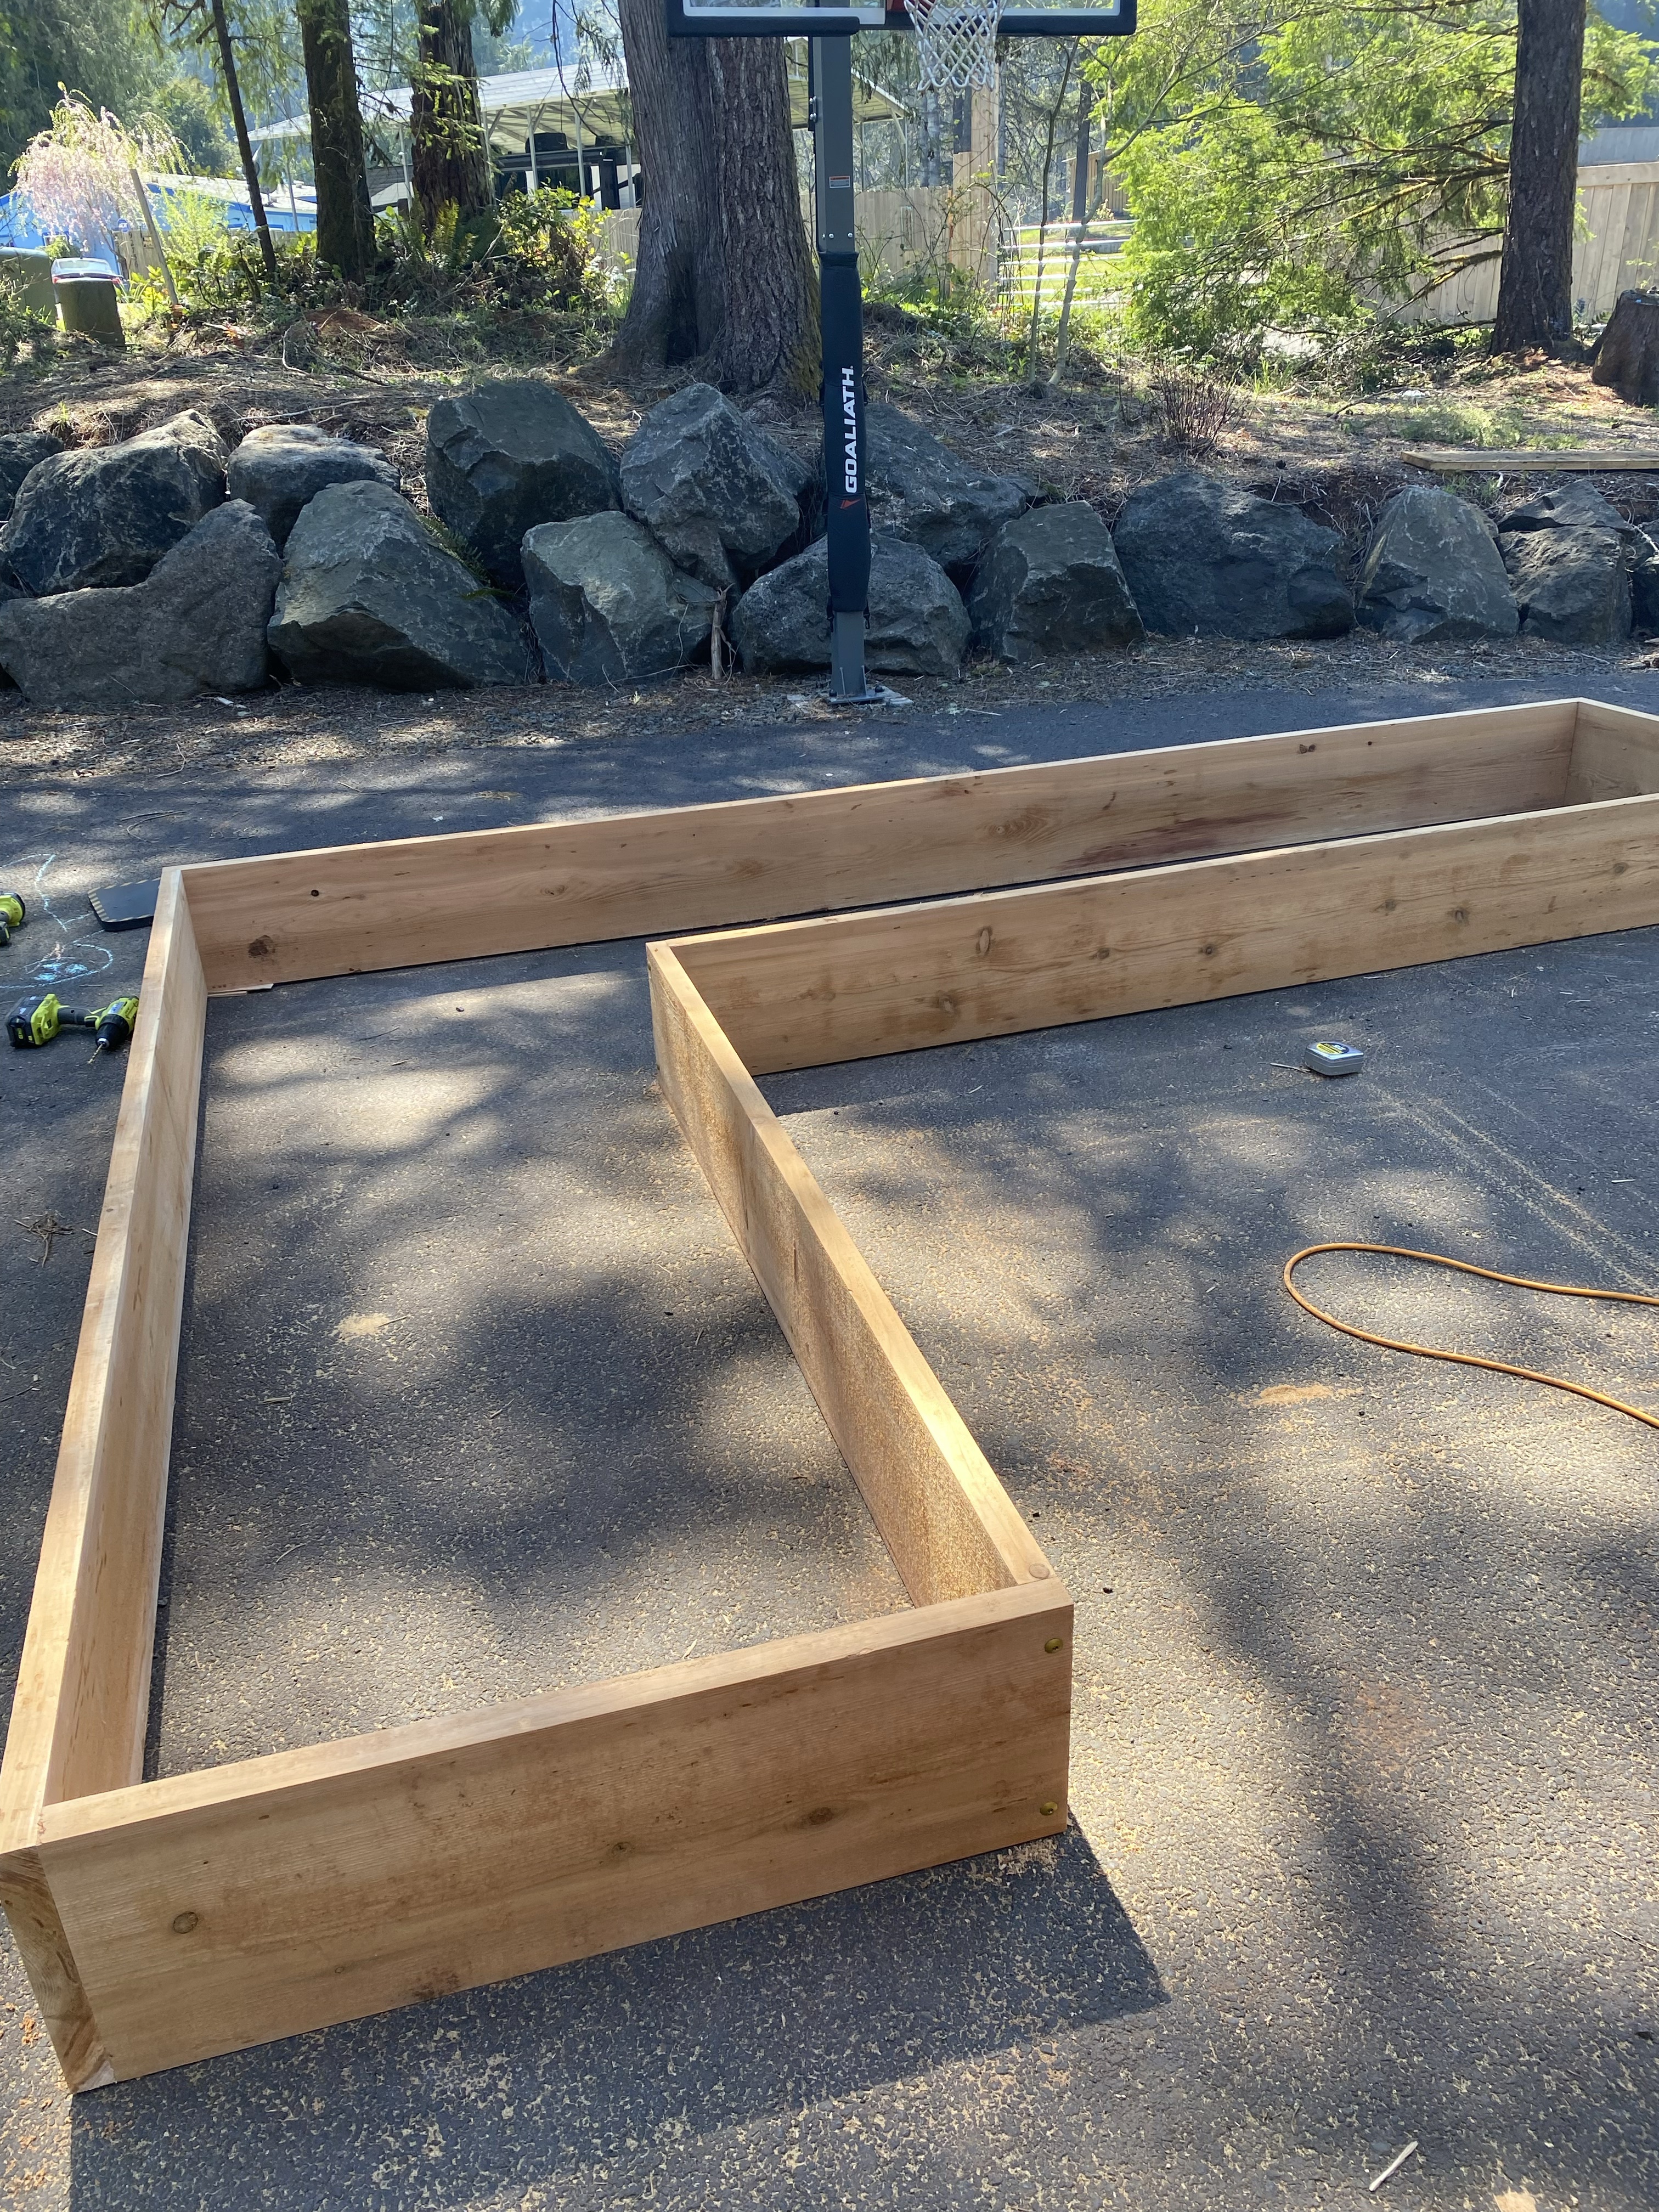
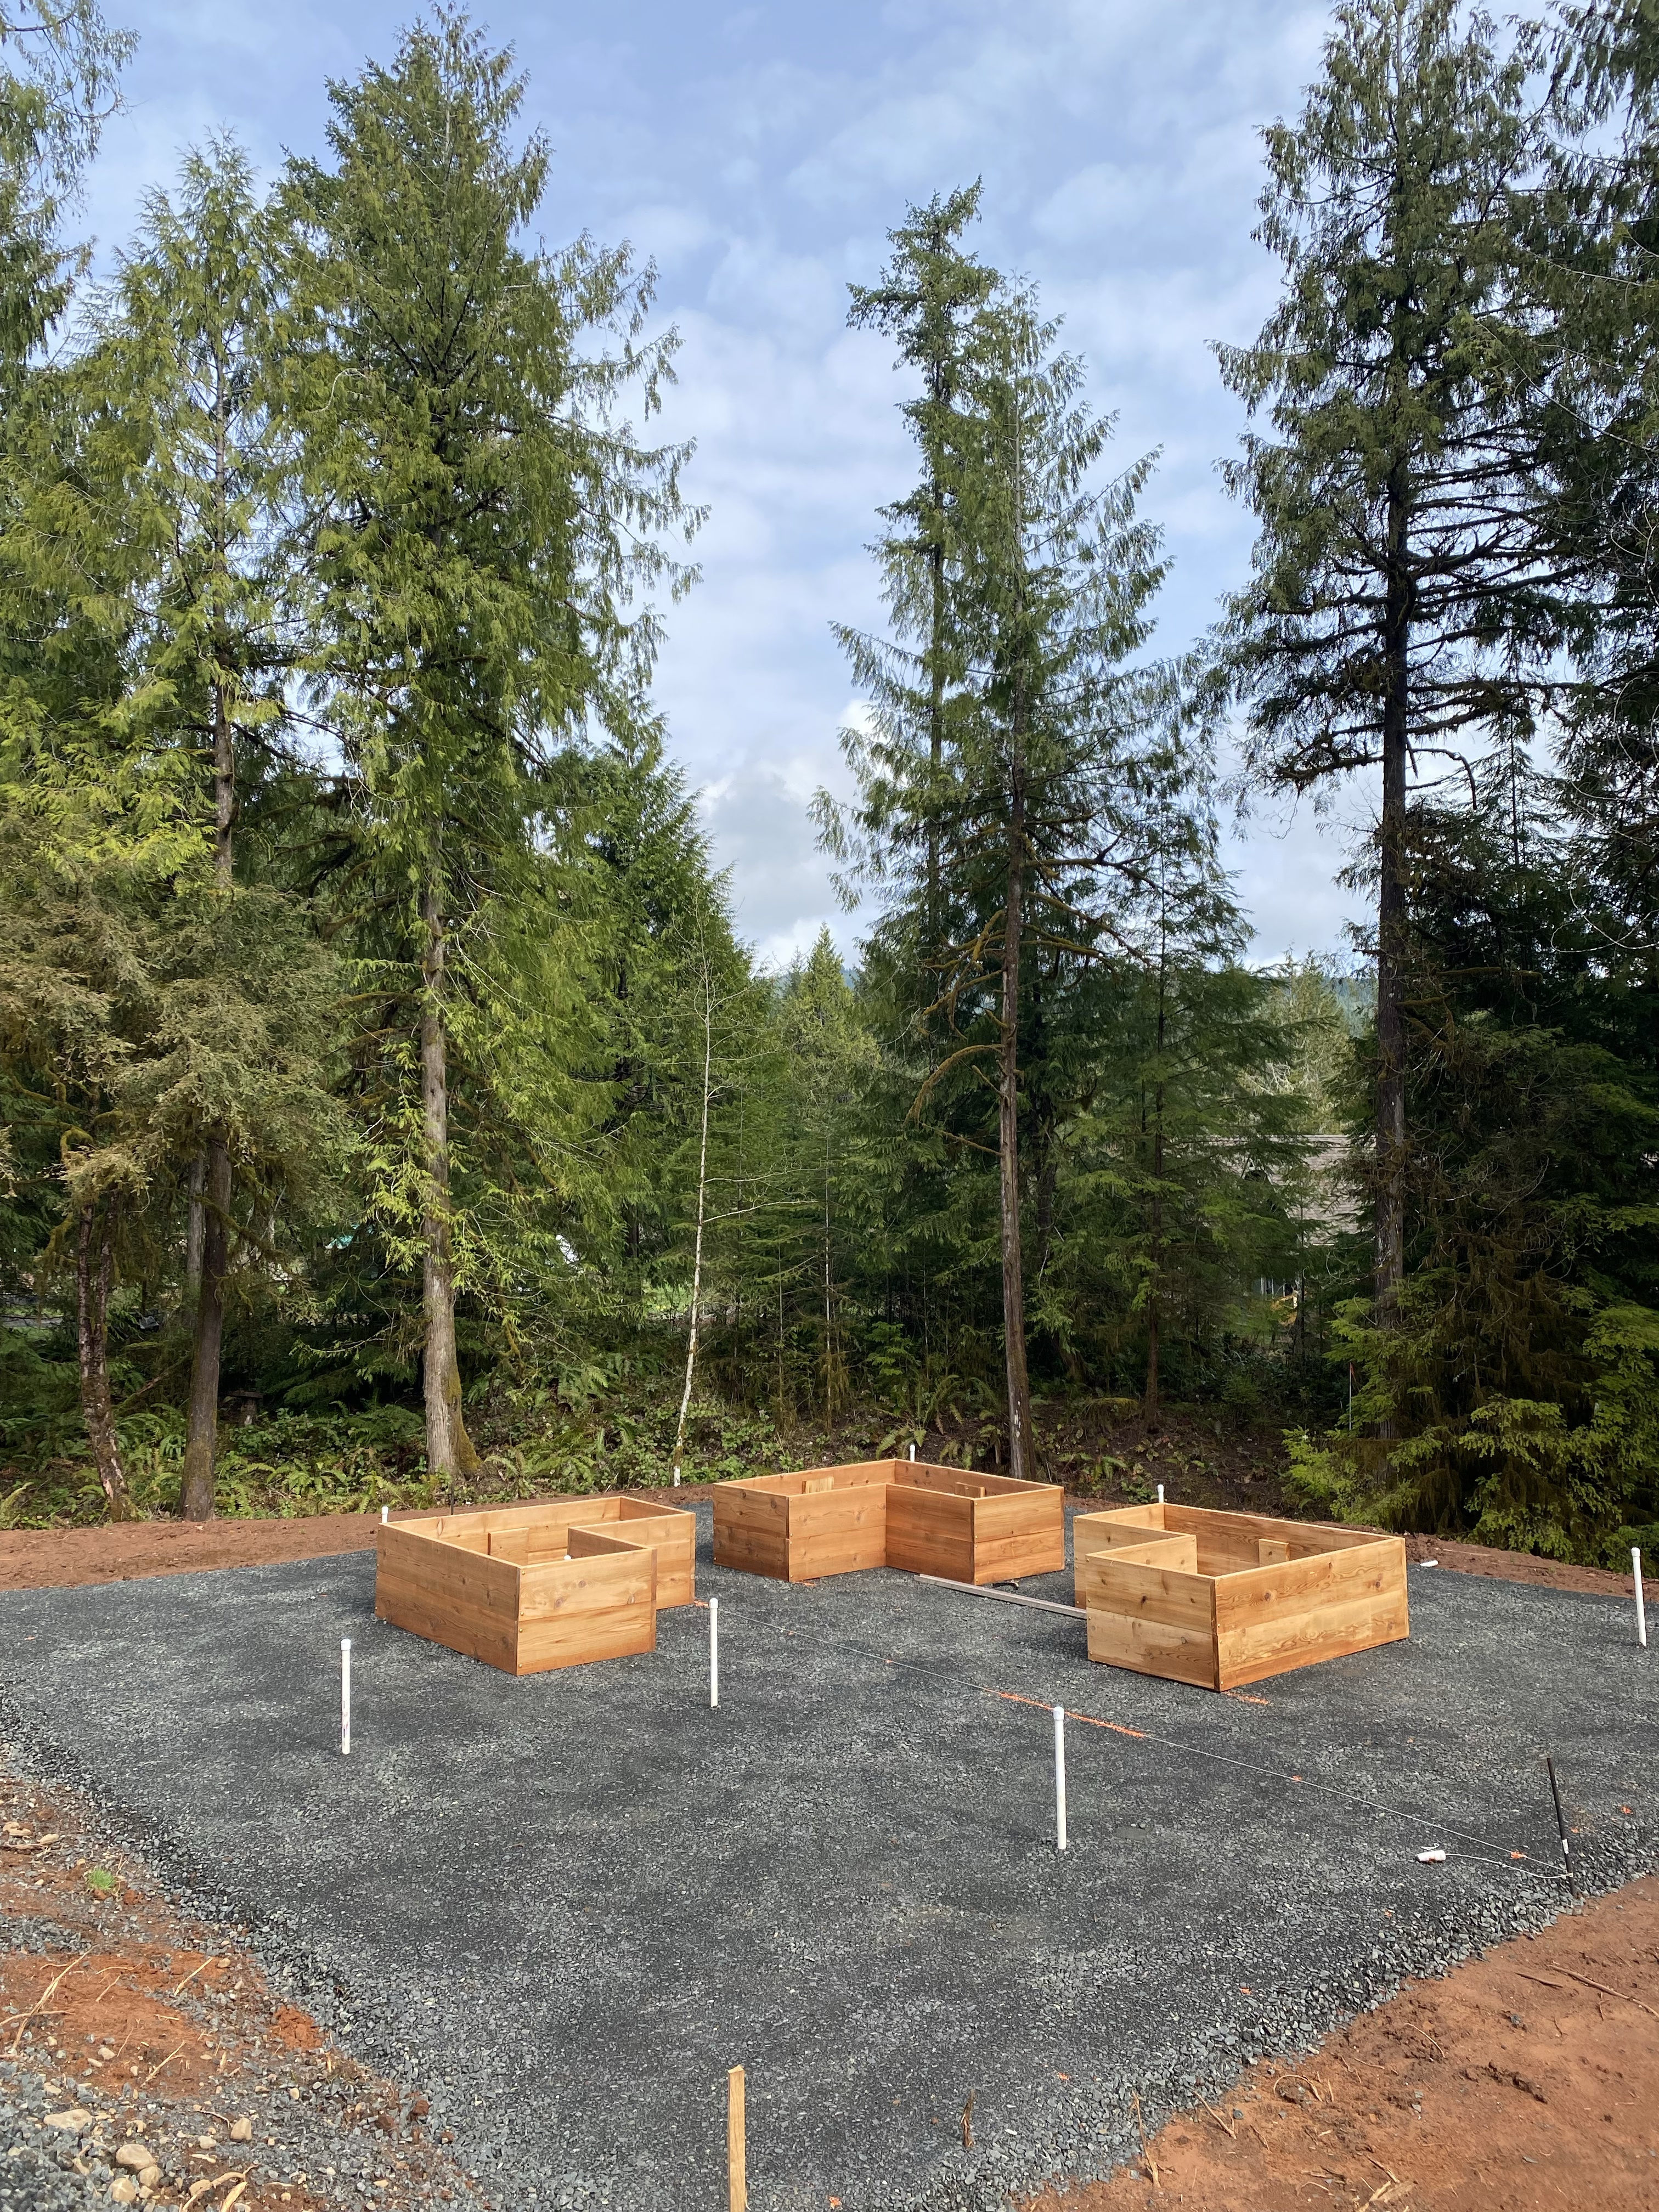
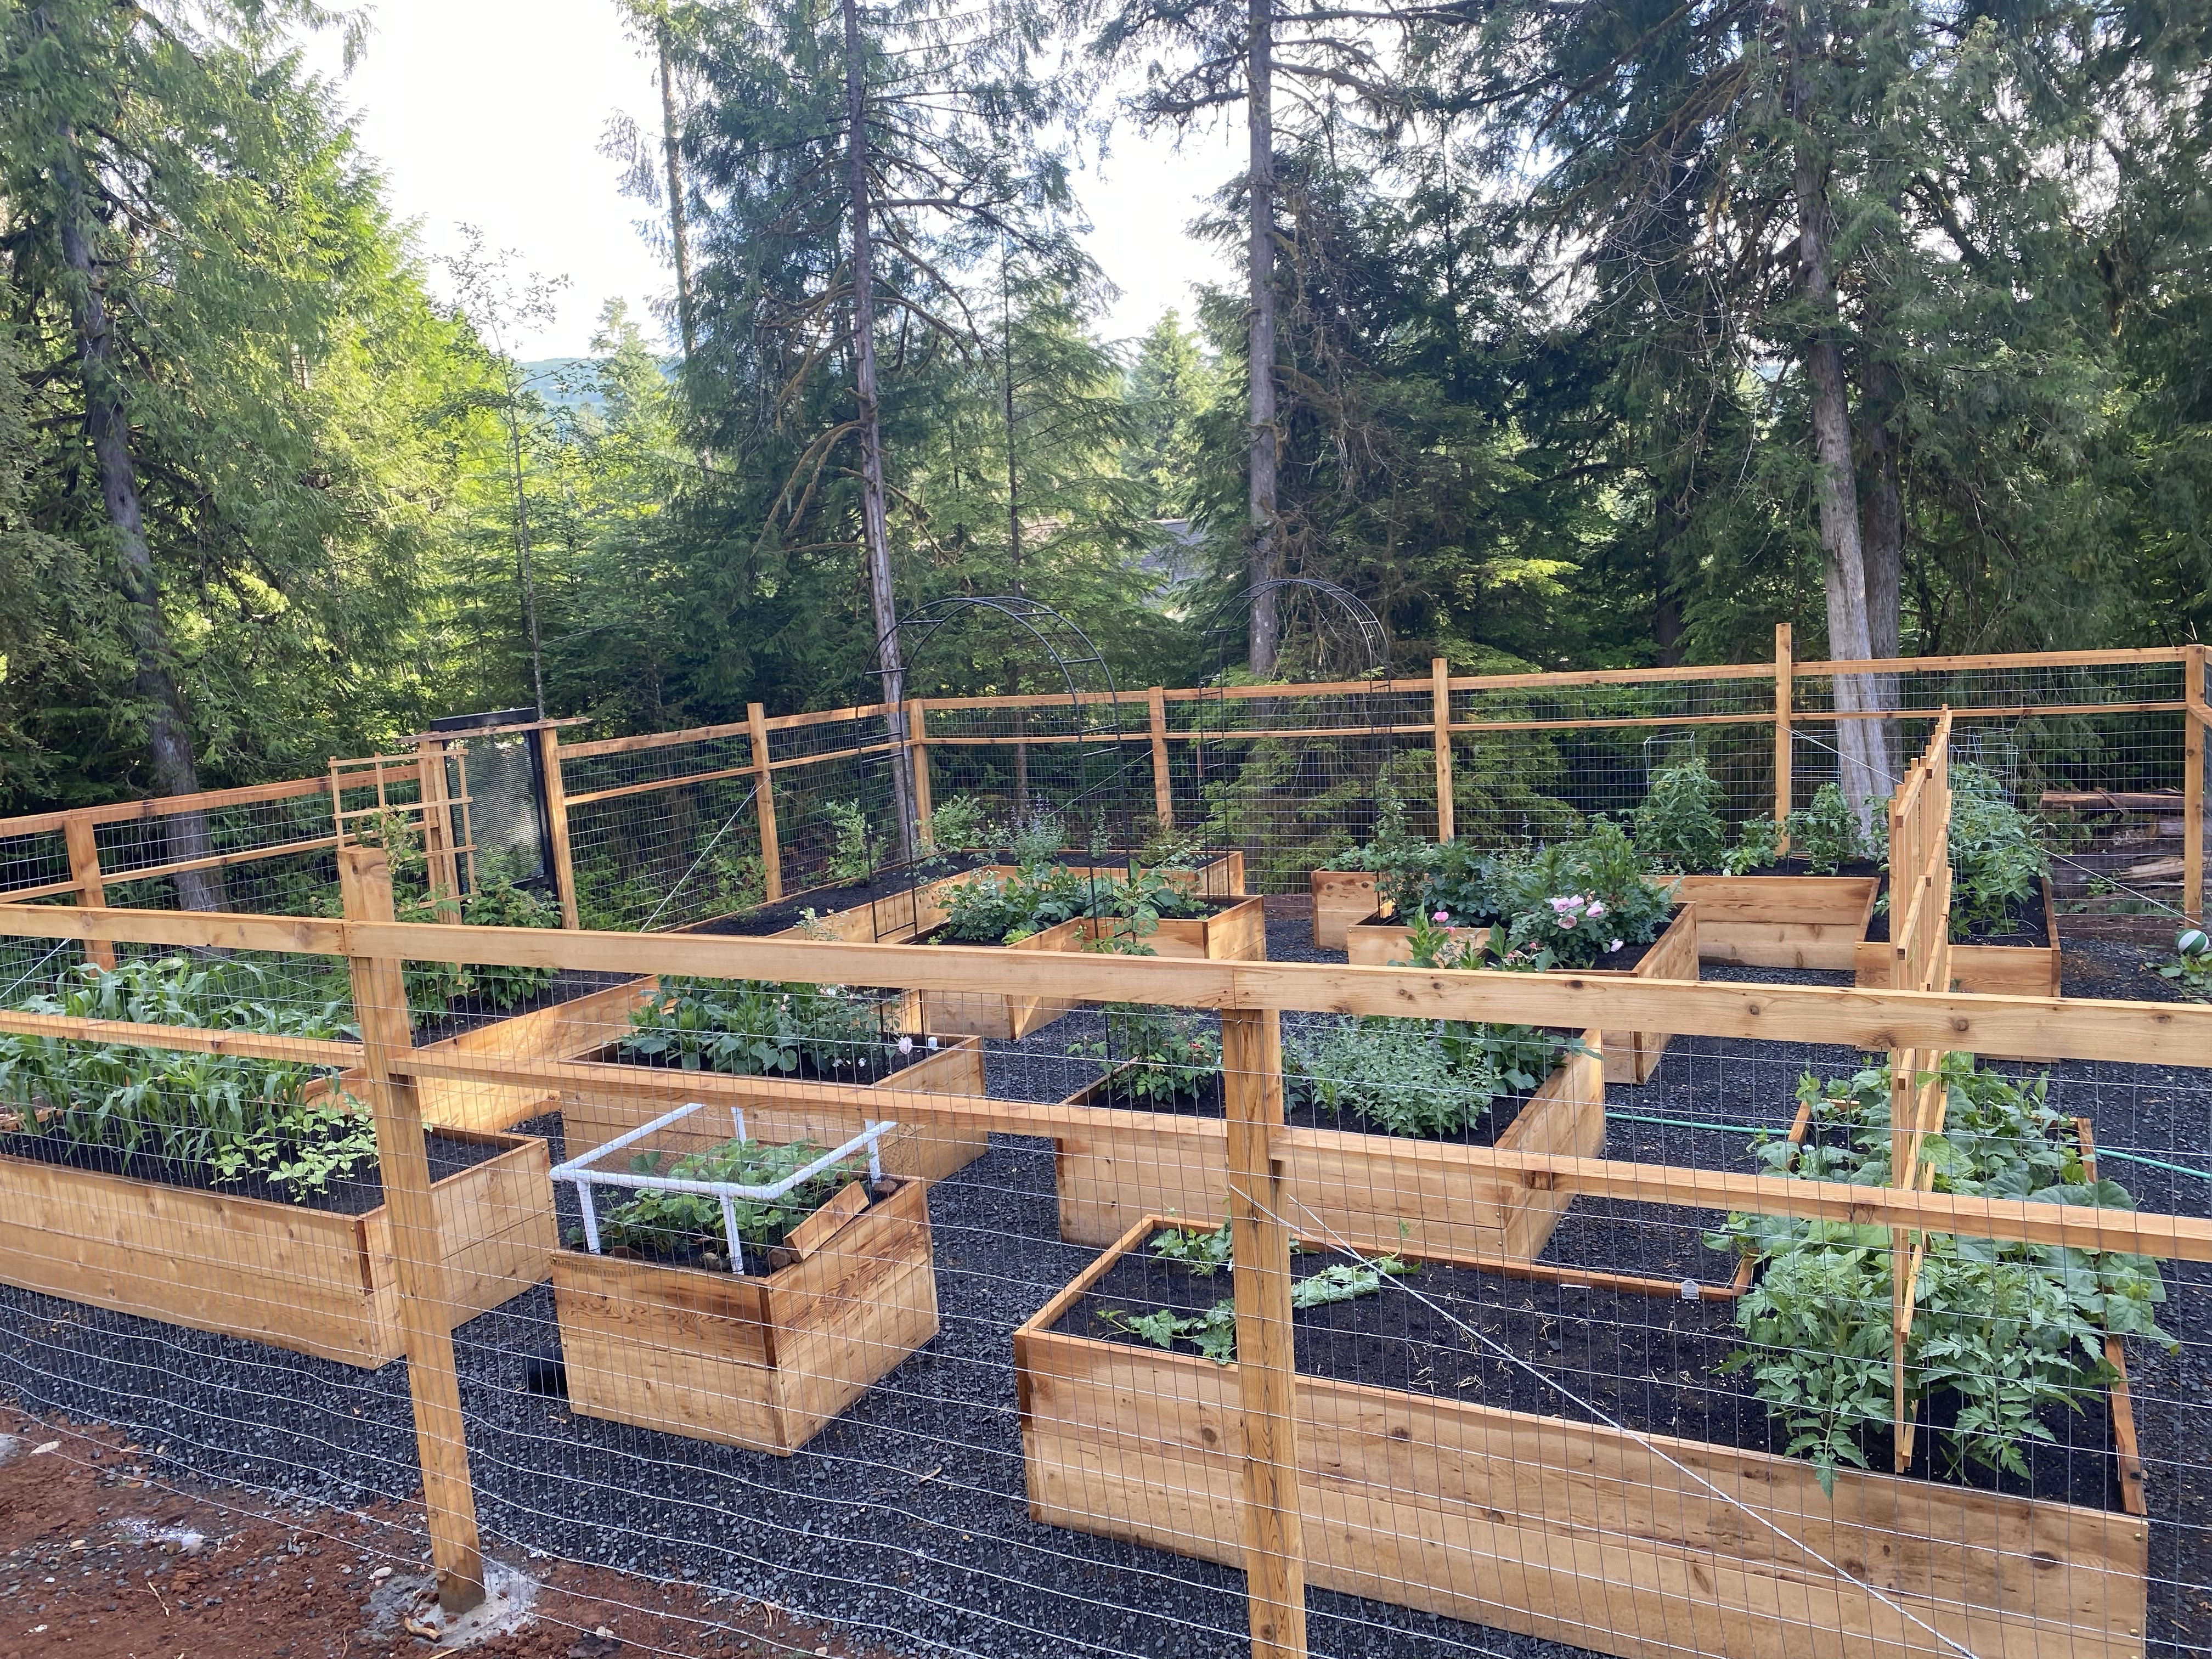
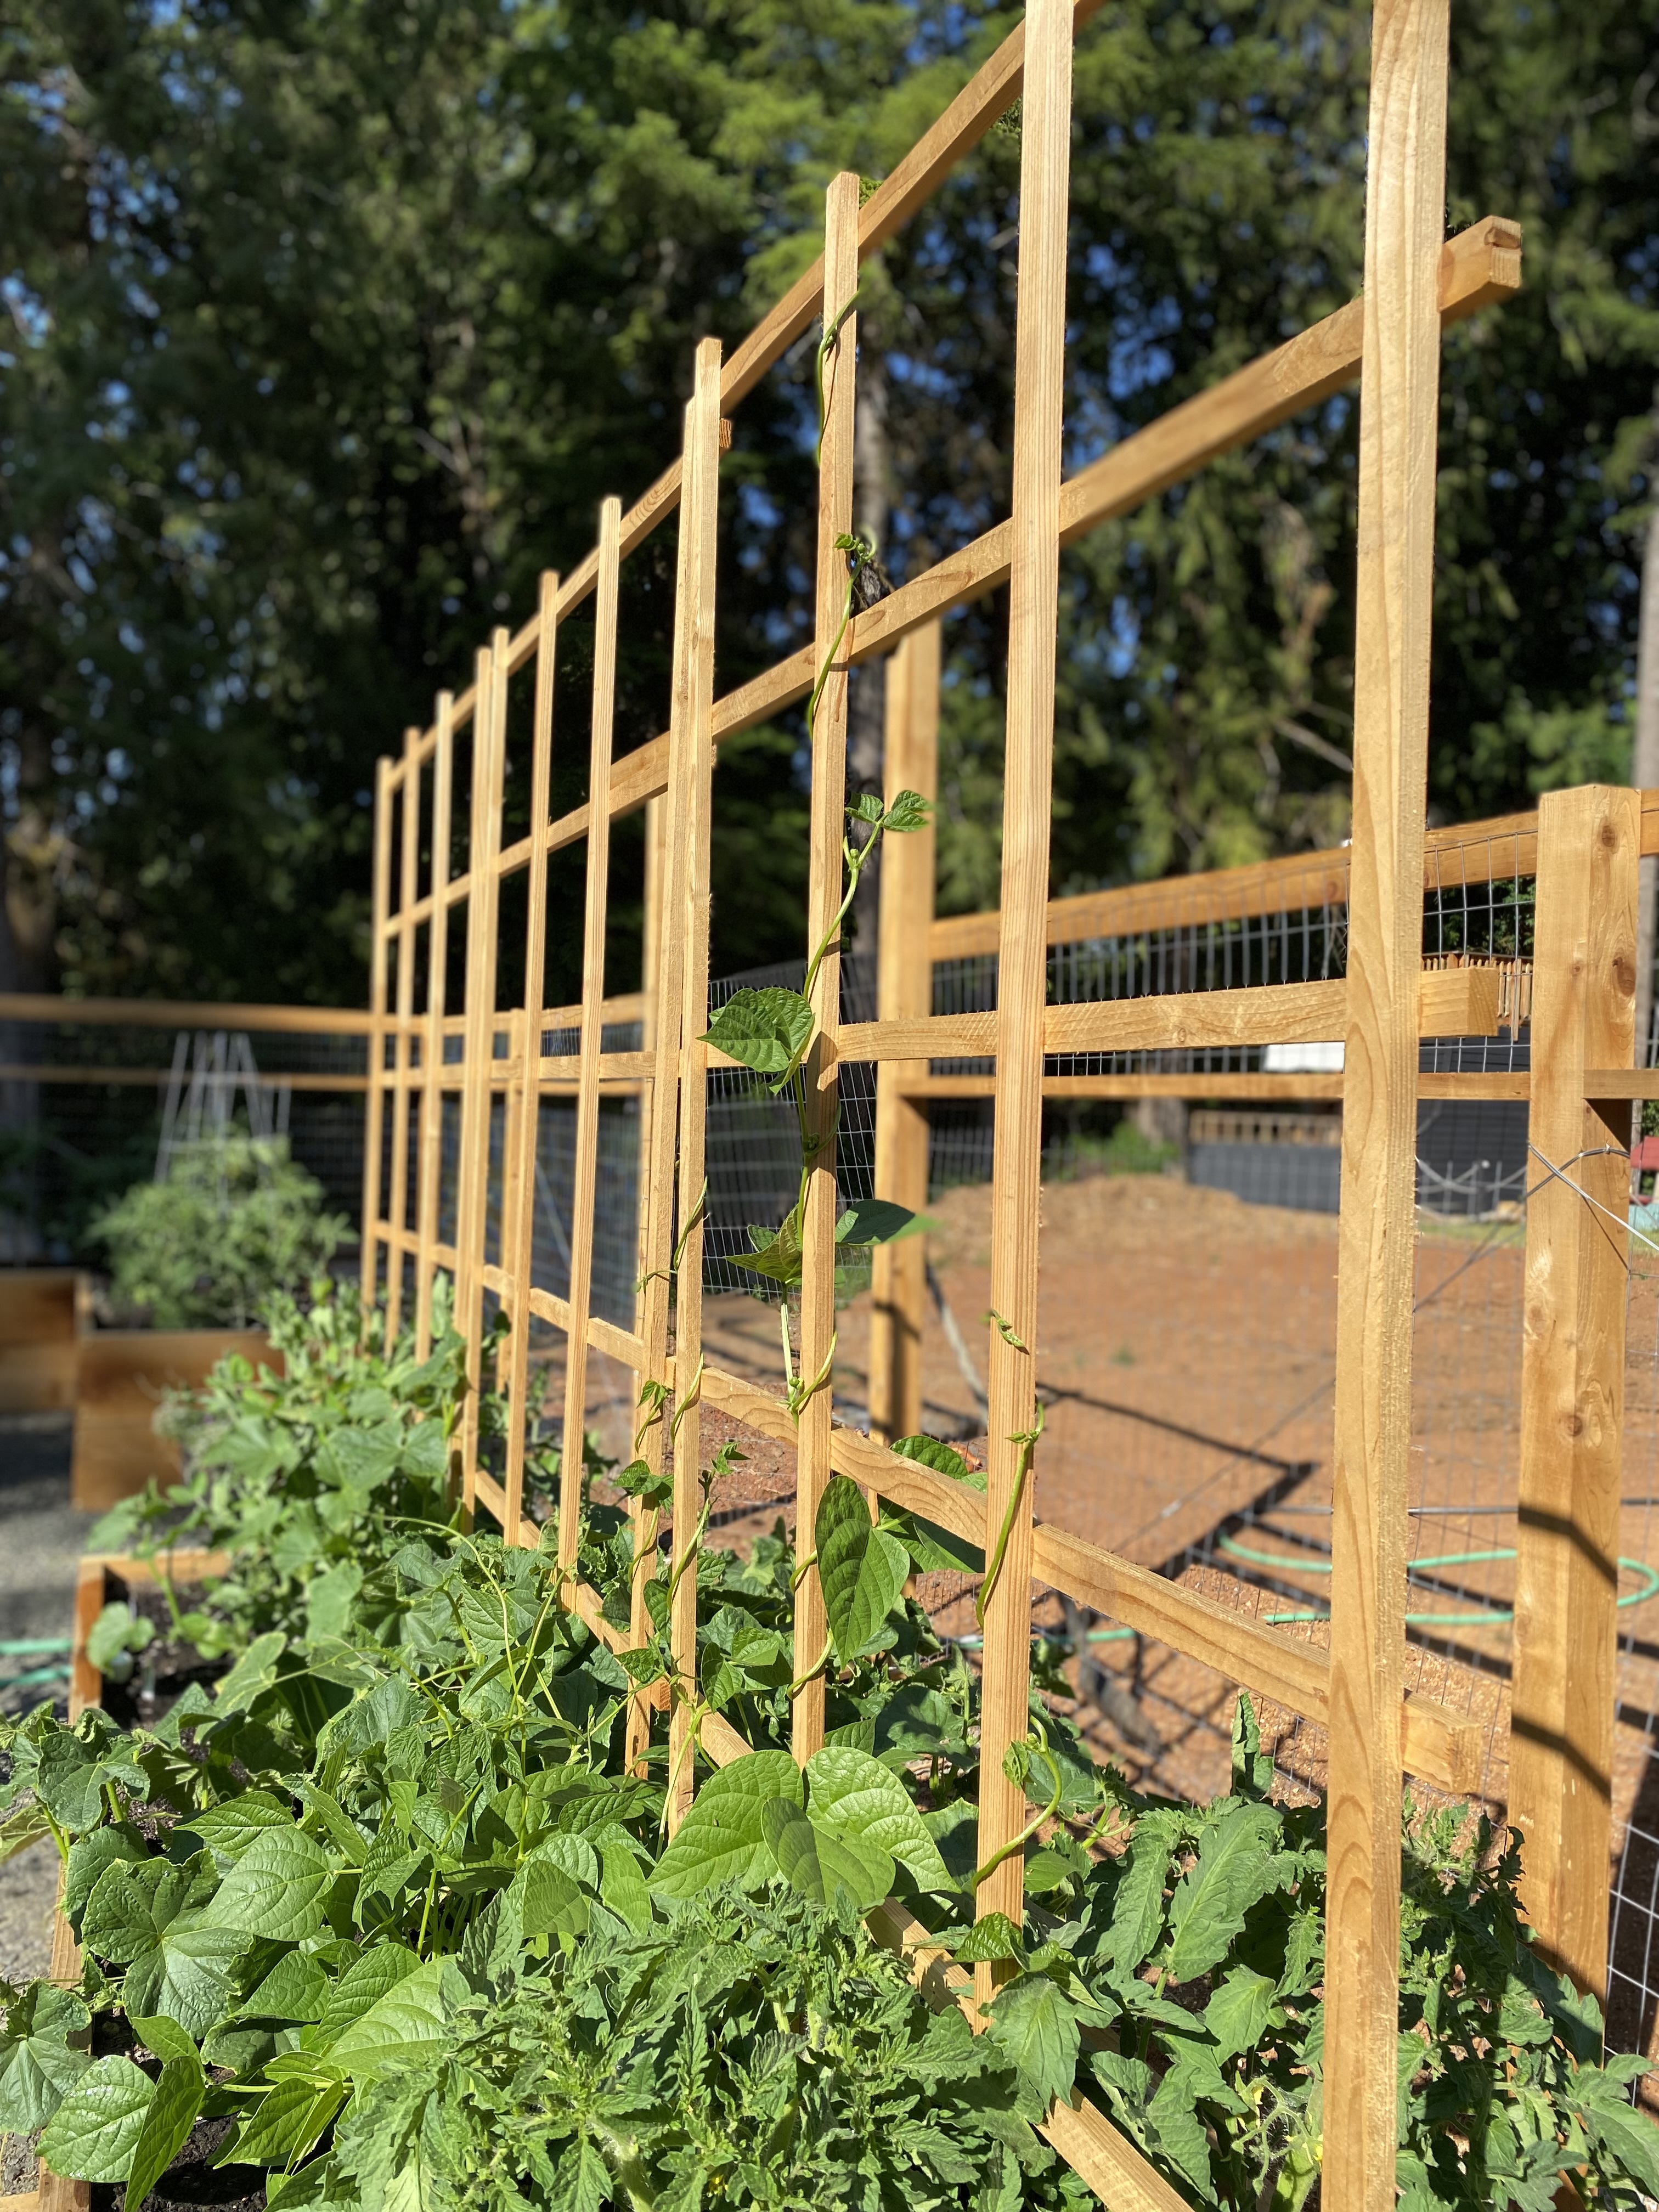
Once the milled wood was delivered, sorted, and stored, we started building the beds with two rows of 2′ x 12′ cedar boards. We added wire at the bottom of the beds to keep out pests like gophers. And lined them with black plastic to try to slow down future decay within the beds. We used stakes and string lines to get everything lined up just perfectly.
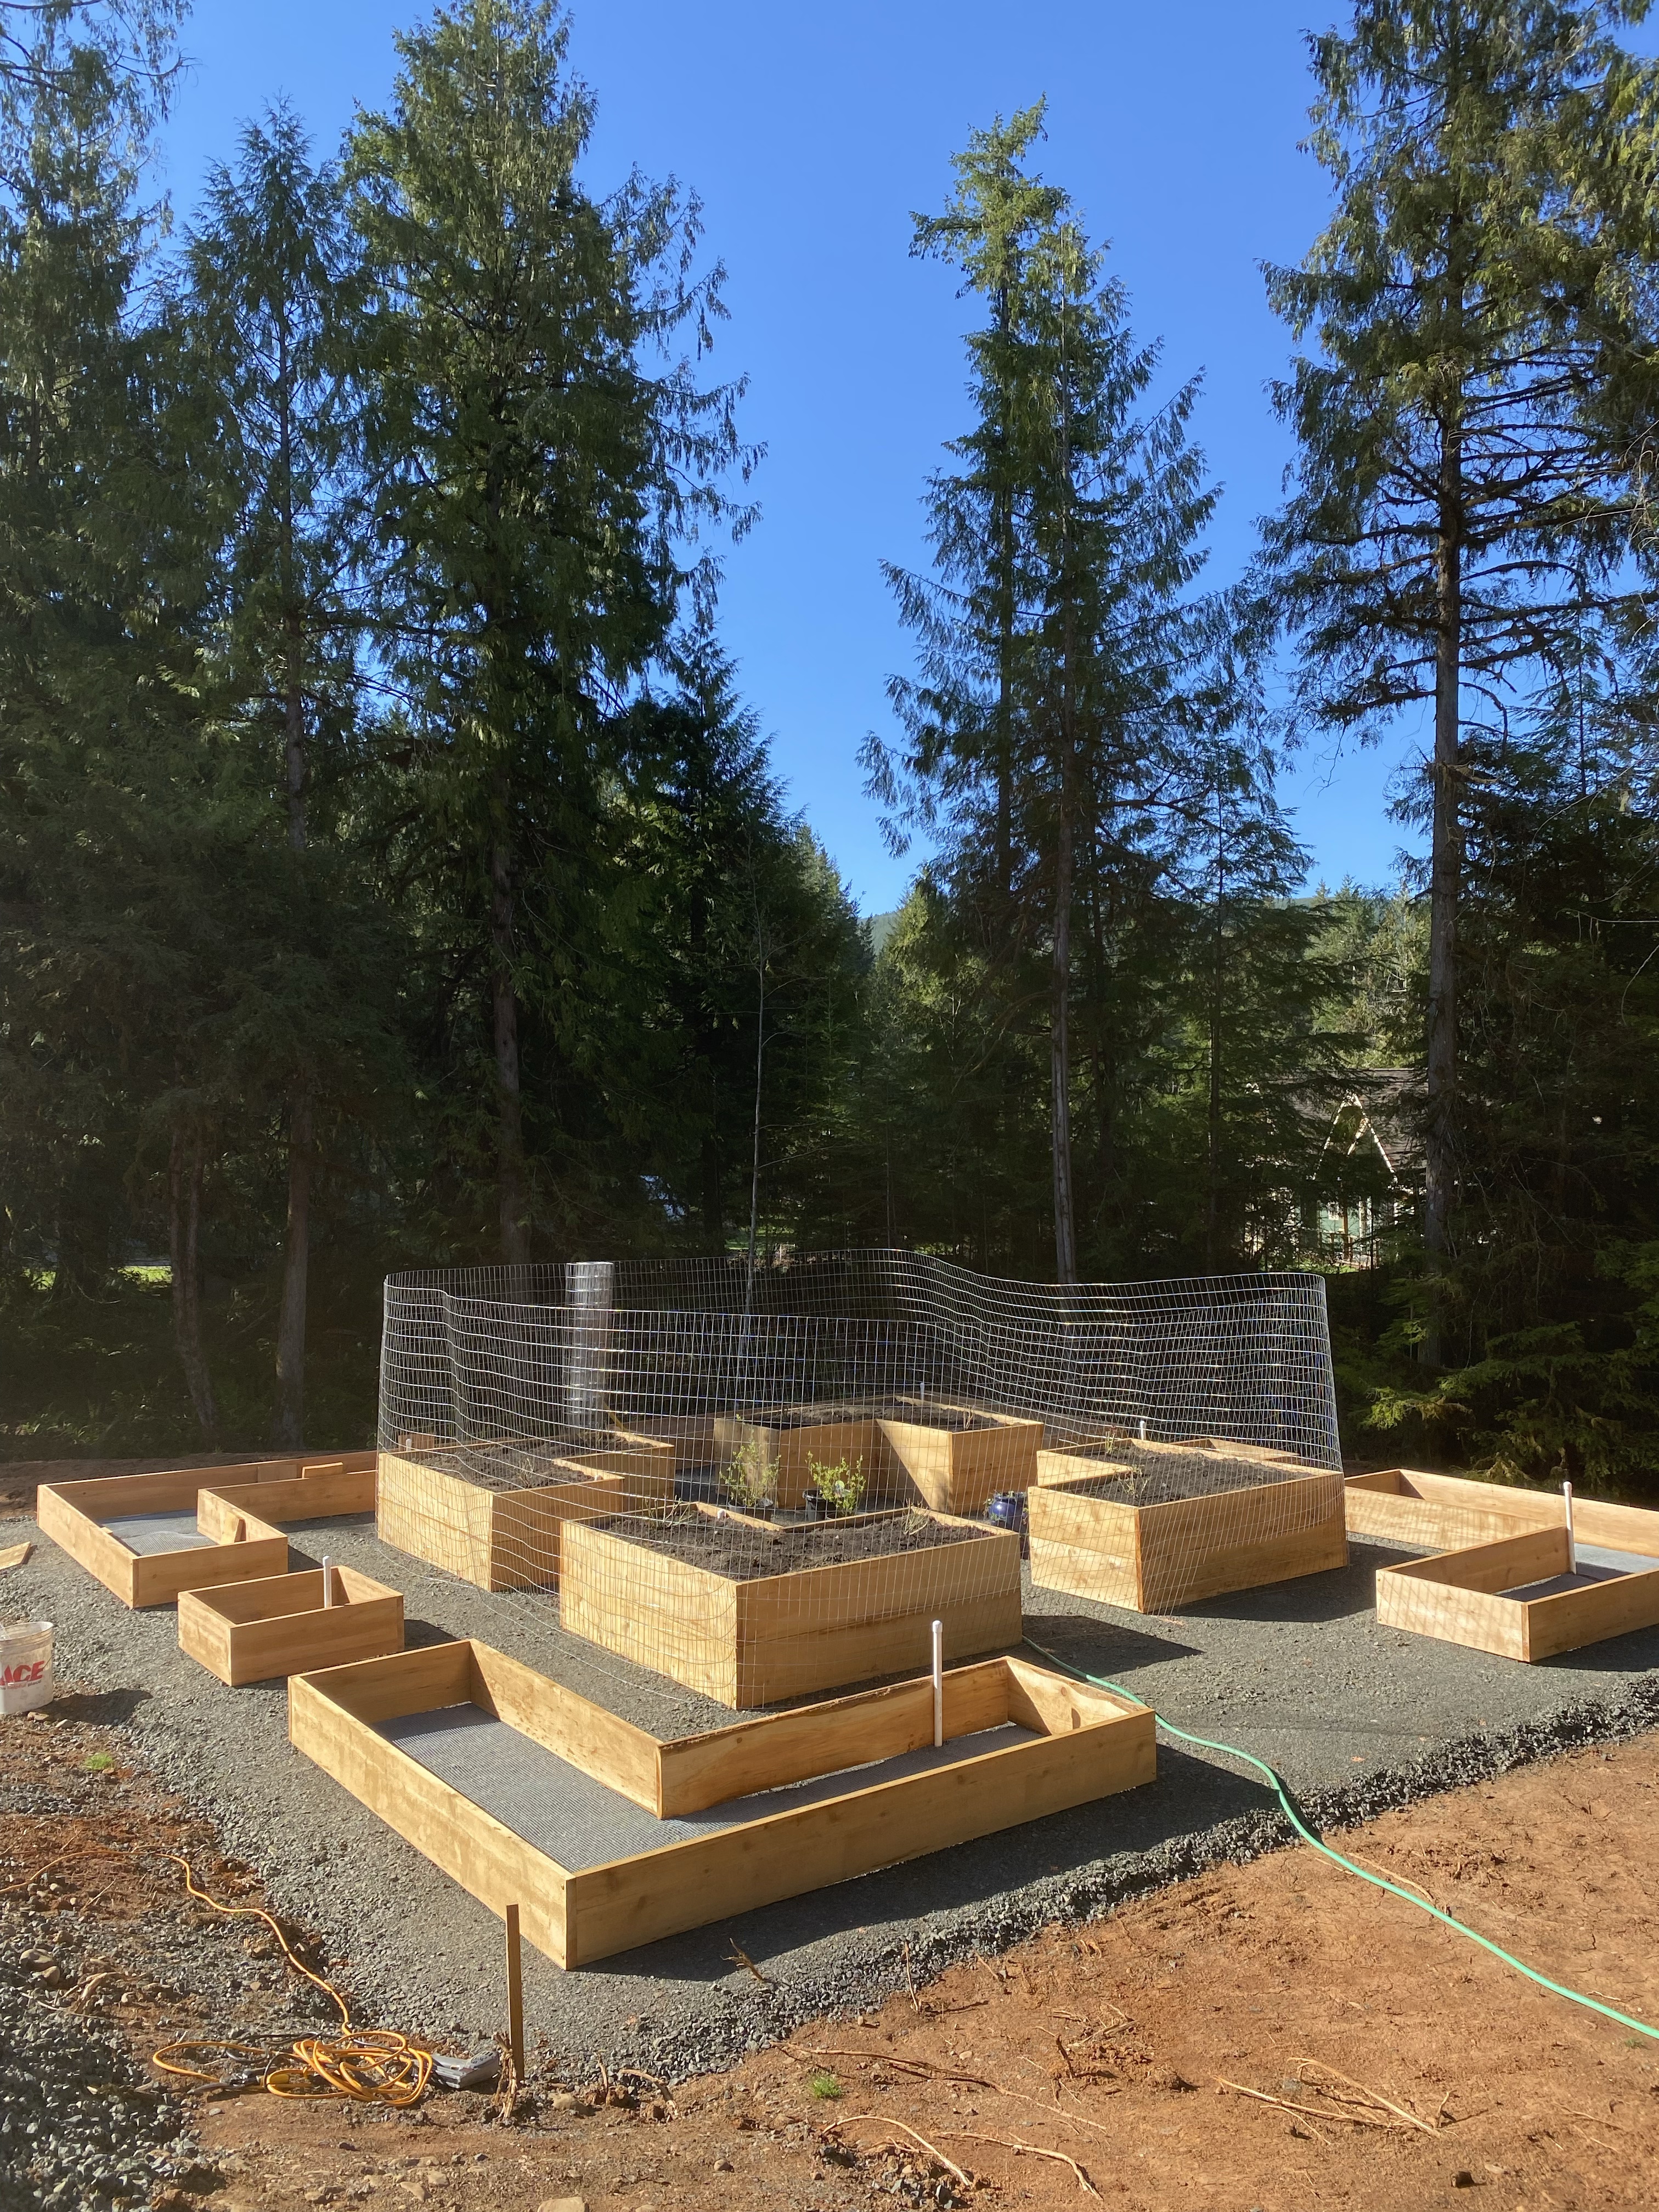
Soil and fencing came next. We partially filled the beds with wood chips from the logging process, then added good soil on top. The fence ended up being a LOT more difficult than we anticipated but so very necessary with the bold deer we have out here. We did end up staining the fencing the following summer.
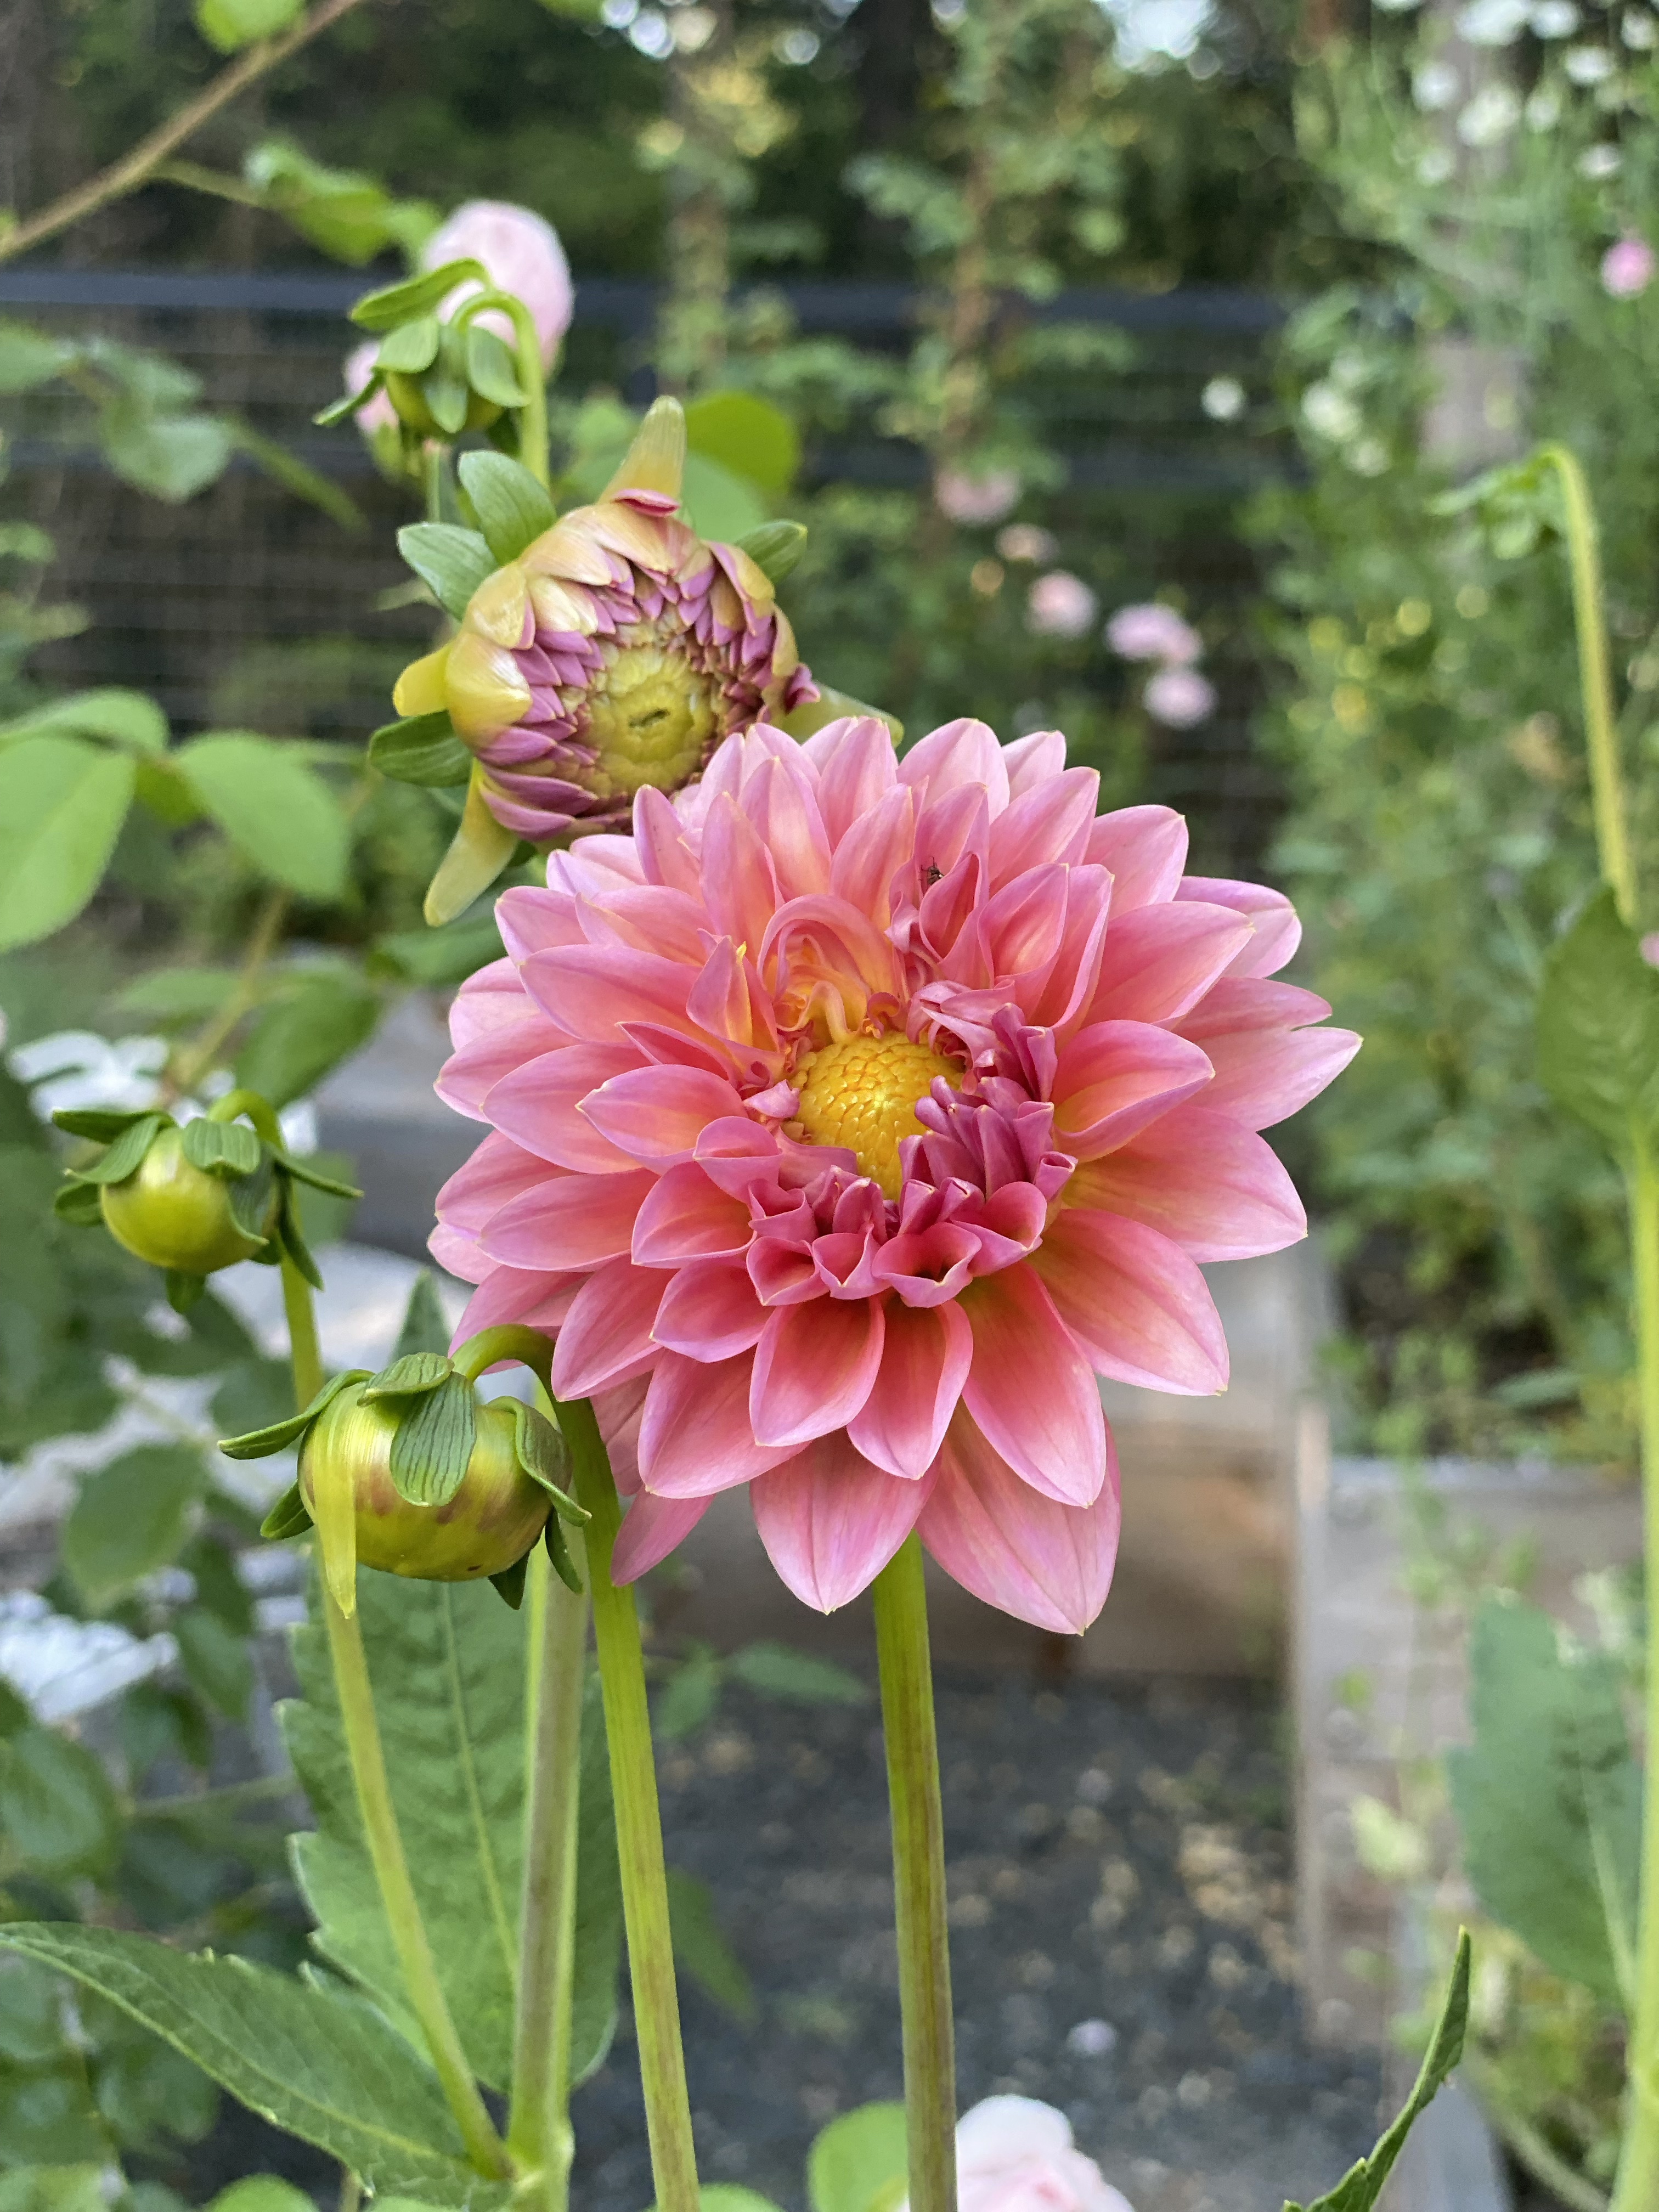
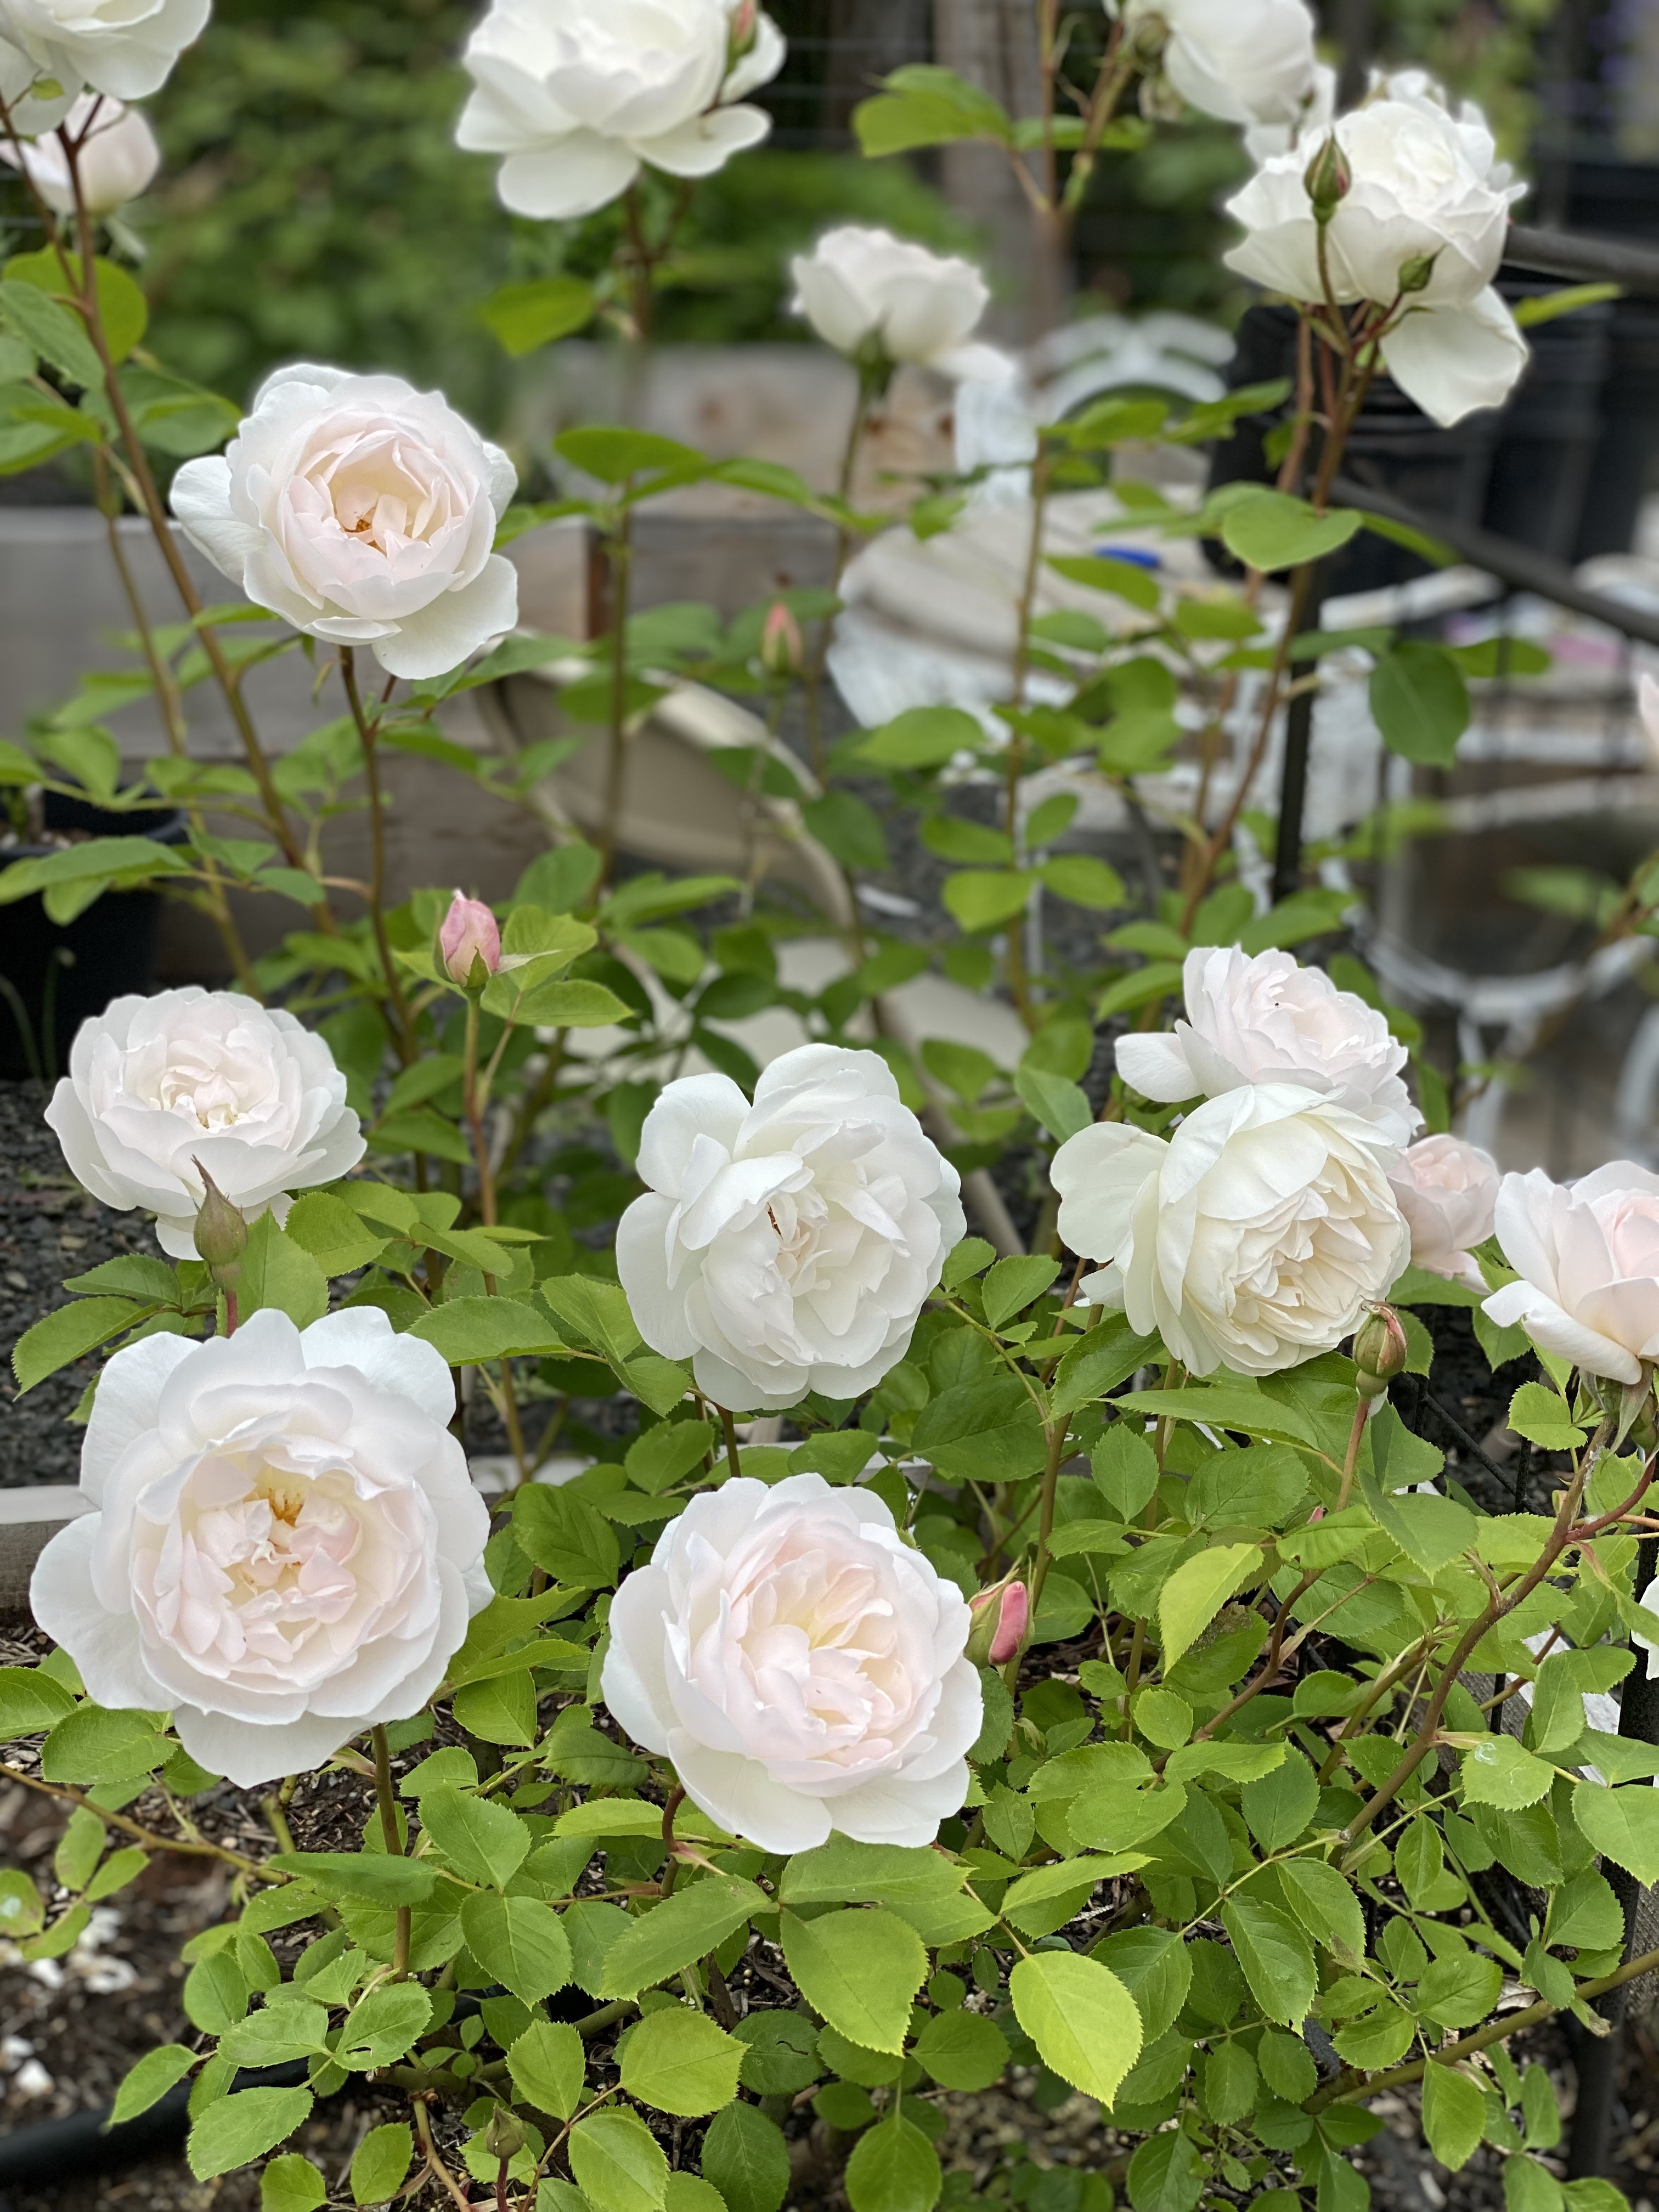
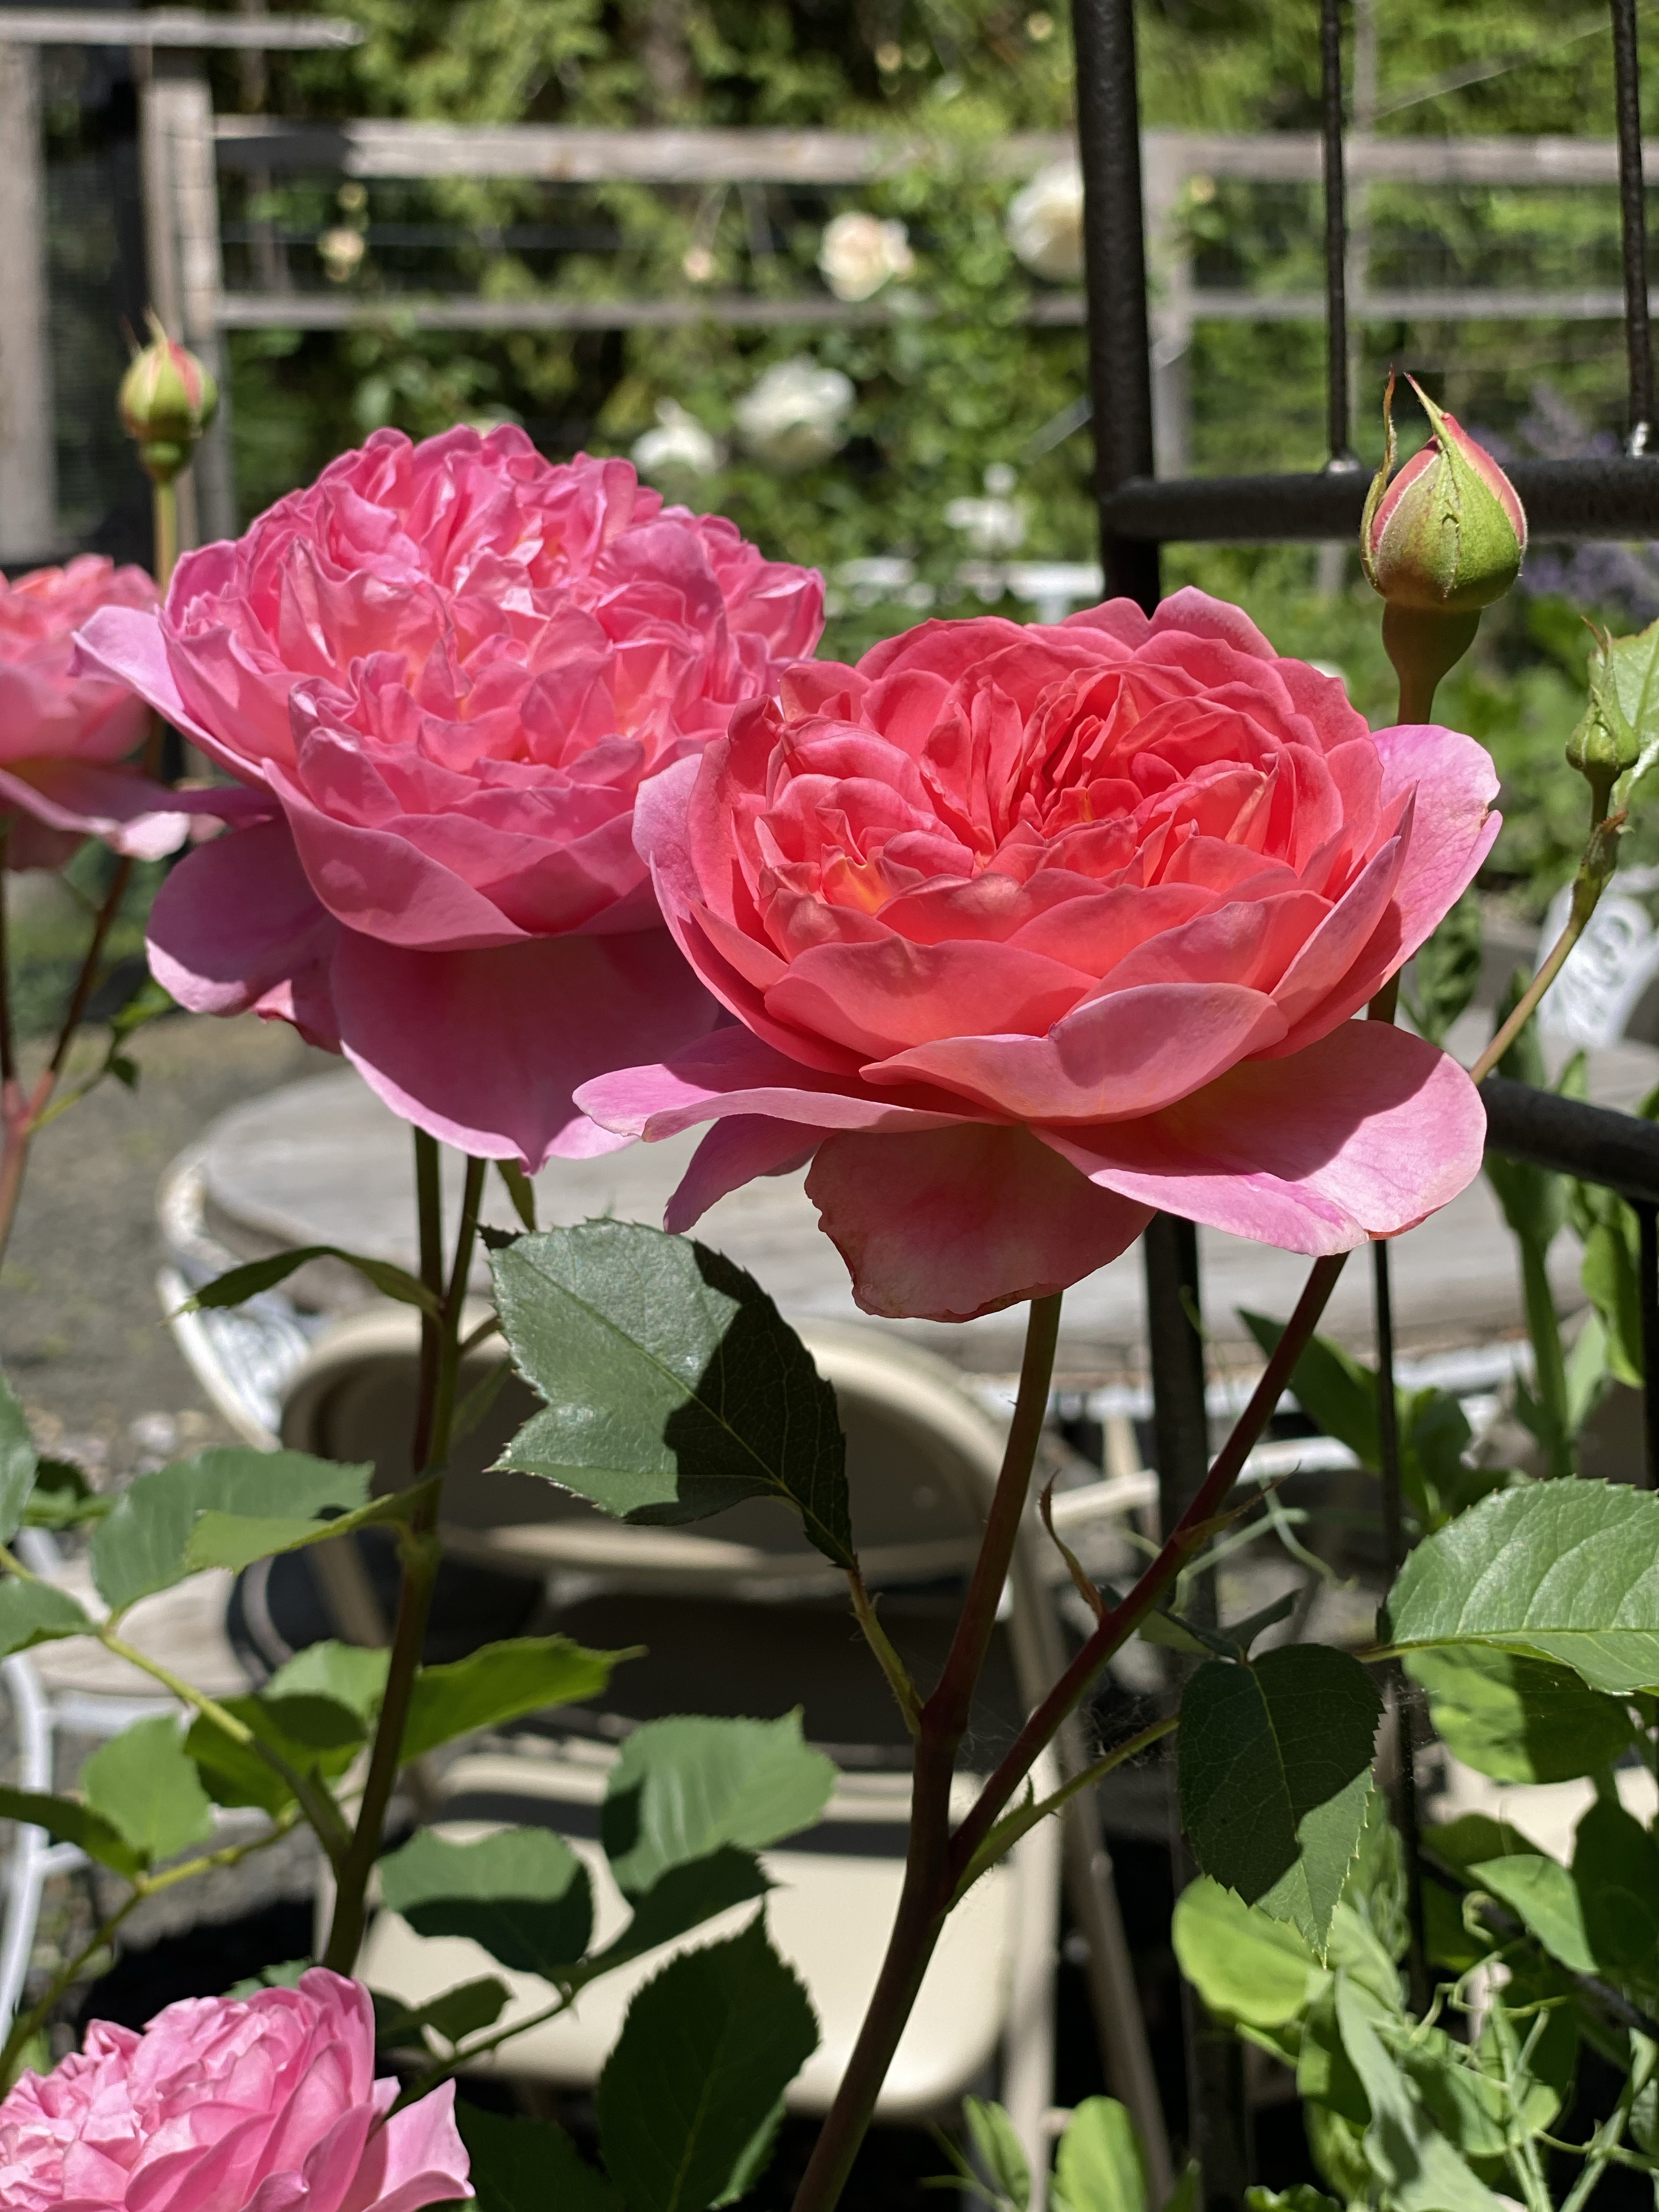
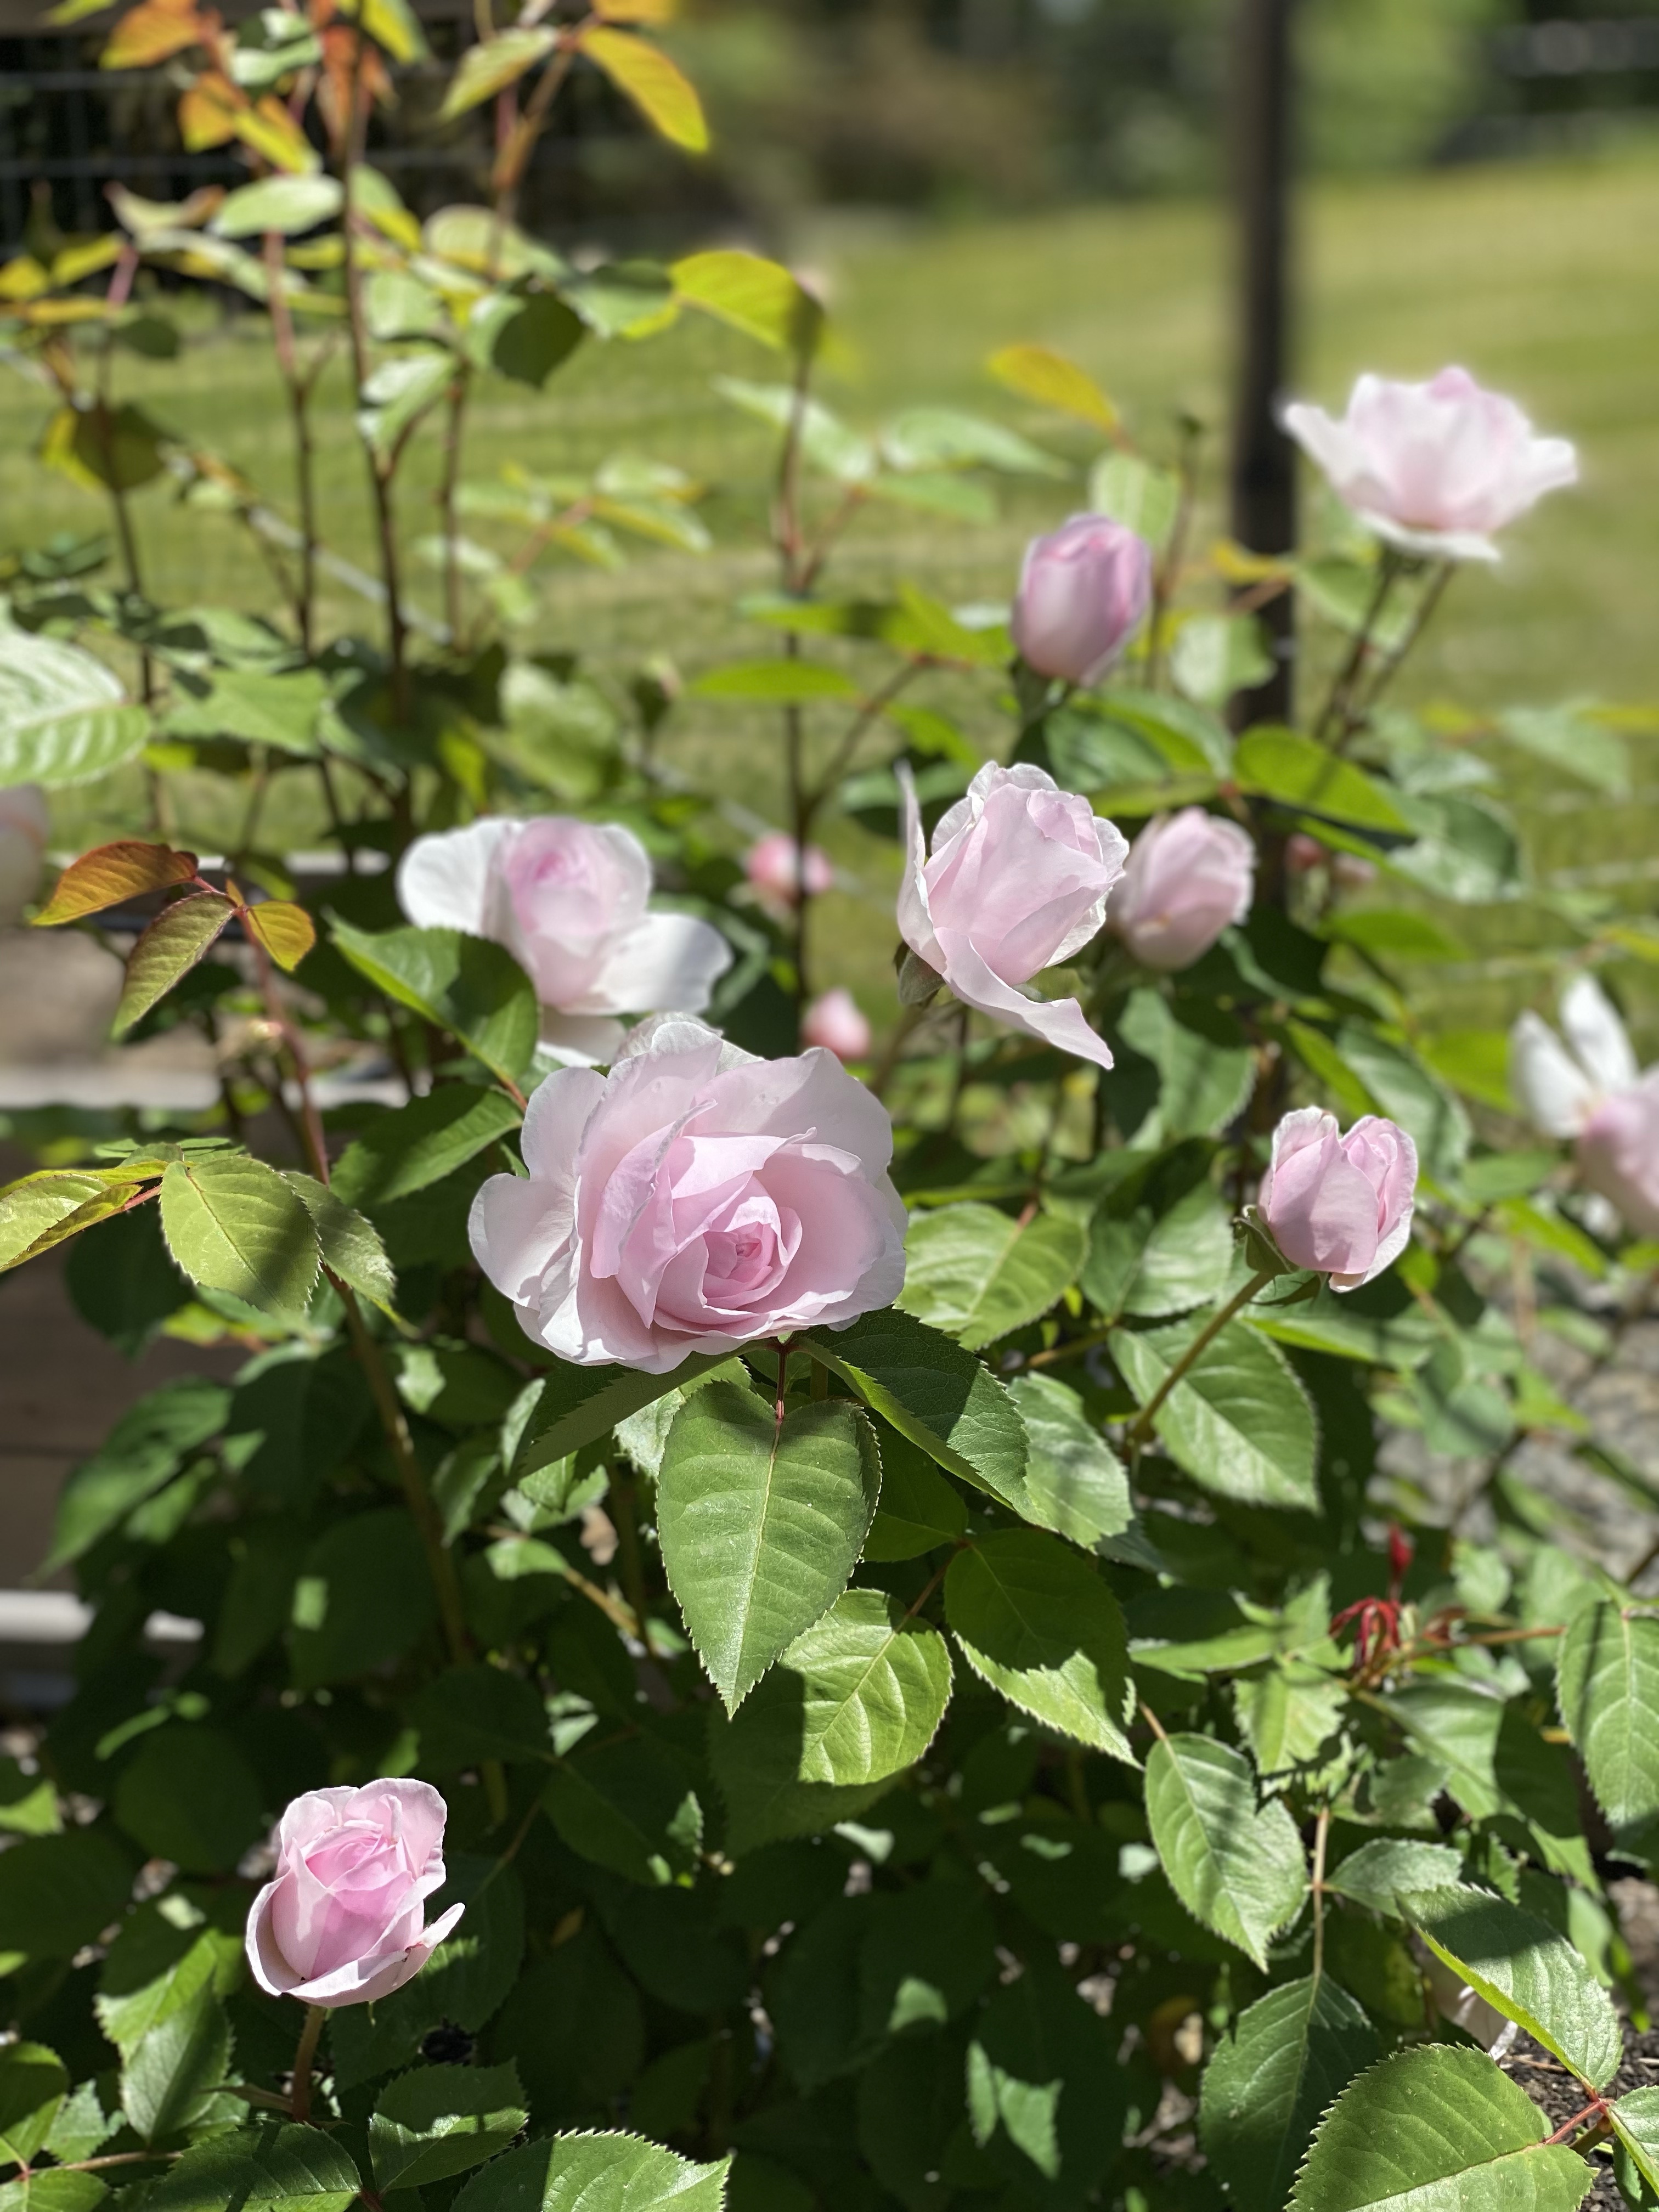
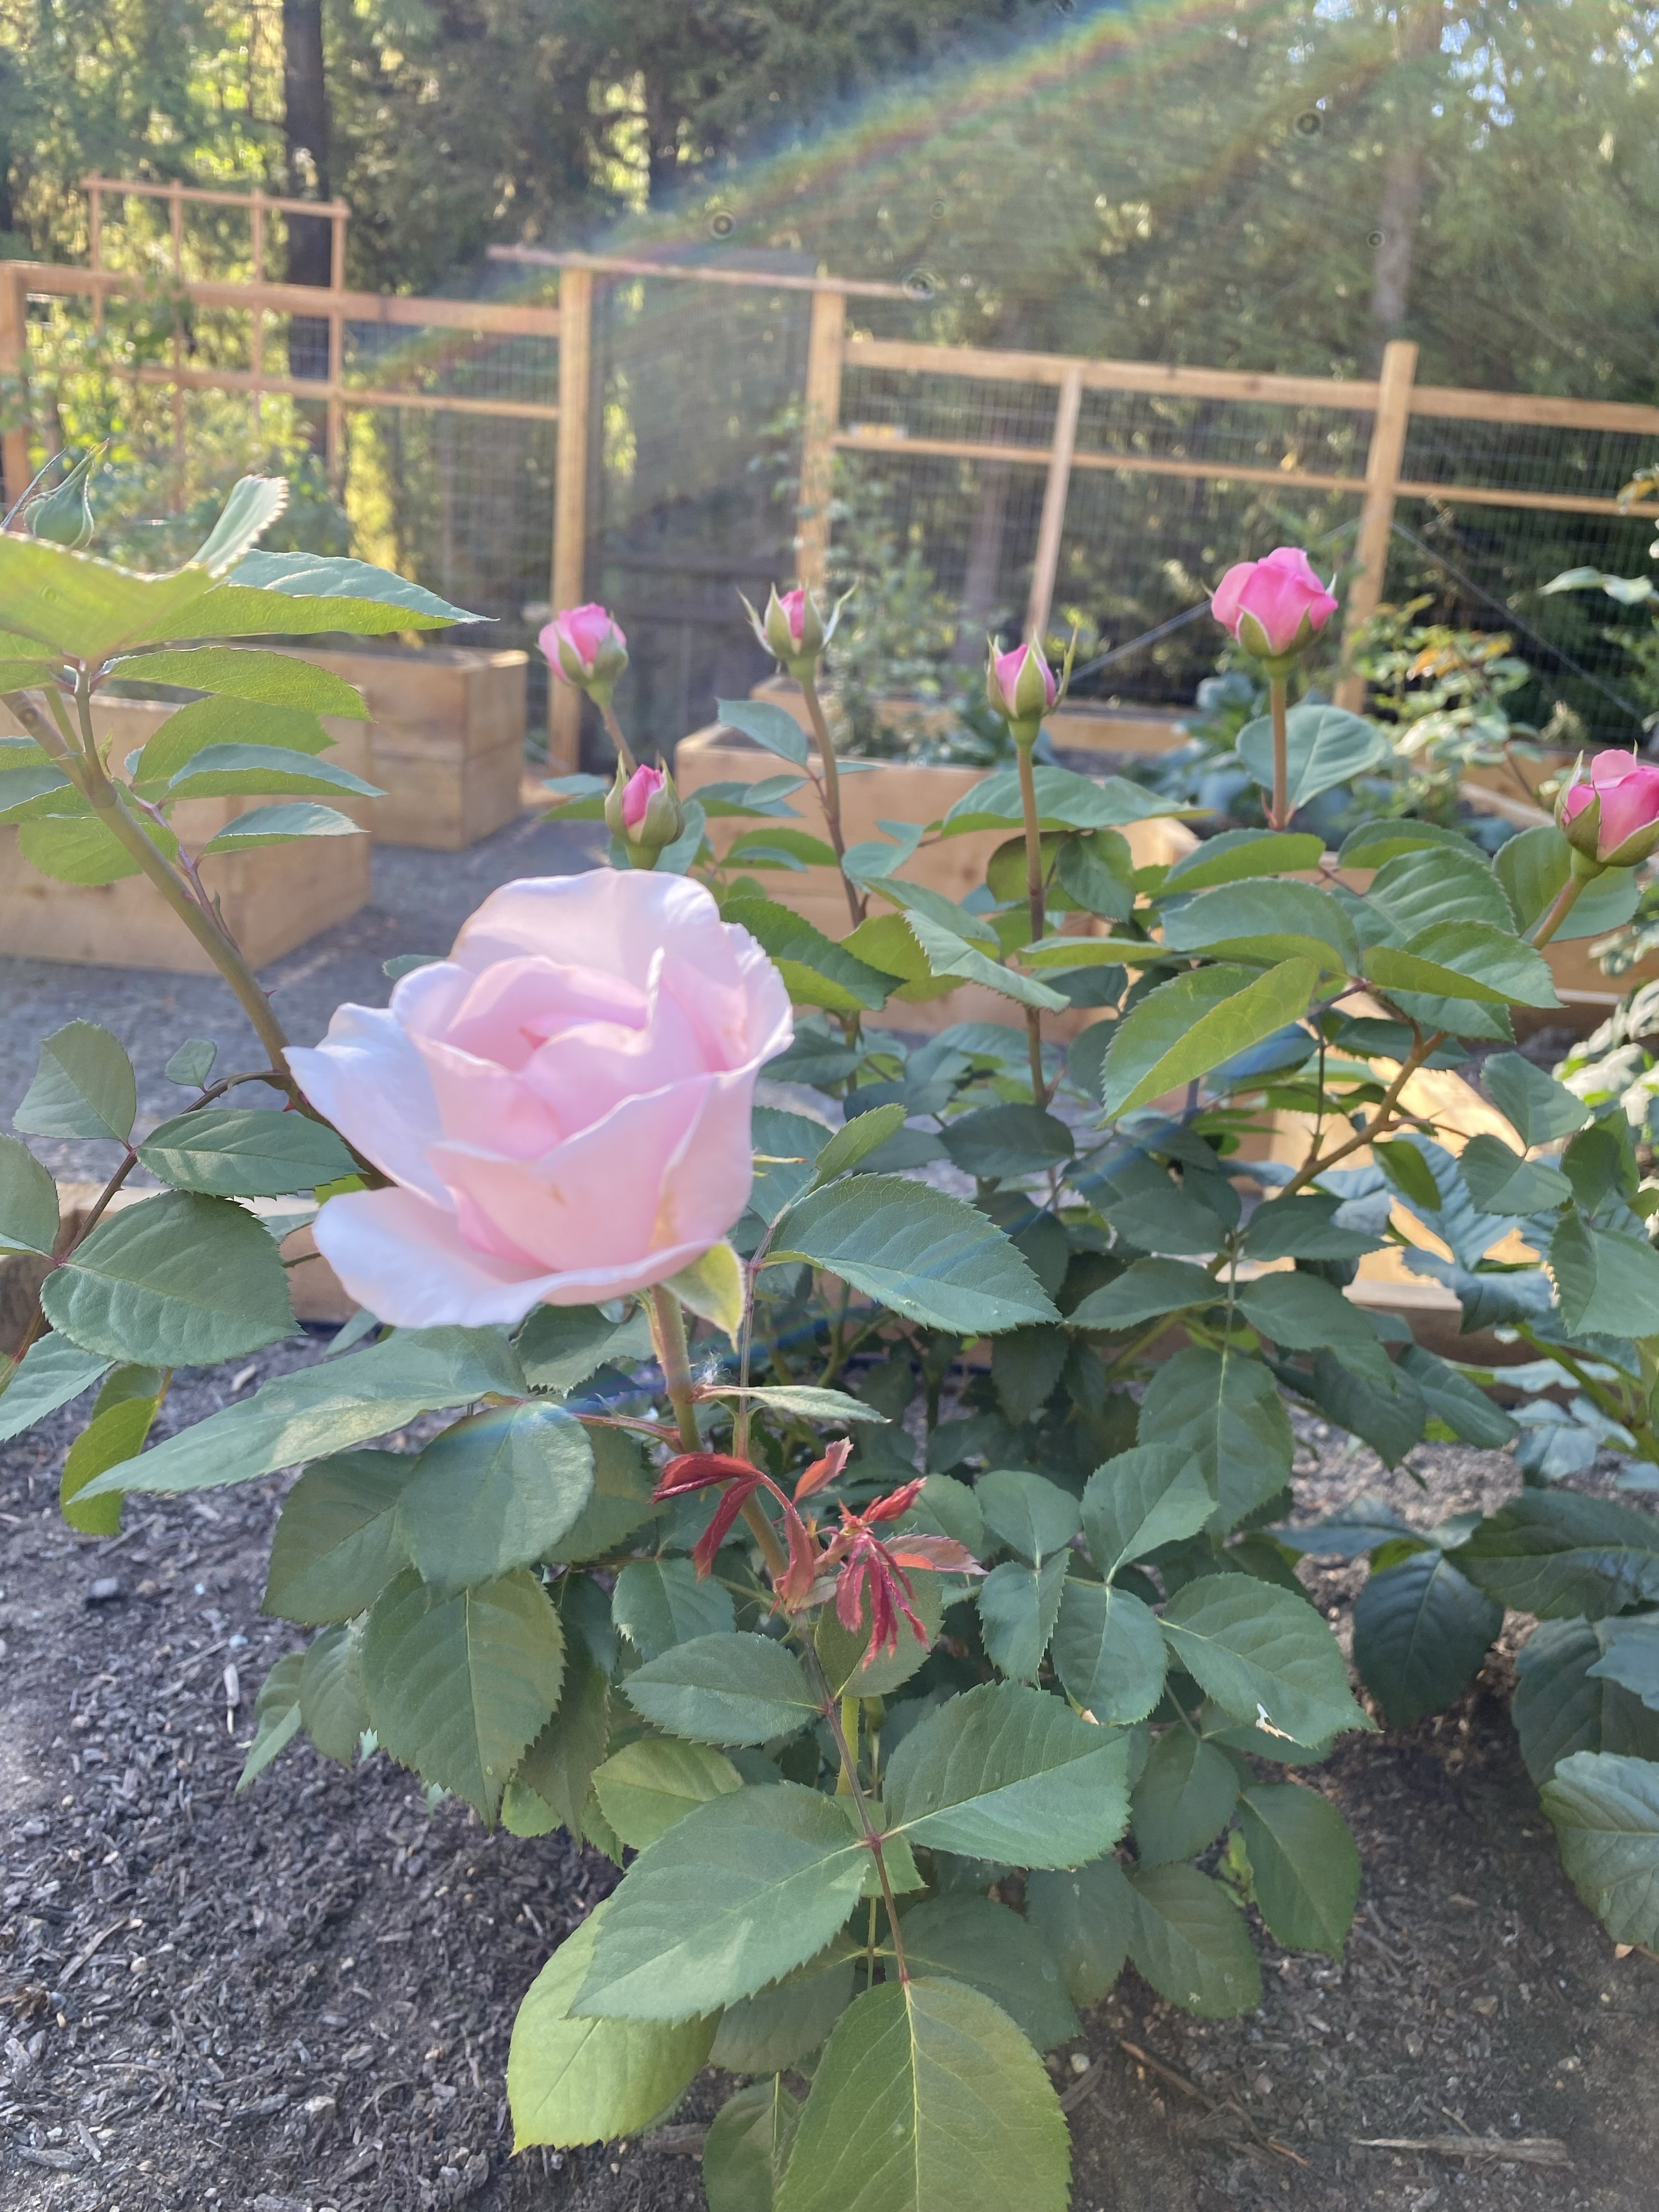
Finally, I had the chance to start planting! I started with David Austin bare root roses in the center of the garden. I planted so many gorgeous varieties including Queen of Sweden, Olivia Rose Austin, Bascobel (my favorite), Lichfield Angel, Charlotte (obviously), Desdemona, and The Generous Gardener. I have since also added Princess Alexandra of Kent and The Alnwick Rose. I also planted dahlia tubers including Wizard of Oz, Cafe Au Lait, Breakout, Thomas Edison, Moor Place, Sweet Nathalie, and Linda’s Baby. All gorgeous! The outer beds were planted with various fruits and veggies.
I can’t even explain the sheer joy when the first rose started blooming. It was the culmination of a giant project and the magic of gardening. How does a dried-out stick turn into something as magical as a fragrant, delicate rose? Gardening has become a bit like parenthood in many ways for me. It’s a beautiful reminder of the miracle of life, God’s creativity on display, and they just delight me (kids and plants).
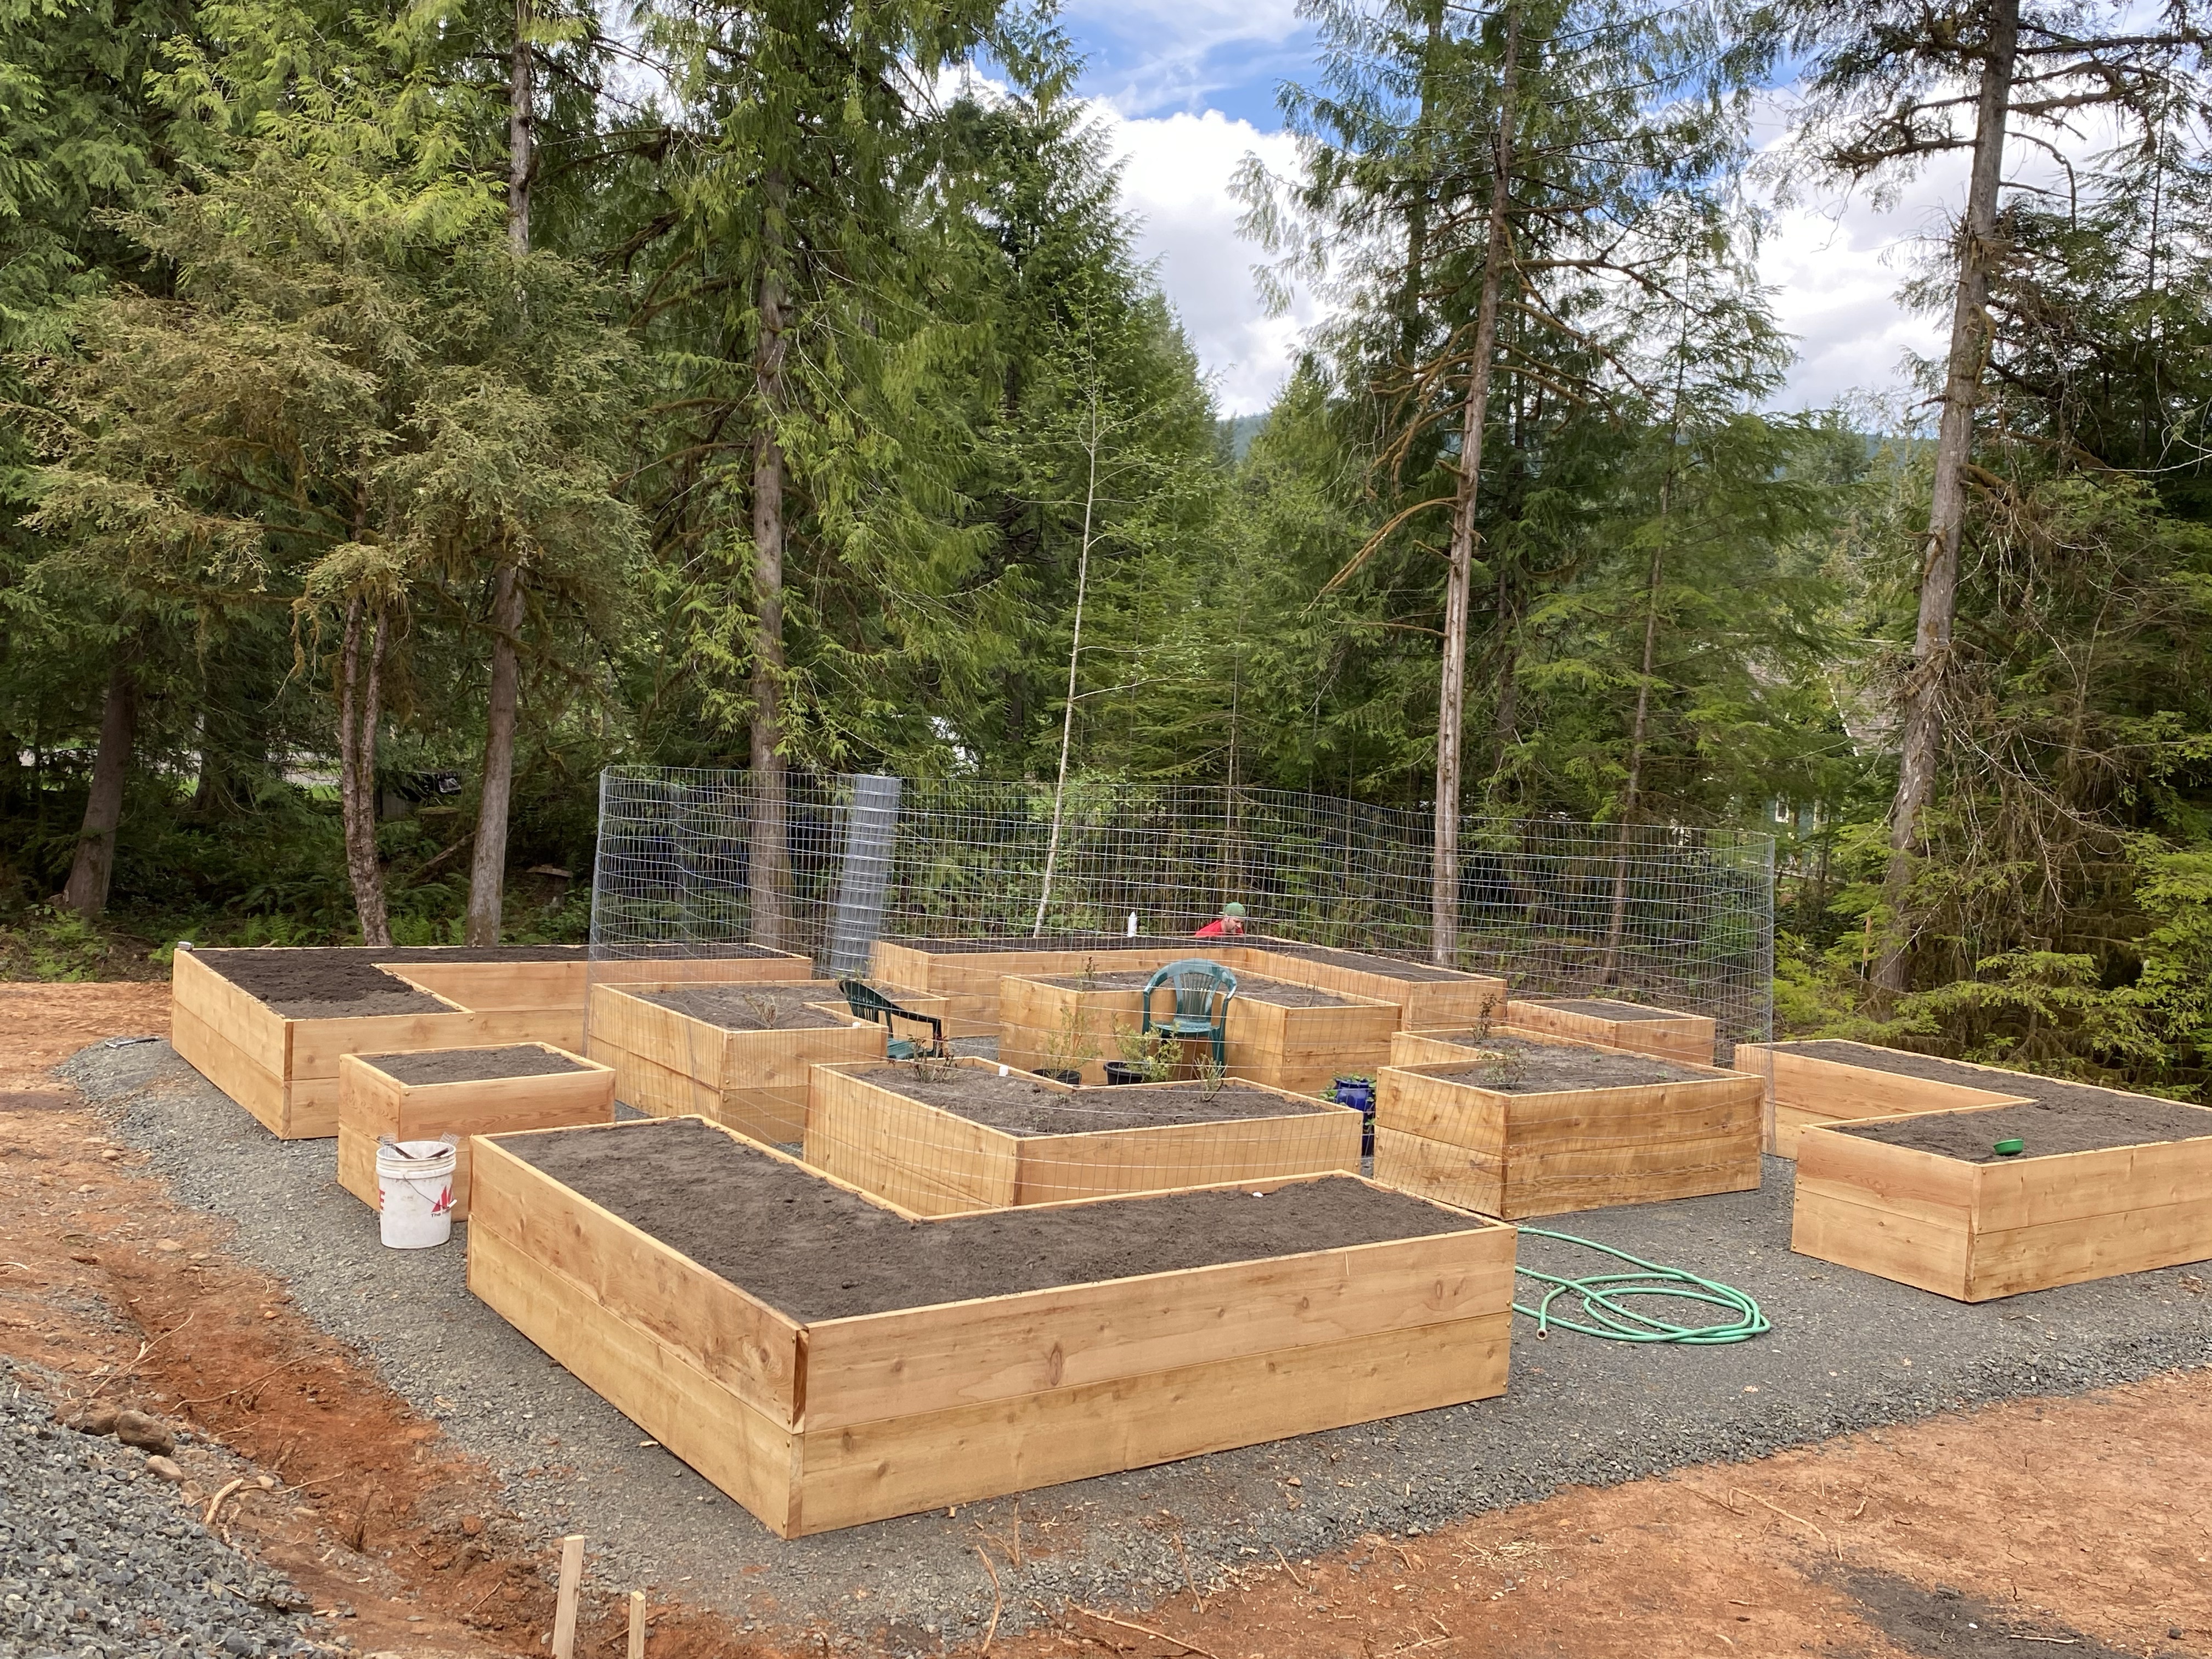
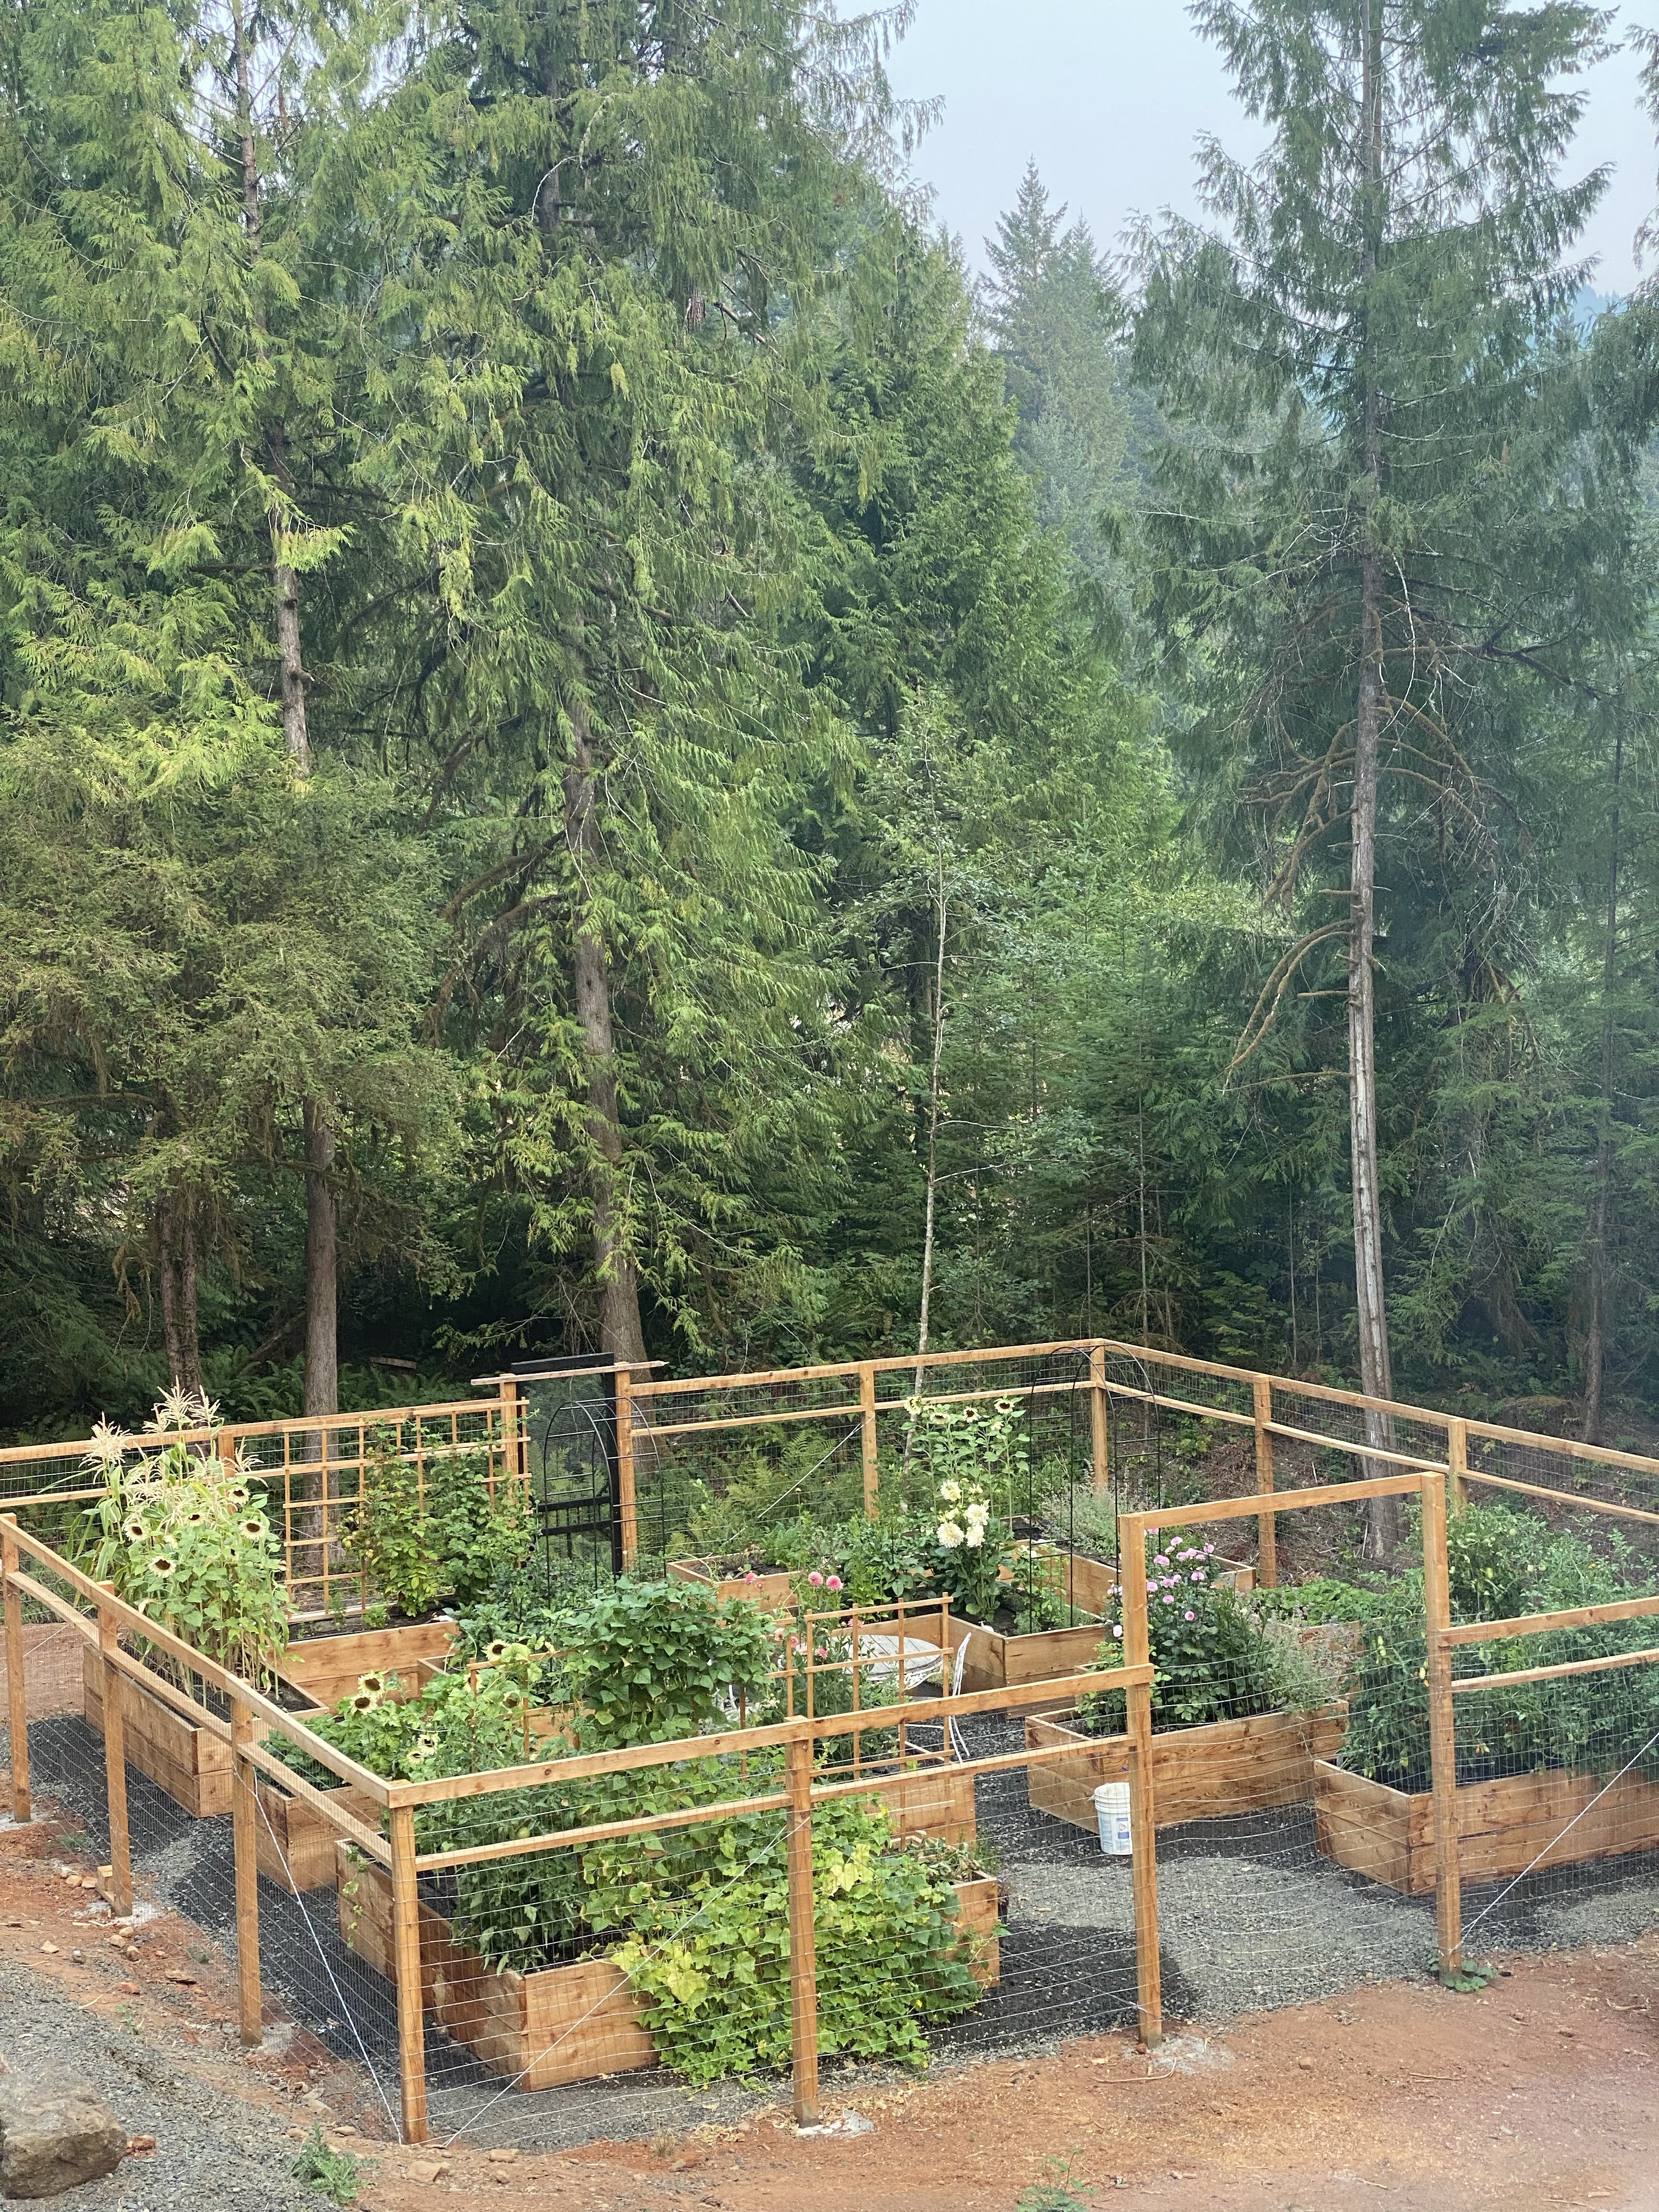
The garden came together beautifully. It was a huge project that we enjoyed and that the entire family will enjoy for years to come. The kids love picking strawberries and Kyrie is a verified plant lady already. Our dying trees gave back to new life, new miracles, new delights. Now I spend summers visiting and tending to my plants, marveling at each bloom, each harvest.
It hit me one evening as I was picking green beans for dinner, how novel it felt to be able to walk outside and gather part of our meal. Novel and so very satisfying. I started those green beans from tiny seeds! It also occurred to me that Ryan’s grandmother (an avid gardener) would have laughed at me for that thought. For so long gardening was an essential part of life, not a hobby. Amazing how quickly things change just within a couple of generations. I’ve enjoyed getting back to some of these basics out here in the Lost Wood Garden.
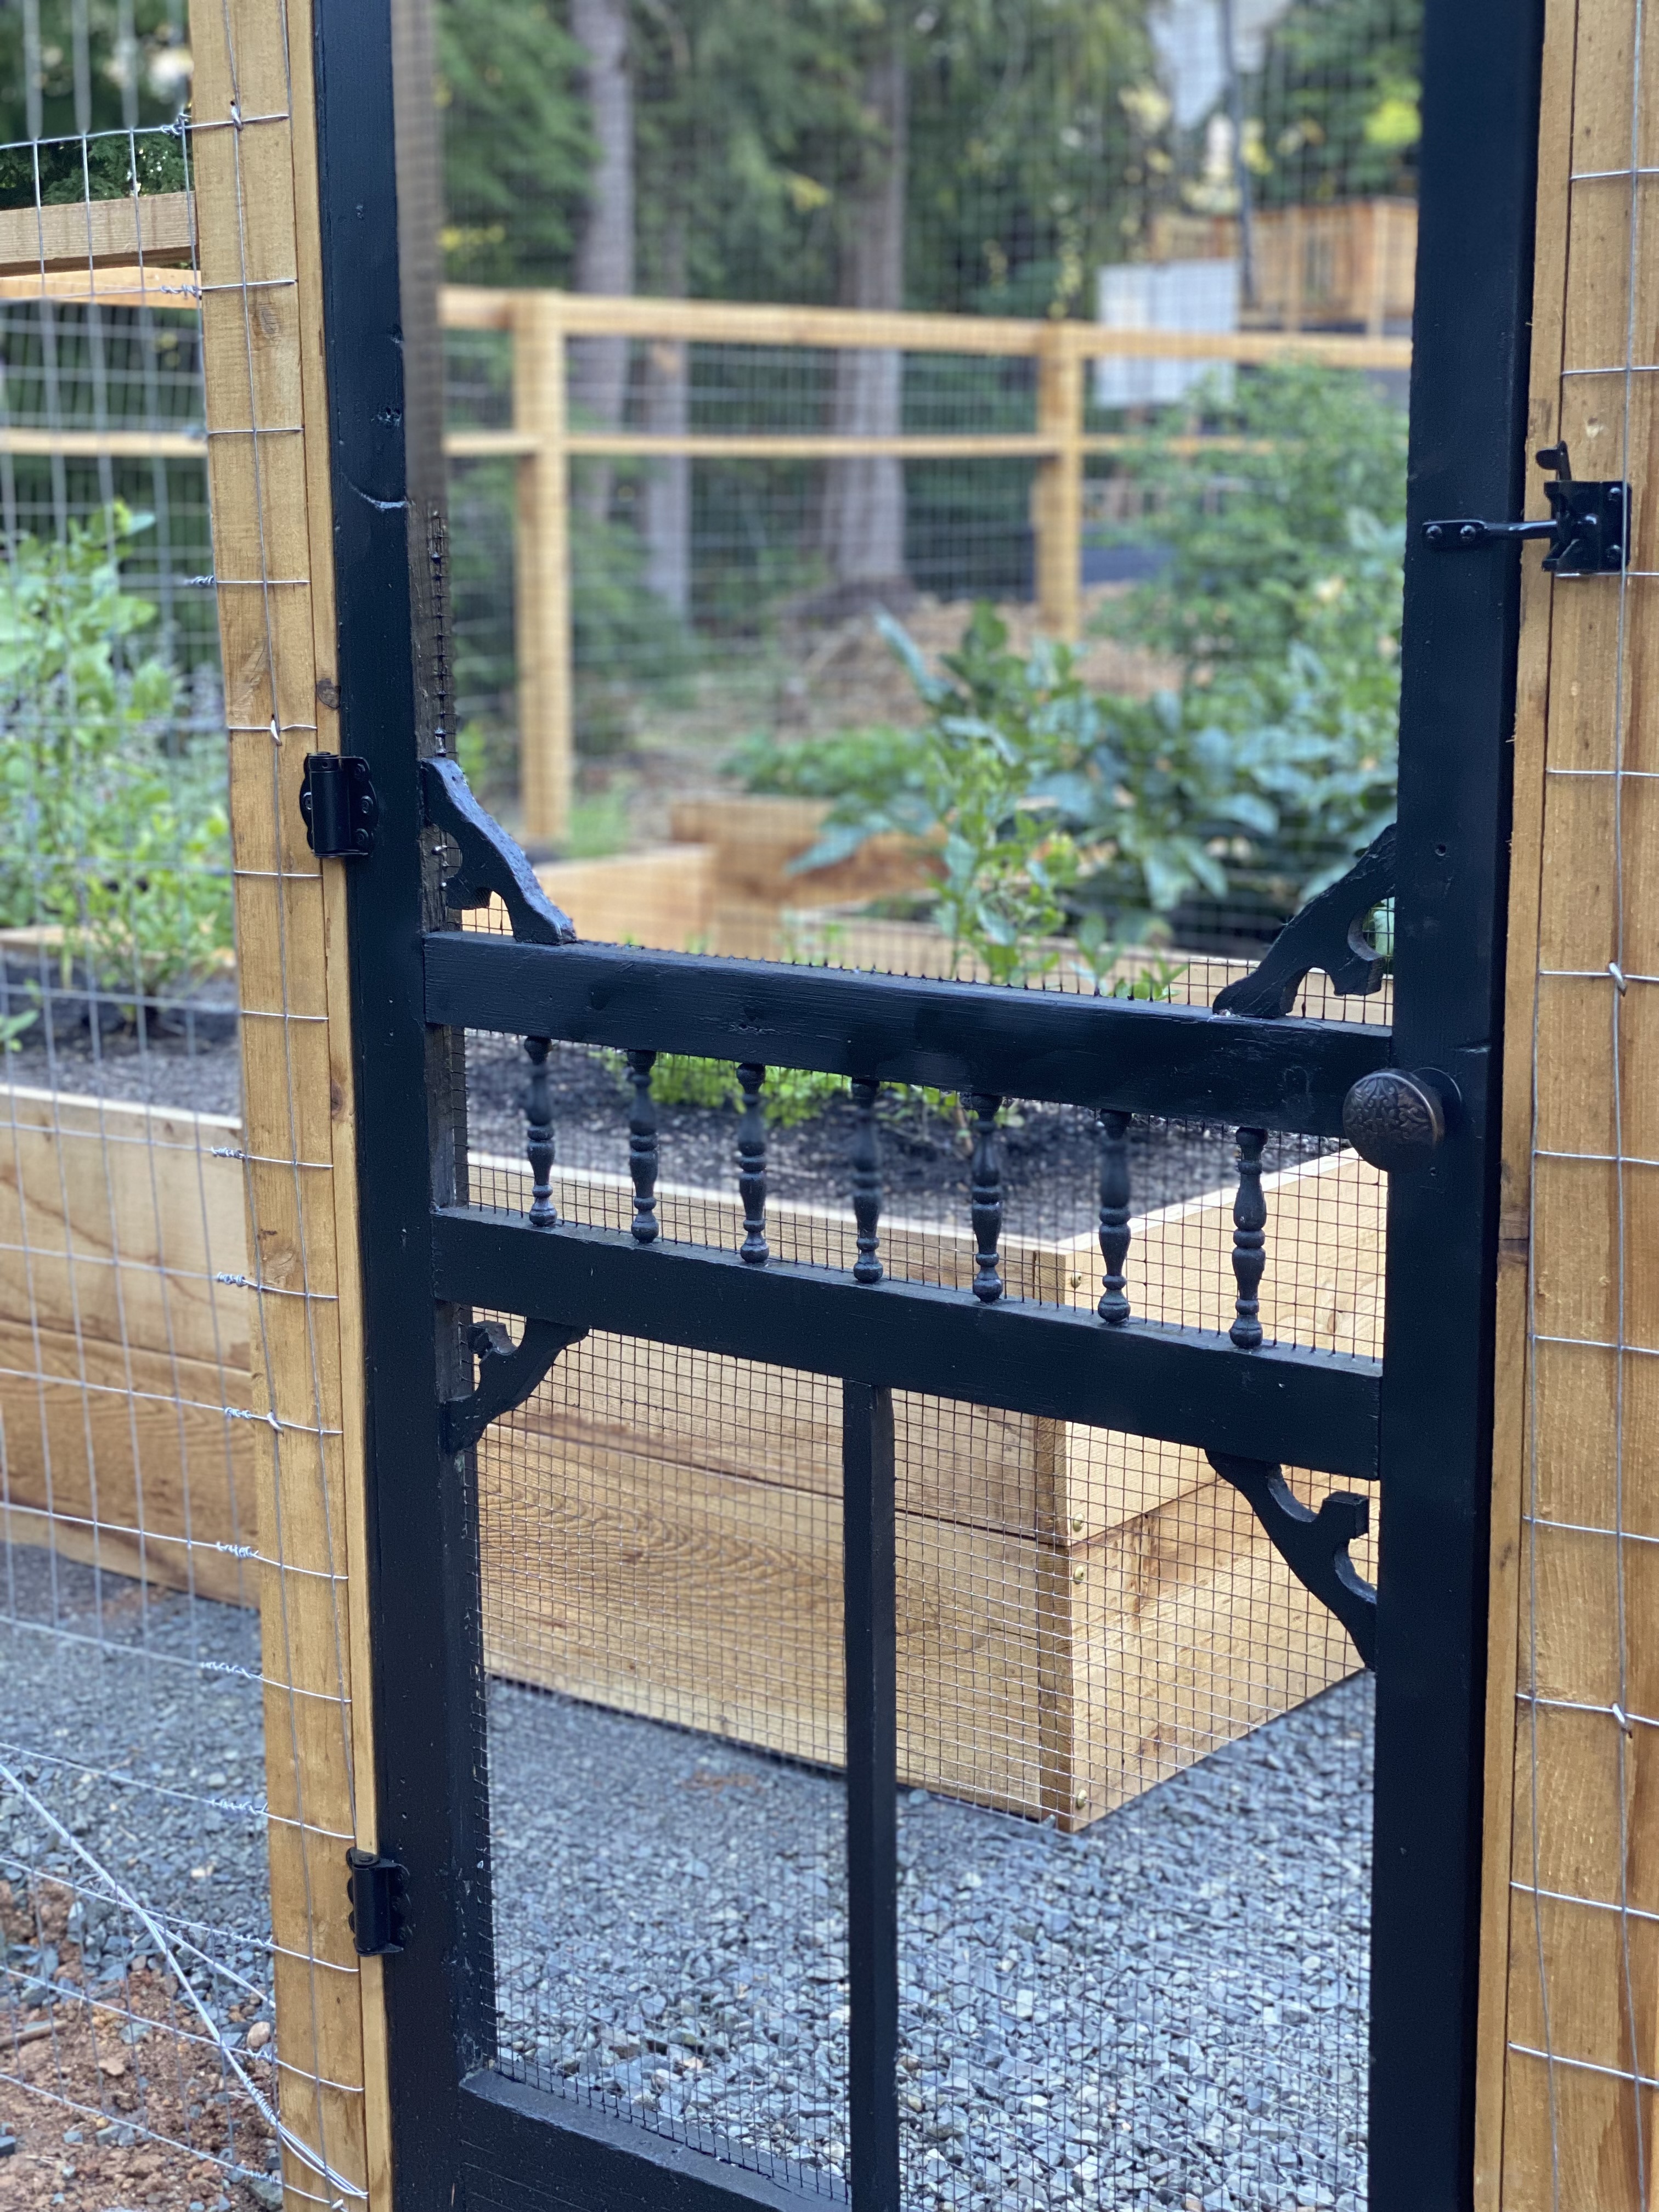
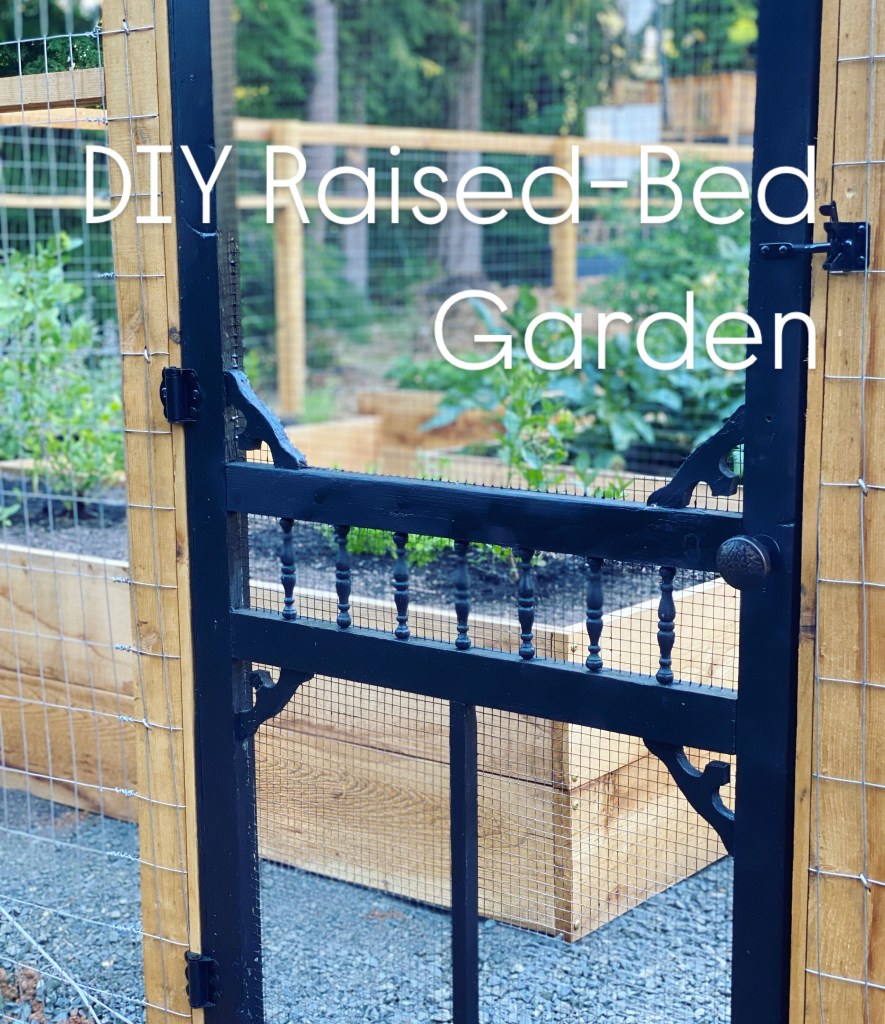
We put an antique screen door on the back entrance and plan to build an arbor entrance on the front. But that’s another project for another day!
XO,
—h
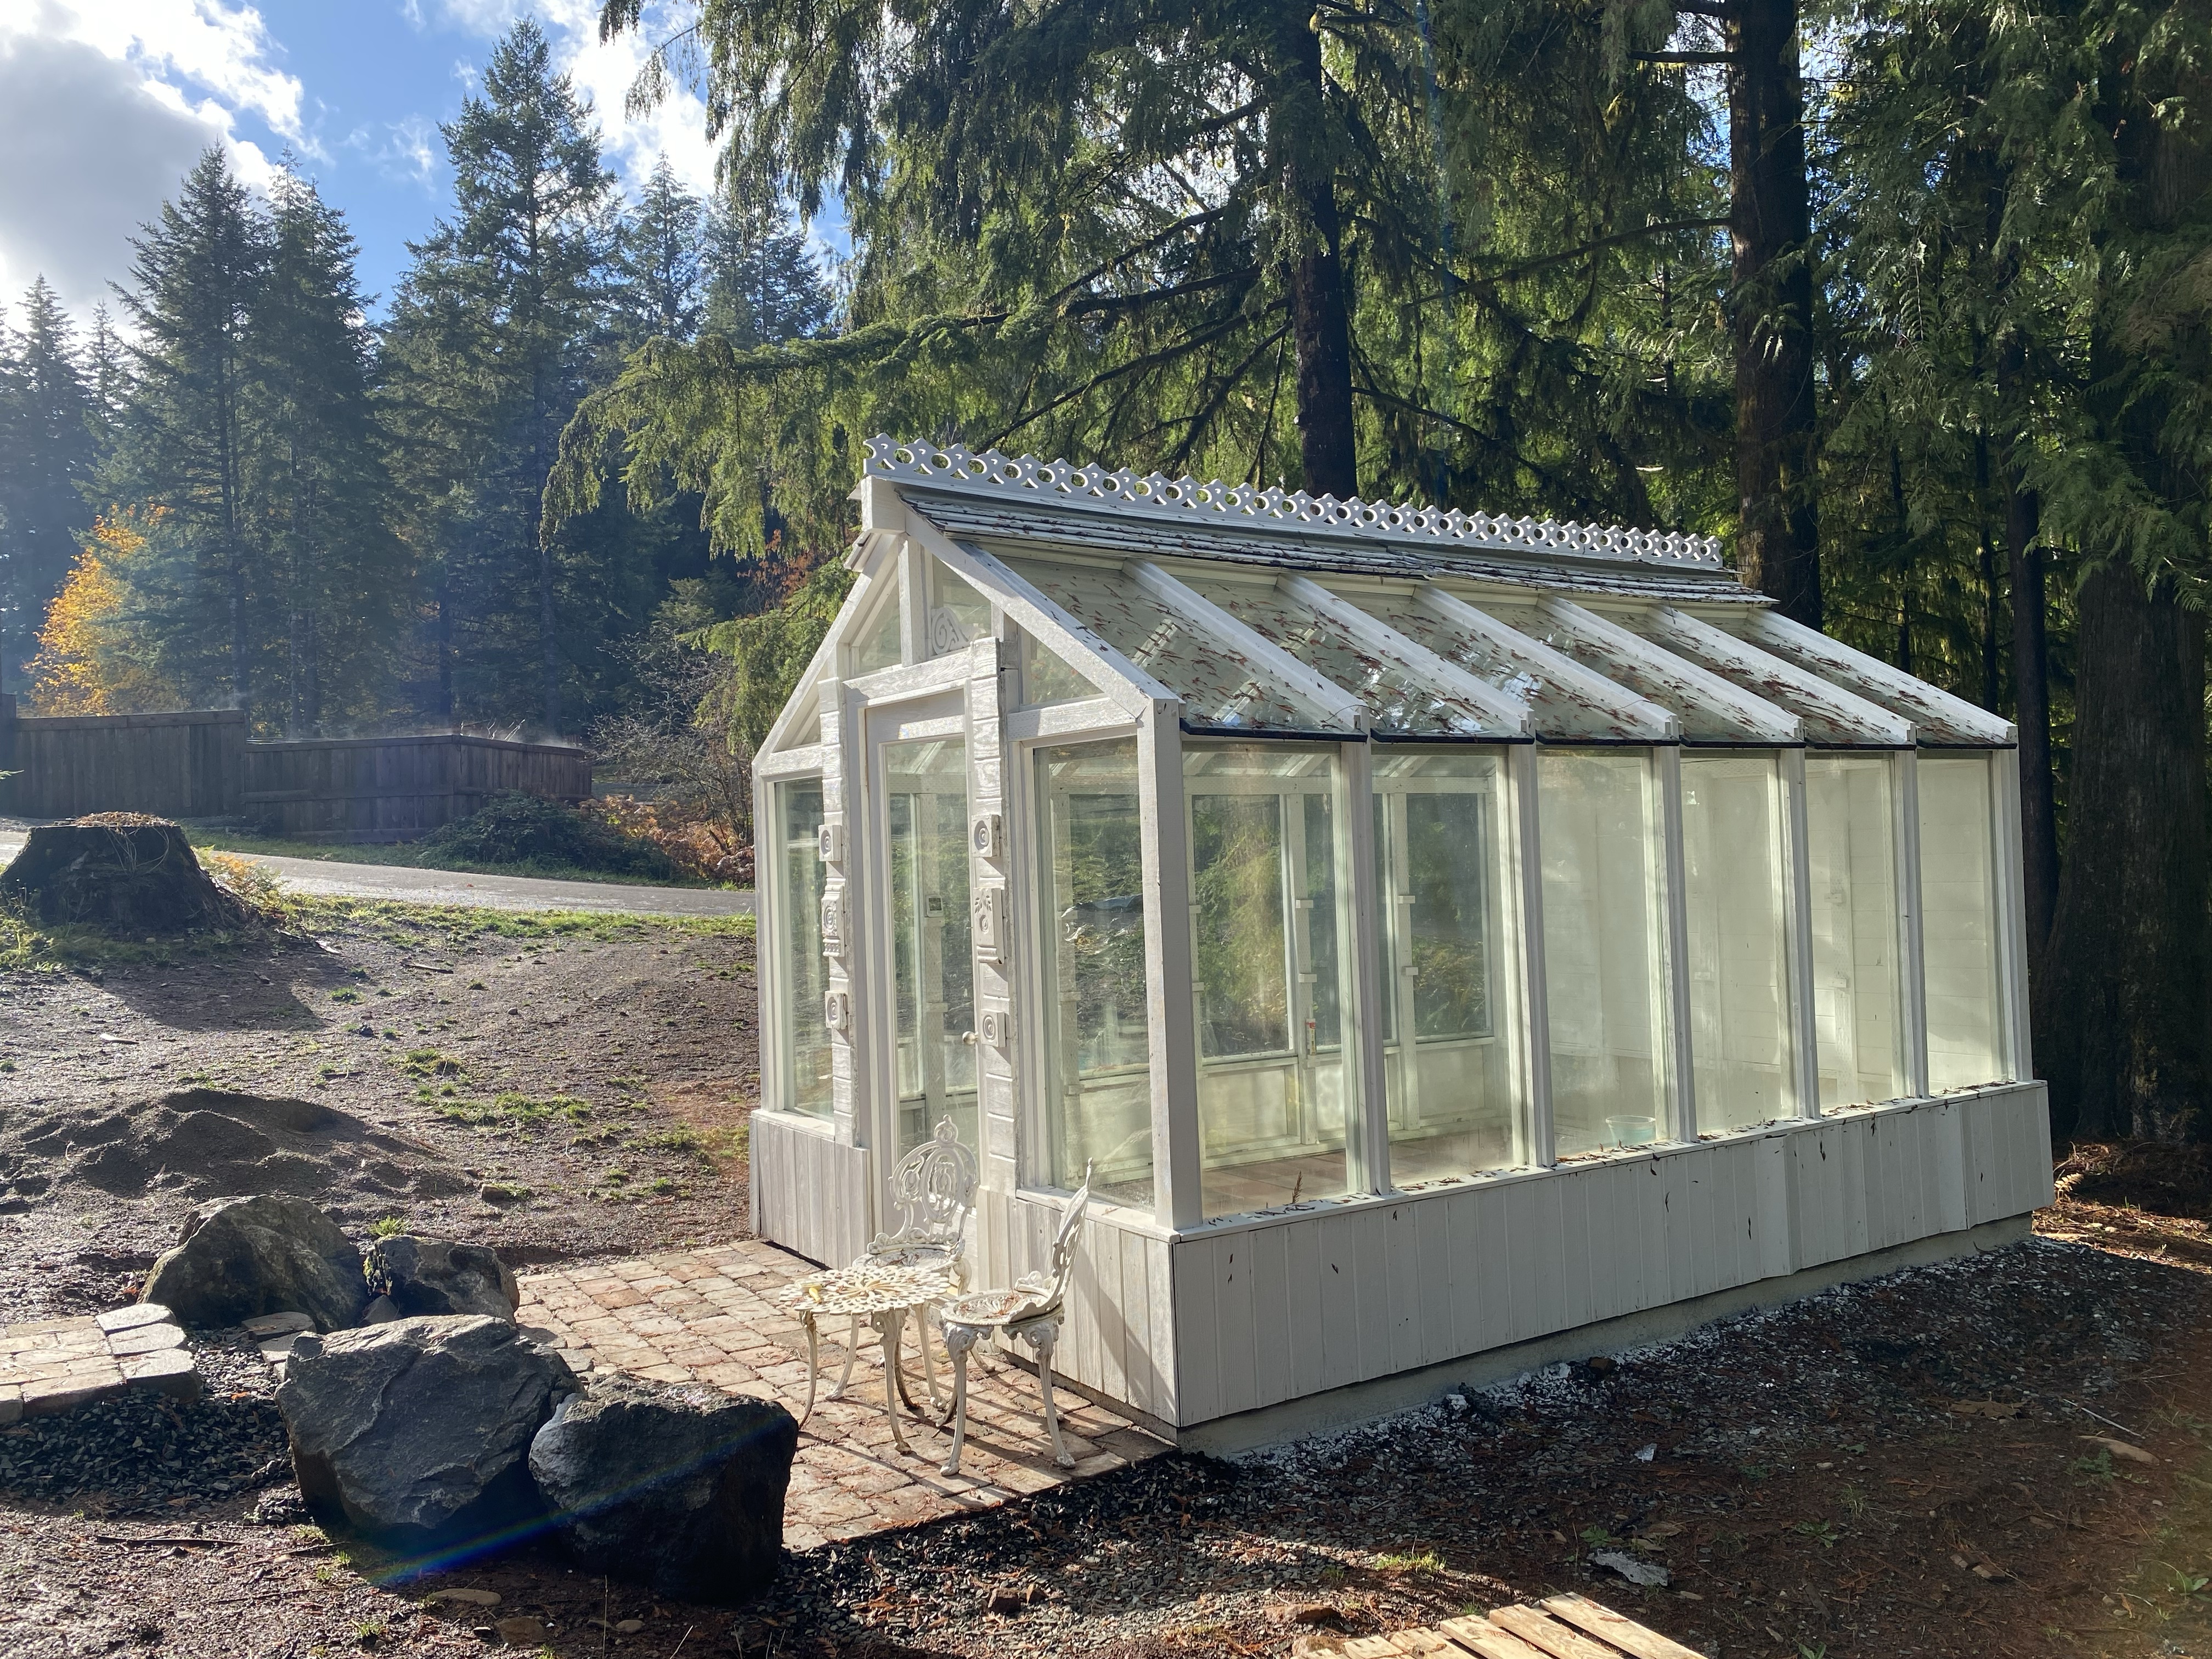
P.S. This all led to the building of our Not-Green Greenhouse, you can read about that here.
Can normalize how long home projects really take? If you follow influencers on social media like I do, they are finishing projects in mere days or at least that’s how it’s presented. I find myself feeling like I’m not doing enough, moving fast enough, not hustling enough, basically not enough. I know it isn’t true, I know it, but it can feel overwhelming at times. Projects just do not get done in mere days. Try months and months and months.
Last October Ryan was chatting with a friend and coworker, Steve, who mentioned he was planning to demo an old greenhouse on their property. Ryan, who really is the best husband a girl could ask for, immediately started asking more questions. It turns out the greenhouse itself was in great shape, but the foundation was starting to crumble and Steve and his wife didn’t need a greenhouse. If we were interested, we disassemble it and the greenhouse would be ours.
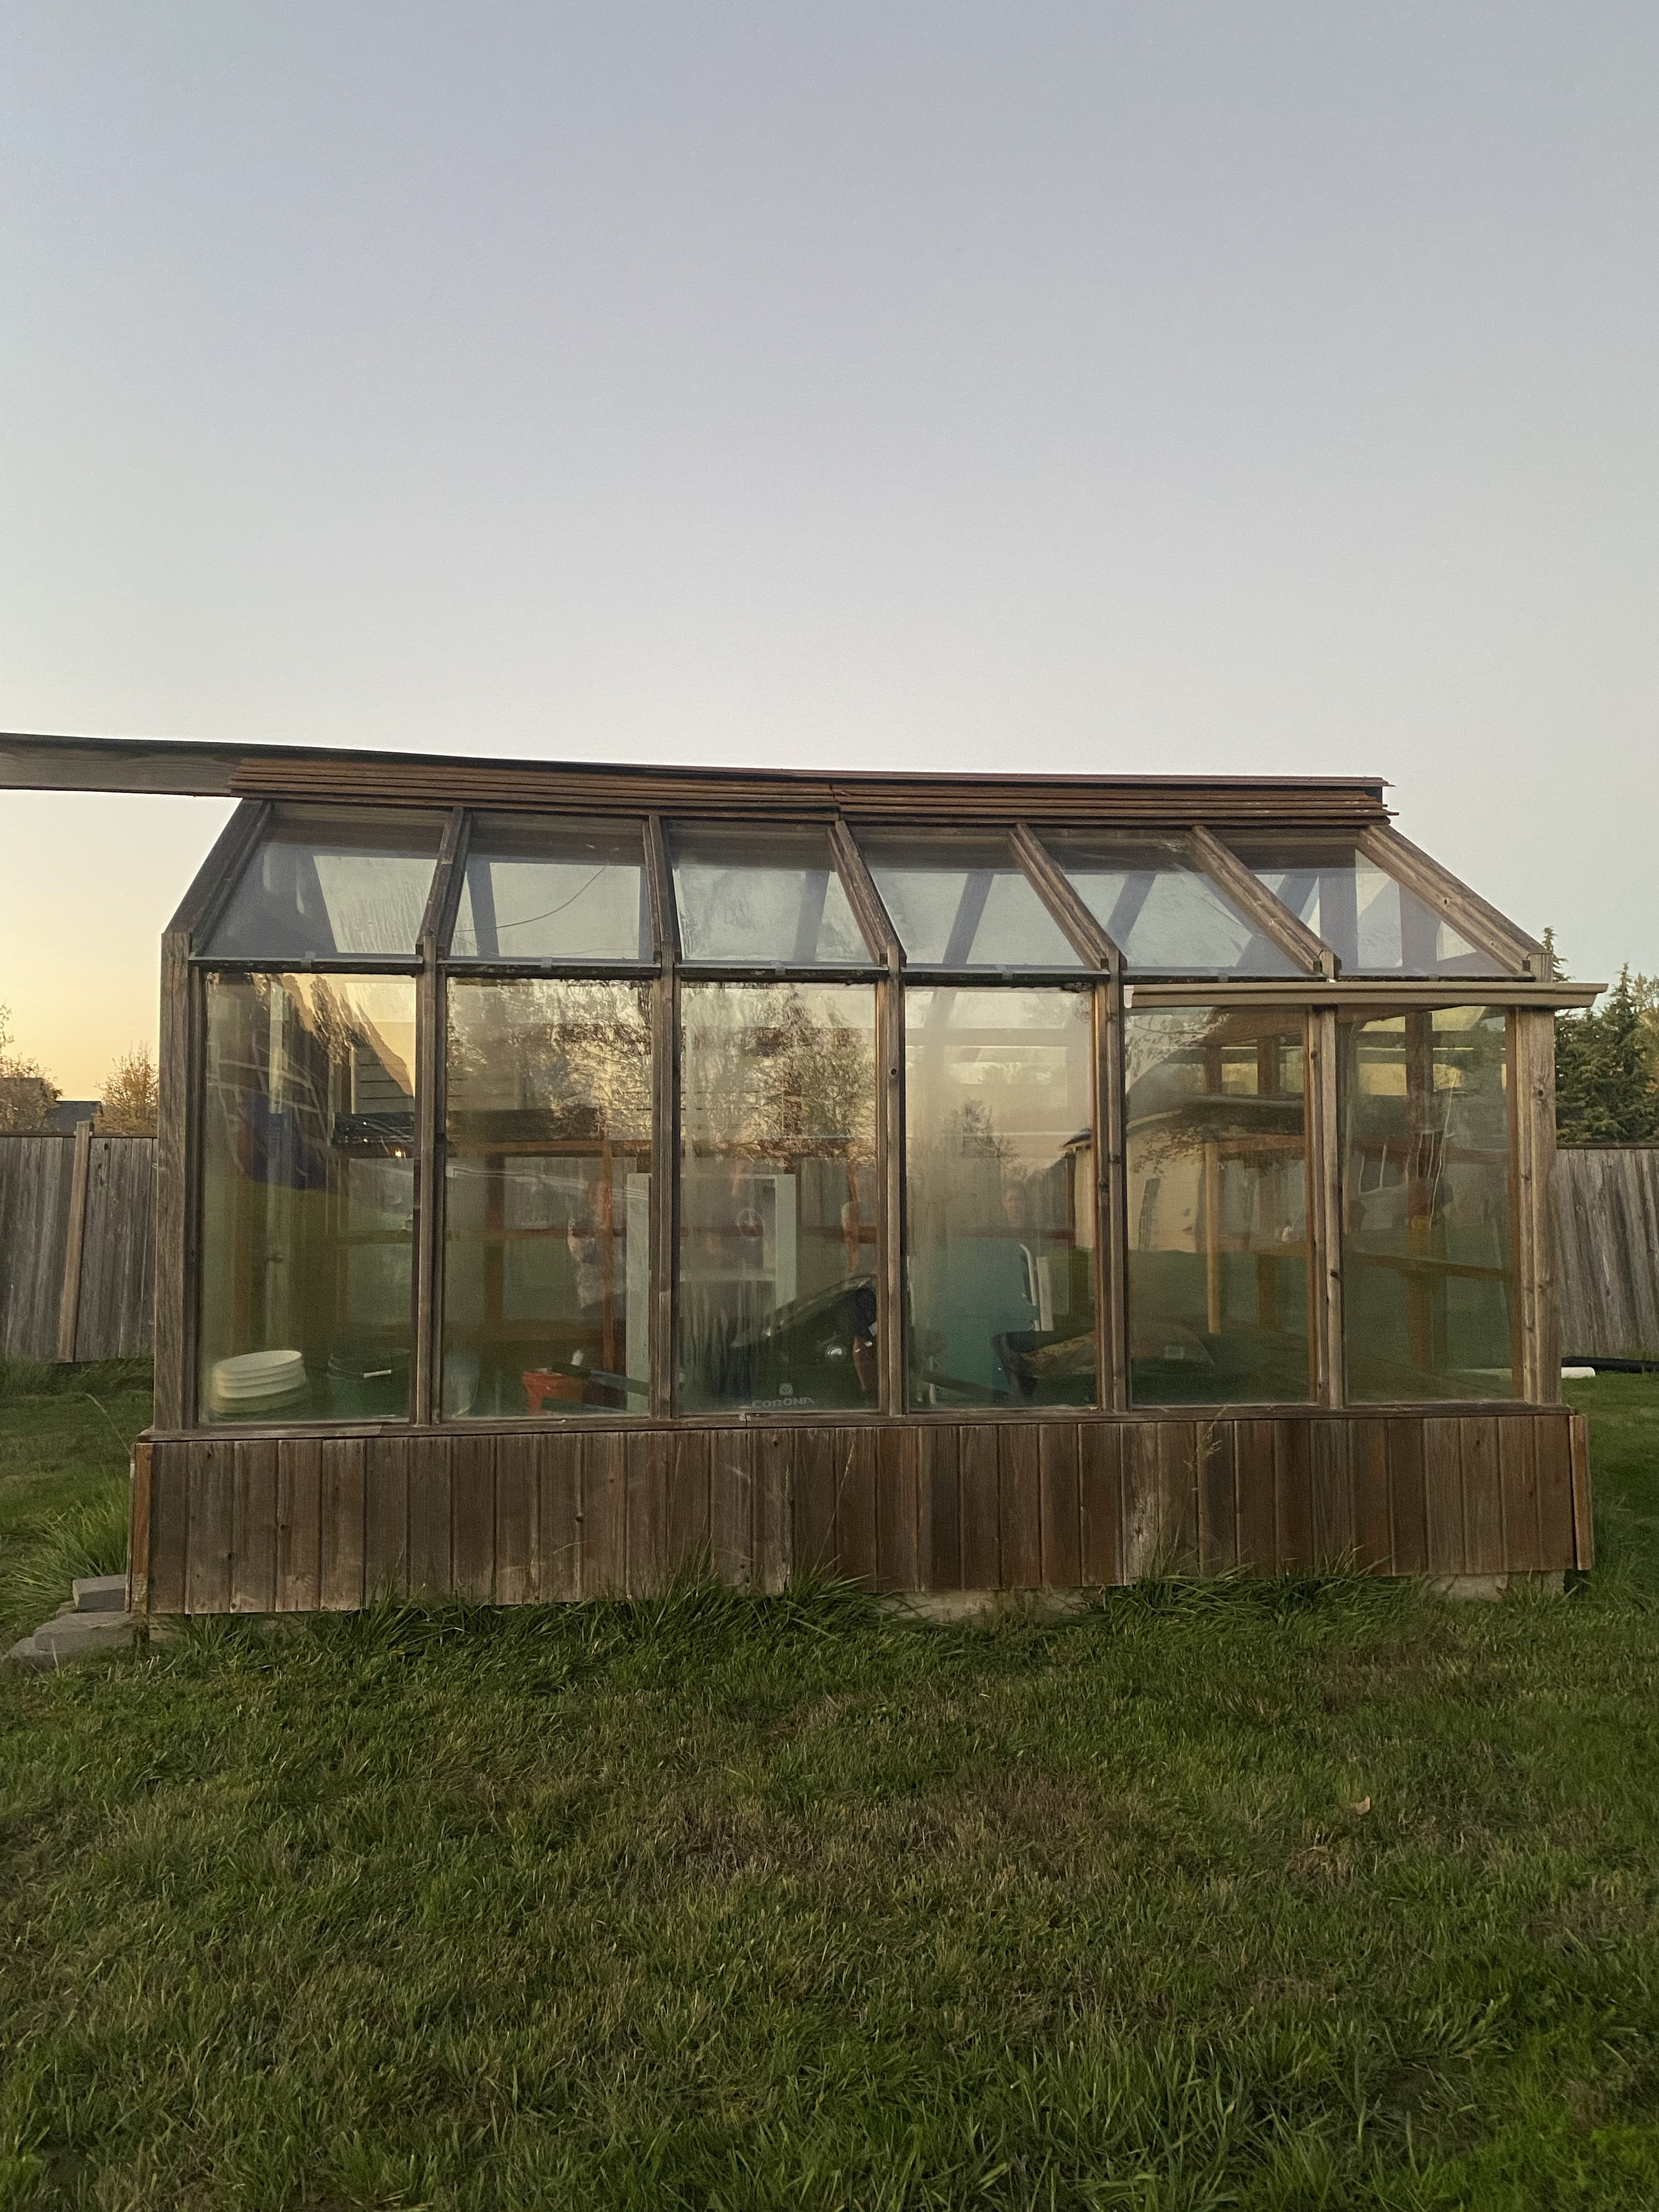
We decided to go look at the greenhouse to see if it would work for our purposes and be worth the work. Ryan was driving and I was gazing out the passenger side of the car, I saw a greenhouse in the distance. I remember thinking, “Wow, that is such a cool greenhouse, too bad that isn’t the one we are going to see. I would love to have a greenhouse like that.” Then Ryan pulled into a driveway. The very driveway with the very cool greenhouse.
Yes, the foundation was crumbling. Yes, there was some siding falling off. Yes, there might be a rotting section or two. But overall the greenhouse was solid with real glass panes! It was going to be some work to disassemble, transport 30 miles, and reassemble, but this was the kind of greenhouse that a girl dreams about. Can you see the potential?
So here we go!
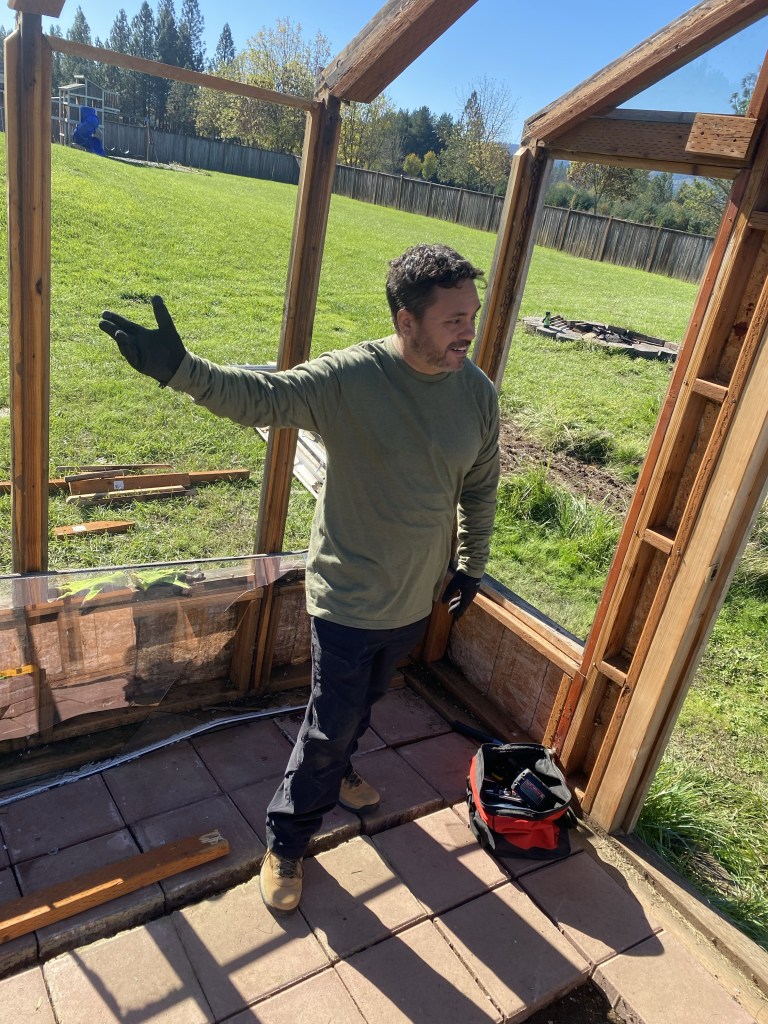
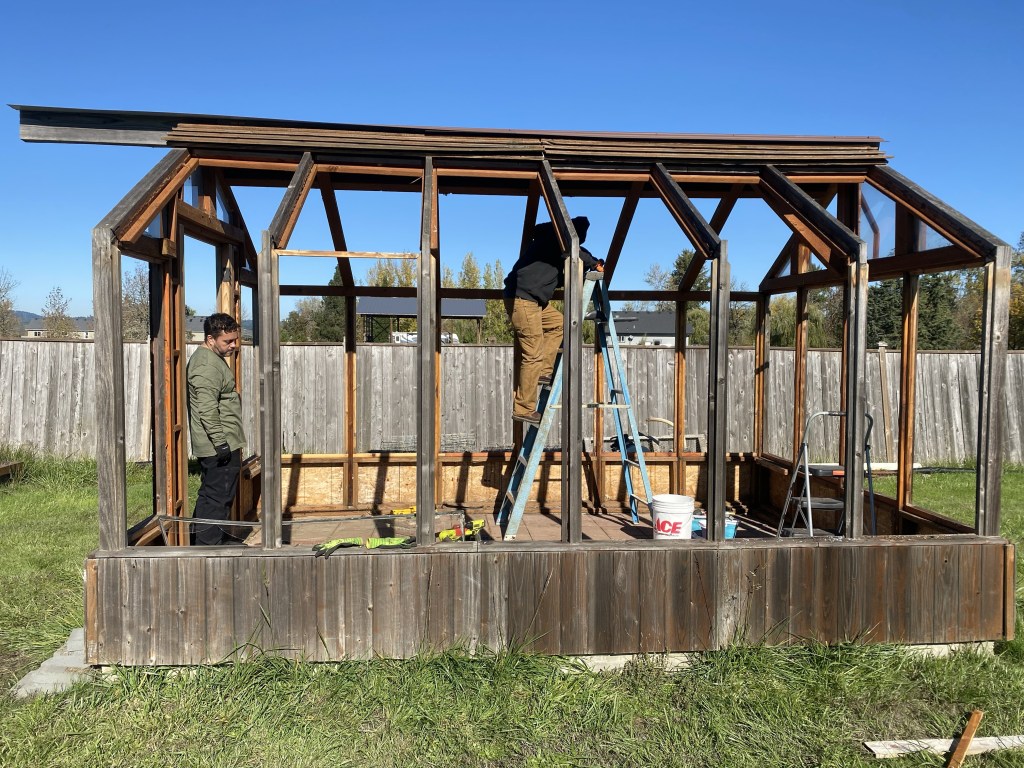
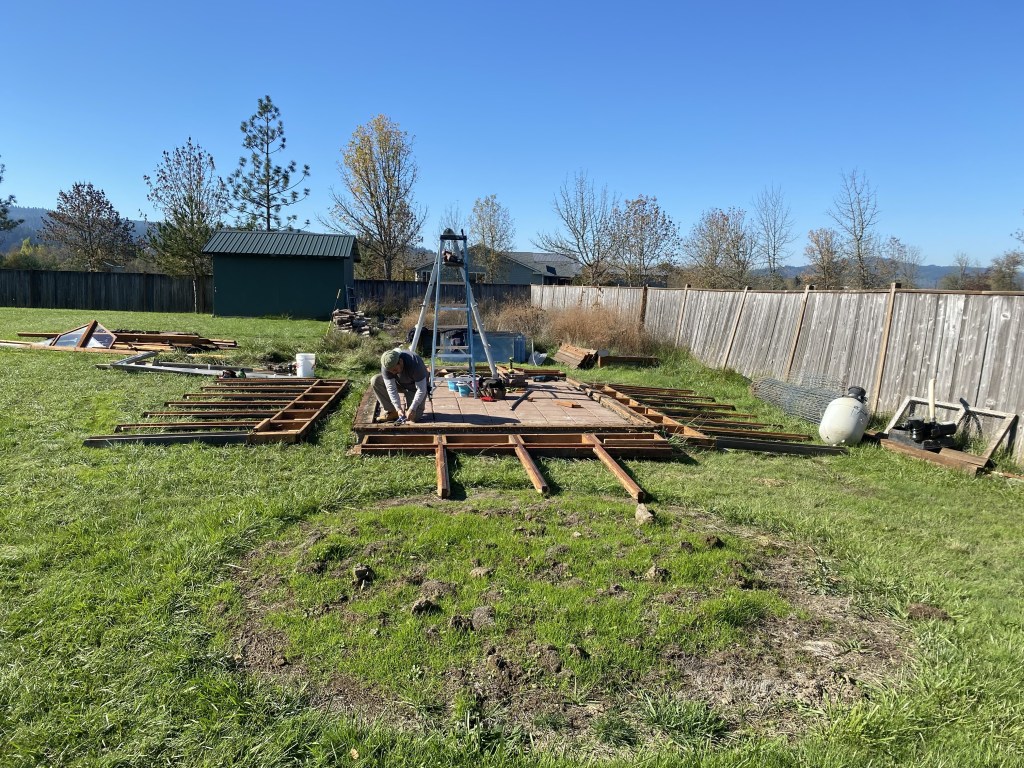
OCTOBER 2023: Ryan, my brother, and a few friends spent several weekends carefully disassembling the greenhouse and transporting it to our house in pieces. The glass panes were particularly tricky to get out and not break. A few broke.
NOVEMBER 2023: no progress
DECEMBER 2023: no progress
JANUARY 2024: Discussions began on where we were going to put the greenhouse. If you aren’t familiar with our property, while lovely, it is not flat. Anywhere. It is a series of slopes that don’t always make sense. And, for a greenhouse that wants sunshine, we have an inordinate amount of shade.
FEBRUARY 2024: Discussions continue. I reached out to an excavation company to see what it might take to level the two areas under consideration.
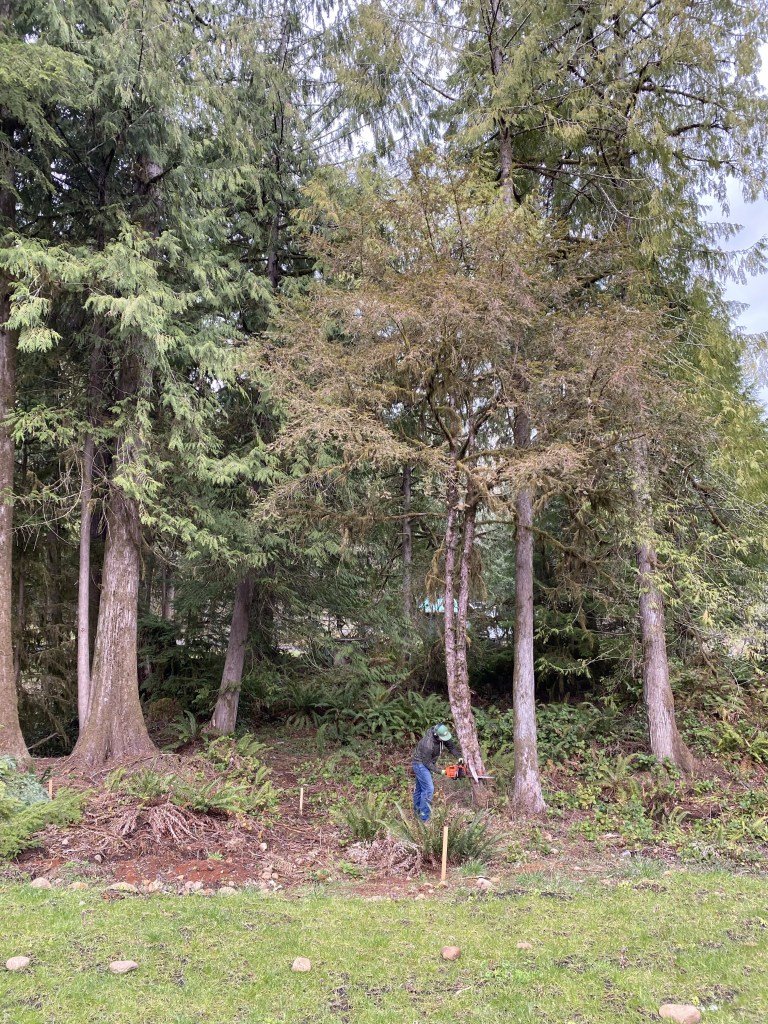
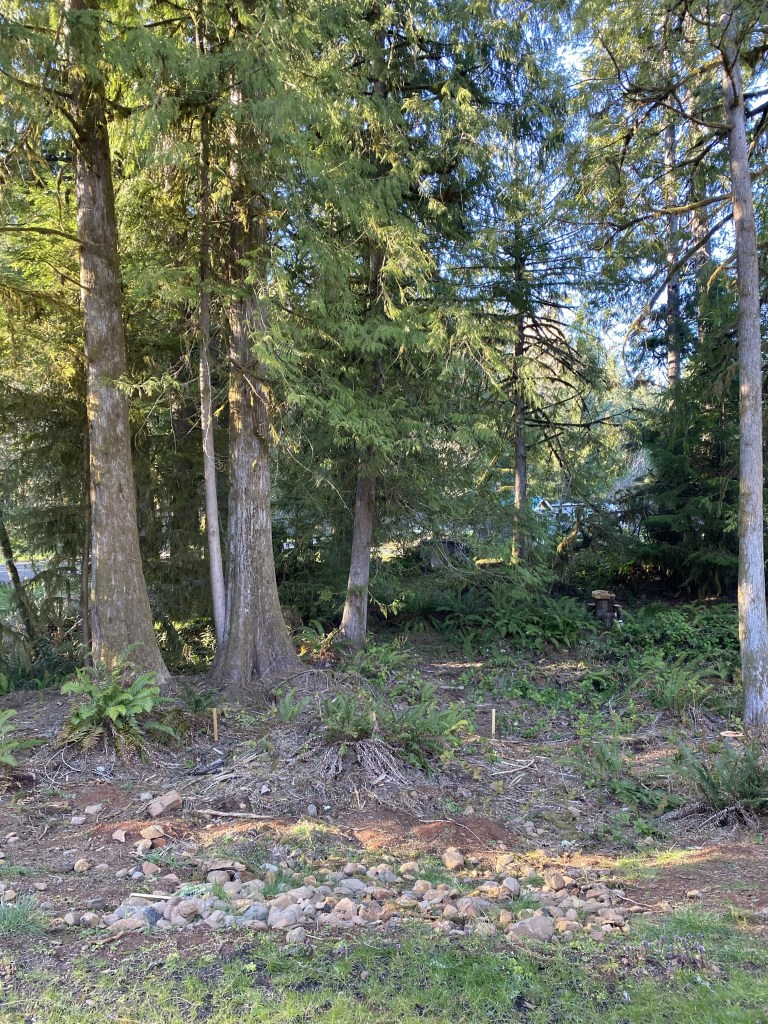
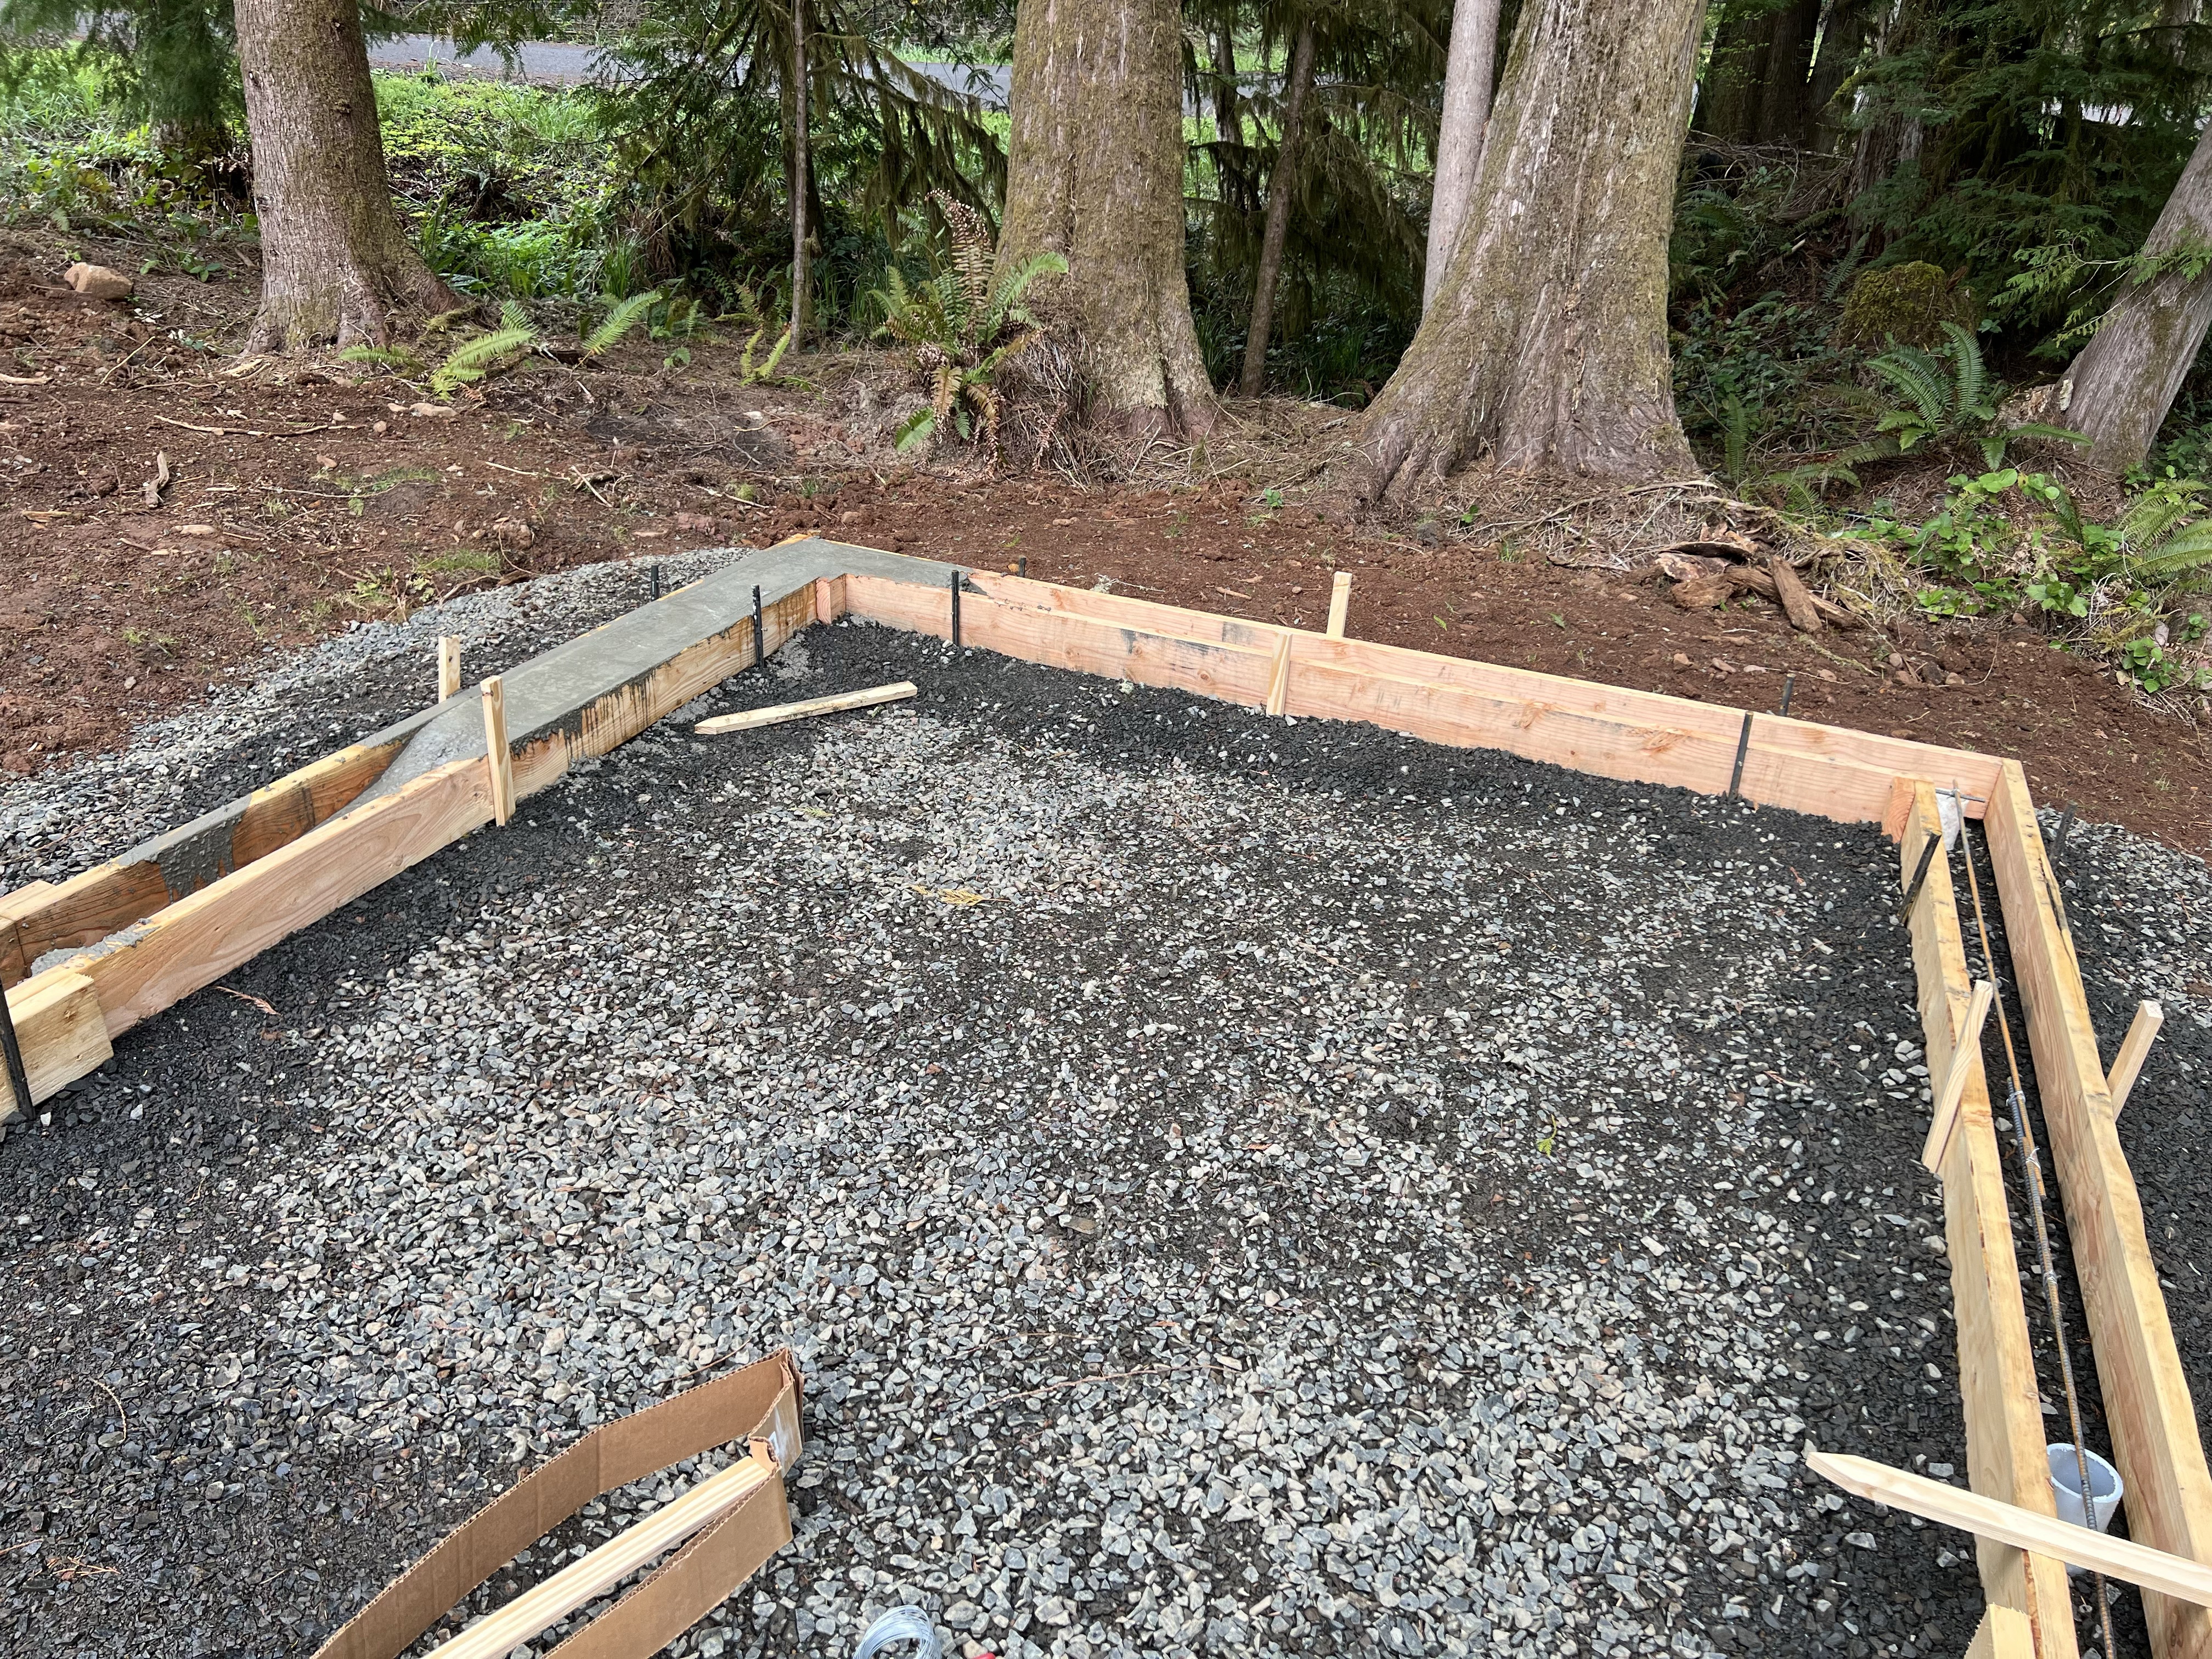
MARCH 2024: Greenhouse site chosen based on the amount of work it would take and amount of sunshine it would receive. Tree branch trimming commences. And don’t kill me, a few smaller trees needed to be removed to give the greenhouse as much sunshine as possible. Site excavation is completed and gravel pad created.
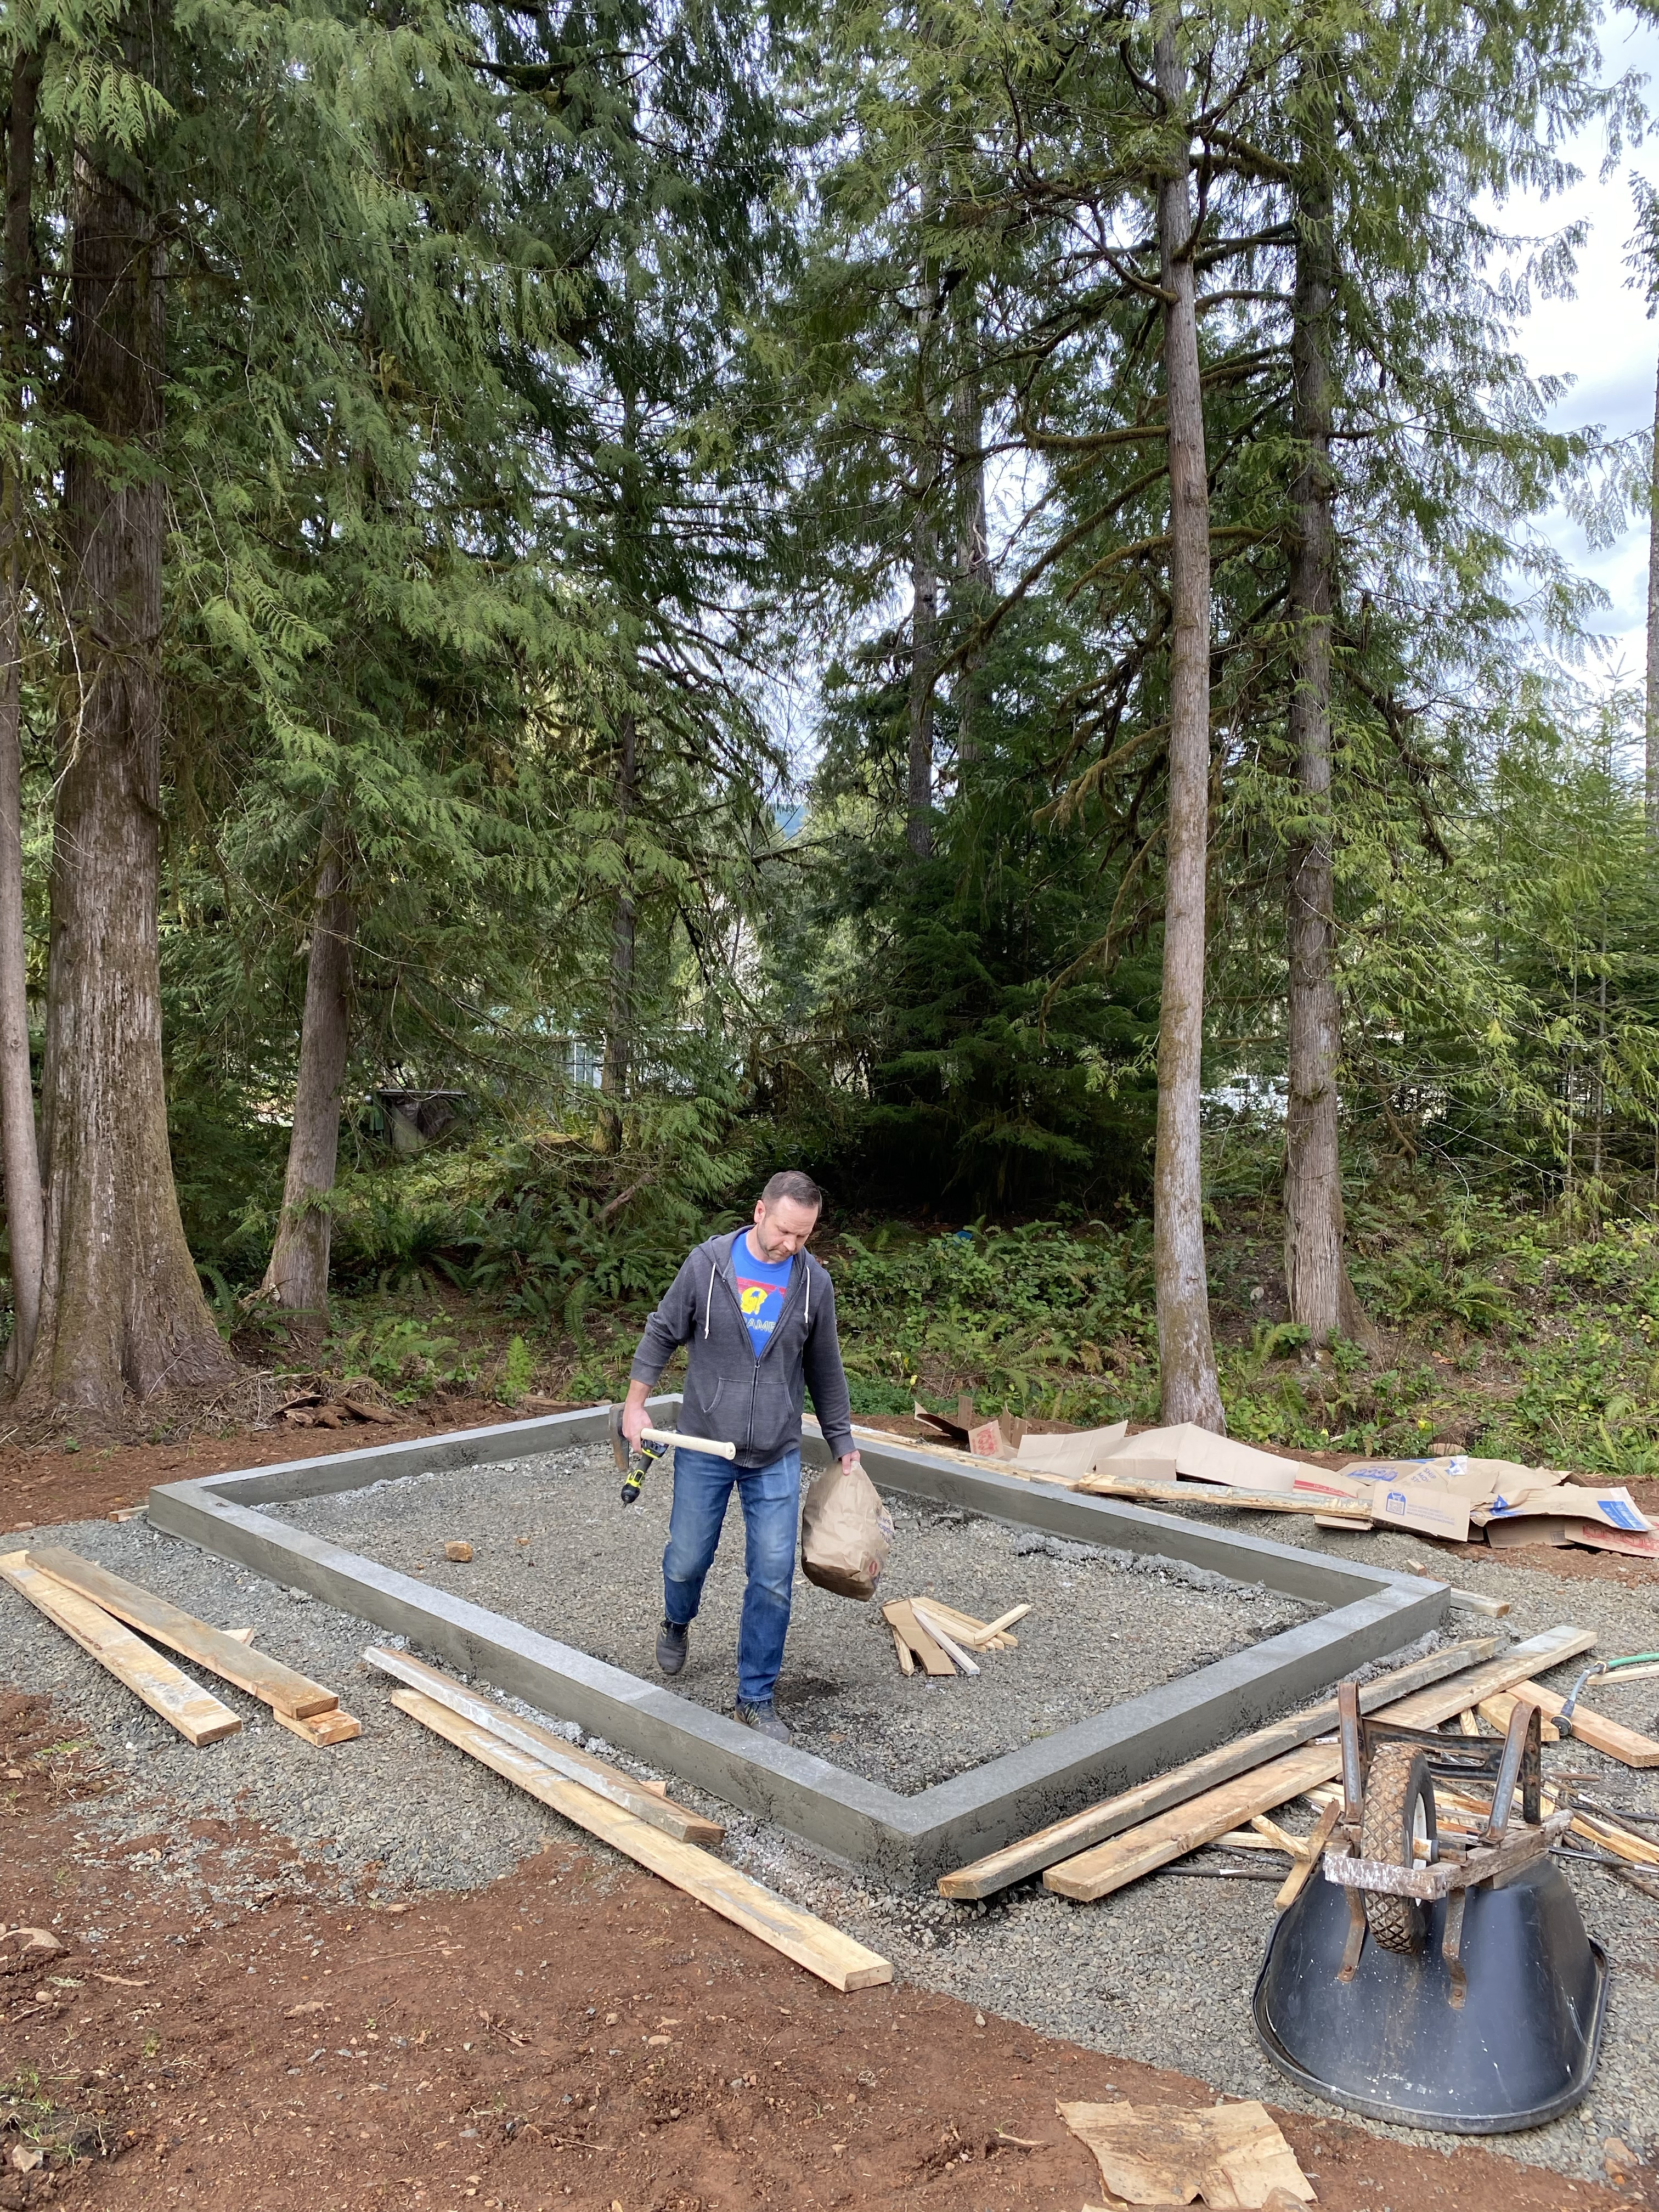
APRIL 2024: We built forms for the foundation. Poured the foundation. In a hilarious calculation error, we thought 3 bags of concrete would be enough for the foundation. That doesn’t even make logical sense, but we started the project confidently thinking we had enough. You can see below how much the three bags accomplished, one corner. My engineer brother, Bryan, especially loves this part of the story. We had to do a very quick run to the local hardware store to get like 20+ more bags. But those three bags were gonna do it. Ha!
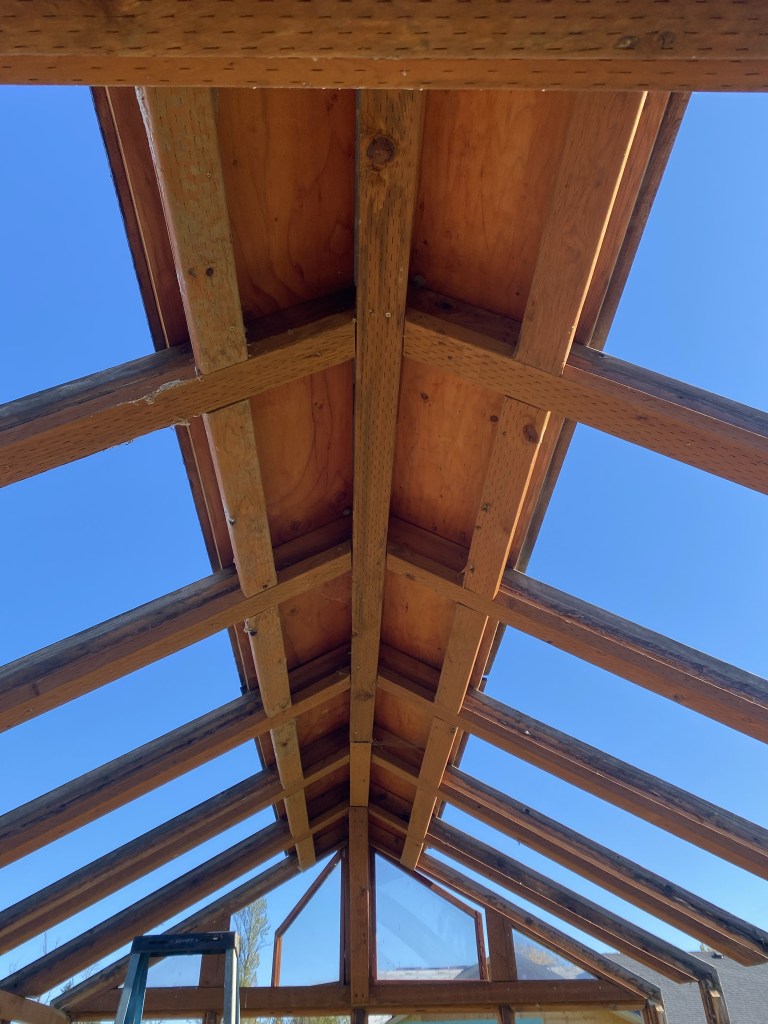
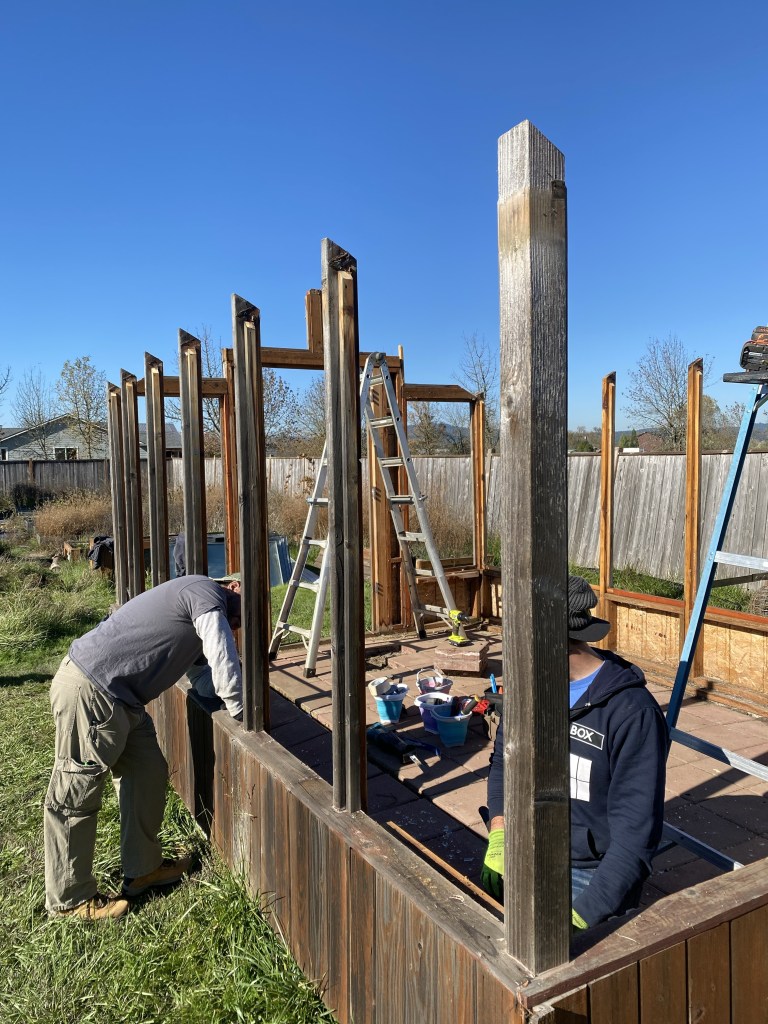
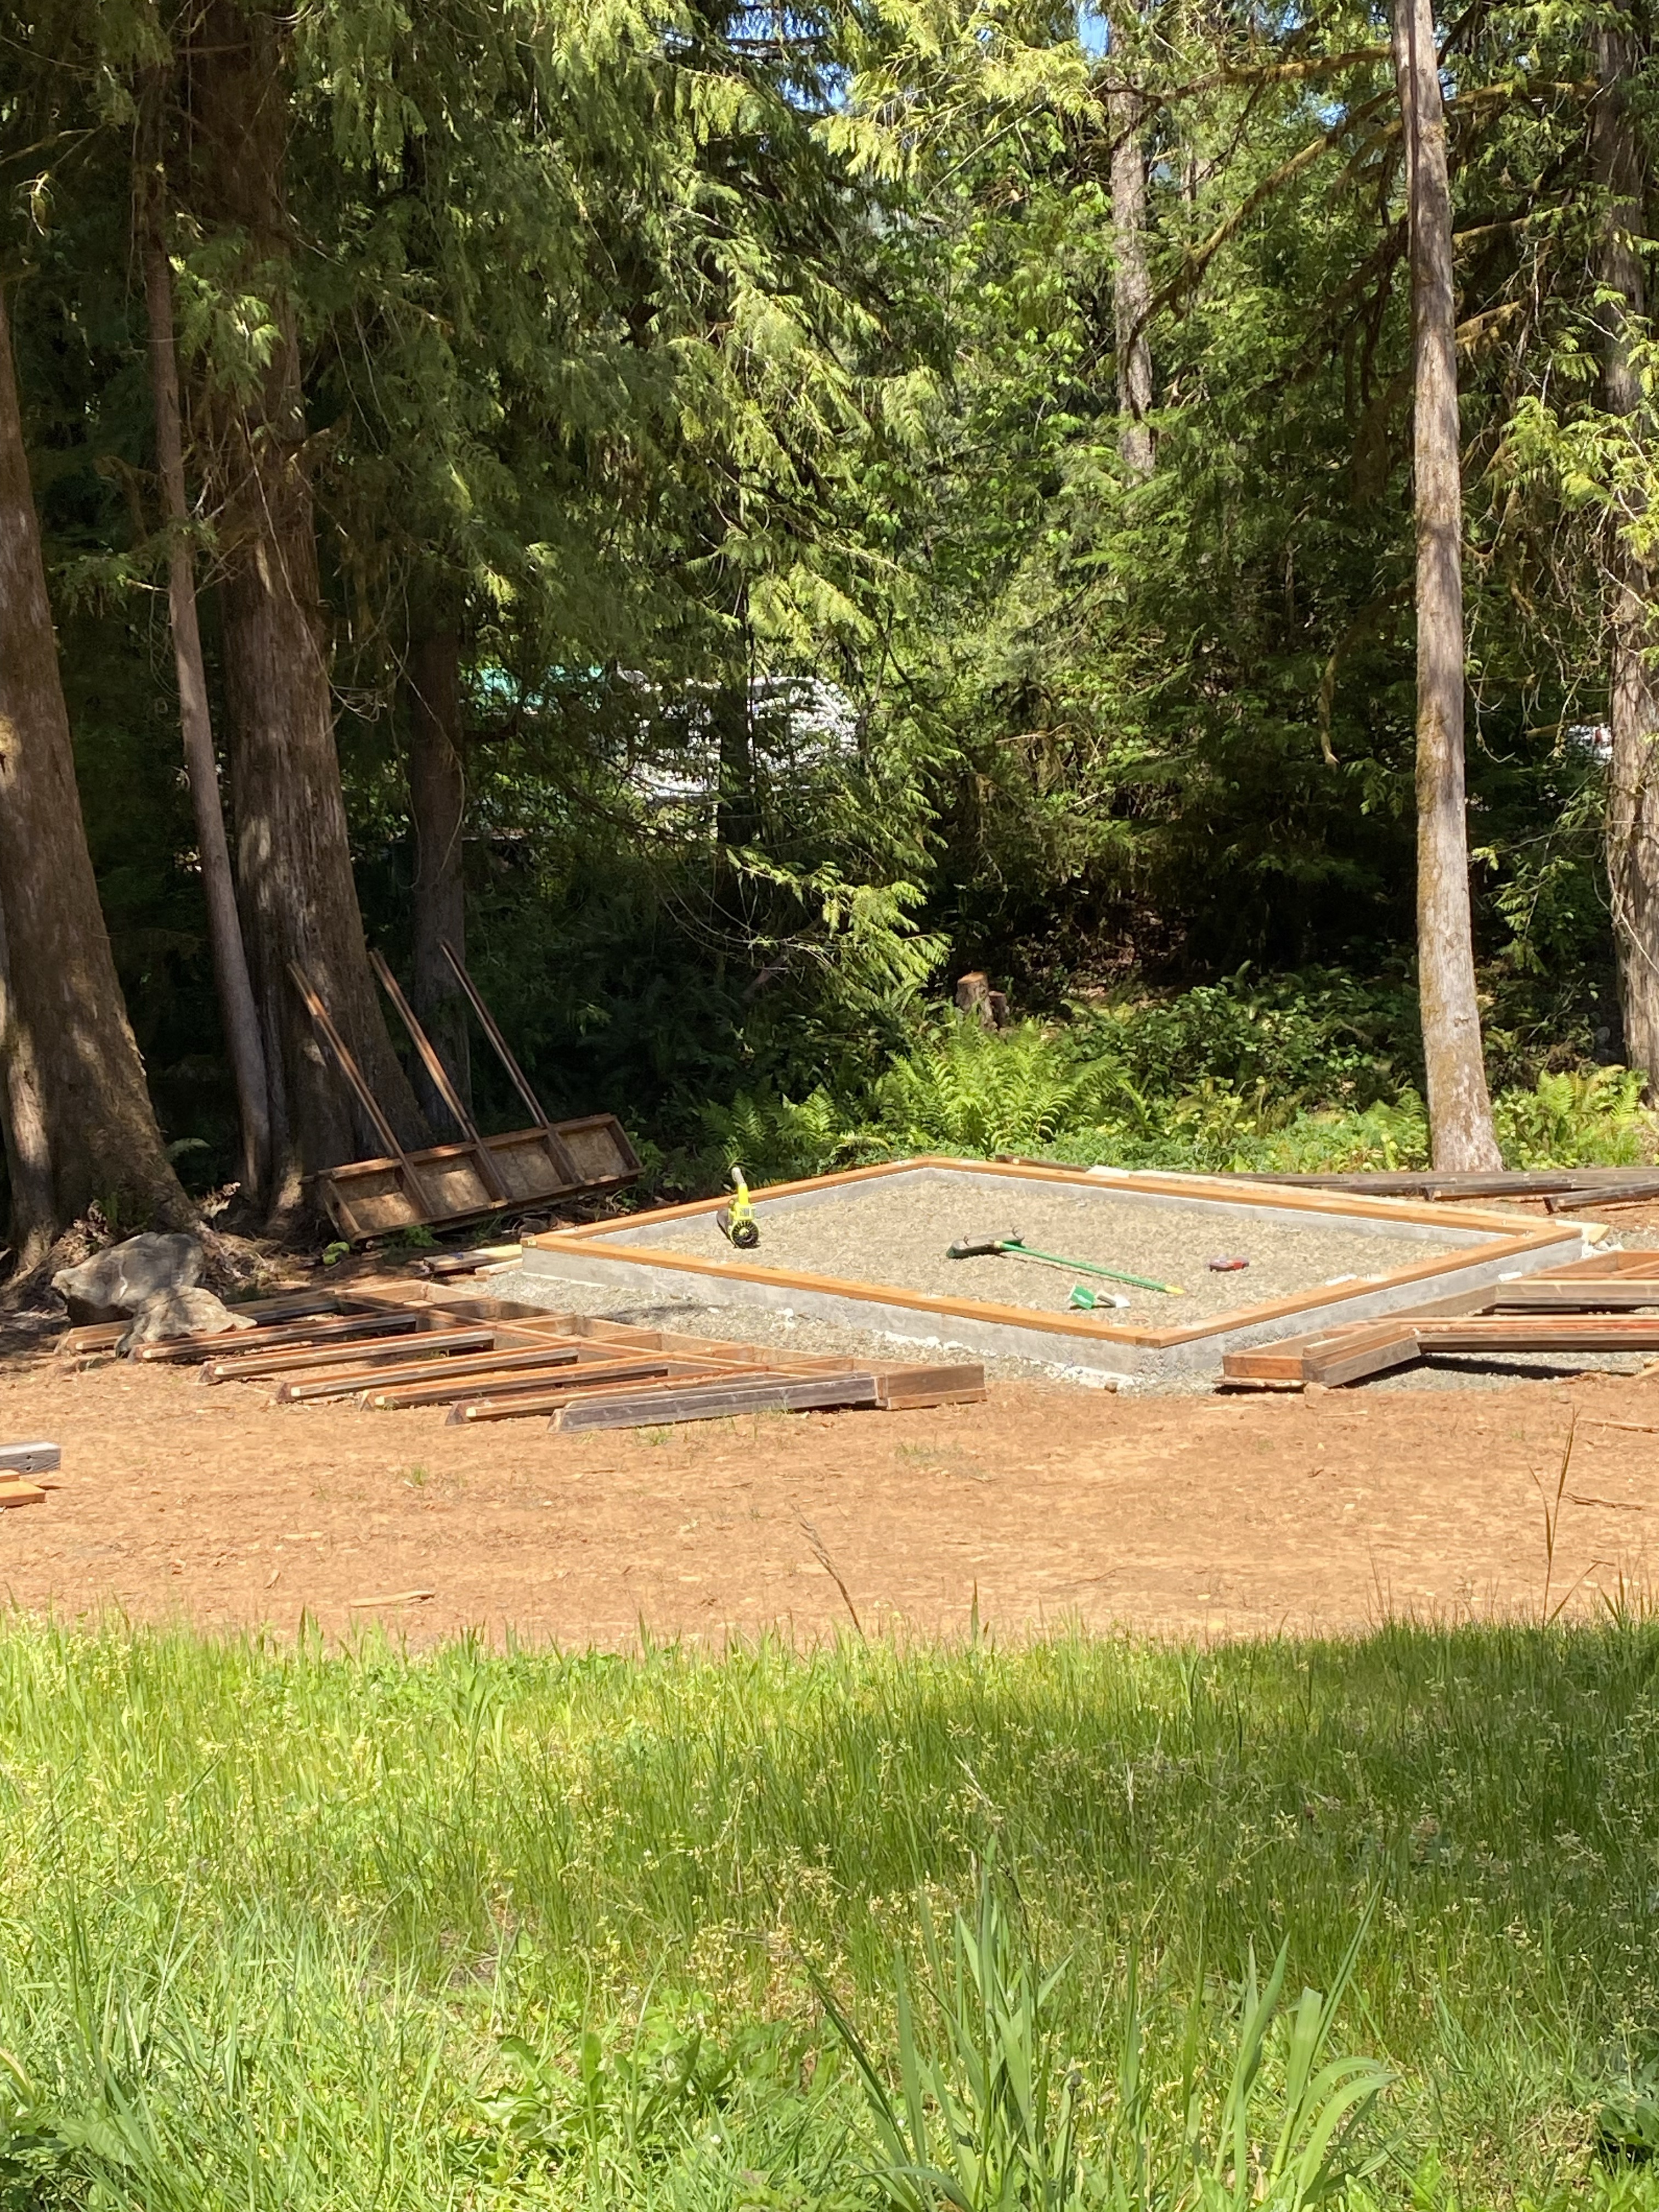
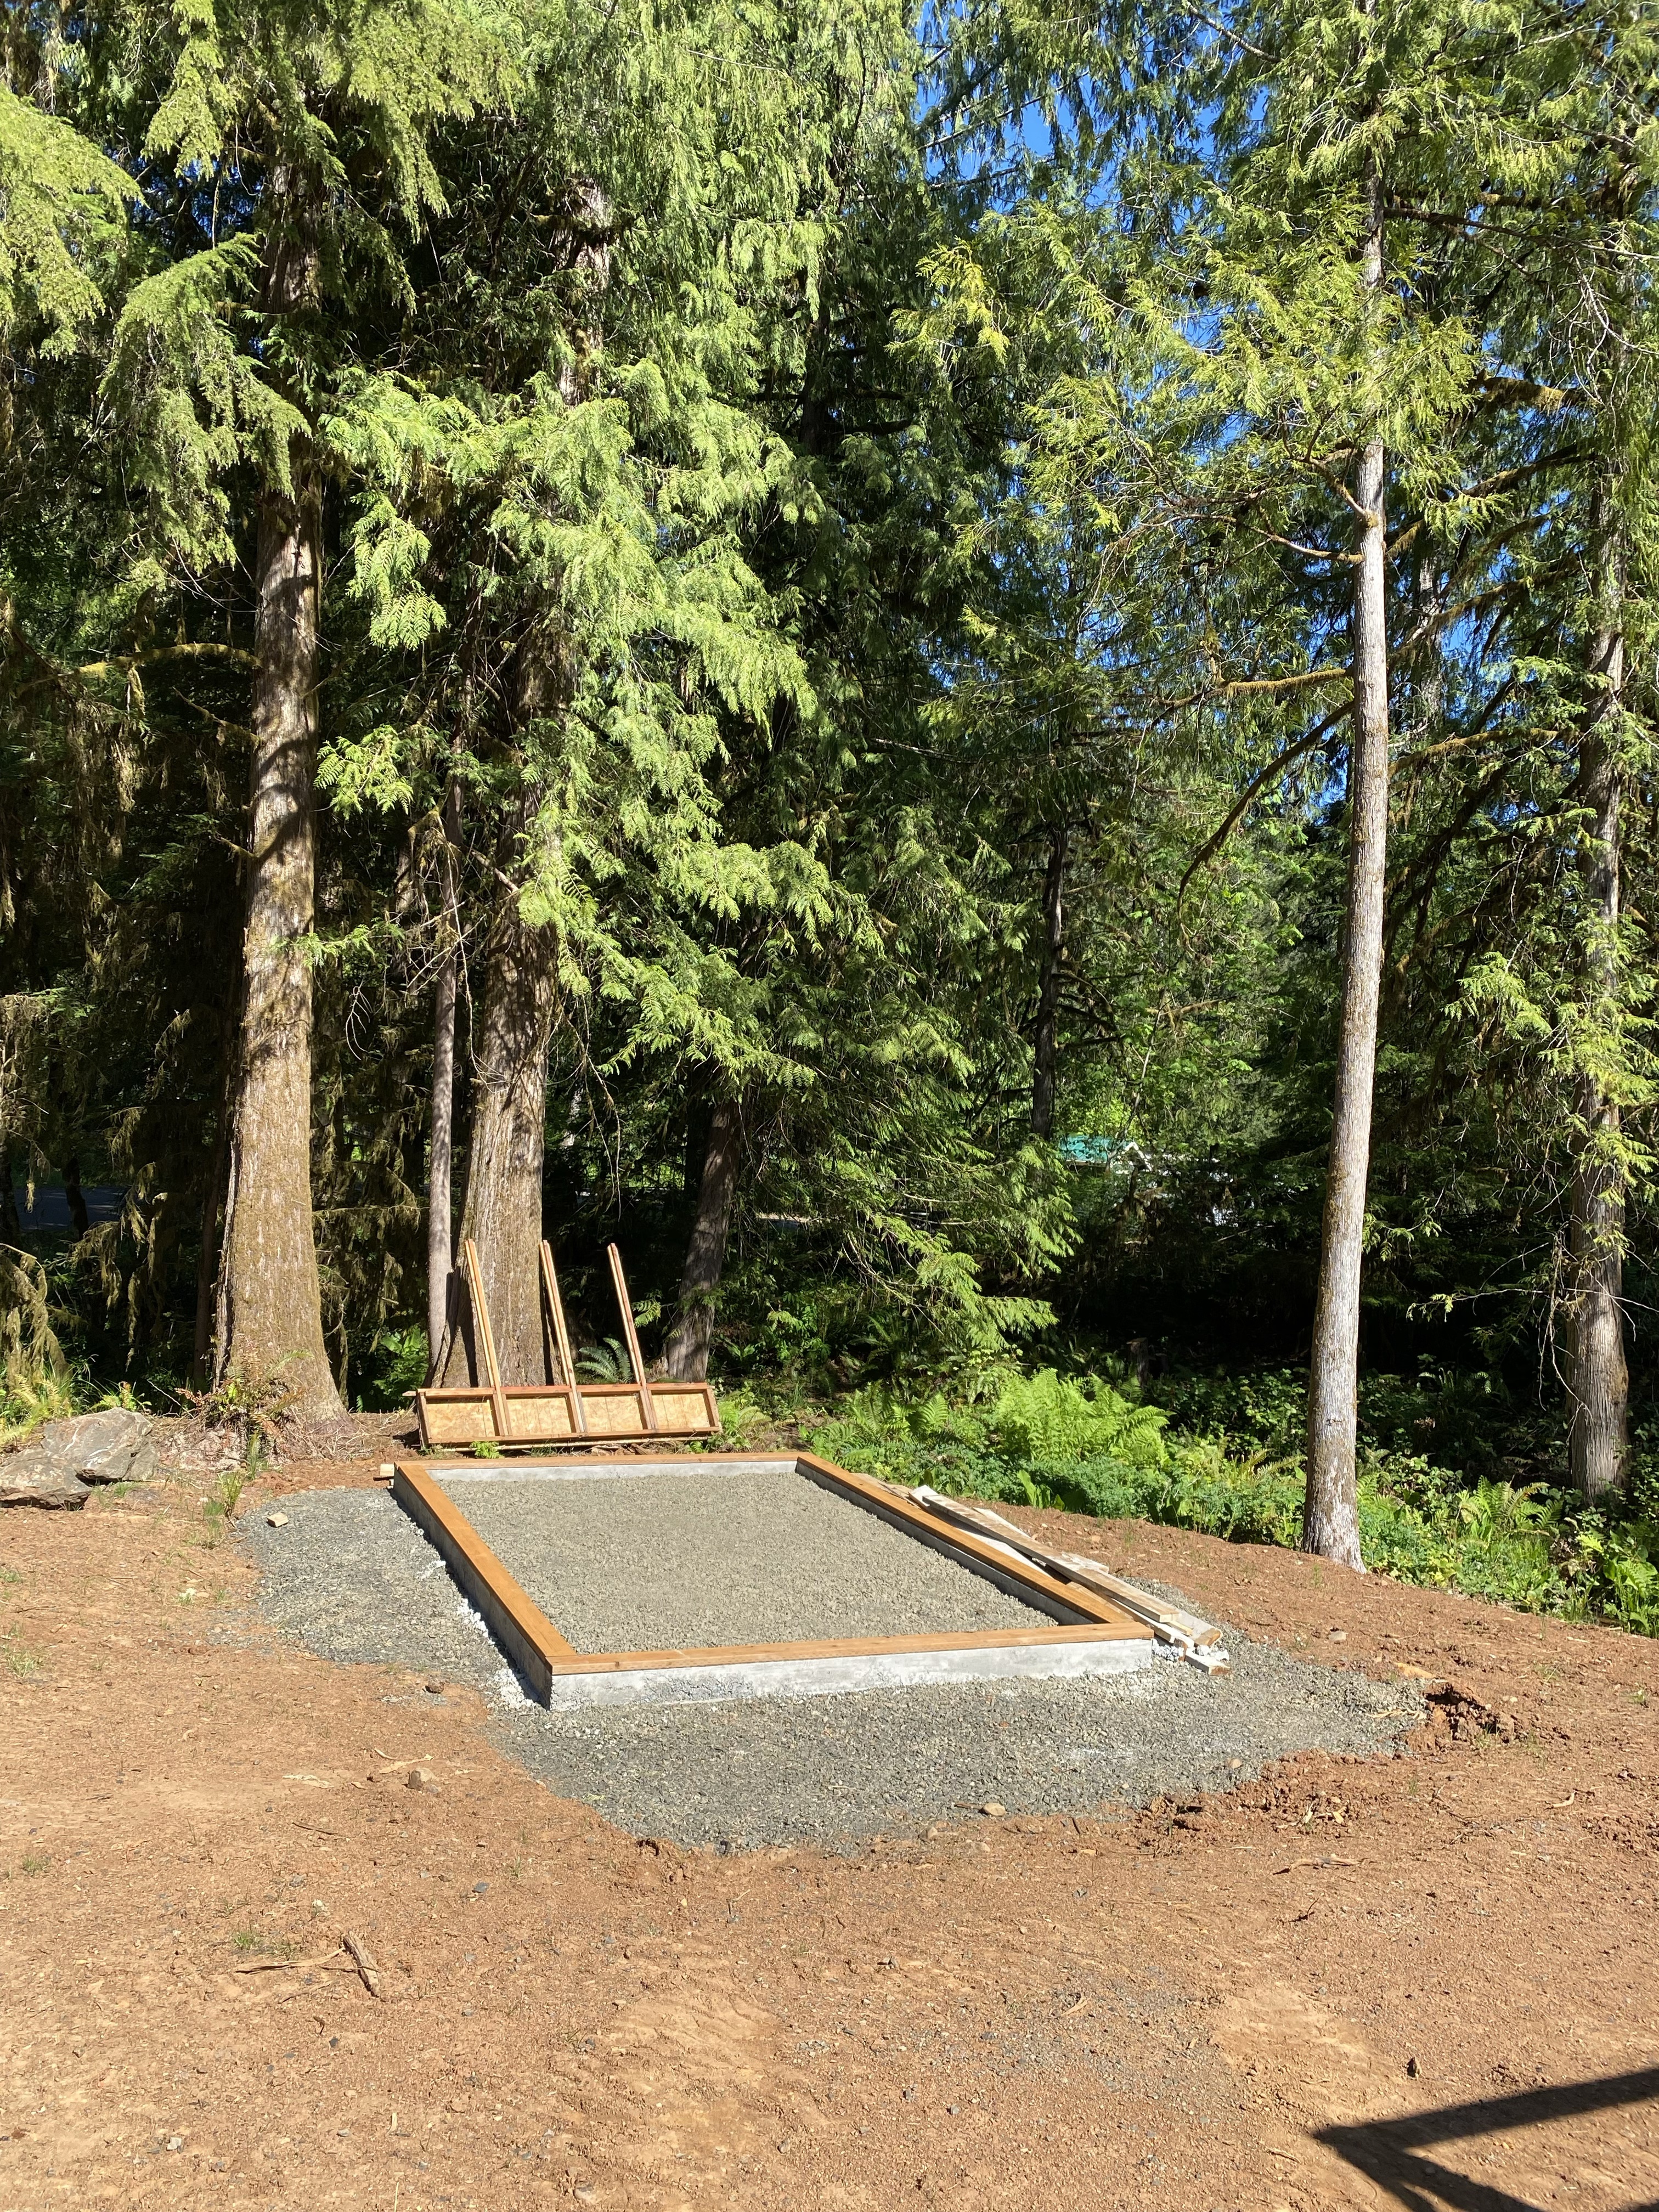
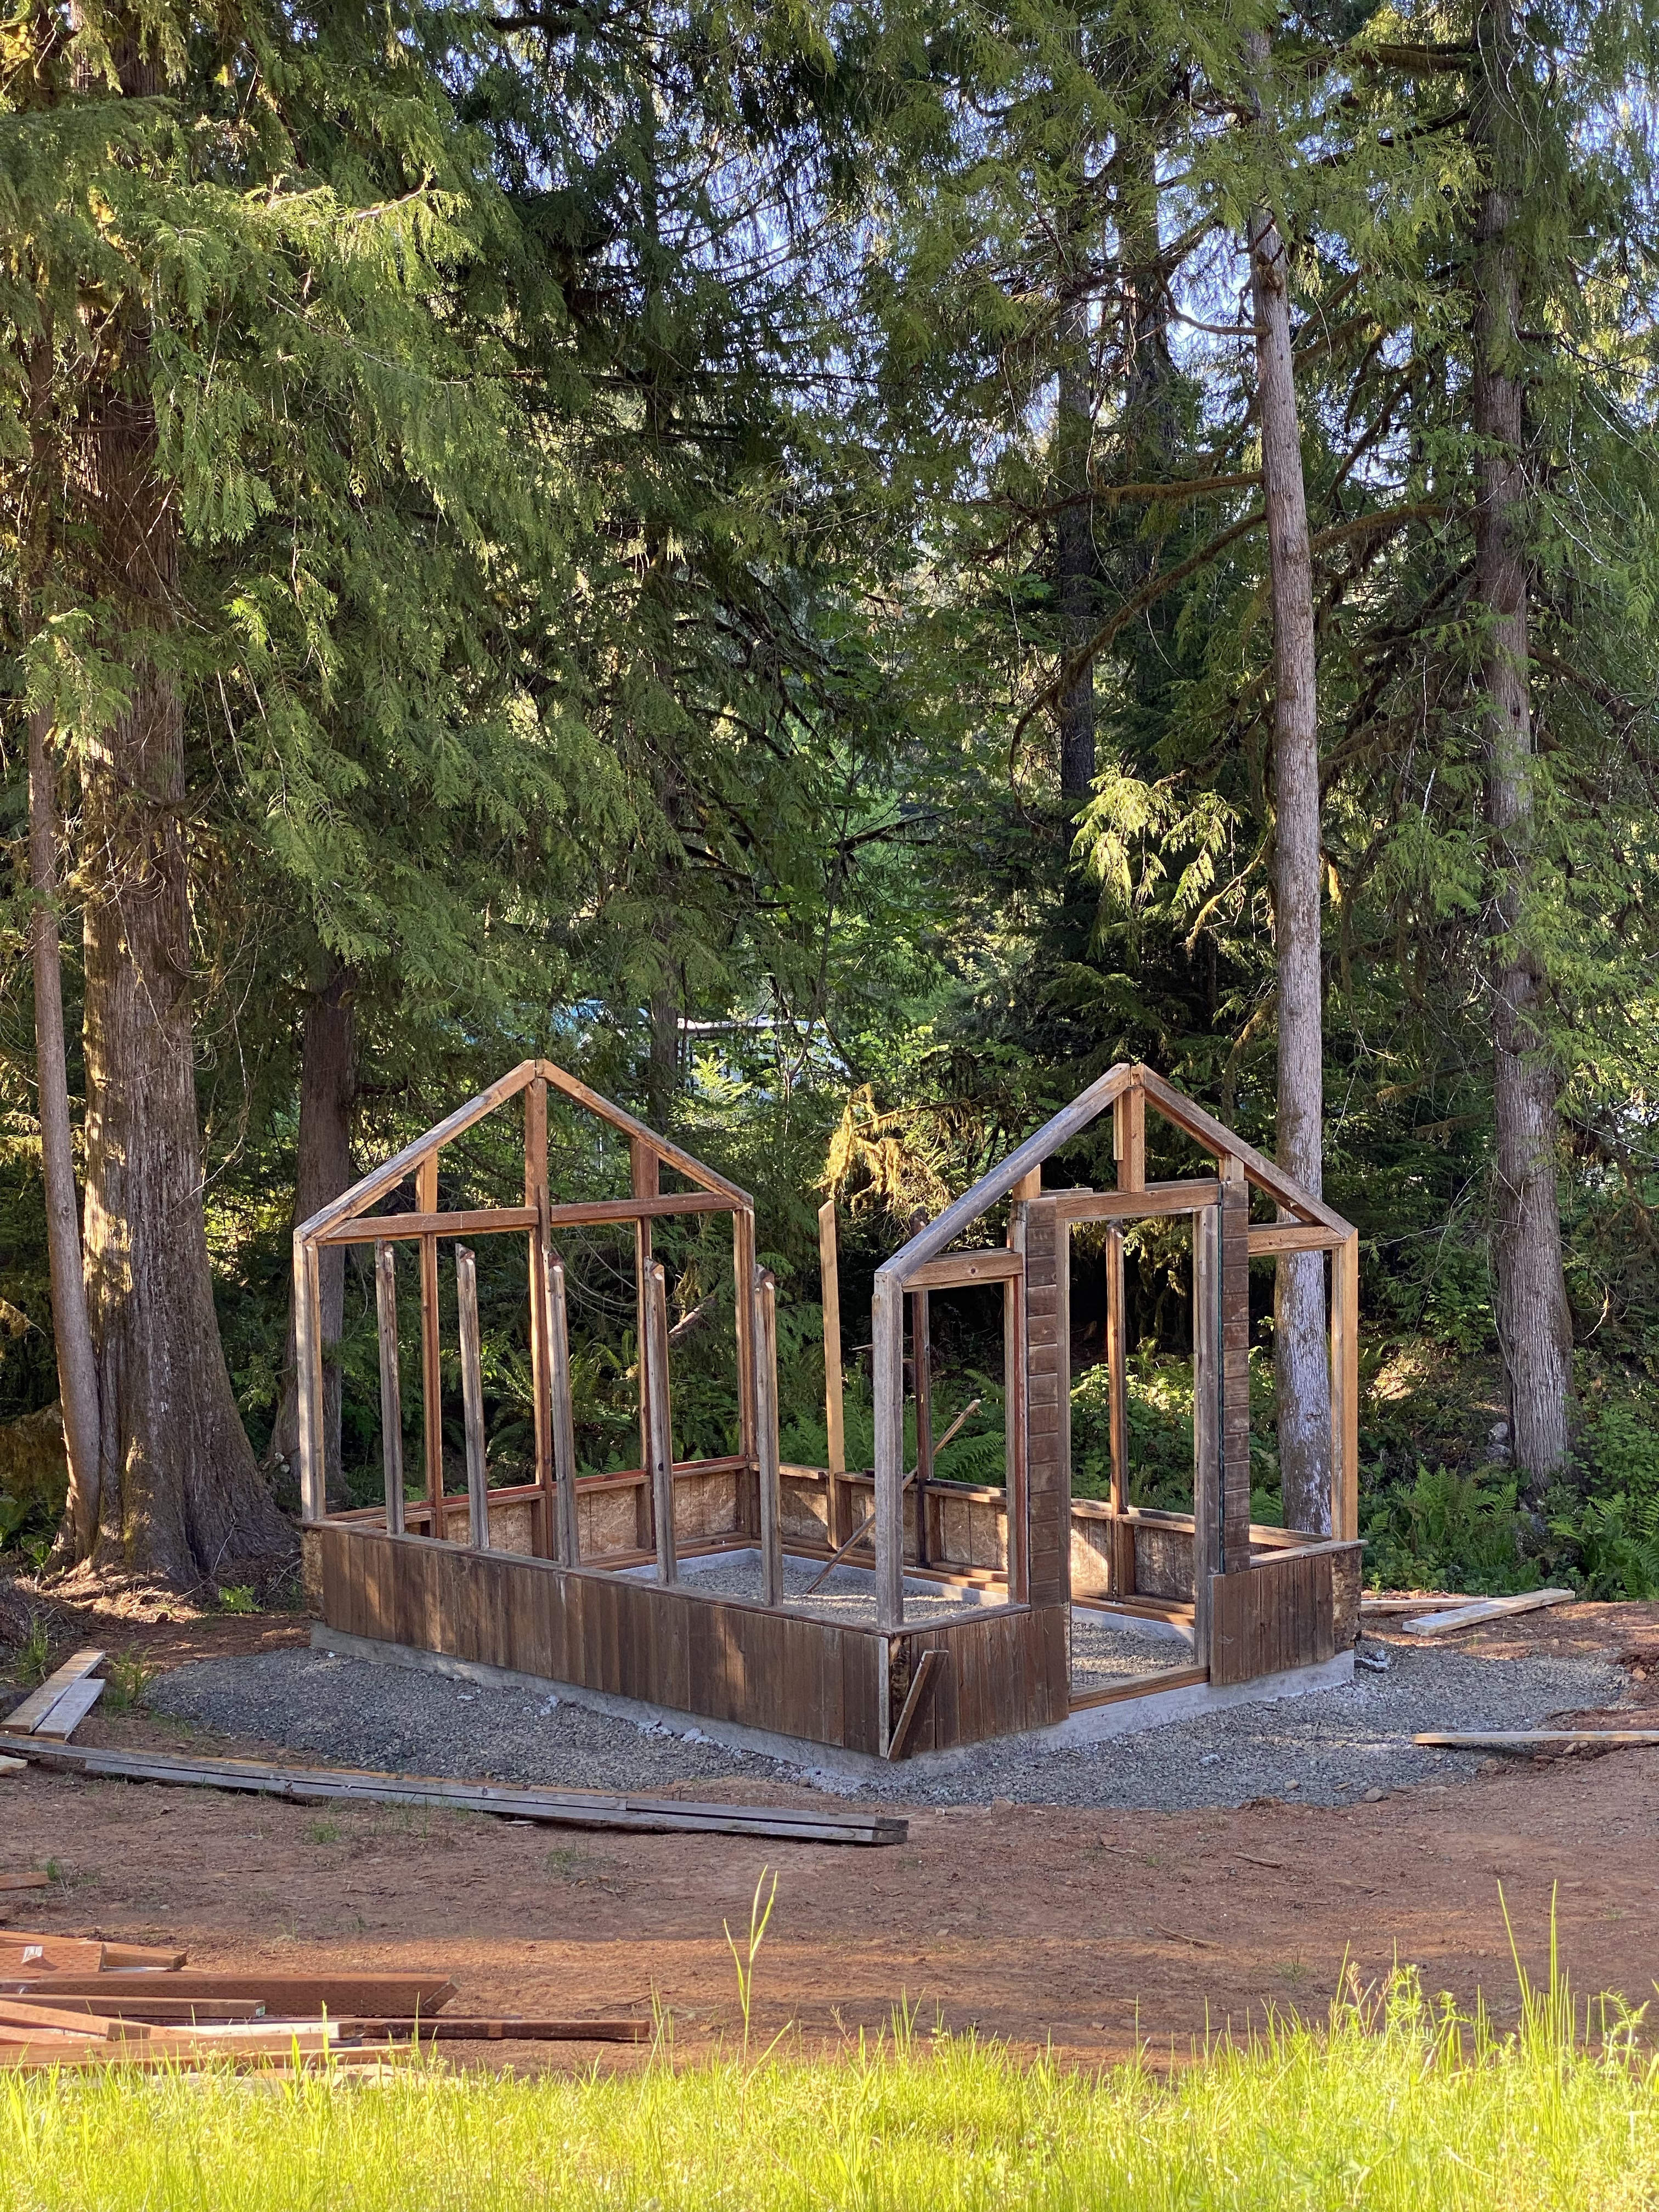
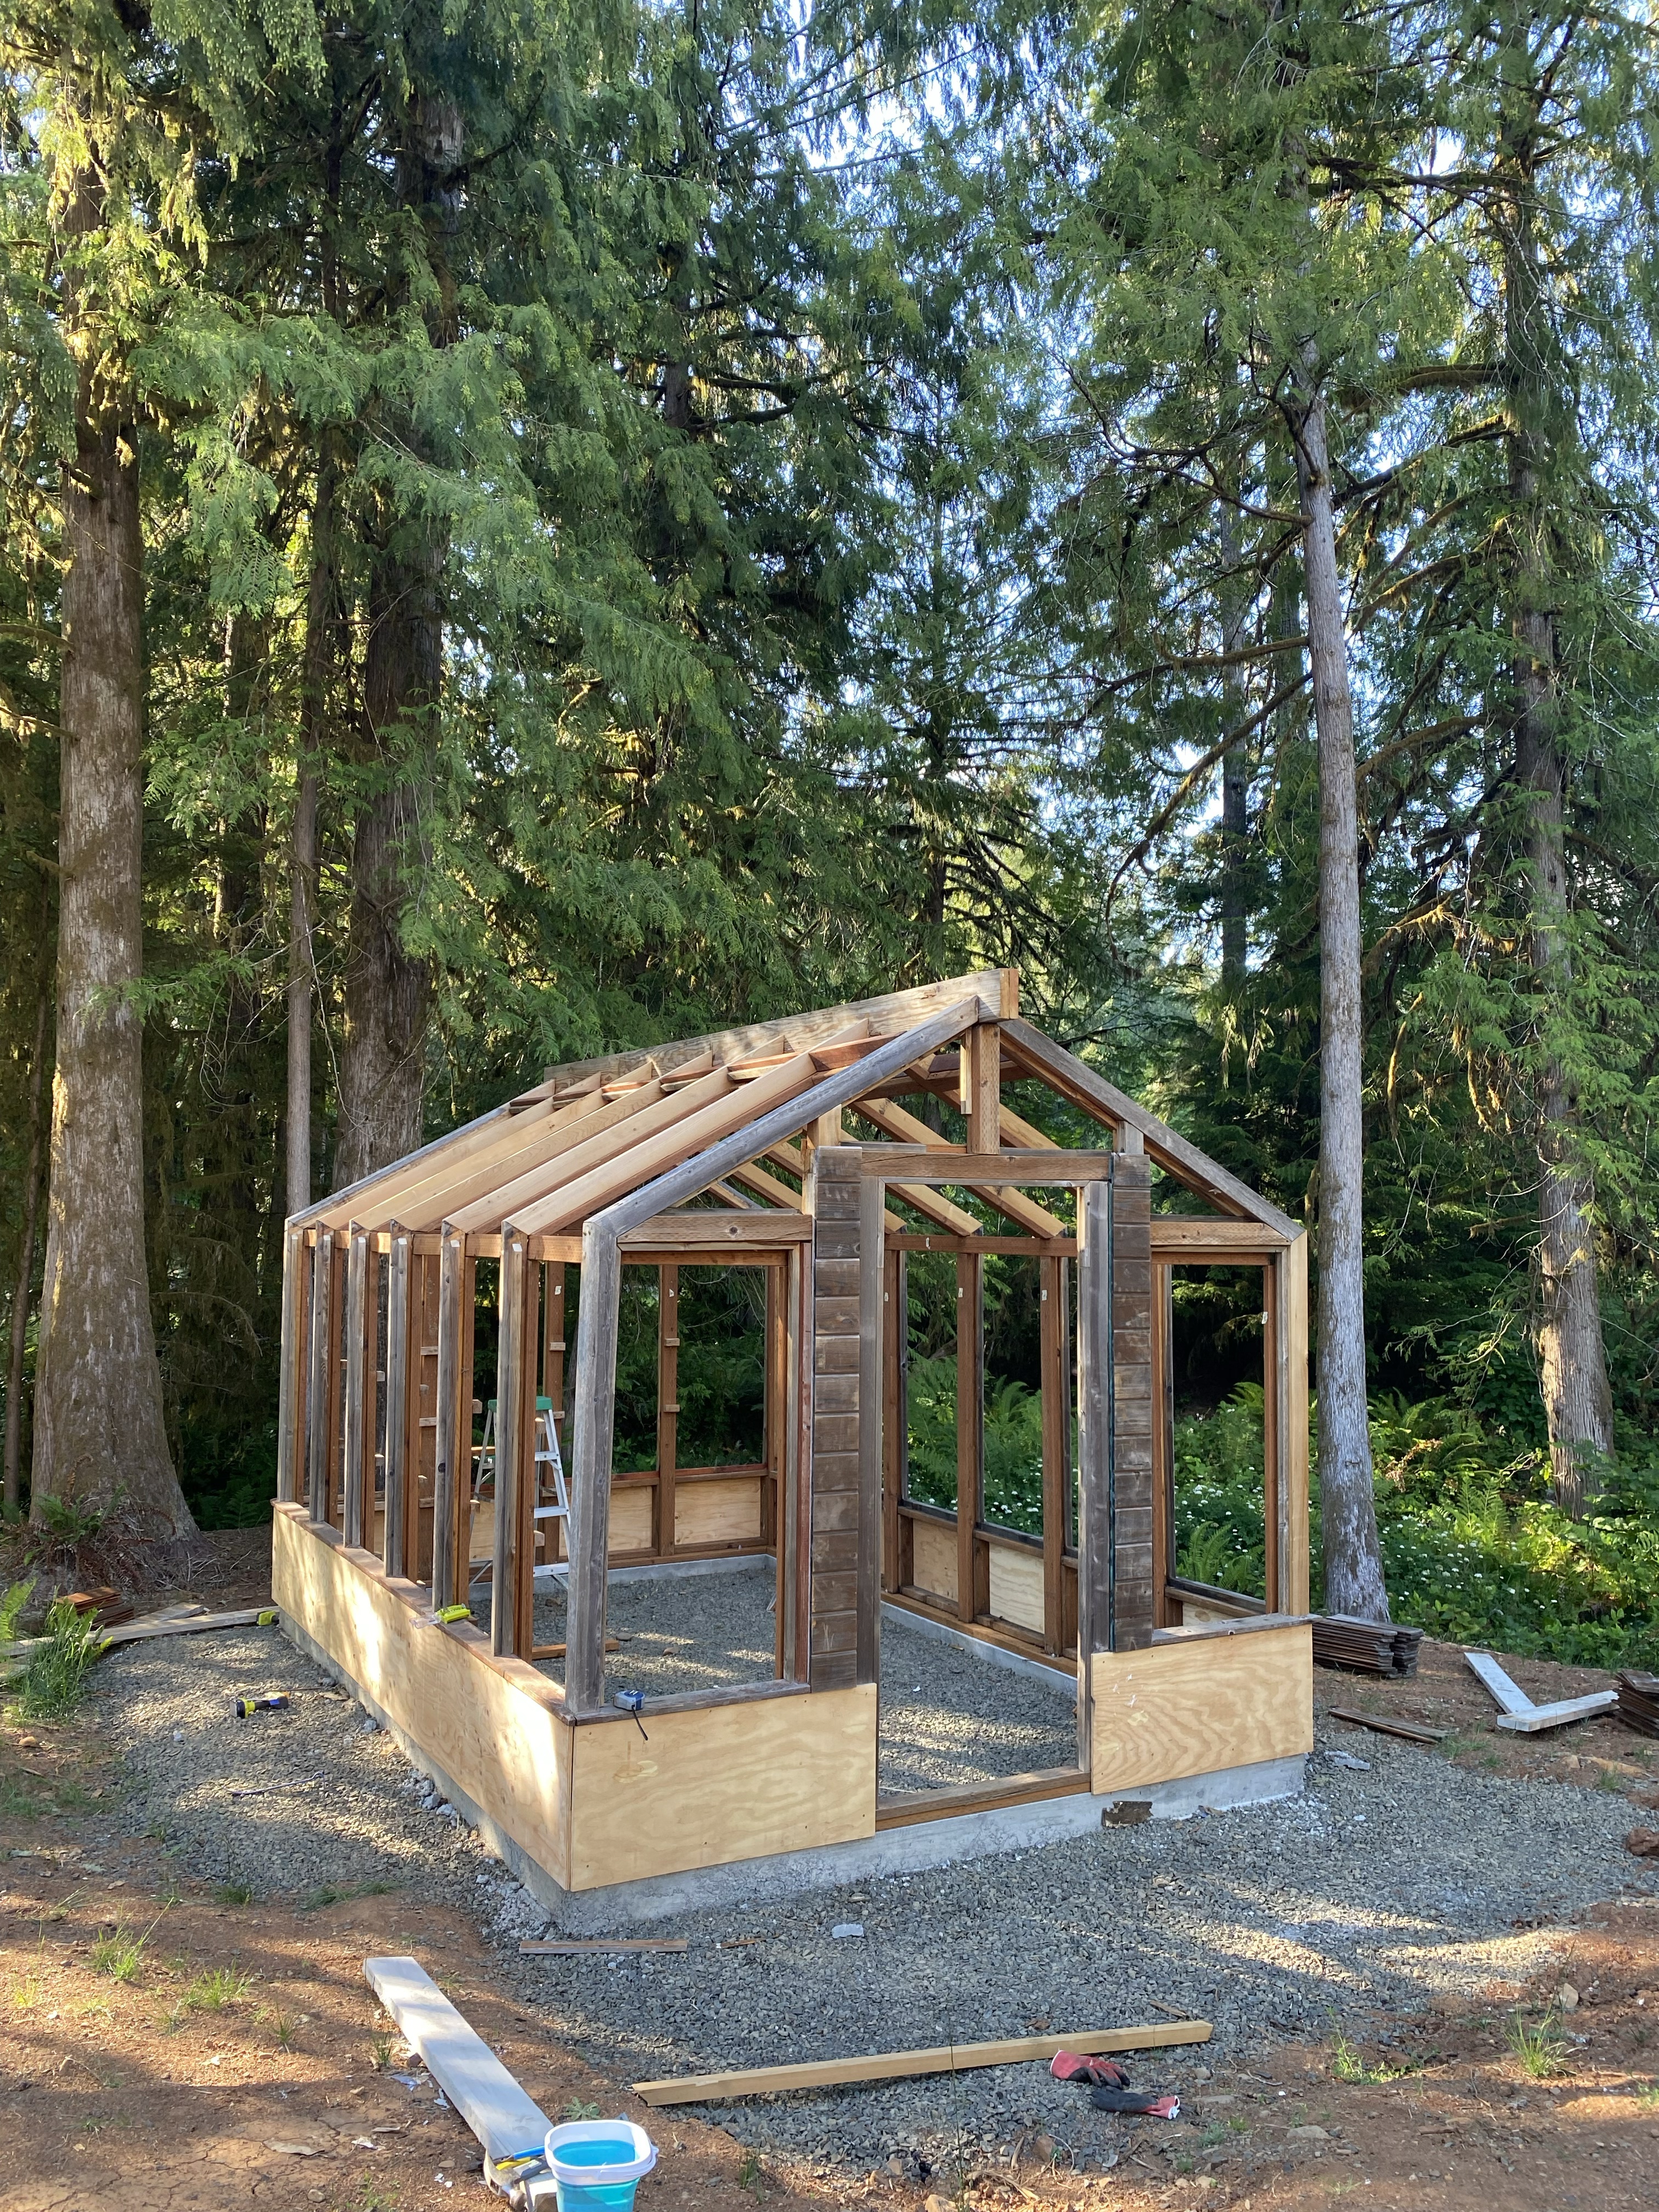
MAY 2024: Mud sills are installed on the foundation. It’s cute to think that at this point, I still thought we would have this project done during the spring. Cute. We started putting up the walls, this was a very exciting step! We also got the giant center beam installed (big thank you to Bryan in the extra short shorts) and the roof rafters set. We did have to replace a good number of the rafters, luckily we still have lumber from the cedar we milled for the garden (read all about the garden here).
JUNE 2024: Replaced plywood on the walls, and installed/replaced siding on the exterior.
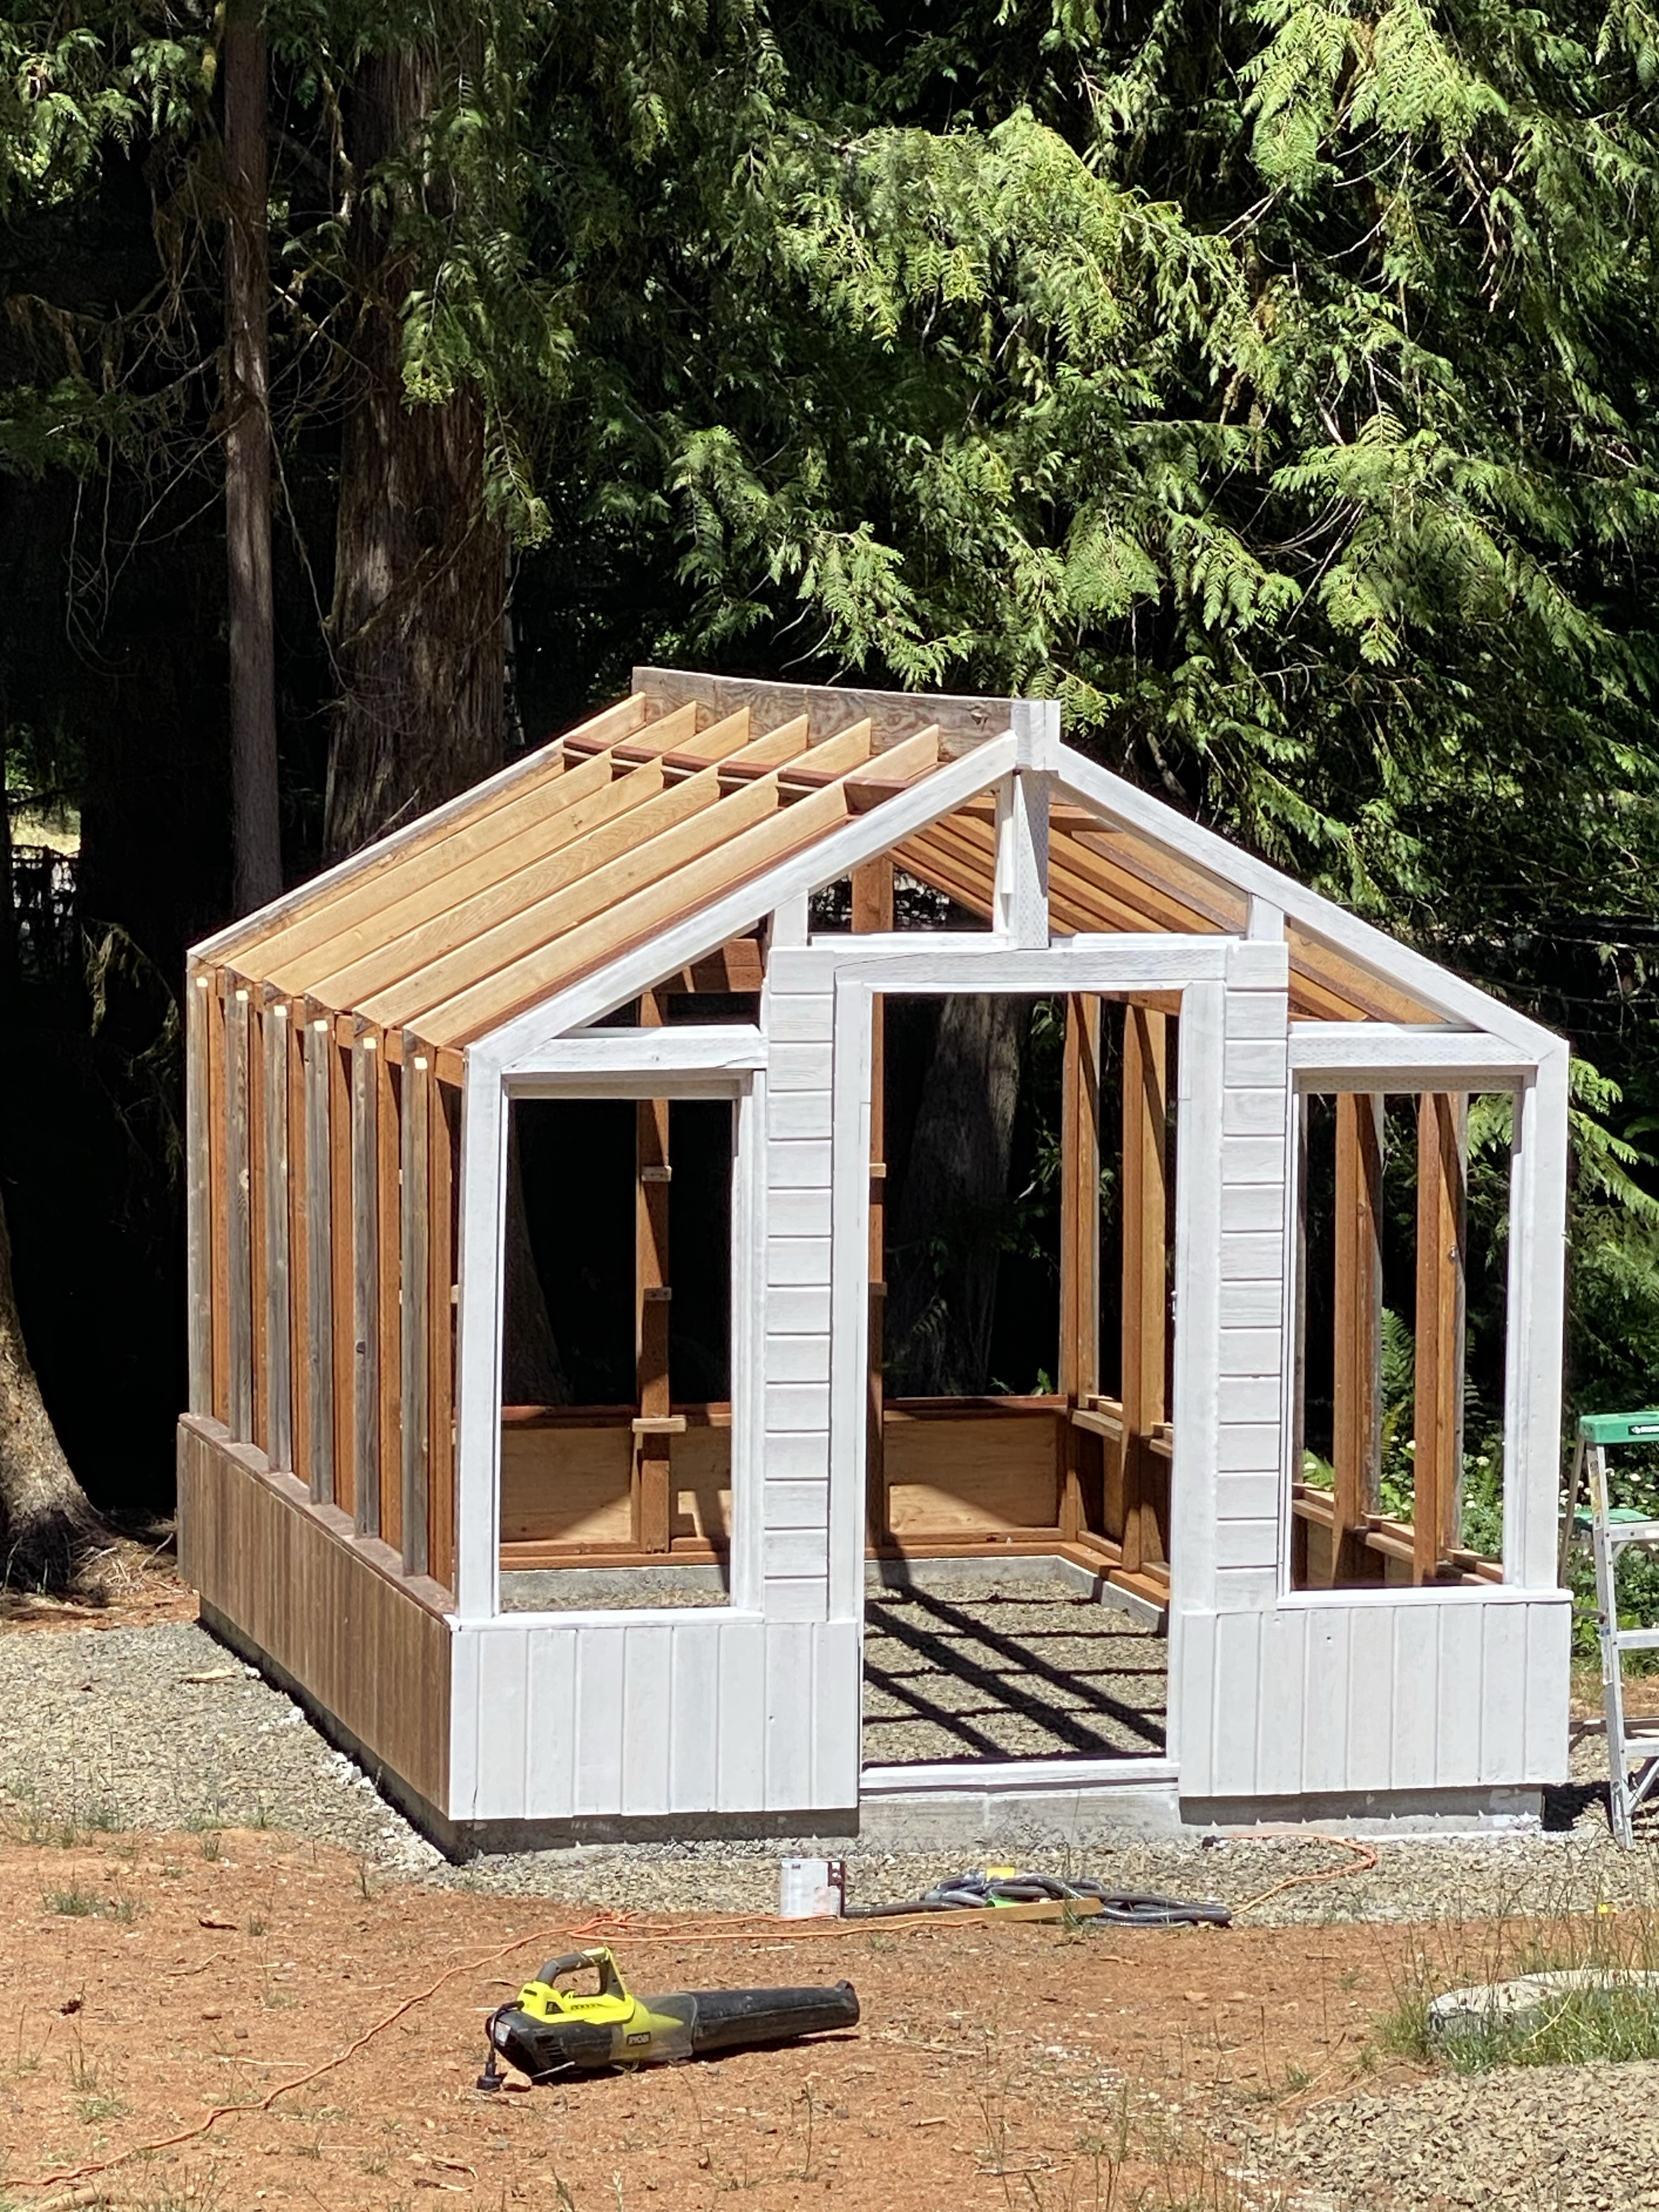
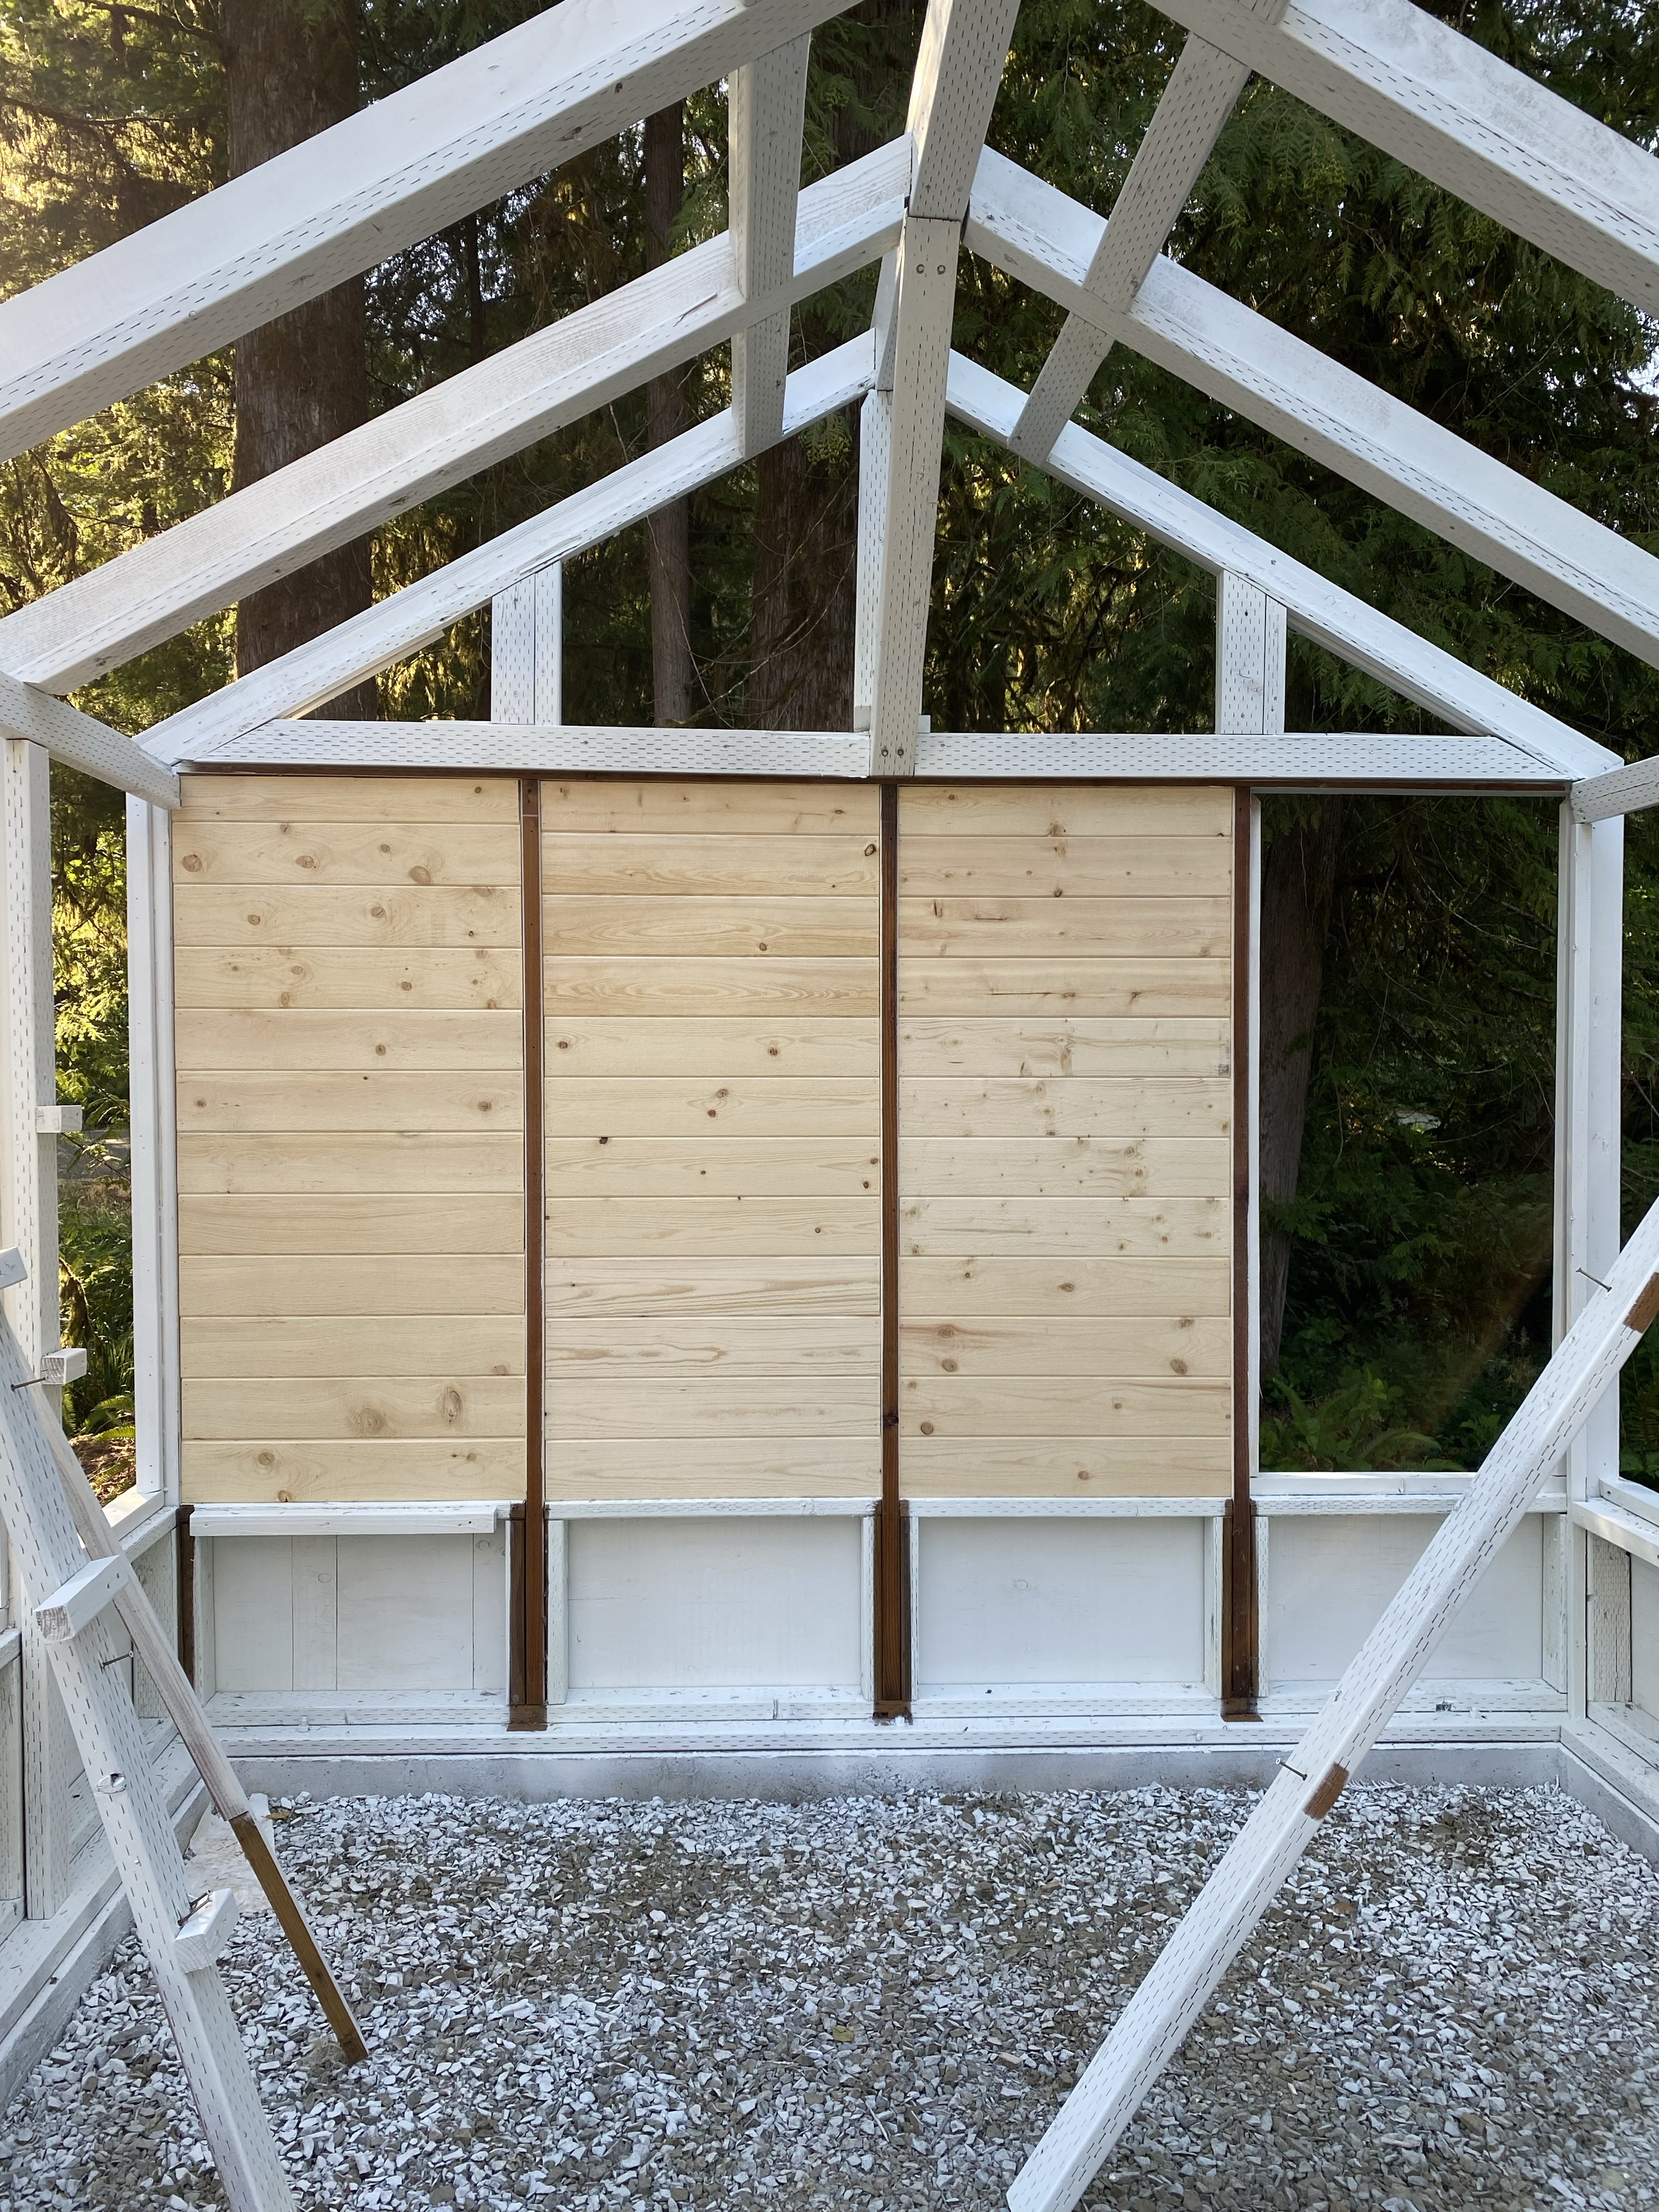
JULY 2024: Painting begins. Oh, my, goodness. So much paint. I decided to spray it, which in retrospect probably wasn’t the best plan because the greenhouse doesn’t really have walls. The kids were not sure why the greenhouse would be white, it’s called a greenhouse. But I assured them it was the right call. Classic greenhouse look, I promise. I used SW Pure White, the same color on the exterior of our house. We also installed siding on the back of the greenhouse, for two reasons. Reason one, several of the glass panes did get damaged during transport thus we were short. Reason two, the back side of the greenhouse faces a wooded area and wouldn’t get sun anyway. Win/win.
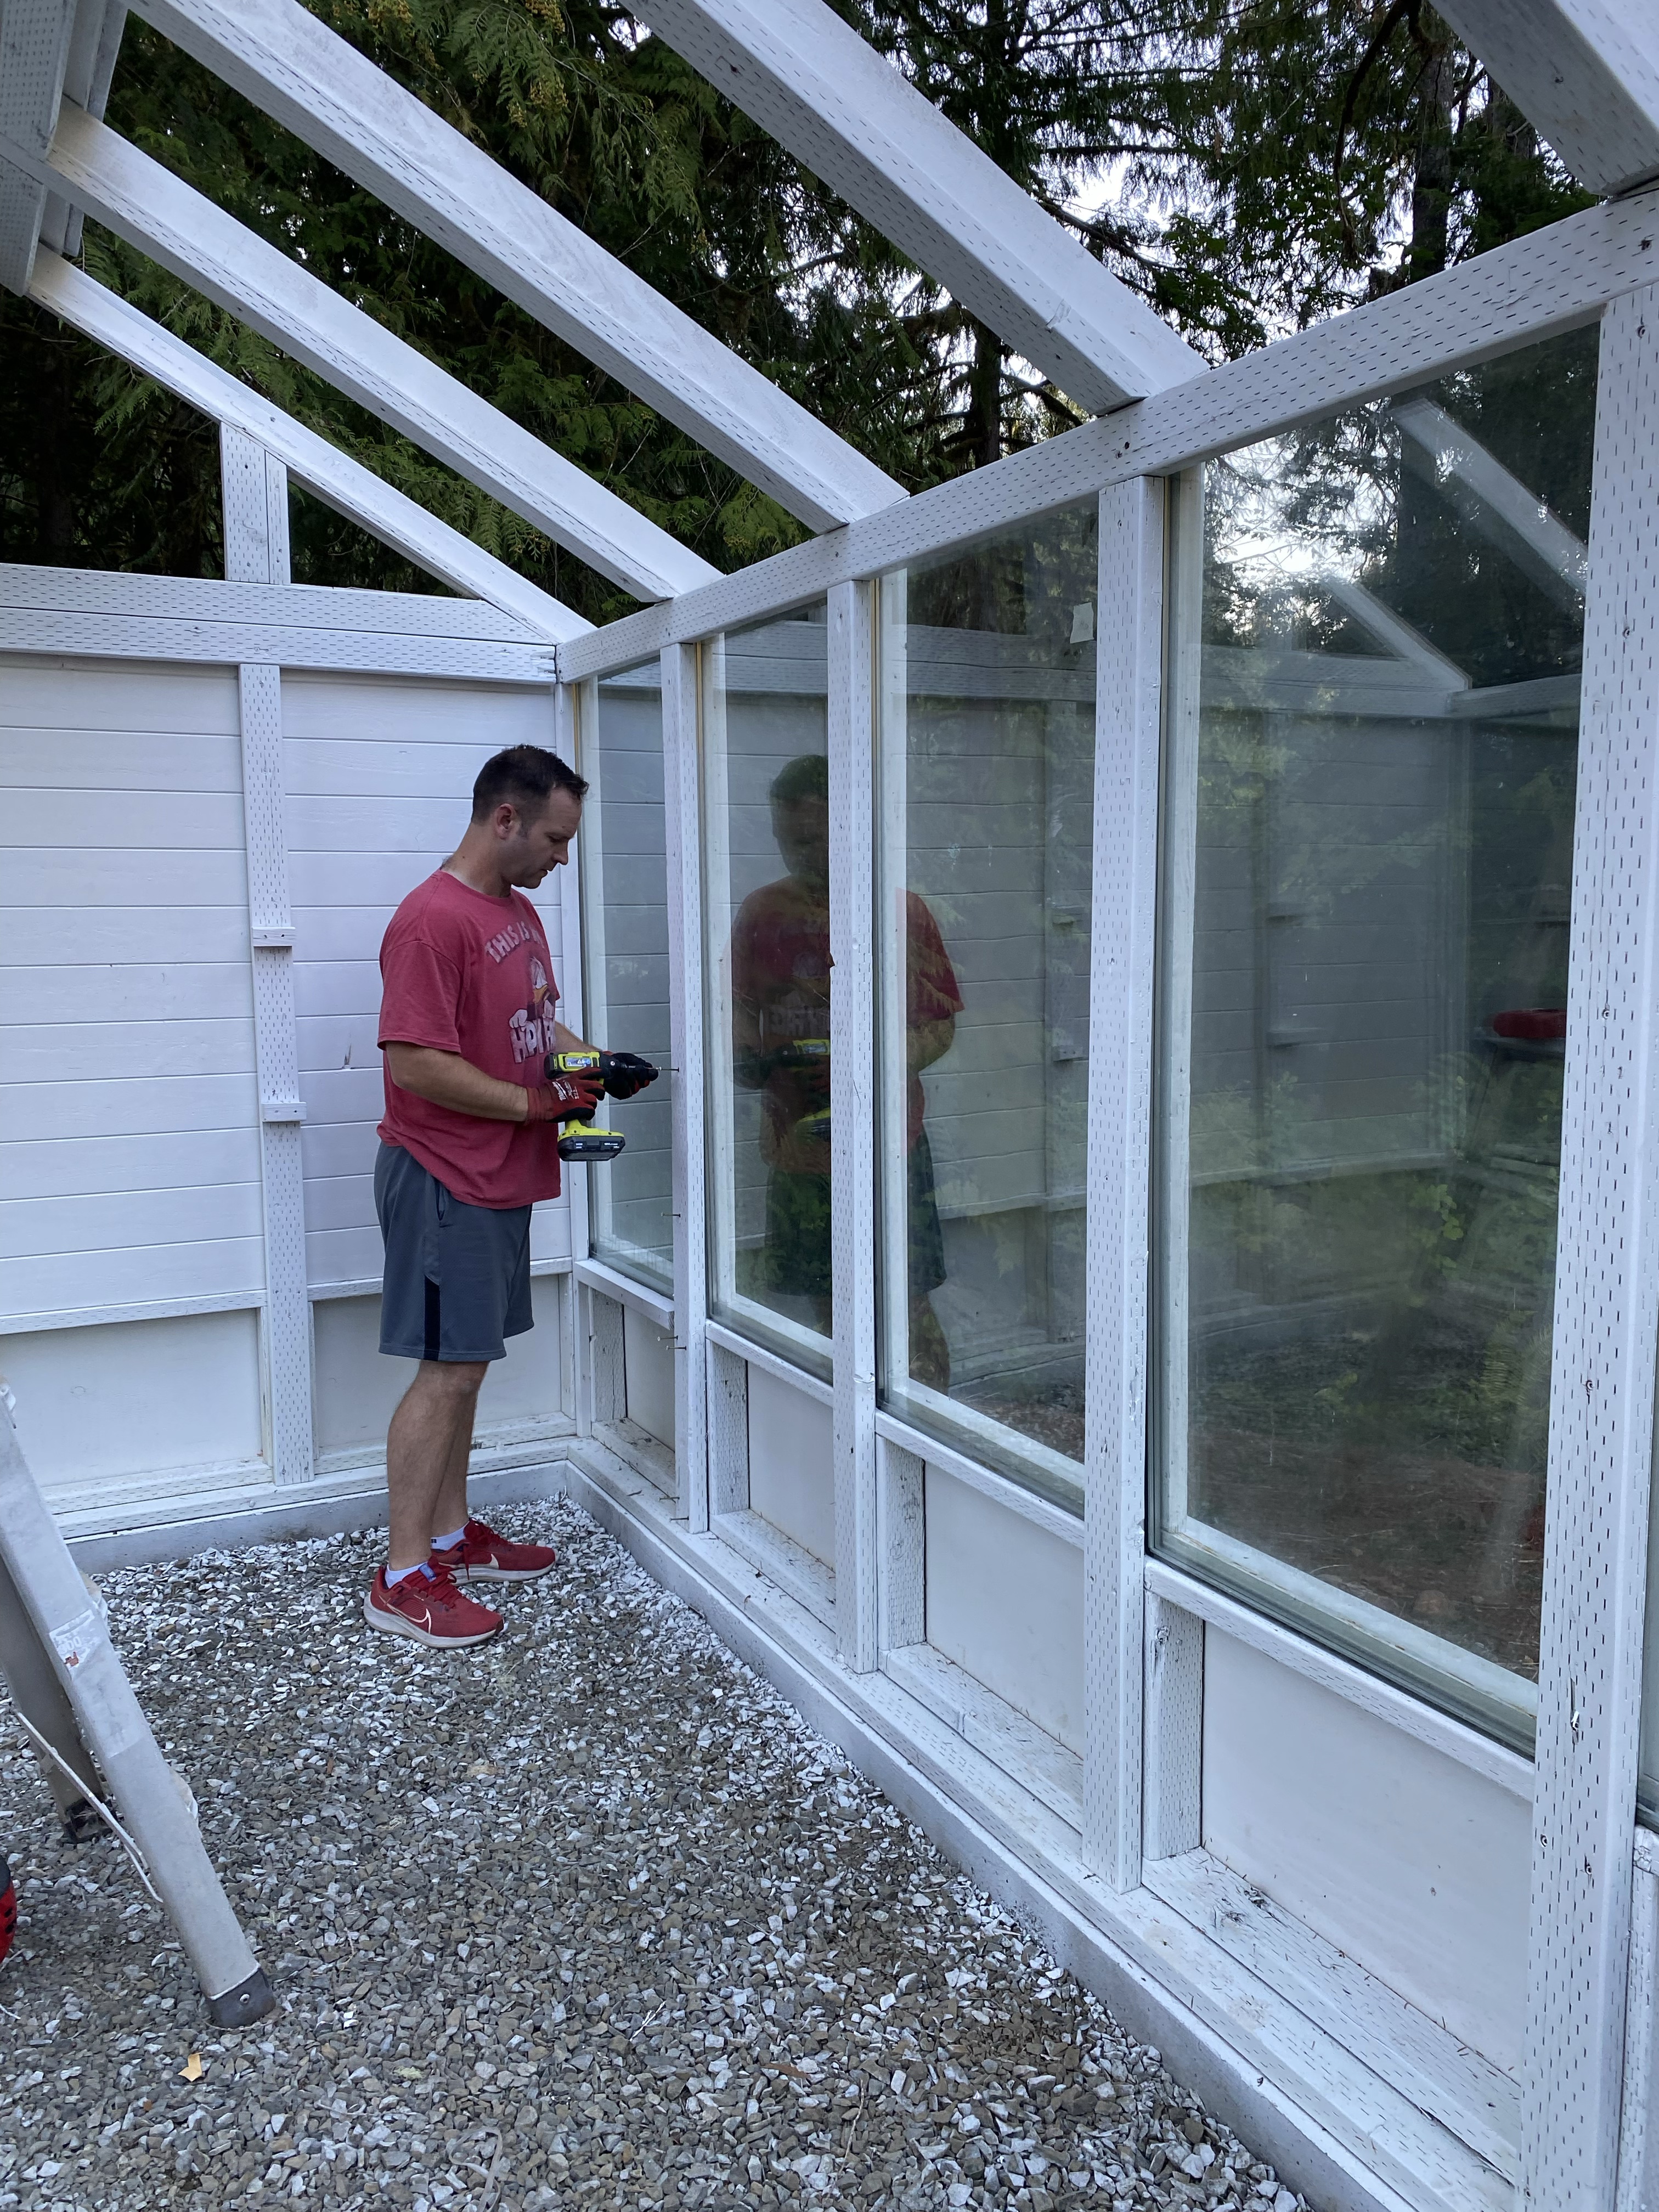
AUGUST 2024: Finished painting. Finally. Added roofing pieces. Started installing the glass panels. I’m not going to lie, we put this off as much as possible. They are tremendously heavy and I think Ryan and I were both very worried about breaking any more panes. But we worked on it as we could — prep, install, and secure.
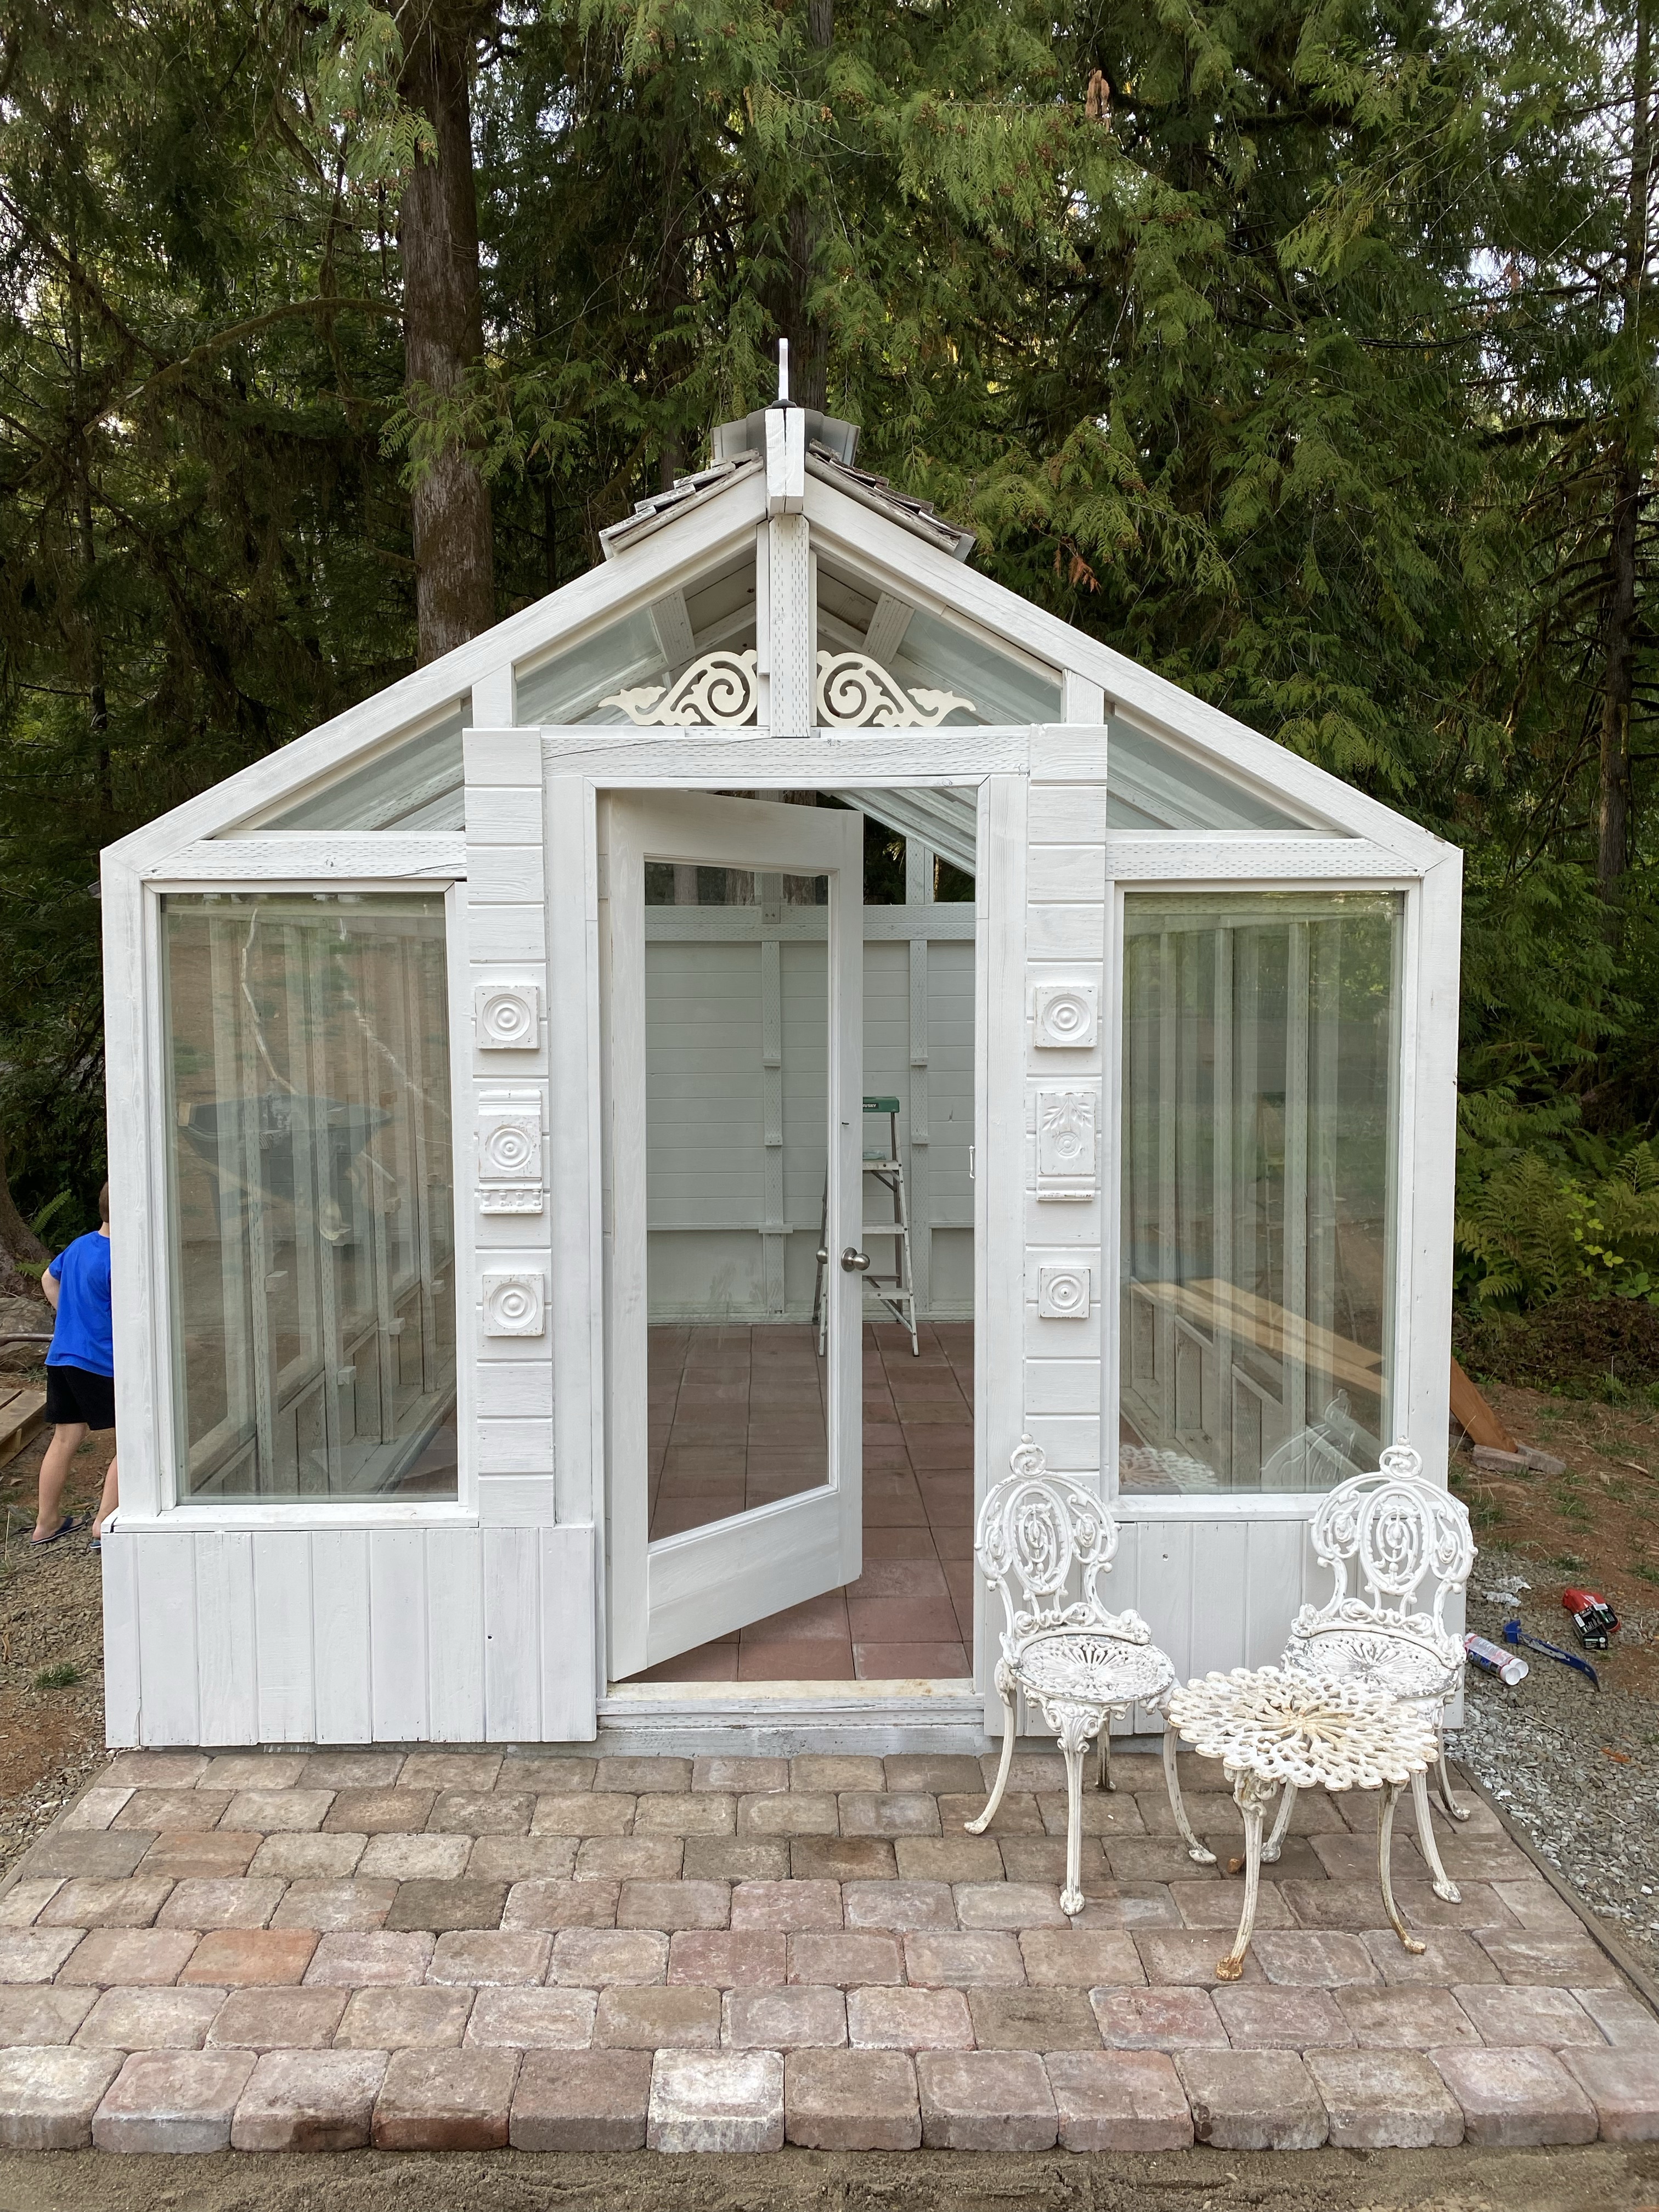
SEPTEMBER 2024: The upcoming change in the weather put us in high gear for completing the project. As I like to say, “It’s go time!” We decided to add some charm to the greenhouse with a Victorian-inspired ridge piece. This one is made of PVC, should withstand the weather, and not yellow or fade. It really made the vision for the greenhouse come together. The white makes perfect sense now, yes? Finished installing all the roof panes (even more tricky). Ryan did a LOT of caulking seams.
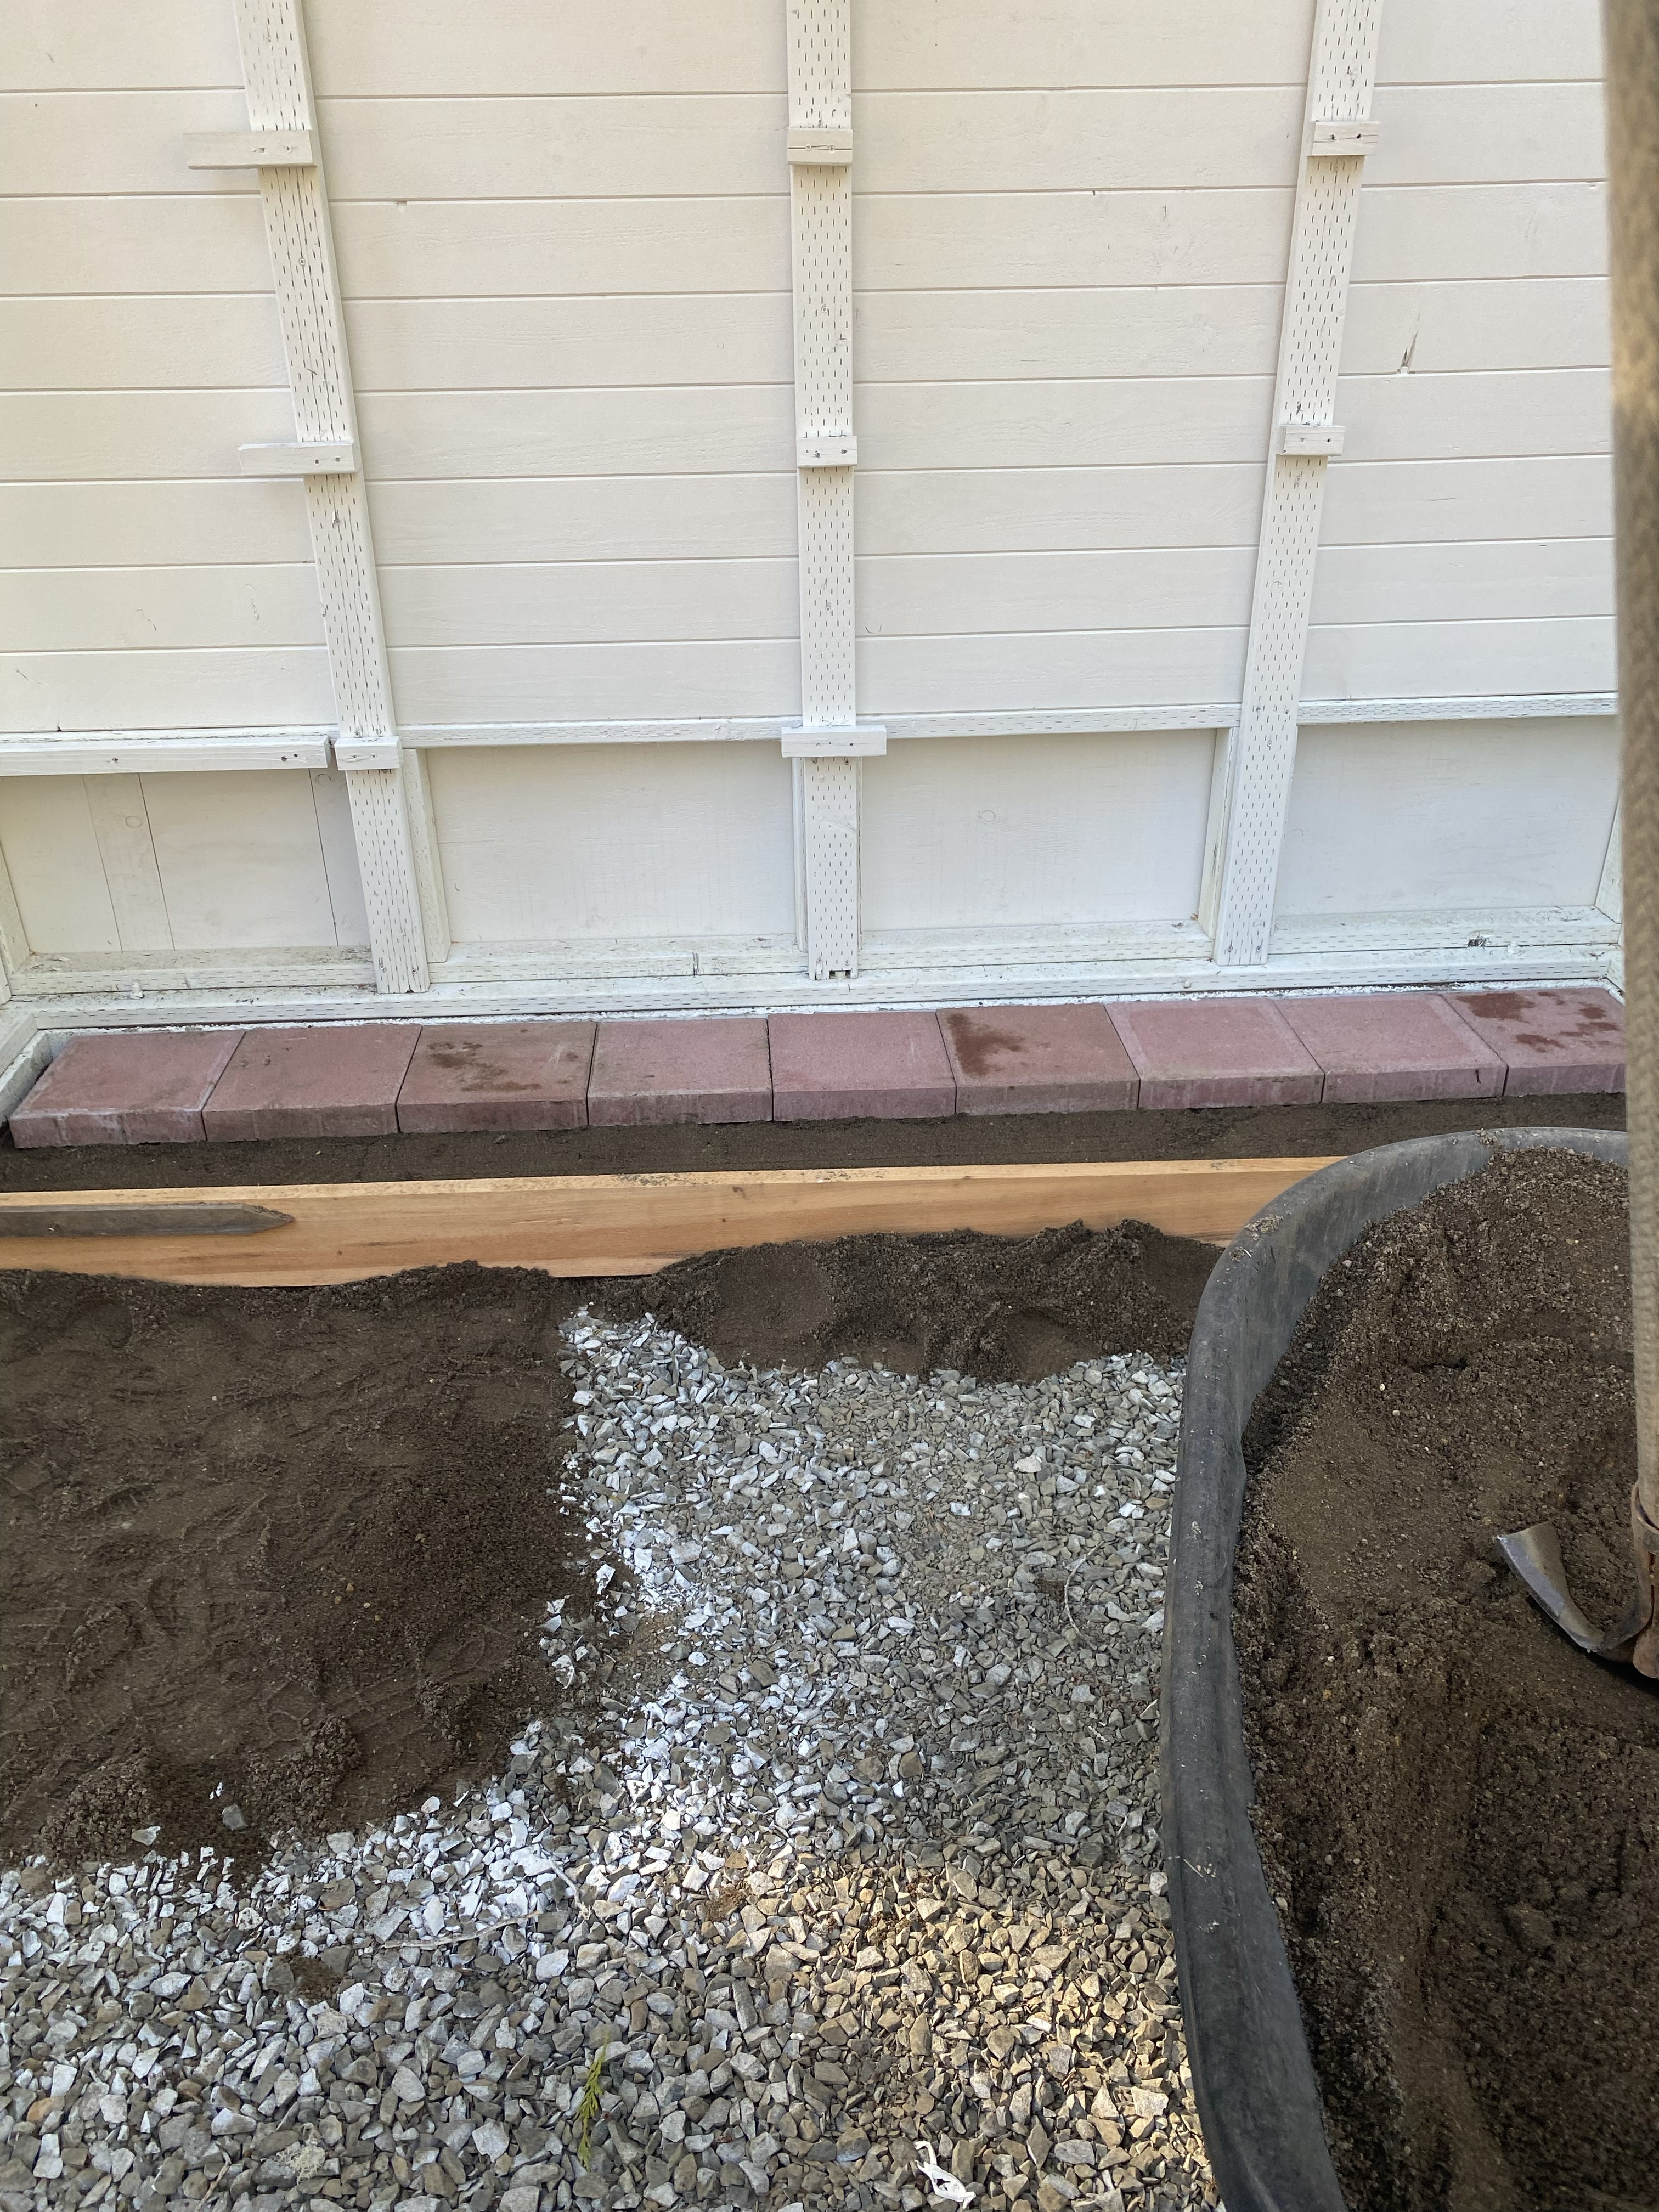
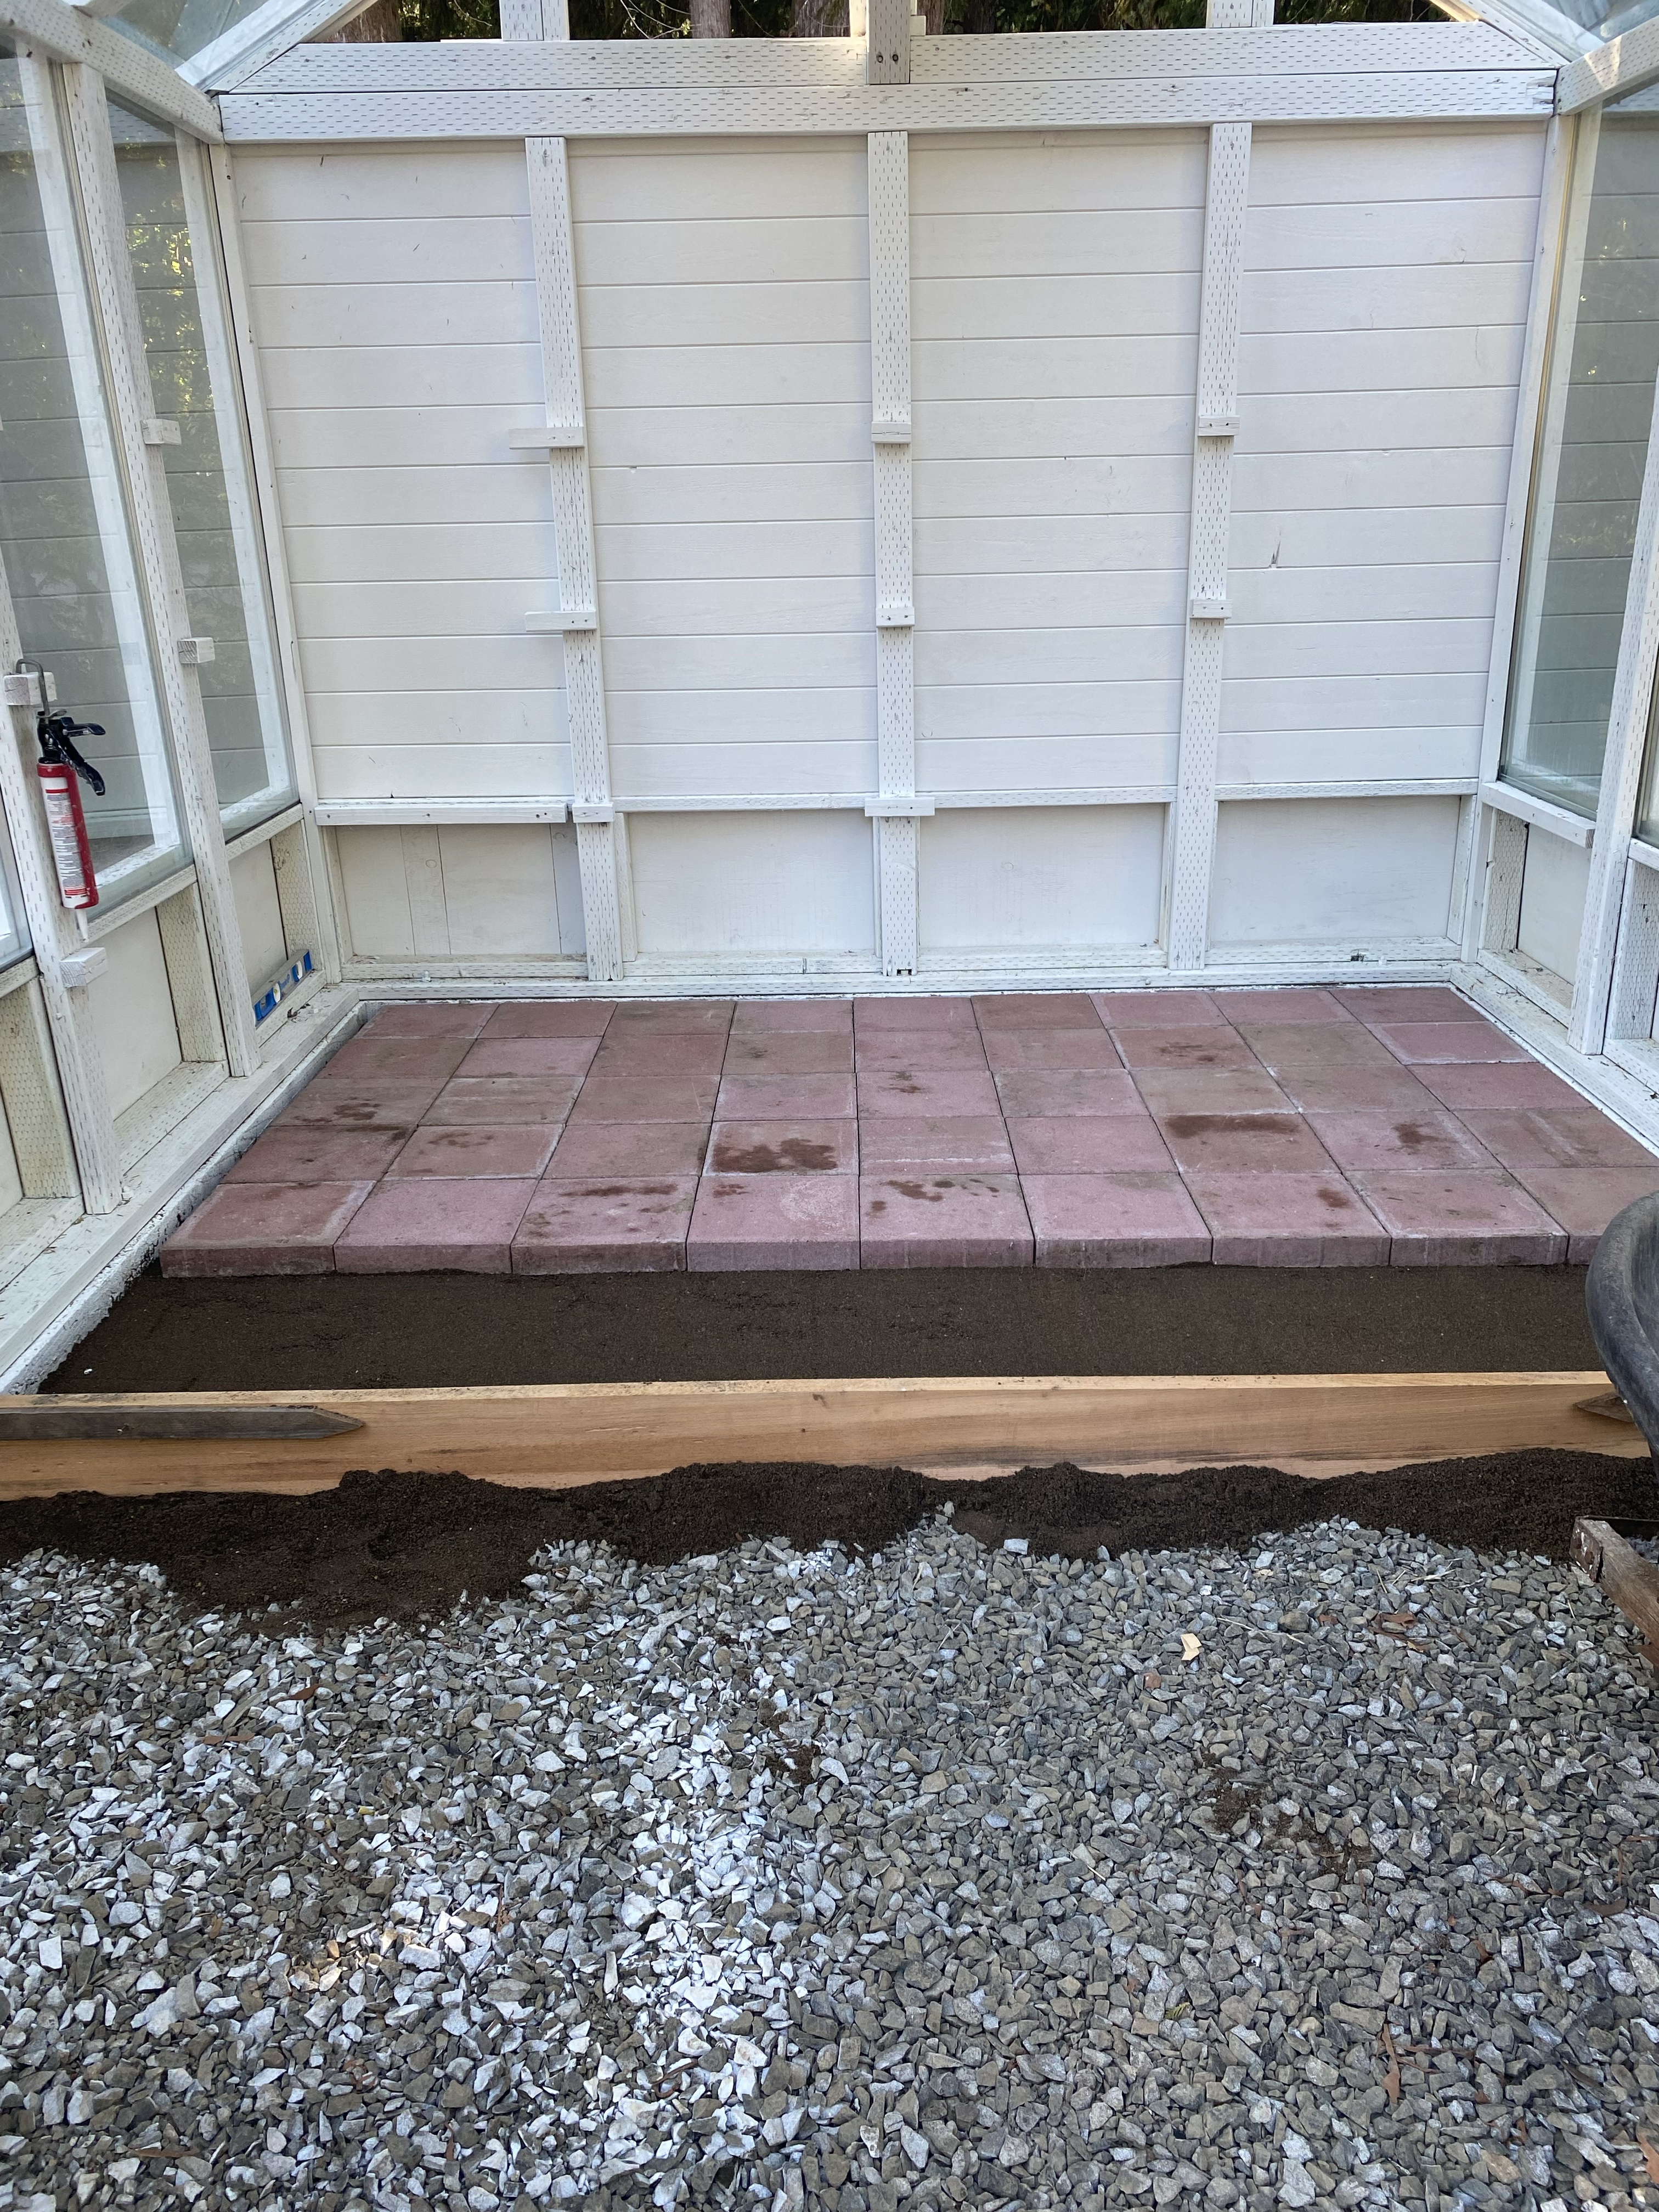
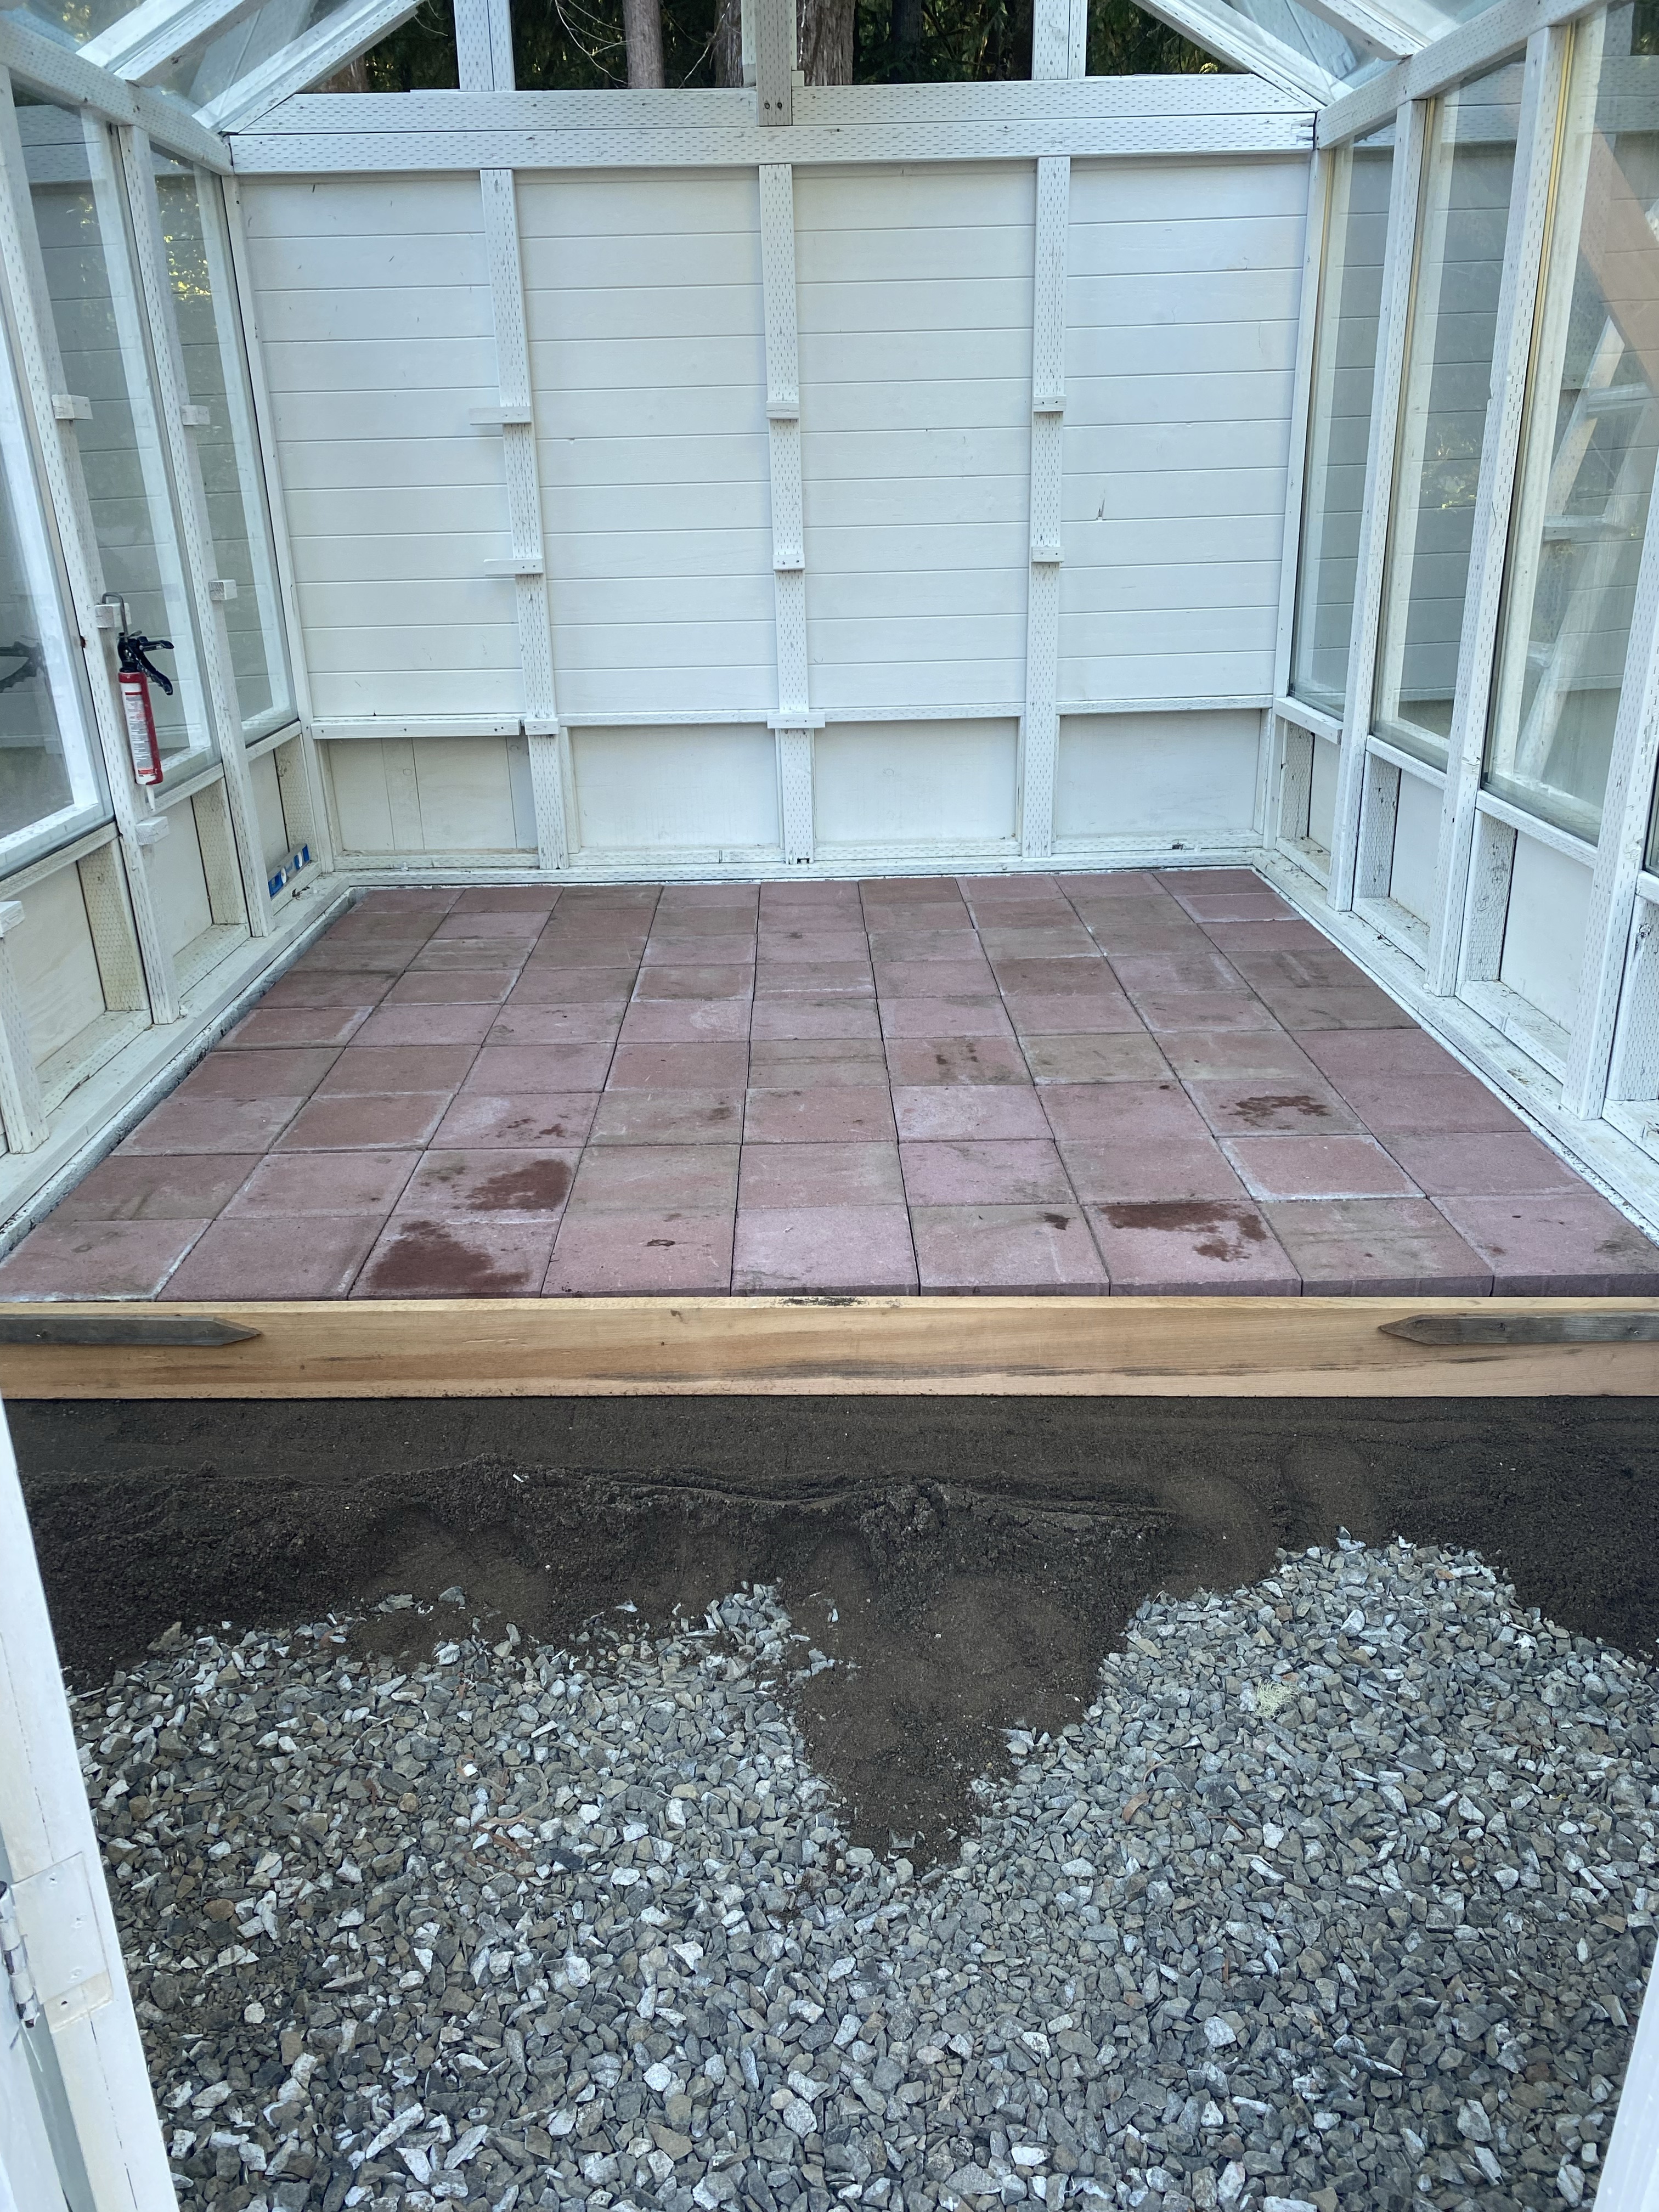
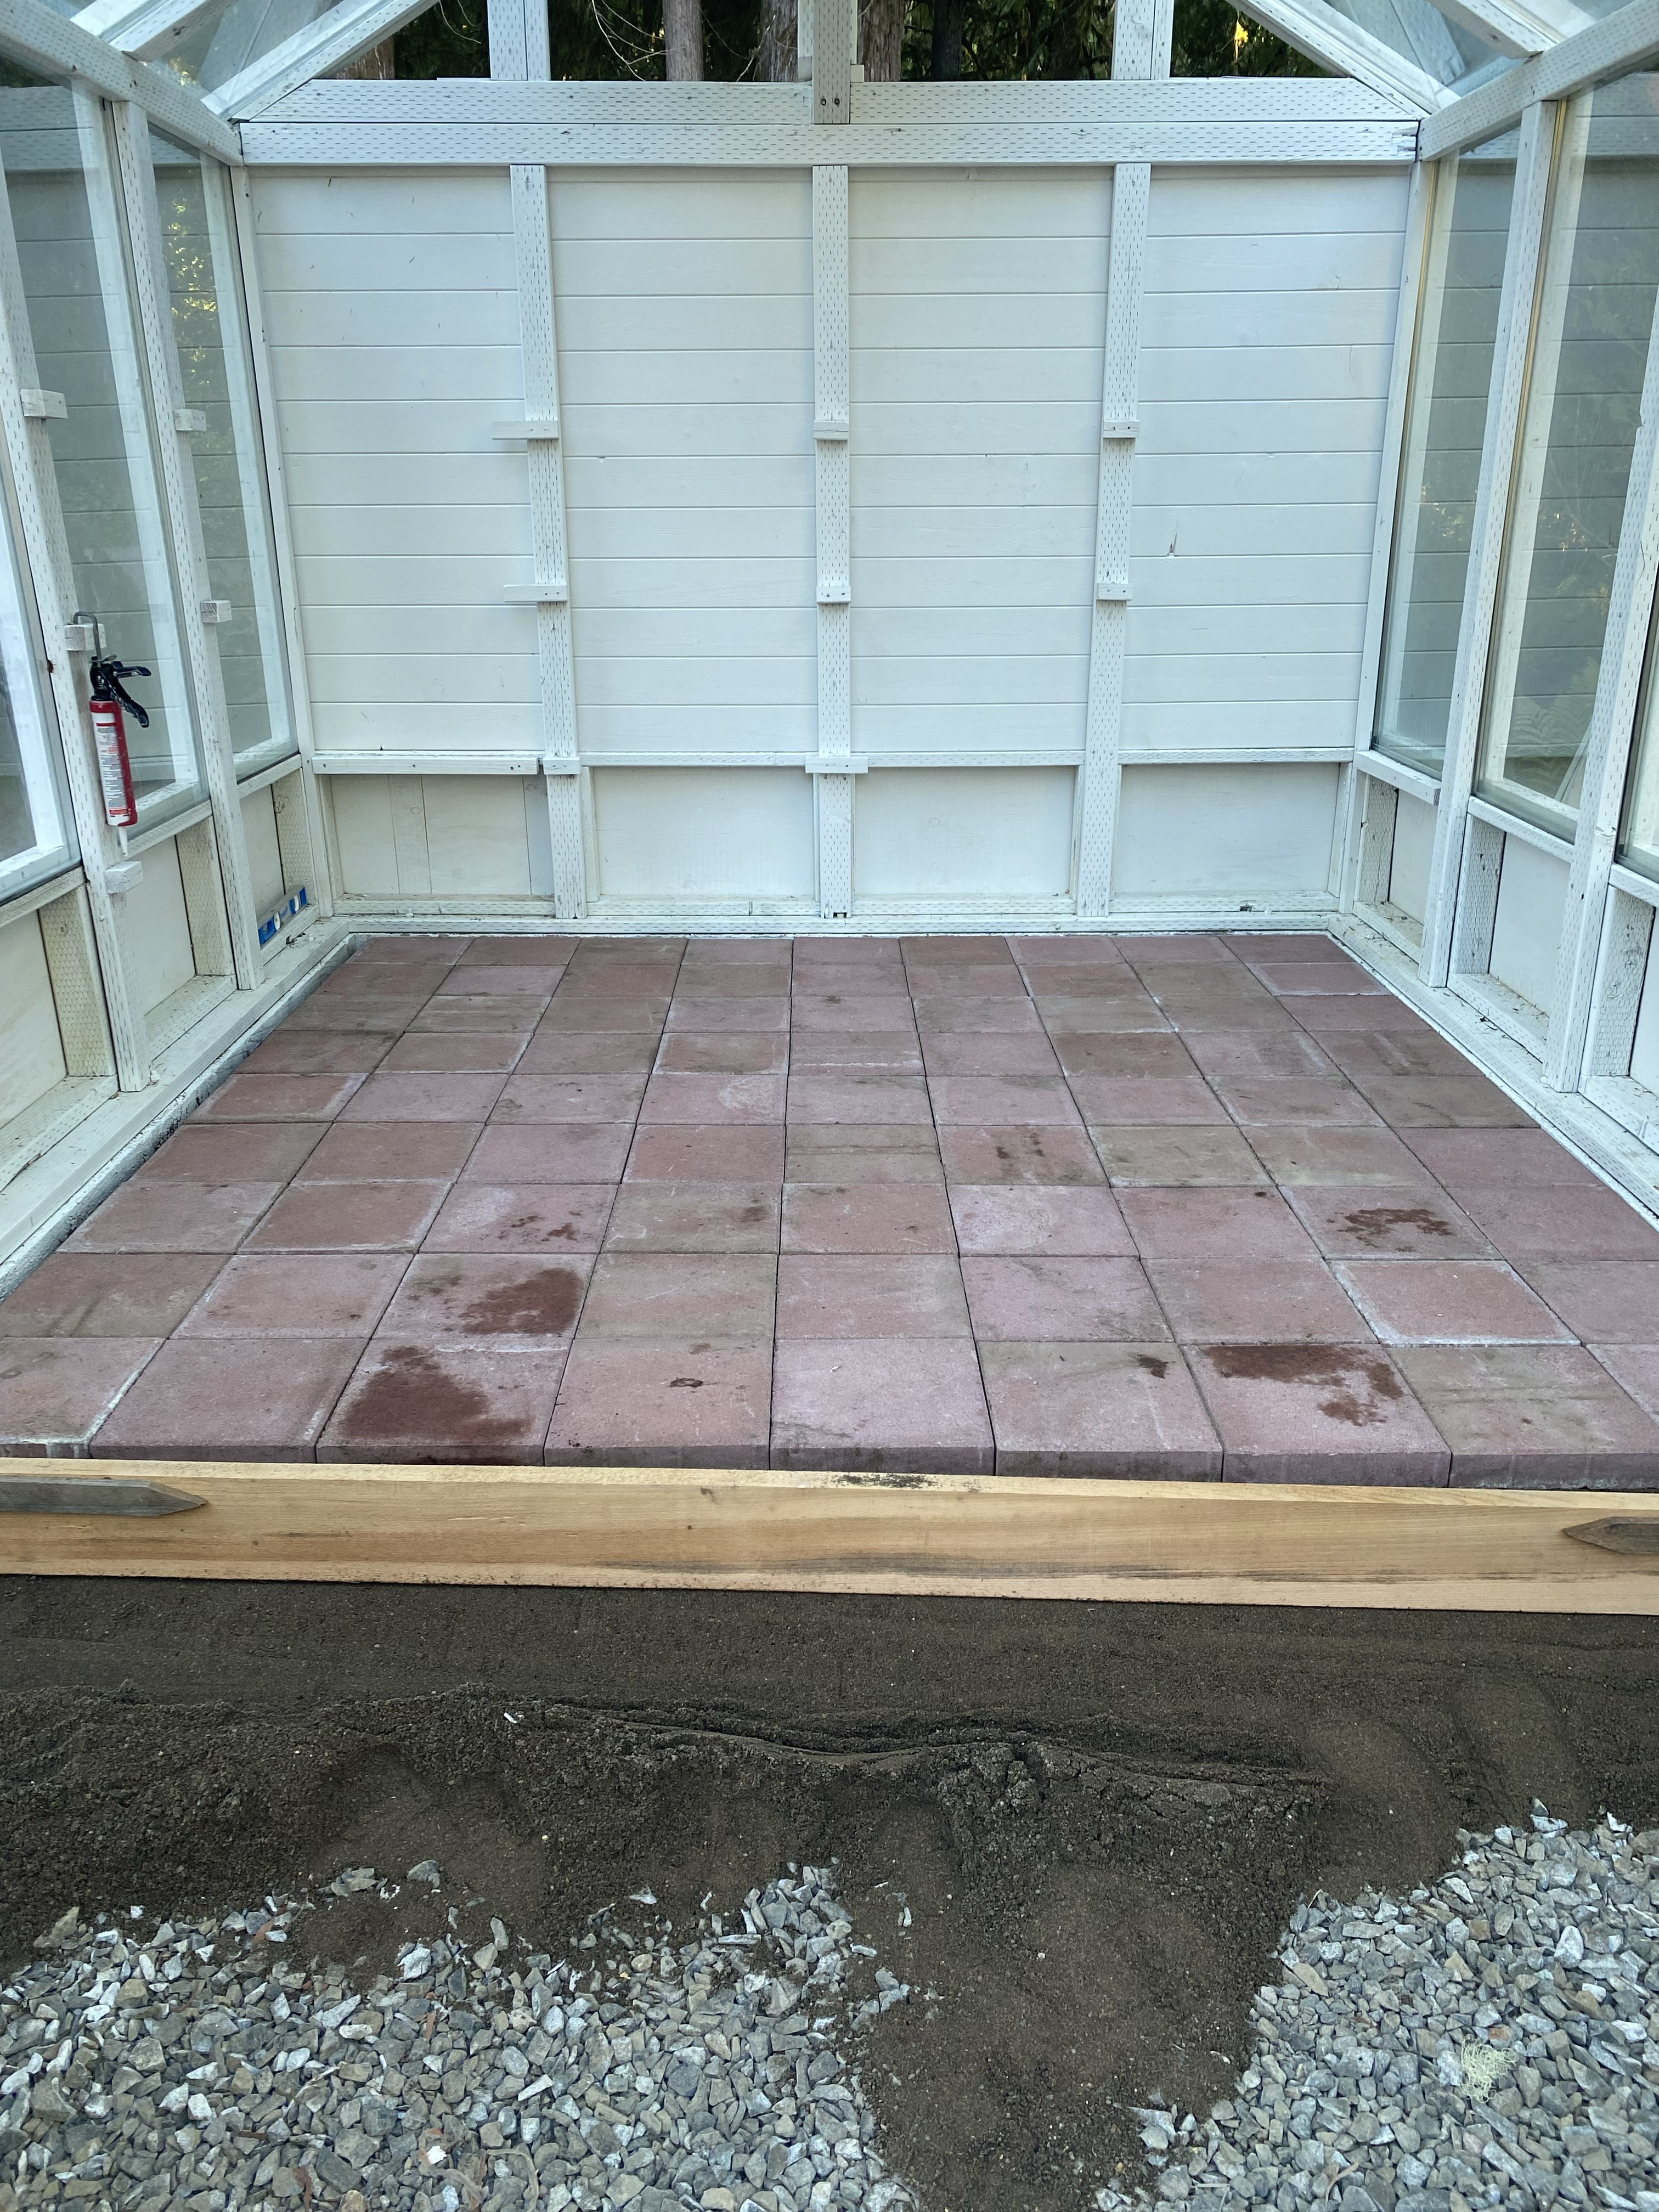
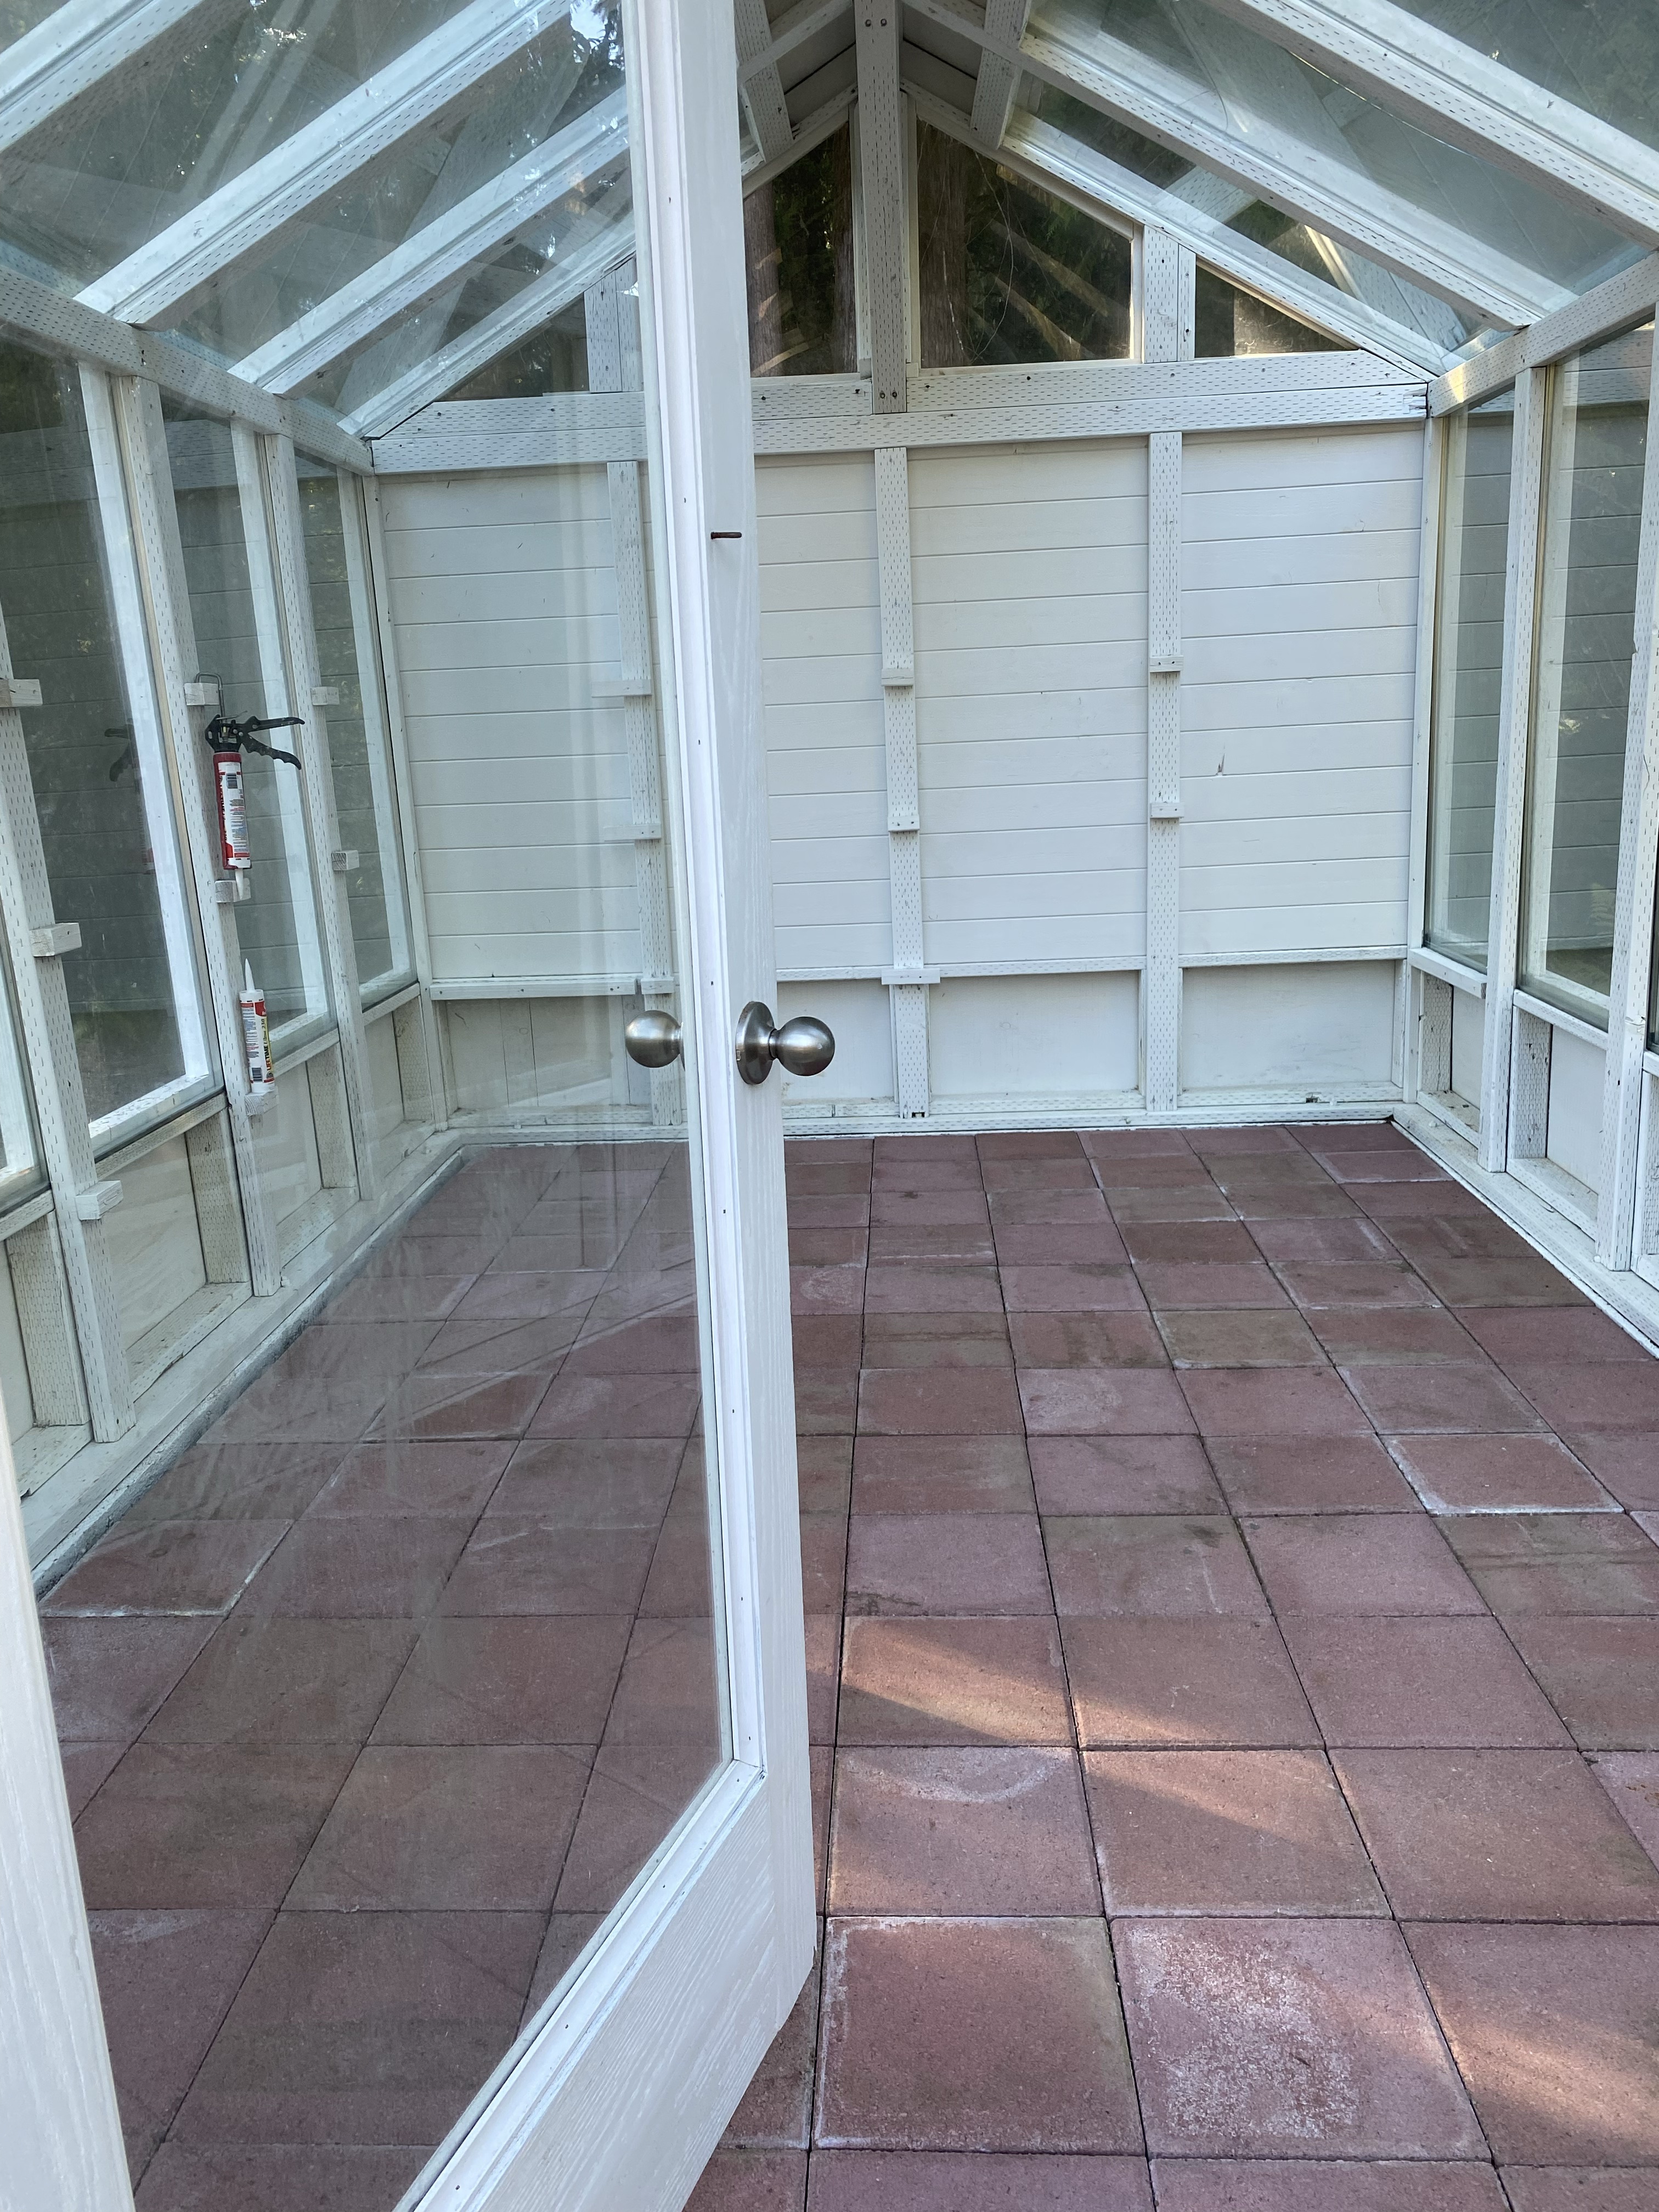
We also started installing the brick floor inside the greenhouse — gravel, sand, screen, and place. This was fun, the three oldest kids helped create an assembly line for brick delivery. We got that floor installed in record time. Pizza after to celebrate.
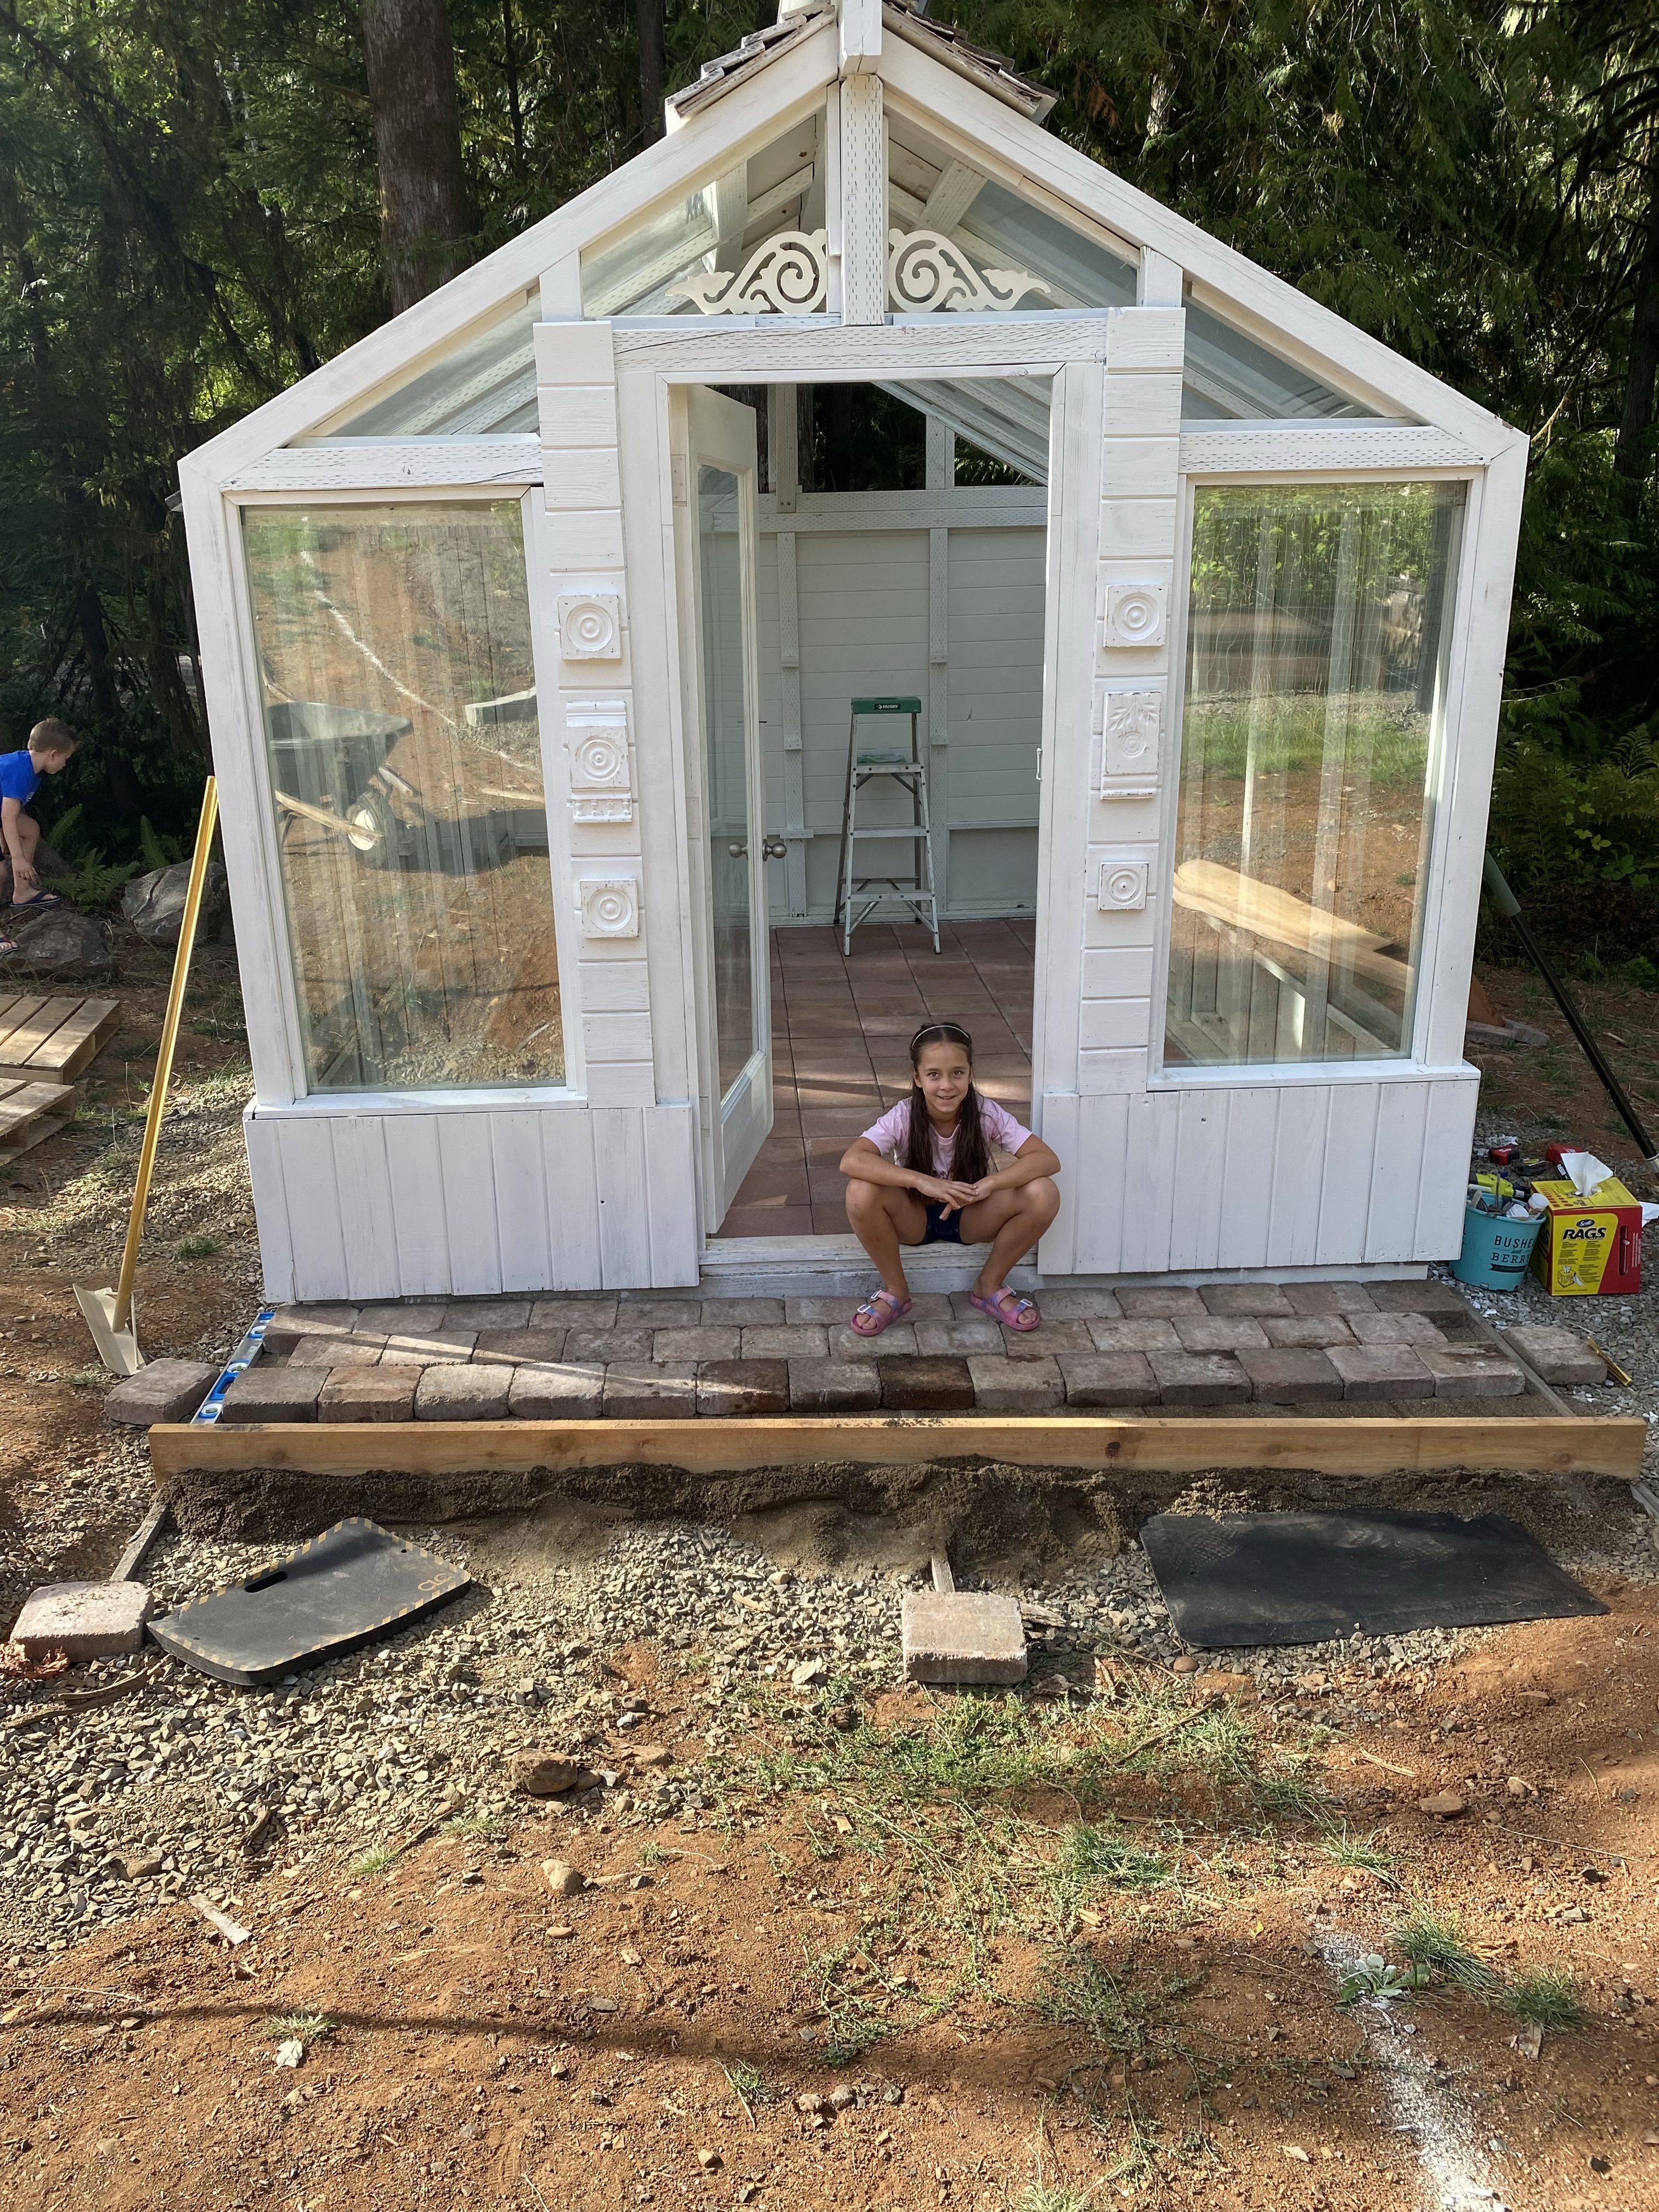
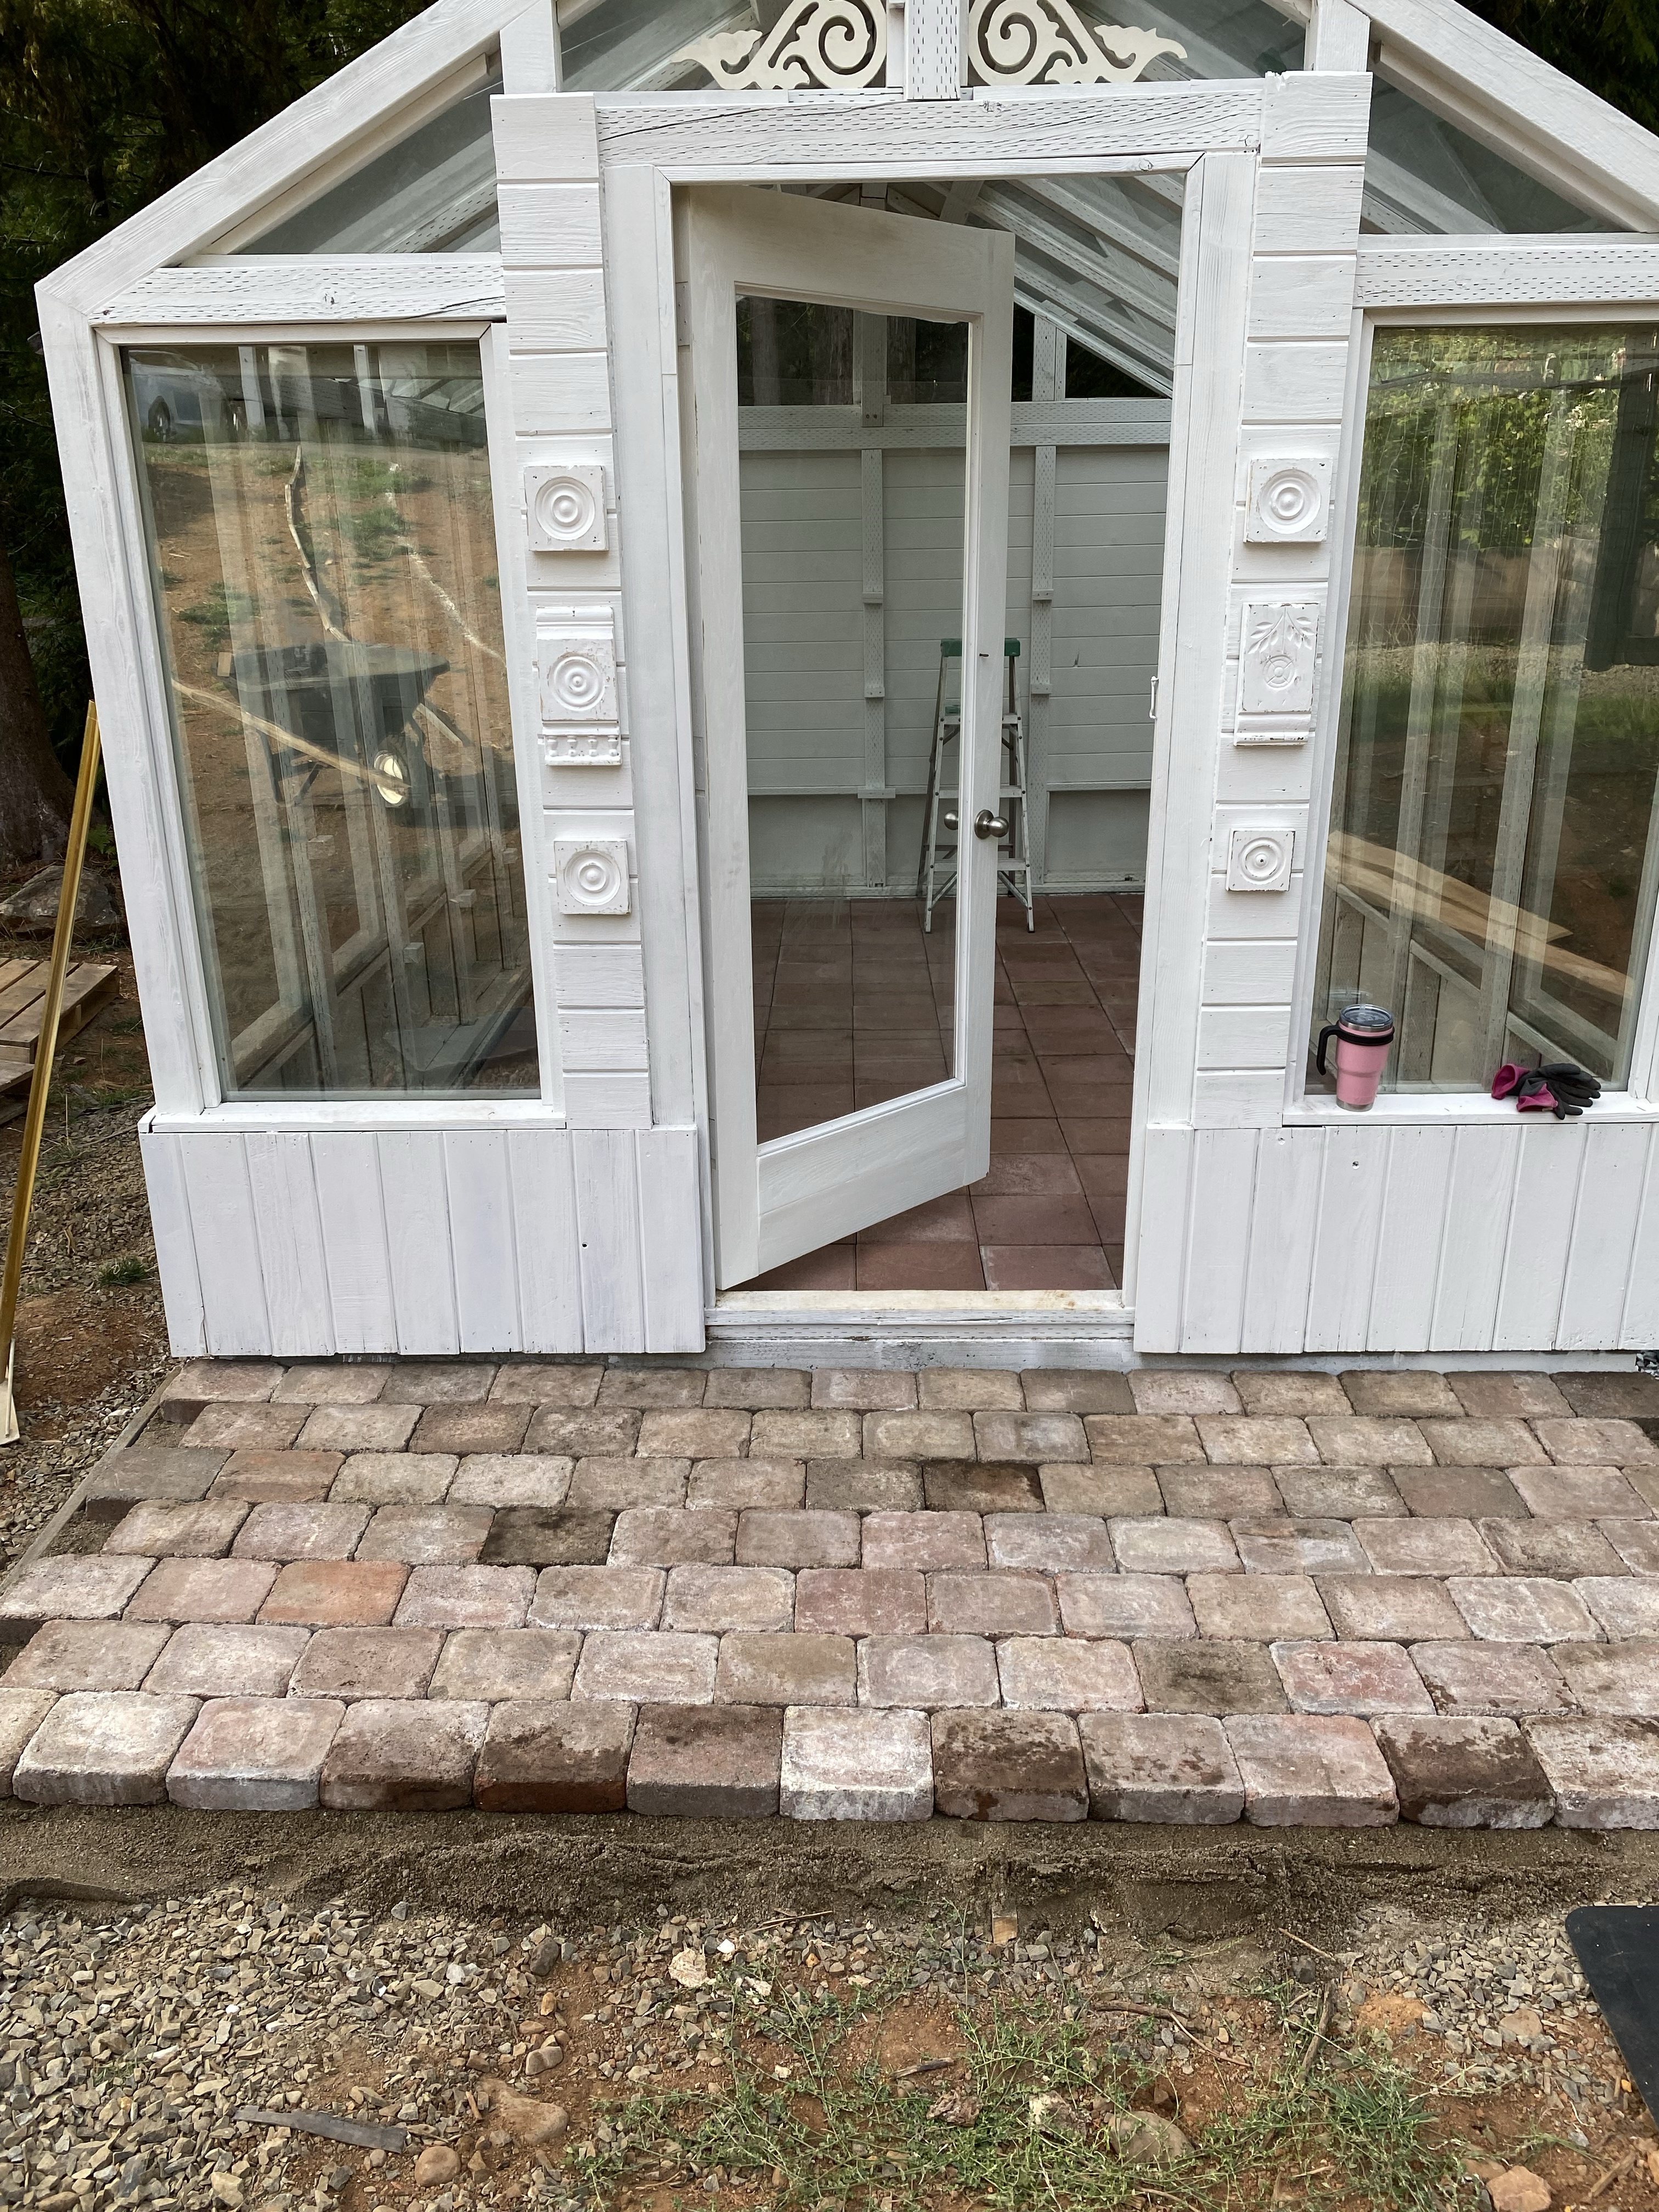
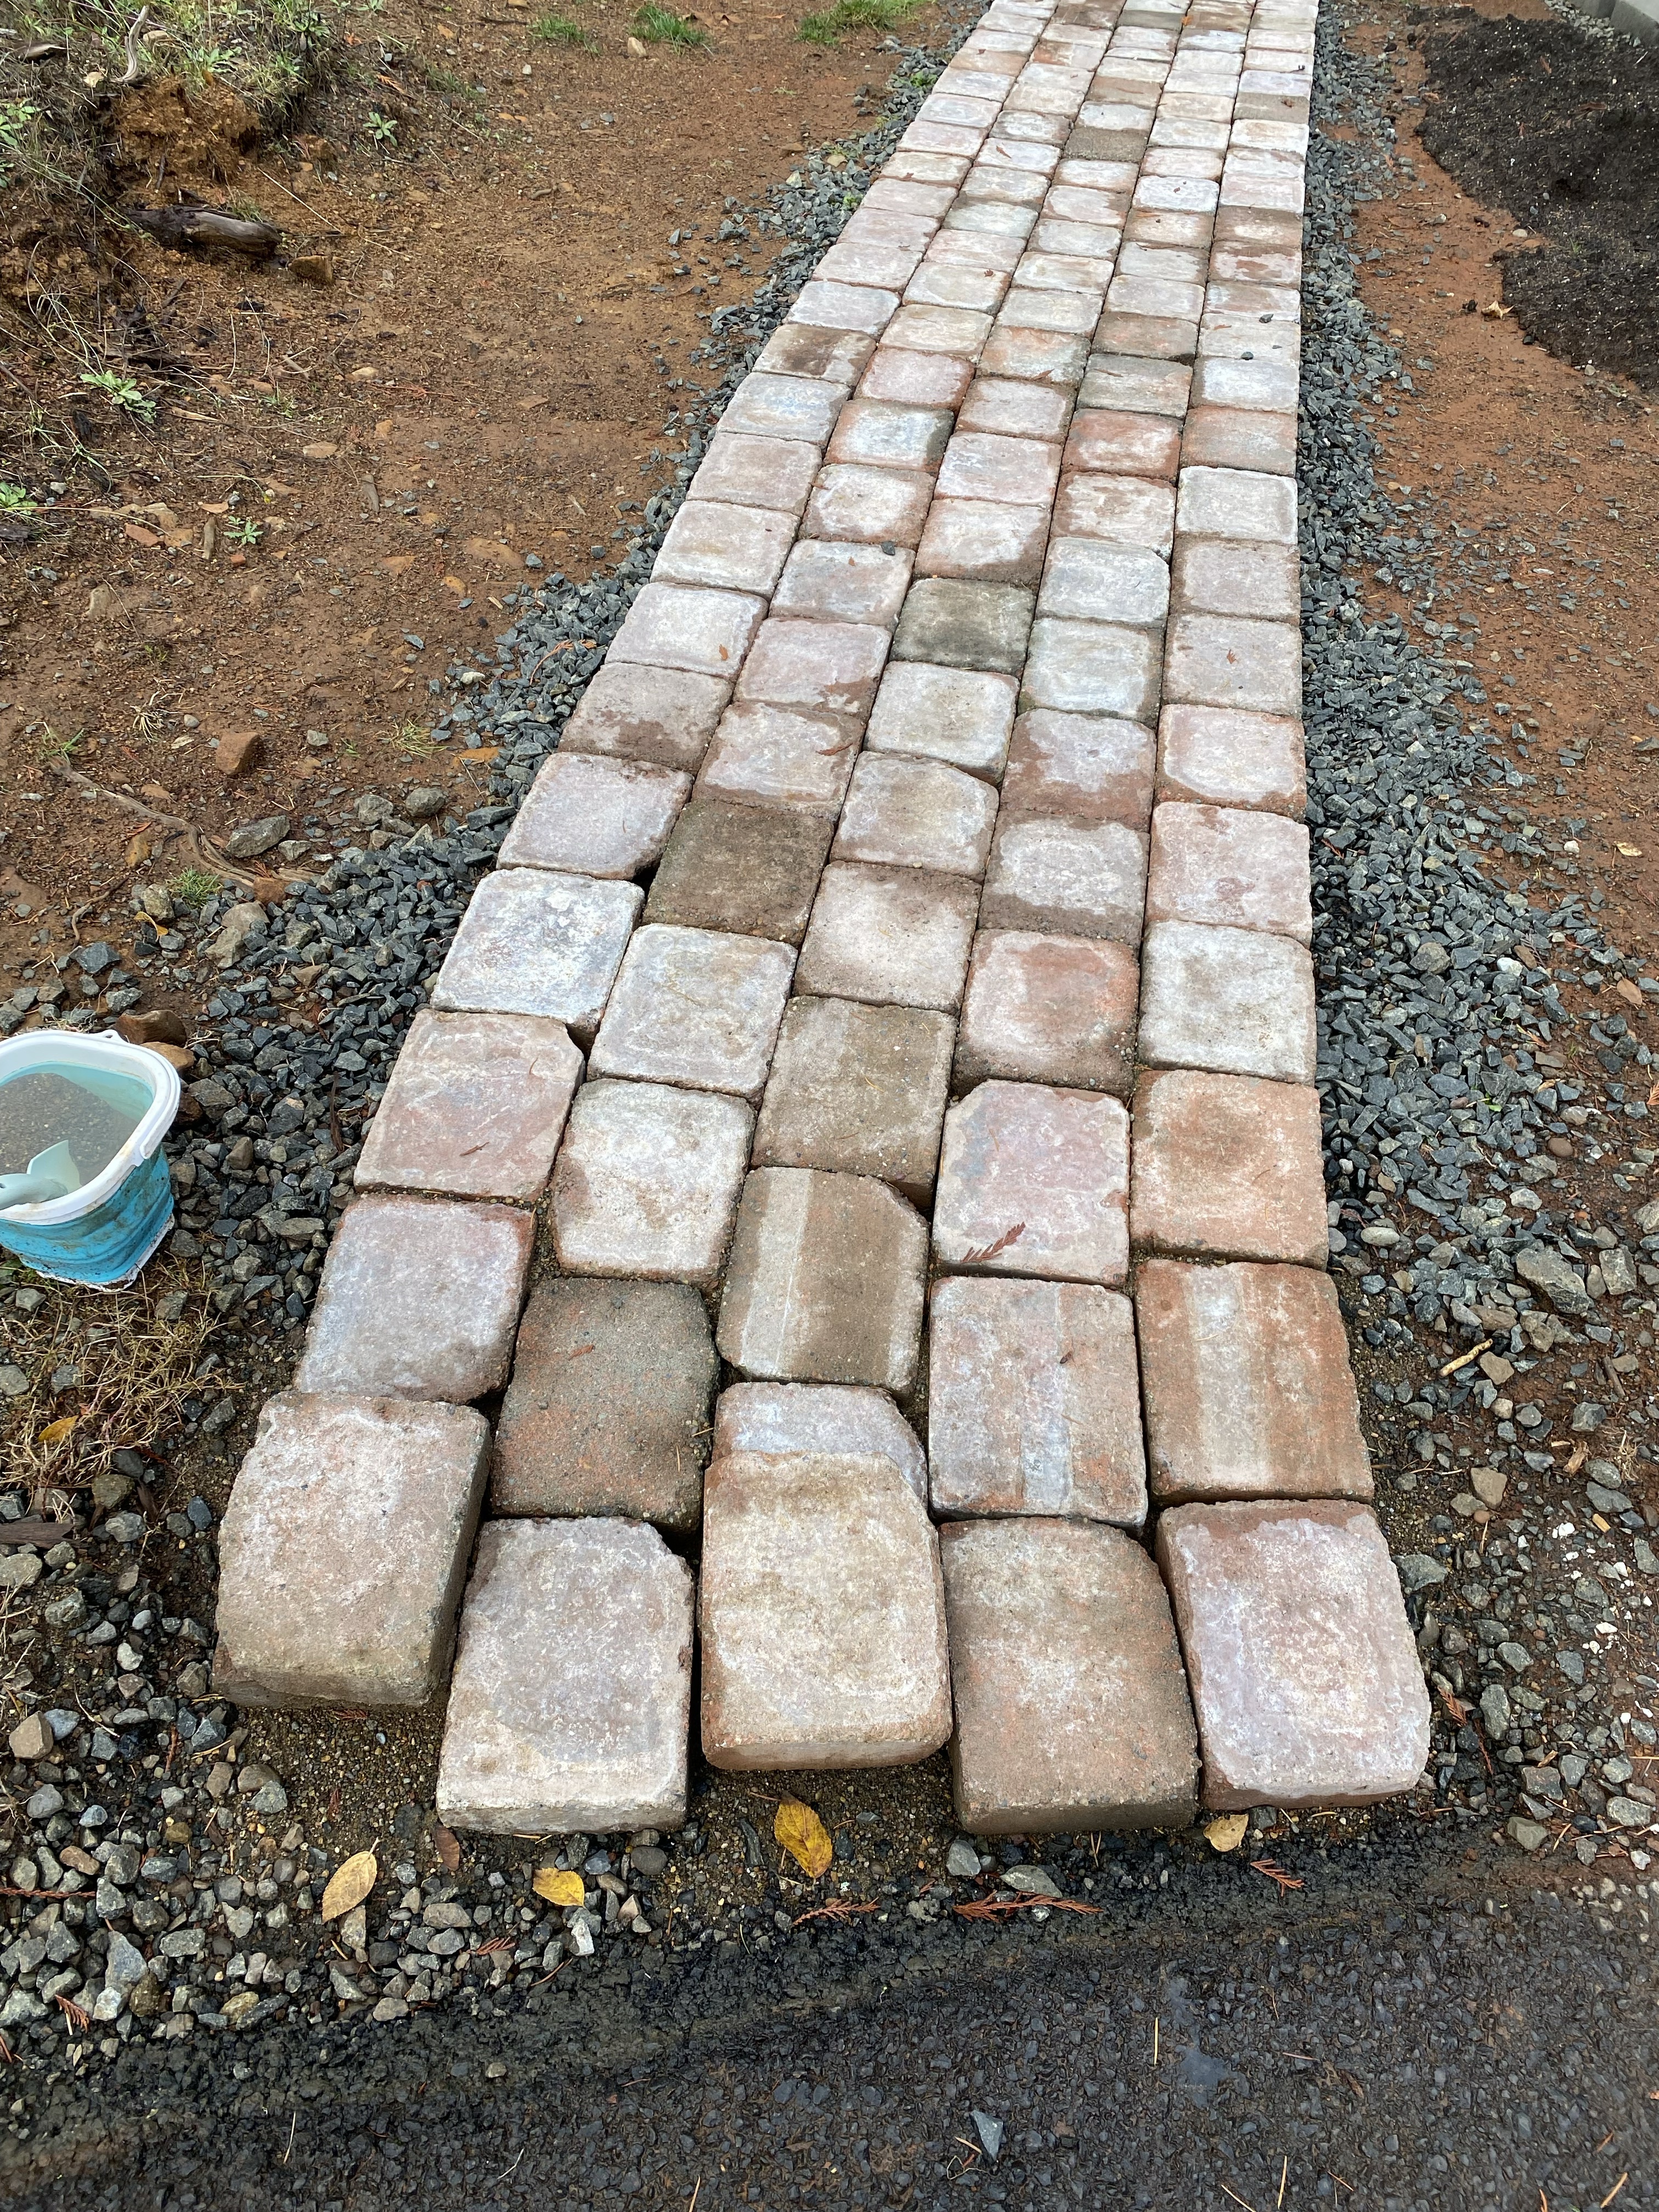
While we were on a roll, we also decided to add a small brick patio at the front of the greenhouse (thanks to the gift of some pavers from a friend). Cue the assembly line. I found an adorable Victorian patio set to add to the front and various antique trim pieces I’ve collected over the years. Getting so very close.
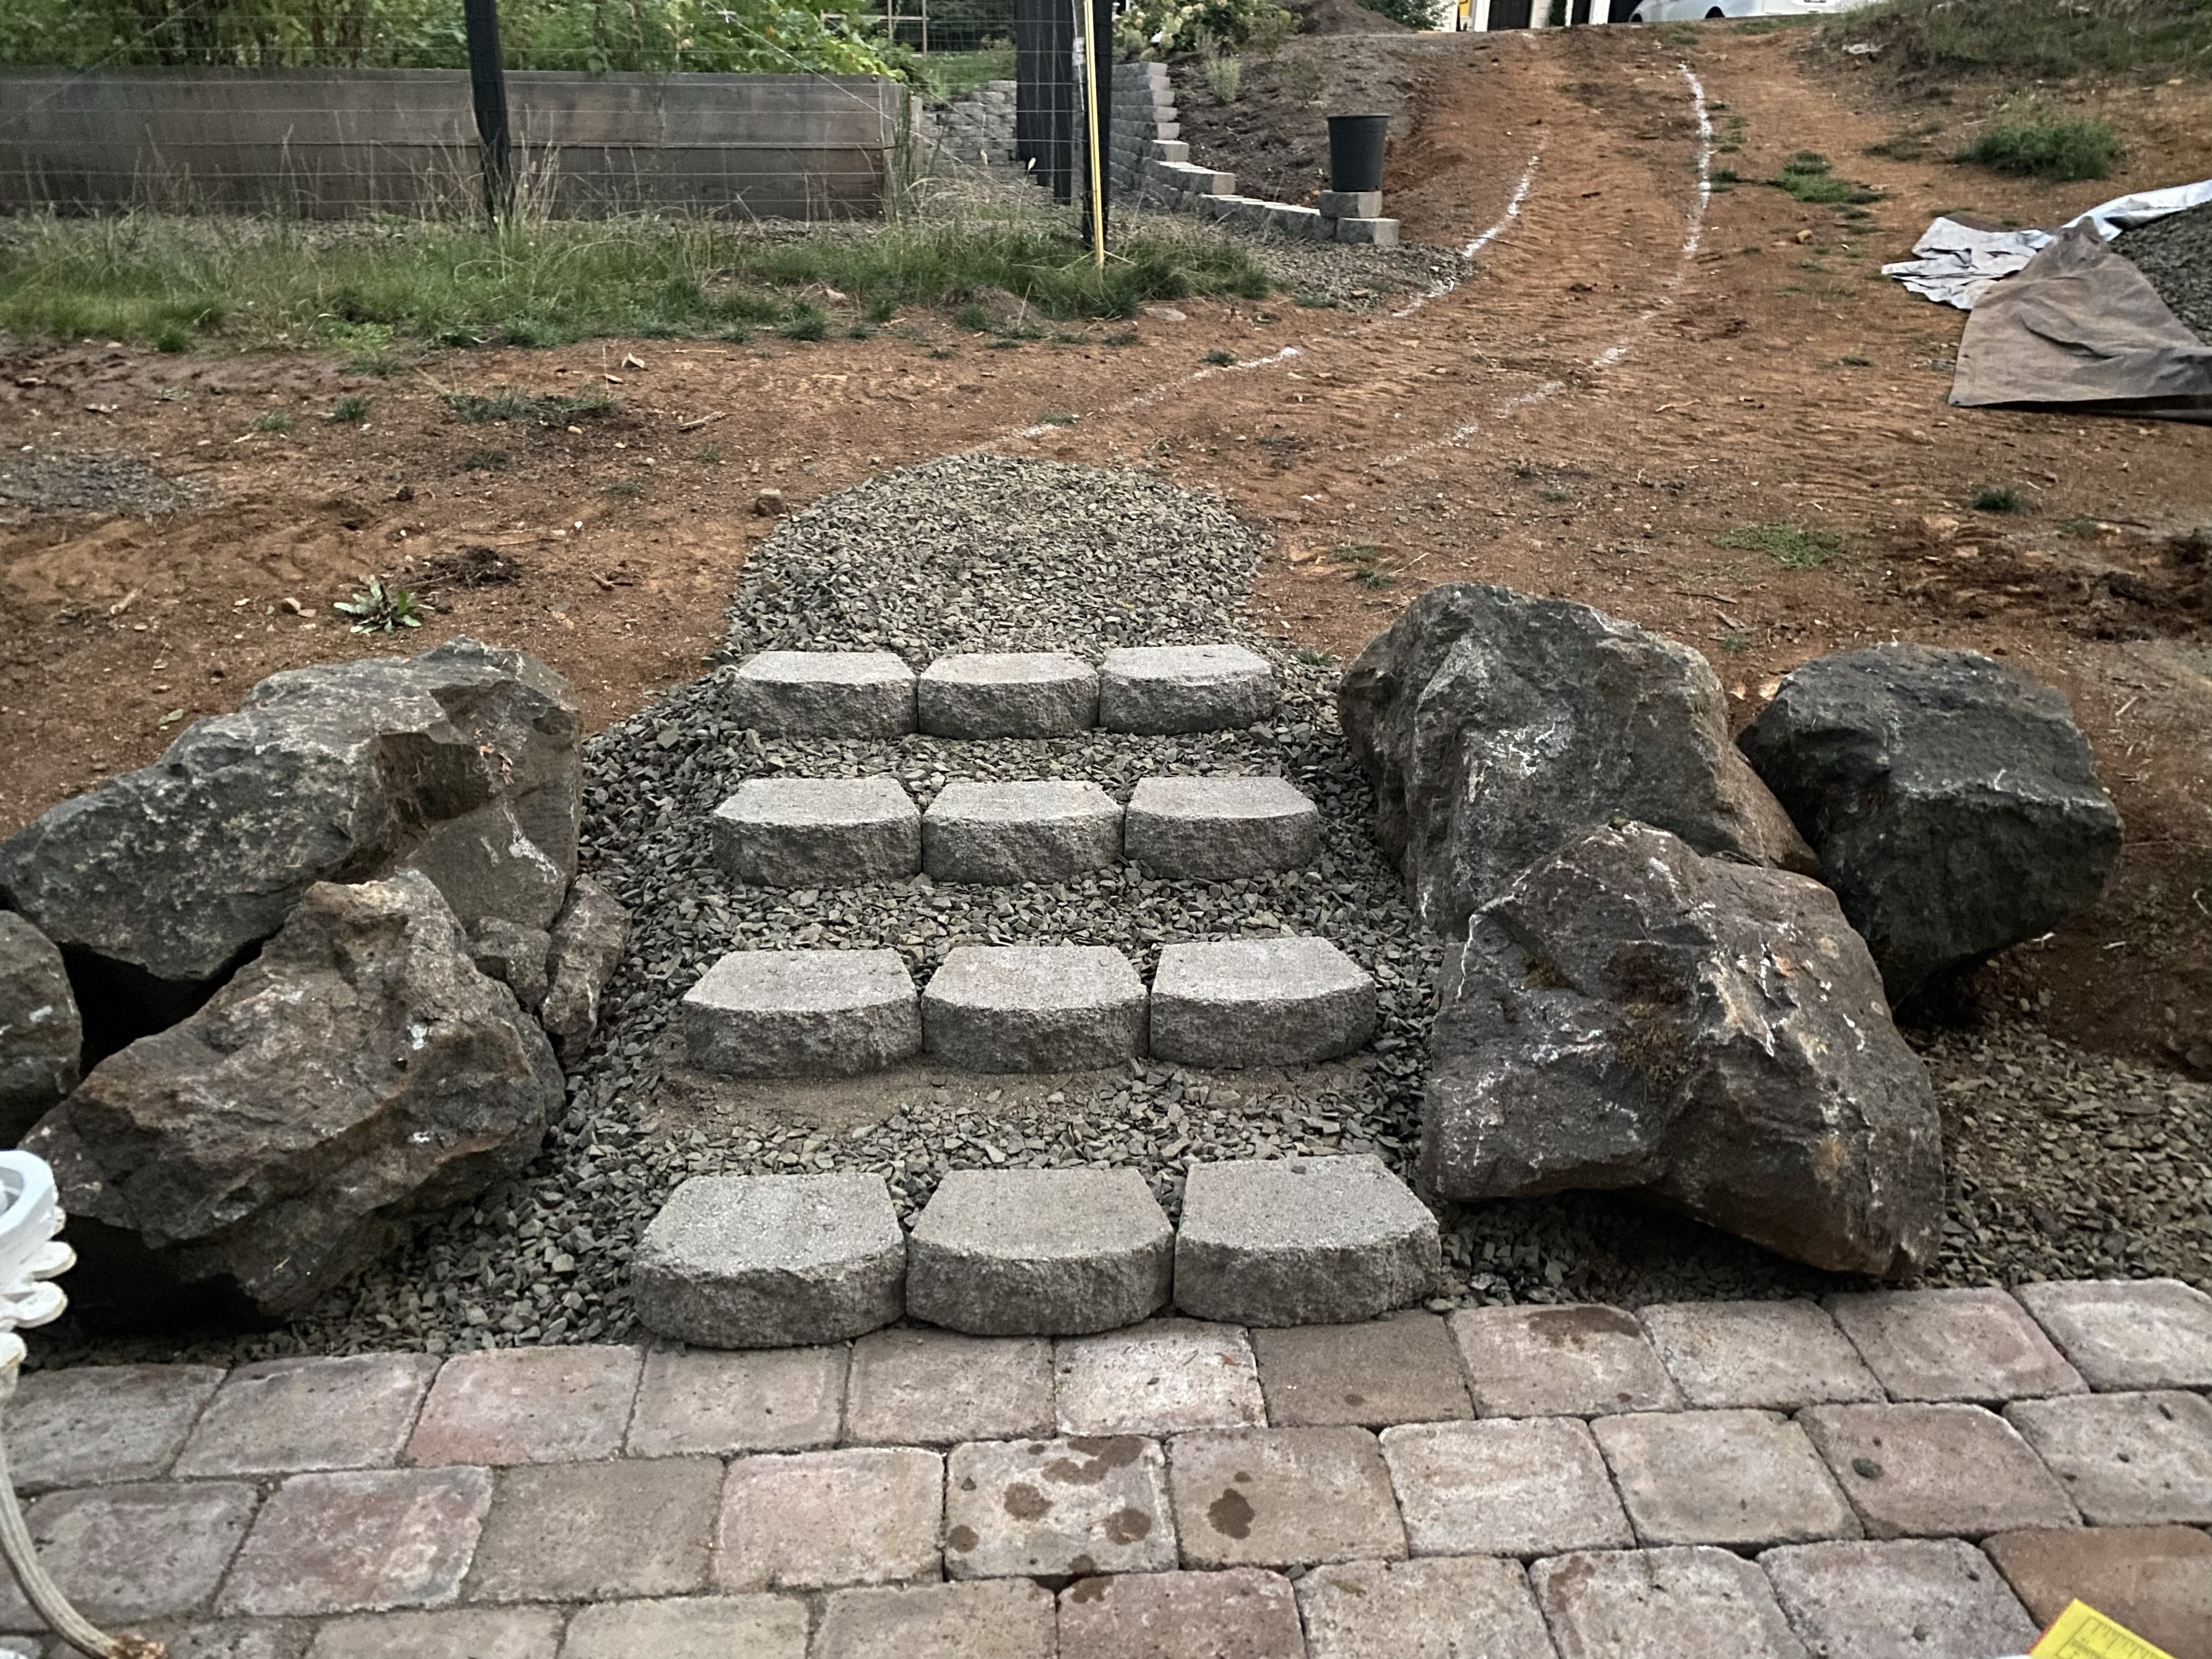
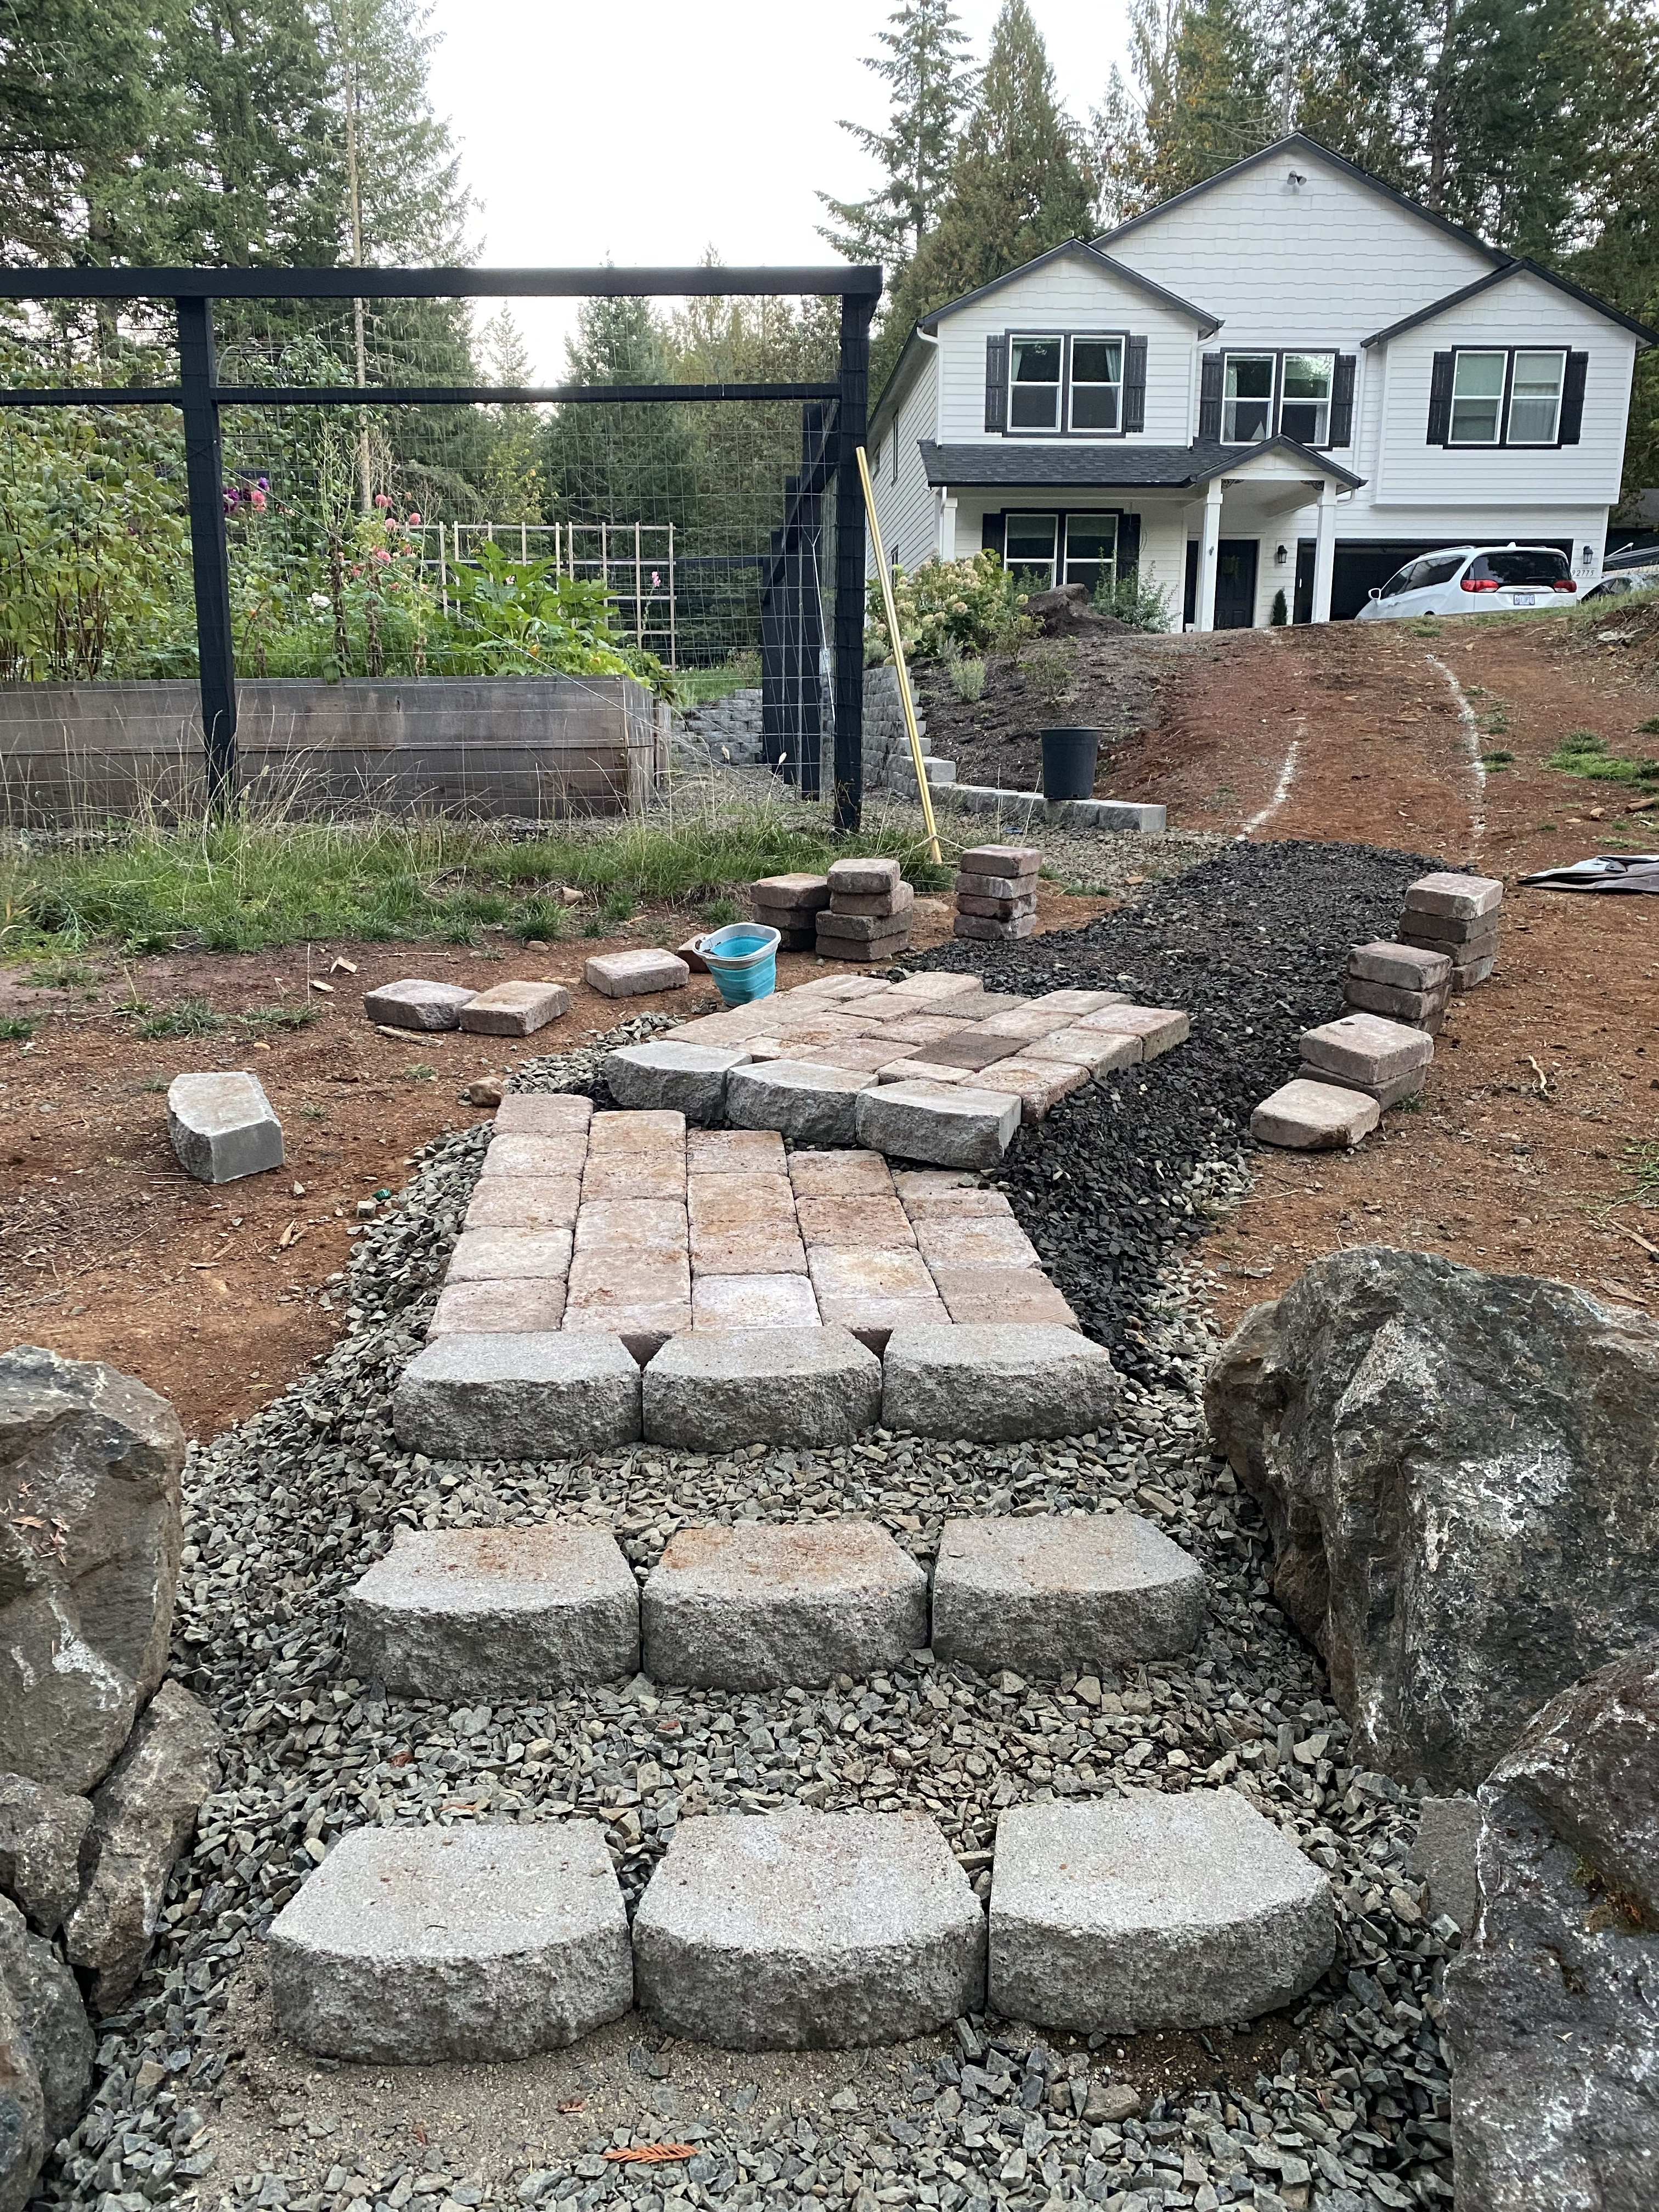
Then because of all the slope…steps, and boulders, and a path from the driveway down to the greenhouse to tie everything together.
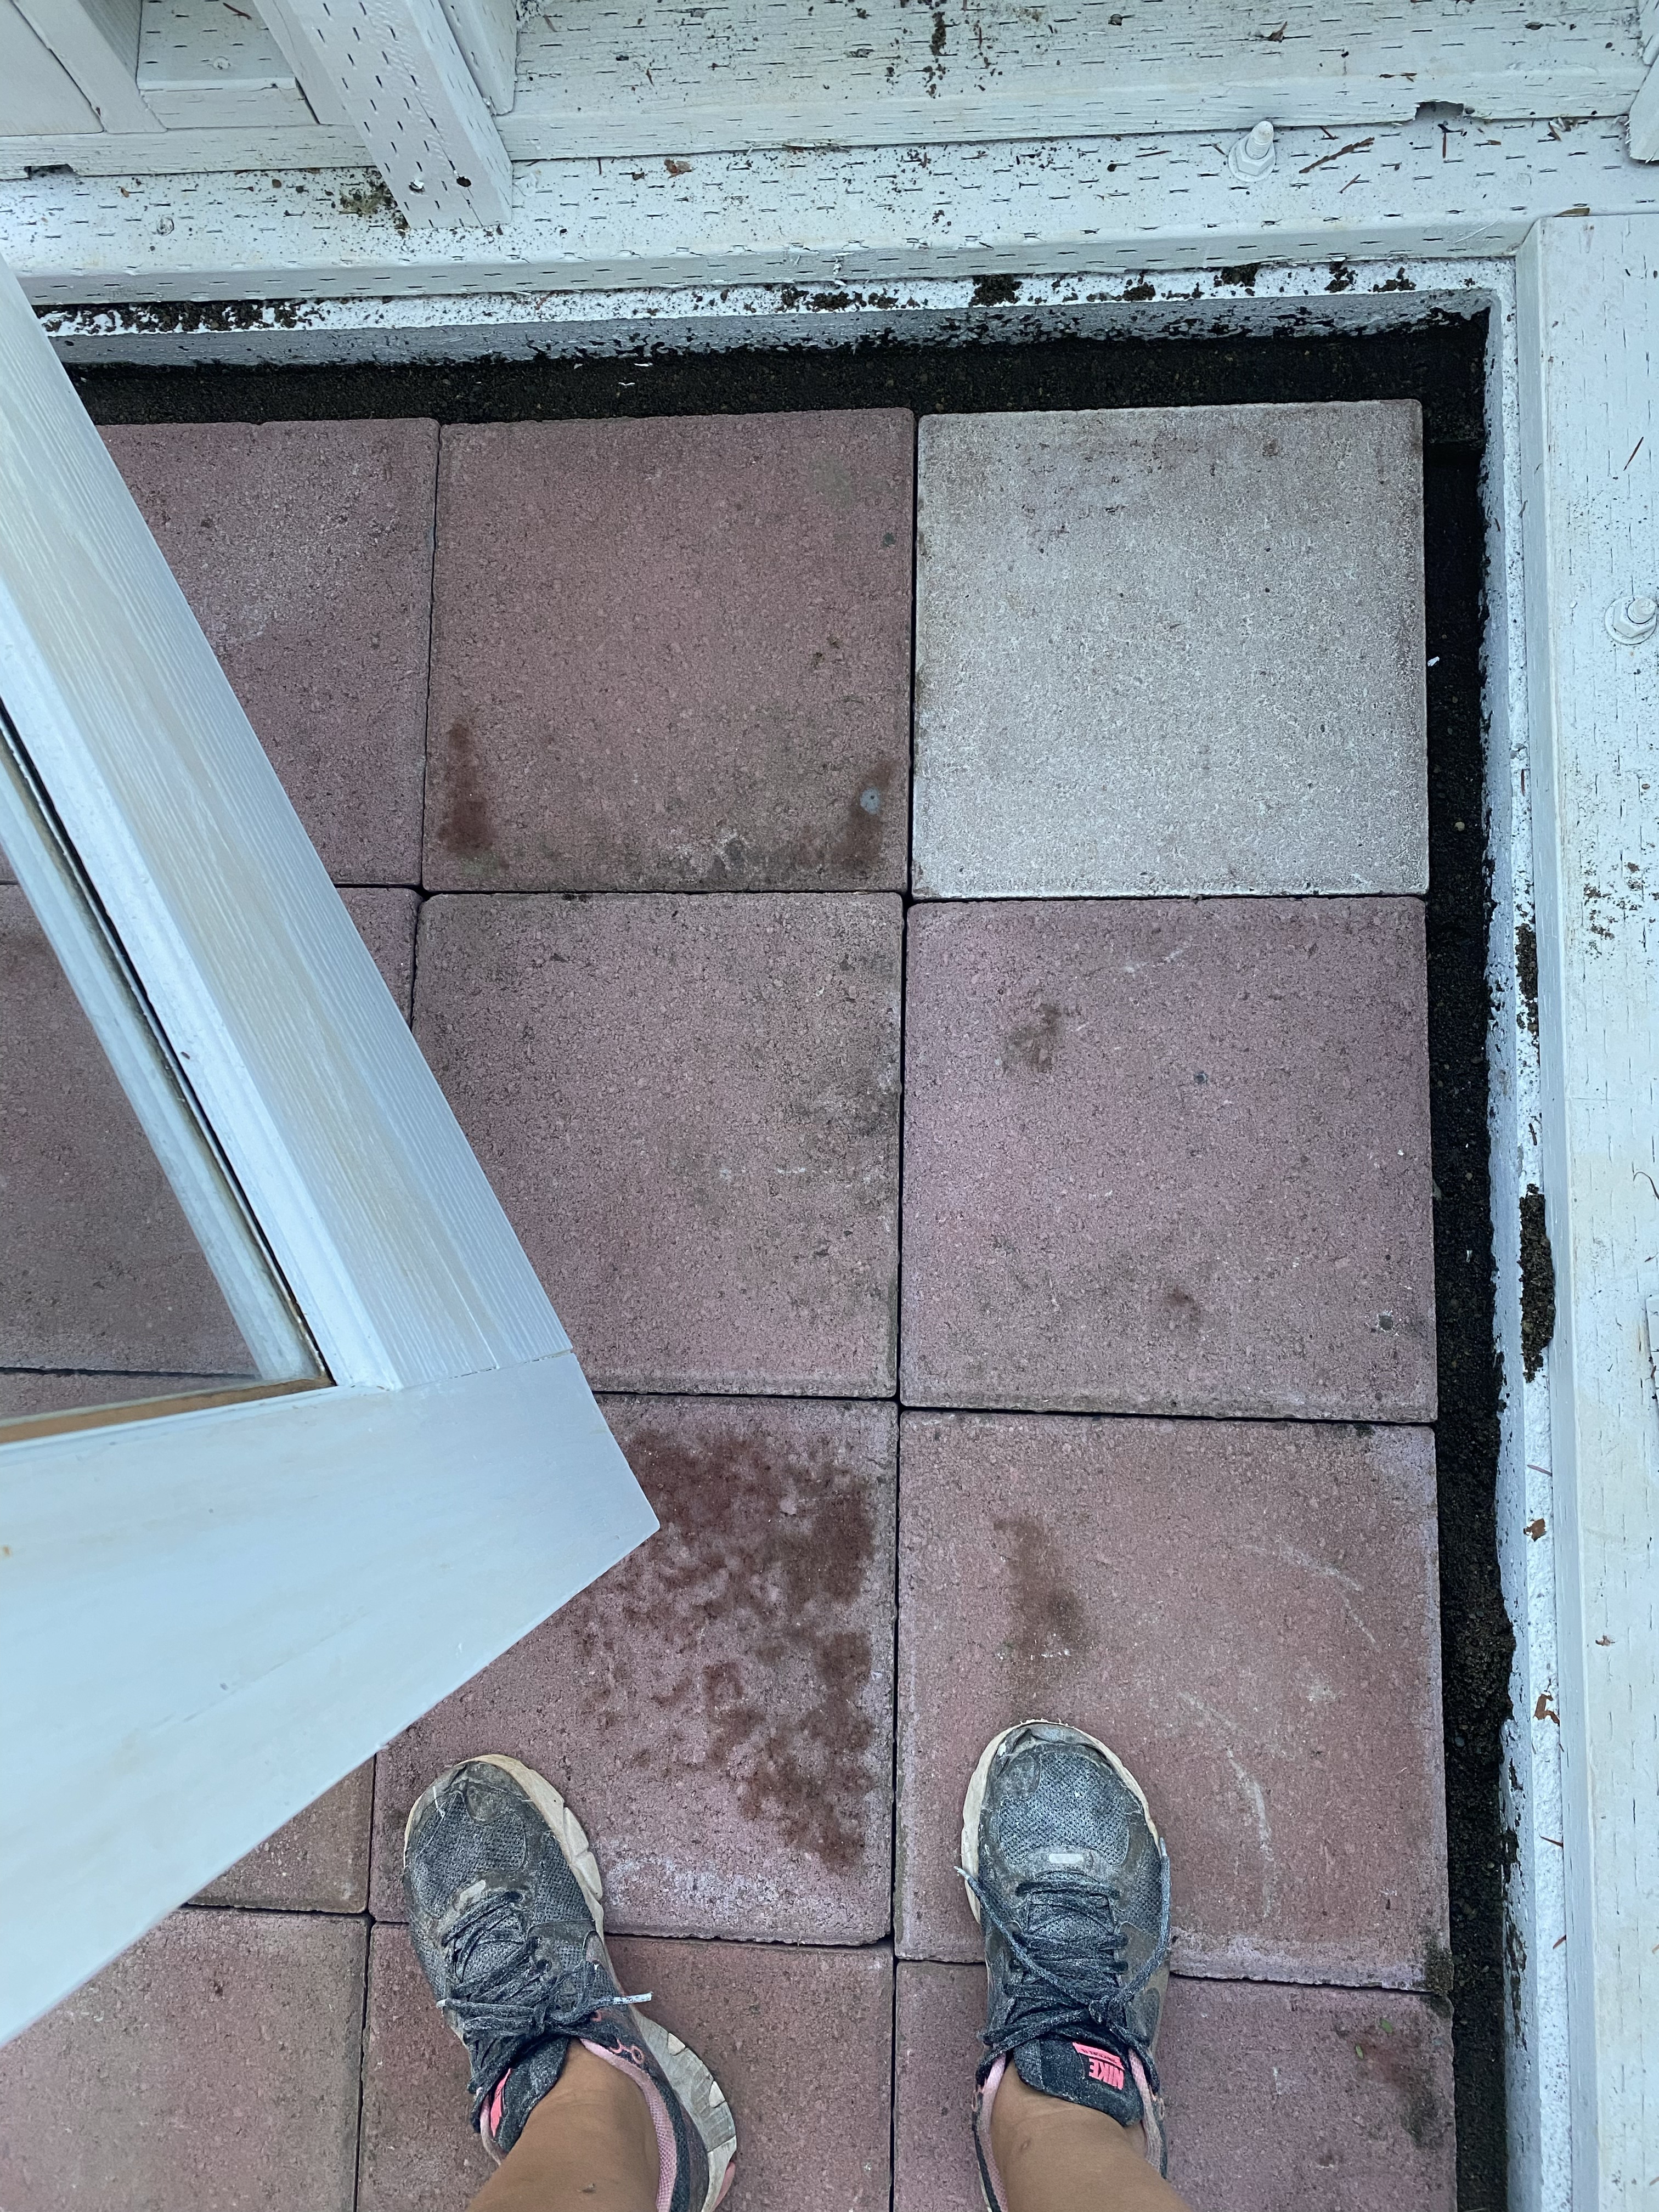
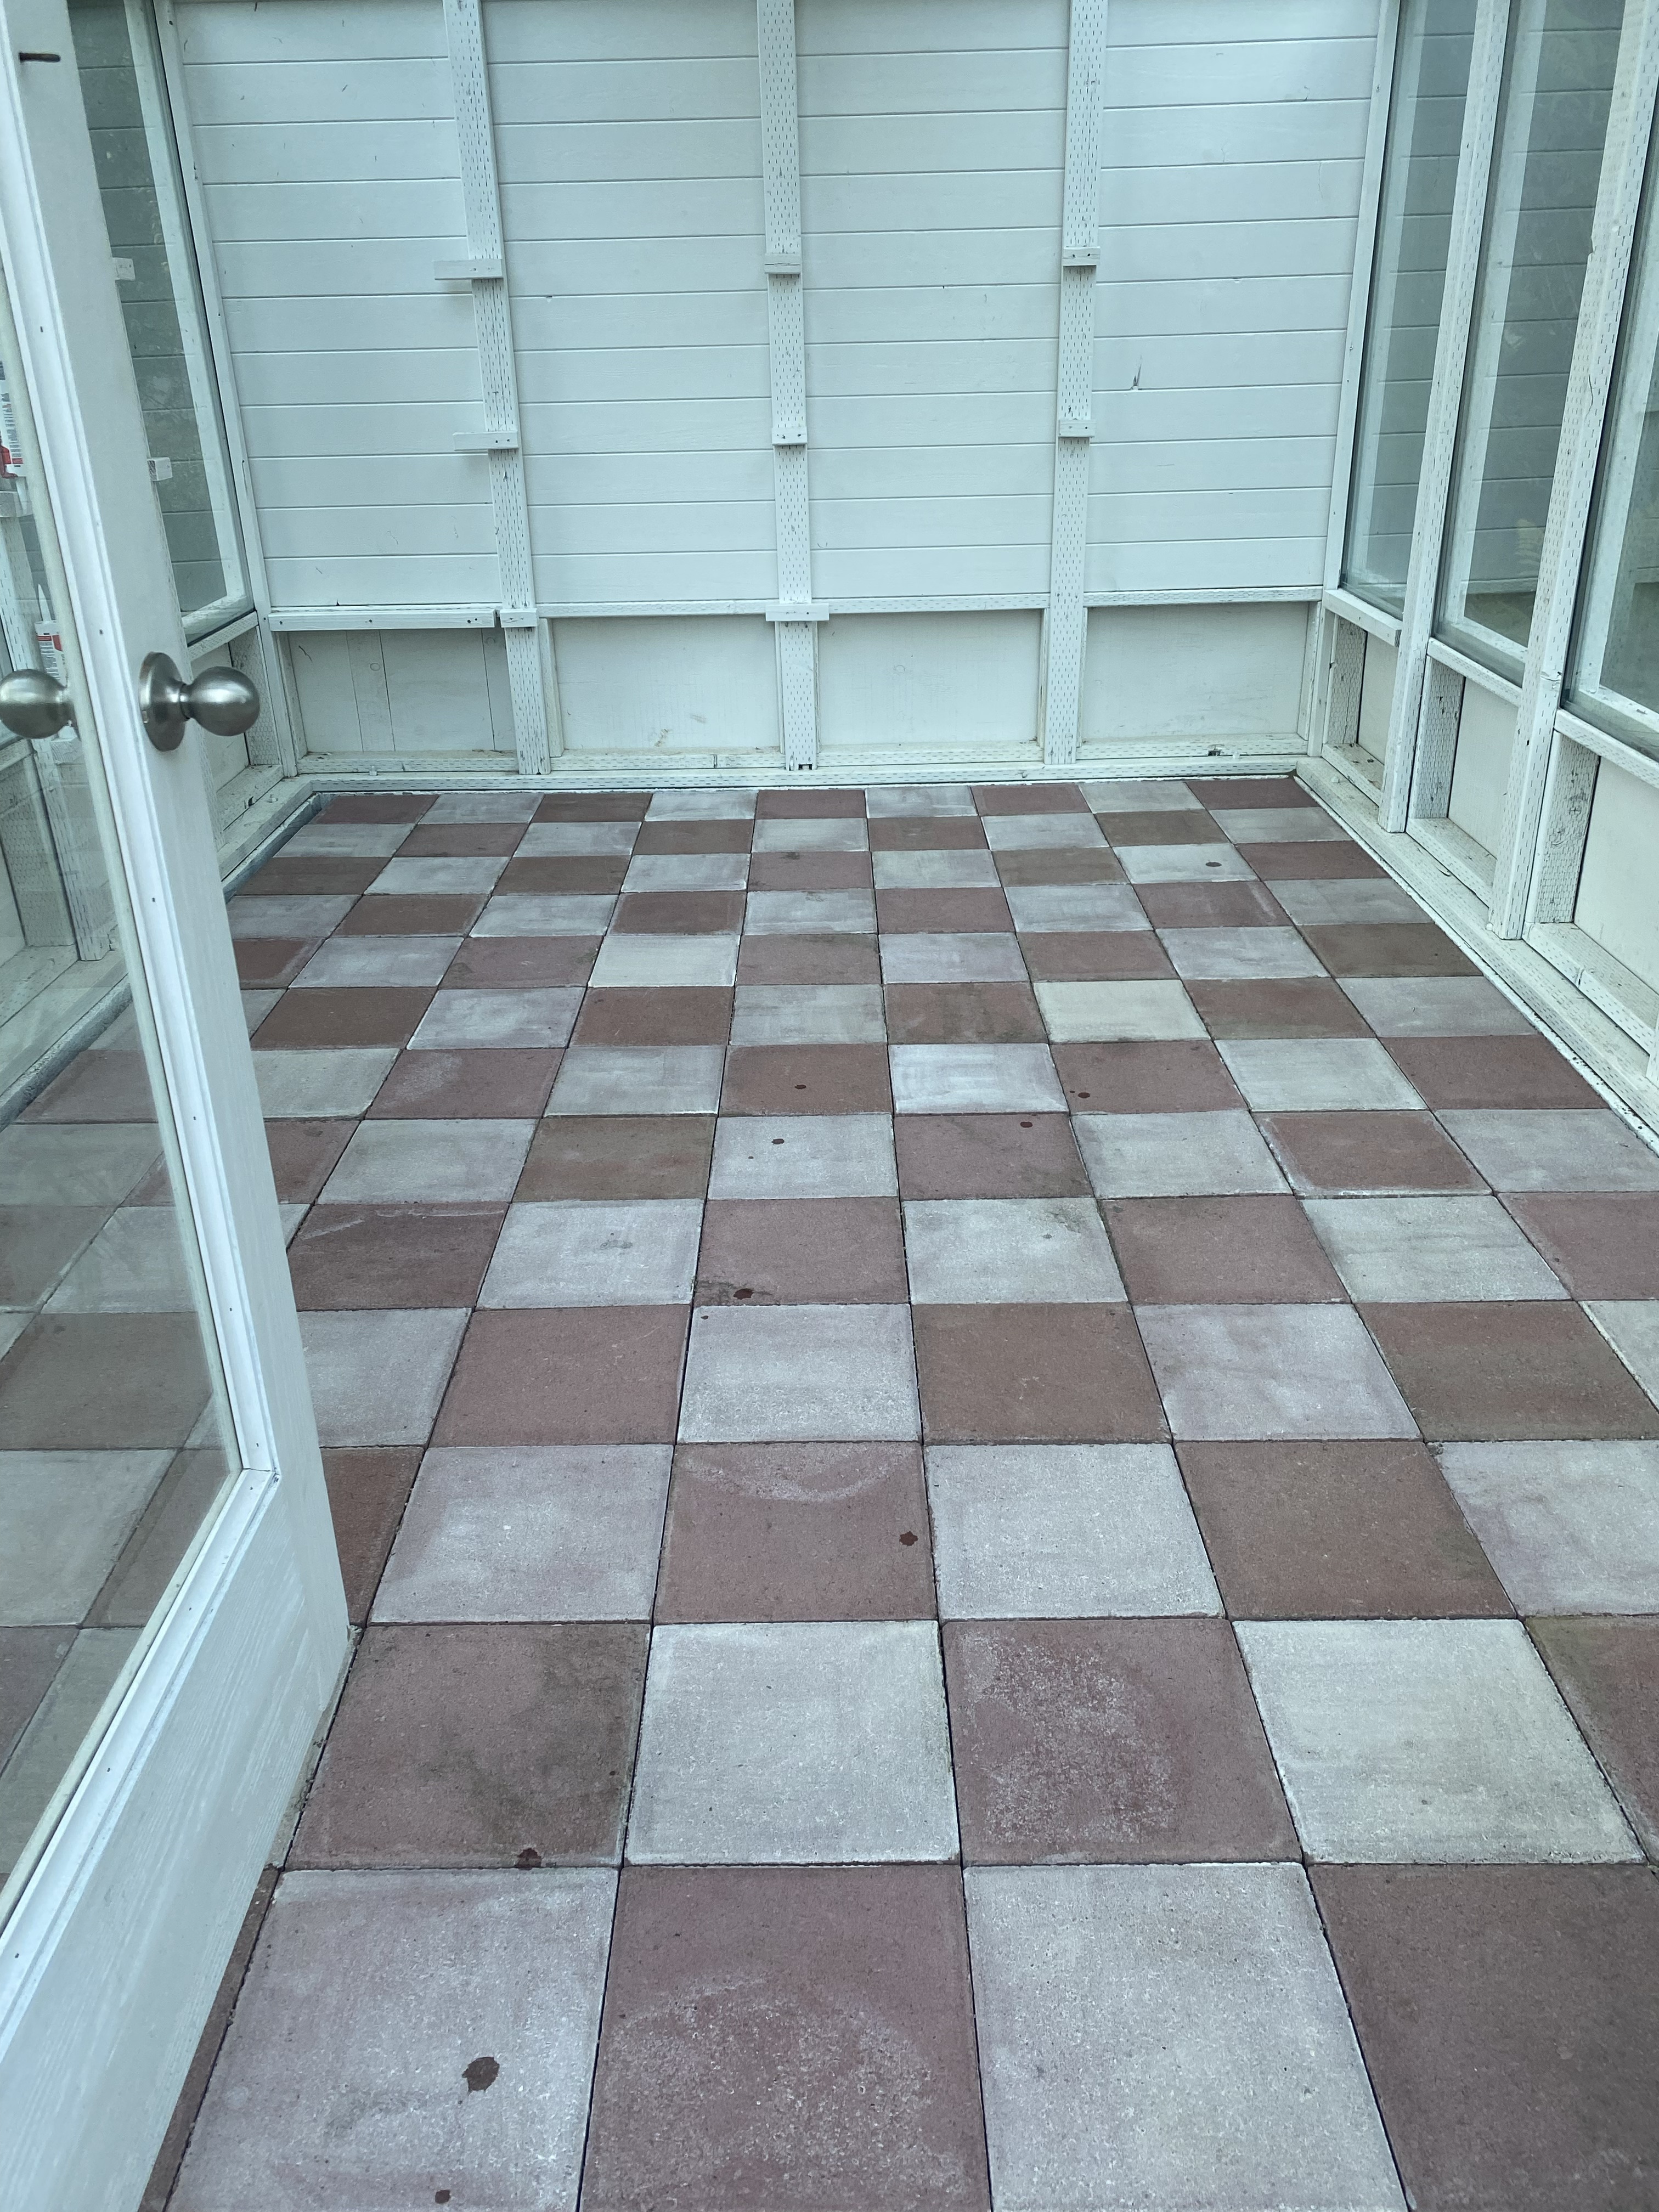
OCTOBER 2024: I decided to lime wash the floor in the greenhouse to create a checkerboard pattern. I didn’t love the all-red bricks since we have so much gray stone on the property and thought it would add another delightful surprise to the greenhouse’s charm. Literally garden lime, water, paintbrush.
NOVEMBER 2024: Now officially over a year since we started this project, I am nearly done with the 45-foot pathway, just need to place the final row of pavers.
The greenhouse is just about done too, we still have a bit of caulking and some shelving to install inside. But truthfully, are these projects ever truly, totally done? So when you see photos of our charming, not-green greenhouse, know it wasn’t done over a weekend or two, but over a year. Let’s normalize real-life and real-project timelines, agreed?